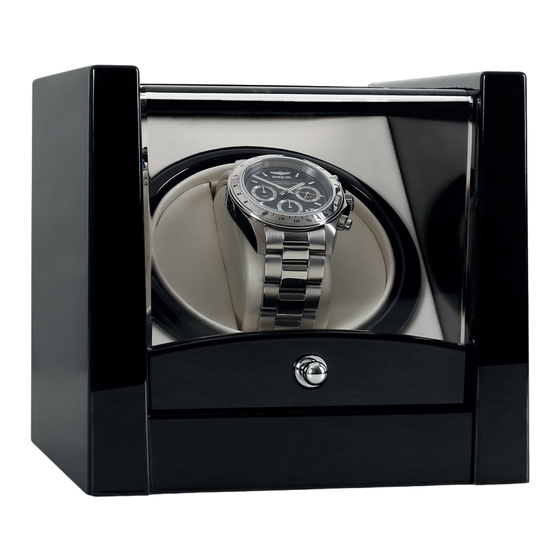
Summary of Contents for Klarstein 10006662
- Page 1 Uhrenbeweger Watch Winder Estuche giratorio para relojes Tourne-montre Caricatore orologio 10006662 10032882...
-
Page 3: Technische Daten
Geräteübersicht 4 Français 11 Bedienung 5 Español 15 Hinweise zur Entsorgung 5 Italiano 19 TECHNISCHE DATEN Artikelnummer 10006662, 10032882 Stromversorgung 220-240 V ~ 50/60 Hz KONFORMITÄTSERKLÄRUNG Hersteller: Chal-Tec GmbH, Wallstraße 16, 10179 Berlin, Deutschland. Dieses Produkt entspricht den folgenden Europäischen Richtlinien: 2014/30/EU (EMV) - Page 4 SICHERHEITSHINWEISE • Lesen Sie sich alle Hinweise sorgfältig durch und bewahren Sie die Anleitung zum Nachschlagen gut auf. • Verwenden Sie nur das mitgelieferte Netzteil. • Trennen Sie das Netzteil vom Gerät, wenn Sie den Uhrenbeweger nicht verwenden. • Schalten Sie das Gerät aus, wenn Sie die Uhren einsetzen oder entnehmen. •...
-
Page 5: Bedienung
BEDIENUNG 1. Verbinden Sie das eine Ende des Netzteils mit dem Netzanschluss auf der Rückseite des Gerätes und das andere Ende mit der Stromquelle. 2. Öffnen Sie die Abdeckung und ziehen Sie vorsichtig den Uhrenhalter aus dem Gehäuse. 3. Legen Sie die Uhr um den Uhrenhalter. 4. -
Page 7: Technical Data
Safety Instructions 8 Product Overview 8 Operation 9 Hints on Disposal 9 TECHNICAL DATA Item number 10006662, 10032882 Power supply 220-240 V ~ 50/60 Hz DECLARATION OF CONFORMITY Producer: Chal-Tec GmbH, Wallstraße 16, 10179 Berlin, Germany. This product is conform to the following European... -
Page 8: Safety Instructions
SAFETY INSTRUCTIONS • Read all the safety and operating instructions carefully and retain them for future reference. • Please use the AC adaptor supplied with the unit. • Remove the adaptor when the winder is not in use. • Always turn off the power when inserting or removing watches. •... -
Page 9: Operation
OPERATION 1. Connect one end of the power supply to the power connector on the back of the unit and the other end to the power source. 2. Open the cover, then carefully pull out the watch holder. 3. Place the watch around the holder by pushing the spring in the back oft he holder and place your watch around the holder then let go oft he spring. -
Page 11: Fiche Technique
Consignes de sécurité 12 Aperçu de l‘appareil 12 Utilisation 13 Informations sur le recyclage 13 FICHE TECHNIQUE Numéro d’article 10006662, 10032882 Alimentation 220-240 V ~ 50/60 Hz DÉCLARATION DE CONFORMITÉ Fabricant : Chal-Tec GmbH, Wallstraße 16, 10179 Berlin, Allemagne Ce produit est conforme aux directives européennes... -
Page 12: Consignes De Sécurité
CONSIGNES DE SÉCURITÉ • Lisez attentivement toutes les instructions et conservez le mode d‘emploi pour référence ultérieure. • Utilisez uniquement l‘adaptateur secteur fourni. • Débranchez l‘adaptateur secteur de l‘appareil lorsque vous n‘utilisez pas le remontoir. • Éteignez l‘appareil lorsque vous installez ou retirez les montres. •... -
Page 13: Informations Sur Le Recyclage
UTILISATION 1. Branchez une extrémité de l‘adaptateur d‘alimentation à la prise d‘alimentation à l‘arrière de l‘appareil et l‘autre extrémité à la prise de secteur. 2. Ouvrez le couvercle et retirez doucement le support de la montre du boîtier. 3. Placez la montre autour du support de montre. 4. -
Page 15: Datos Técnicos
Indicaciones de seguridad 16 Vista general del aparato 16 Funcionamiento 17 Indicaciones sobre la retirada del aparato17 DATOS TÉCNICOS Número de artículo 10006662, 10032882 Fuente de alimentación 220-240 V ~ 50/60 Hz DECLARACIÓN DE CONFORMIDAD Fabricante: Chal-Tec GmbH, Wallstraße 16, 10179 Berlín, Alemania... -
Page 16: Indicaciones De Seguridad
INDICACIONES DE SEGURIDAD • Lea atentamente todas las indicaciones y conserve este manual de instrucciones para futuras consultas. • Utilice exclusivamente el cable de alimentación incluido en el envío. • Desconecte el cable de alimentación del aparato cuando no lo utilice. •... -
Page 17: Indicaciones Sobre La Retirada Del Aparato
FUNCIONAMIENTO 1. Conecte un extremo del cable de alimentación a la parte posterior del aparato y el otro extremo, a la toma de corriente. 2. Abra la tapa y retire con cuidado el soporte. 3. Fije el reloj al soporte. 4. -
Page 19: Dati Tecnici
INDICE Avvertenze di sicurezza 20 Descrizione del prodotto 20 Utilizzo 21 Smaltimento 21 DATI TECNICI Numero articolo 10006662, 10032882 Alimentazione 220-240 V ~ 50/60 Hz DICHIARAZIONE DI CONFORMITÀ Produttore: Chal-Tec GmbH, Wallstraße 16, 10179 Berlino, Germania. Questo prodotto è conforme alle seguenti direttive... -
Page 20: Avvertenze Di Sicurezza
AVVERTENZE DI SICUREZZA • Leggere attentamente tutte le avvertenze e conservare il manuale per future consultazioni. • Utilizzare solo il trasformatore incluso in consegna. • Staccare il trasformatore dal dispositivo quando non viene utilizzato. • Spegnere il dispositivo quando vengono messi o tolti gli orologi. •... - Page 21 UTILIZZO 1. Collegare un’estremità del trasformatore alla connessione sul retro del dispositivo e l’altra a una fonte di corrente. 2. Aprire la copertura e togliere il supporto dell’orologio dall’alloggiamento facendo attenzione. 3. Posizionare l’orologio sul supporto. 4. Rimettere il supporto nel dispositivo fino a quando si innesta. 5.


Need help?
Do you have a question about the 10006662 and is the answer not in the manual?
Questions and answers