Scania AUS4 Original Instructions Manual
Truck entertainment premium radio with navigation system
Hide thumbs
Also See for AUS4:
- Original instructions manual (92 pages) ,
- Manual (42 pages) ,
- Manual (42 pages)

Related Manuals for Scania AUS4


Summary of Contents for Scania AUS4
-
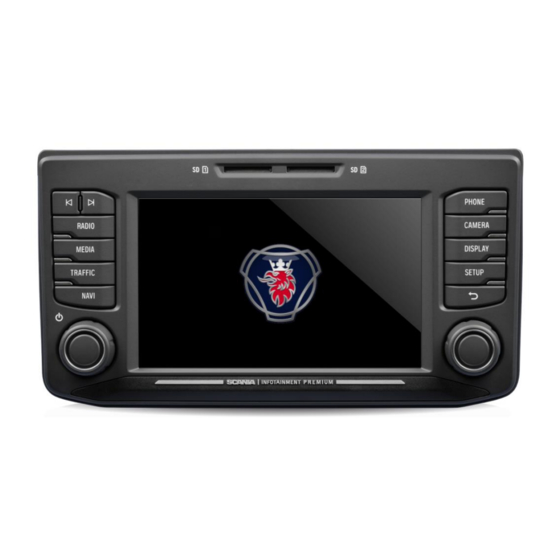
Page 2: Buttons And Controls
BUTTONS AND CONTROLS Buttons Button In radio mode: Return to previous view Short press: Switch to next/previous Right rotary encoder preset (radio) Select menu item, change setting (rotate); Long press: Switch to next/previous Confirm setting (press) station on station list (radio) In media mode: Approach Sensor Next/previous track (press) -
Page 3: Table Of Contents
General information ..........32 Important information ..........32 CONTENT Media sources............33 Buttons and controls ..........2 Audio files of an MP3 player, USB drive....33 Important information ..........5 Playing audio files from an SD card ....33 Playing files from USB mass storage device ..33 This must be observed! .......... - Page 4 Information on the map display ......... 58 Certification Information ........101 NAVI button and menu navigation ......60 Destination entry ..........60 Enter address ............60 Confirm route menu ..........63 Alternative route ........... 64 POI - Point of Interest........... 65 Geo Coordinates ..........
-
Page 5: Important Information
IMPORTANT INFORMATION The infotainment system was manufactured according to the current state of the art and recognised safety regulations. However, there may be hazards if you do not observe the safety information in these instructions. Note Read these instructions carefully and completely before first use. Keep these instructions where they will be accessible for all users at all times. -
Page 6: Notes On Handling Sd Cards
This may cause data loss or destruction of the SD card. USABLE NAVIGATION SD CARDS This infotainment system may only be operated with original data storage SCANIA media. Note The infotainment system is not designed for the use of self-generated navigation SD cards. -
Page 7: Formatting Conventions
Formatting conventions Safety instructions are highlighted with a grey bar and the symbol: Helpful hints are highlighted with a grey bar and the symbol: You will also find items in these instructions, clearly marked as illustrated here: Action steps: • Press ... Device buttons: e.g. -
Page 8: Introduction
INTRODUCTION FEATURE LIST Mode Feature Radio FM (18 stations) AM (18 stations) LW (6 stations) MW (6 stations) SW (6 stations) DAB (18 stations)* *) DAB is not receivable in each region. USB port 2 USB ports: Media data Charging external media USB port 1: Provides current up to 1.5 A USB port 2 (optional):... -
Page 9: Radio Reception
RADIO RECEPTION Radio reception can be degraded by atmospheric interference, noise, distortion or other reception interference, such as: Change in distance from the transmitter Multipath reception due to reflection or shadowing In such conditions the radio reception is disturbed. However this is not a faulty behaviour of the infotainment system. -
Page 10: Multifunction Knob
Touch screen Risk of damage to the touch screen The infotainment system is equipped with a capacitive touch display. Only use your fingers. Do not use sharp or hard objects such as pens or pencils for the operation of the touch screen. The screen of the infotainment system has a sensor interface that enables direct selection of displayed menu options. -
Page 11: Scroll Through A List Of Menu Items
Scroll through a list of menu items With the touch screen: • Tap on the button at the top or bottom of the slider. • Move the slider of the slider bar up or down with your finger. • Swipe your finger up or down to scroll through the list of menu items. With the right rotary encoder •... -
Page 12: Customise Settings
CUSTOMISE SETTINGS The following examples describe a method to change the settings available in the different menus using the menu options on the screen or the right rotary encoder Sound settings • Press the SETUP button. • Tap on the icon ... - Page 13 To change the settings you can proceed as follow: • Tap on one of the screen buttons ( ) to change the audio settings. • Move the slider via touch screen. • Move the slider by rotating the right rotary encoder Bass: Use this setting to modify the low frequencies of your audio source.
- Page 14 the vehicle. Change settings Via touch screen: • Tap with your finger on the intersection of both lines and then hold and move the finger to the desired position. Values for Balance and Fader change according to the position of the intersection.
-
Page 15: Volume Settings
VOLUME SETTINGS Adjusting volumes • Press the SETUP button. • Tap on the icon • Tap on Volumes. • Select the list entry you want to modify. • Adjust the Volume to the desired level. The selected volumes are adjusted. Note For some settings you can test the selected volume by pressing the button Subwoofer level:... - Page 16 The volume of the traffic announcements can be adjusted during the message using the left rotary encoder . When the message has been completed or is cancelled, the volume is reset to the original volume setting automatically. Adjusting the volume of voice (SDS) The volume of voice announcements can be adjusted, when Speech Dialogue System - SDS is available.
-
Page 17: System Settings
SYSTEM SETTINGS The default settings for the infotainment system can be changed via the menu SYSTEM SETTINGS. • Press the SETUP button and tap on the icon With the touch screen: • Tap on a menu item to change the setting. With the right rotary encoder •... -
Page 18: Units
Units • Select the menu item Units. A list of the Units is displayed. • Select the desired system of units: Automatic Metric (km, m, t, kmh) Imperial (mi, yd, ft, t, mph) Note If Automatic is selected. The Units are set via instrument cluster. Automatic text scrolling •... -
Page 19: Bluetooth And Phone
Factory reset This menu entry provides option to either delete all personal data of individual driver or settings common to all the vehicle driver ID holders. • Select the menu item Factory reset. A screen is asking for user’s acknowledgement. Factory reset, present user = Deleting all personal data. -
Page 20: Display Settings
DISPLAY SETTINGS Customising the display • Press the SETUP button and tap the icon • Tap on Brightness. • Select the appropriate option to adjust the Brightness of the screen and to adjust the display to match the light conditions of your surroundings. Note There is one automatic and two manual modes ( day or... -
Page 21: Driver Profiles
If the infotainment system is used standalone (ignition off), changes will always be applied to the last used Driver ID. THEFT PROTECTION Please contact your local SCANIA dealer. SPEECH DIALOGE SYSTEM – SDS* *) Voice recognition feature is dependent on vehicle configuration, the language which is used and region the vehicle is sold. -
Page 22: Supported Commands
Supported commands Navigation, Media, Telephone and Radio are the four major domains supported by the speech dialog system. Below is the list of major commands supported by the Voice Recognition system on board. Europe: Following commands are supported by the on board voice recognition system: Commands Album <Name>... -
Page 23: Dialog Session
Other regions (out of Europe): Following commands are supported by the on board voice recognition system: Commands Tune to < Frequency > Seek Up Seek Down Next preset Previous preset FM/AM Next Track Previous Track Album <Name> Genre <Name> Artist <Name> Playlist <Name>... - Page 24 Example 1: Disambiguation between two similar artists: Example 2: Select an album and play it: • Press the Push to Talk button on steering wheel to initiate the voice recognition A beep is played. The speech session has started. ...
- Page 25 Help system The voice recognition solution comes with an on board help system. If no command is uttered, the help dialog is initiated in which the system reads out some of the supported commands. You could also utter "more commands" or "all commands" to trigger a help dialog.
-
Page 26: Radio
RADIO You can only use the touch screen to select or activate the menu items in the Radio menu. ACTIVATING THE RADIO • Turn on the infotainment system. • Press the button RADIO The radio function is activated. The last station you listened to is played after activating the radio. Note If an RDS station is being played, the information about the station name and the program will be displayed. -
Page 27: Traffic Announcements (Ta)
Note If the waveband is changed from FM to DAB, to AM or vice versa, the currently received station remains activated. There is an FM waveband menu. You can store 18 FM stations. There is an AM waveband menu. You can store 6 AM stations for each waveband: LW, MW and SW If DAB is available, you can store 18 DAB stations. -
Page 28: Station Search
STATION SEARCH You can set the desired radio station either automatically or manually. Via touch screen: Switch to the previous DAB station within the currently set DAB ensemble. Switch to the previous station in the station memory (AM/FM). Press for a longer time: Automatic search for previously available radio station (AM/FM). -
Page 29: Display Available Radio Stations
Display available radio stations • Press the button RADIO • Tap on the icon The available radio stations will be displayed for the selected waveband and can be selected. Note The first time that the AM is used, you need to click on the update button at the top left in order to update the station list. -
Page 30: Manual Station Tuning (Am/Fm)
Manual station tuning (AM/FM) Using the right rotary encoder • In the radio menu, turn the rotary encoder clockwise or counter-clockwise to change the reception frequency. Using the frequency display: • Tap on the icon A frequency scale is displayed. Perform one of the following to set the desired station manually. -
Page 31: Radio Settings
RADIO SETTINGS • Press the RADIO button and tap on the icon The Radio settings menu is displayed. Following menu items are available: Traffic news (AM/FM/DAB) Enables or disables traffic announcements. Sound settings (AM/FM/DAB) SOUND SETTINGS Menu opens. For more details see chapter "Introduction", sub- chapter "Sound settings"... -
Page 32: Media
MEDIA The last selected Media source can always be selected by pressing the MEDIA button. GENERAL INFORMATION For the position of the USB port, see the vehicle documentation. Note The USB port must always be kept clean and dry. An MP3 player, USB drive or a SD card (via the USB port/adapter) can be connected to the USB port. -
Page 33: Media Sources
MEDIA SOURCES Audio files of an MP3 player, USB drive • Connect the MP3 player / the USB drive to the USB port via a USB cable. Audio files are played automatically. Supported media files: MP3, WMA, AAC, Flac Playing audio files from an SD card •... -
Page 34: Media Player
Media Player Picture Viewer Each picture is shown on the source medium regarding its orientation. There is no possibility for the user to rotate pictures. The maximum supported image size that can be shown is 5163 x 3098 pixel. The user can select an image from within the USB browse menu, and then the picture viewer will be shown. -
Page 35: Bluetooth Audio Connection
Supported Media Files M3u, pls, wpl Media Containers FLAC QtFF MP3 (MPEG-1 Layer 3, MPEG-2 Layer 3) WMA 9 (standard; loseless; Voice), WMA9.1, WMA9.2, WMA10 Waveform (WAV – PCM Windows format) Audio Codec AAC (MPEG-4 AAC, Low Complexity Profile) HE-AAC ALAC (Apple lossless Audio Codec) H.263 (v1/P0/P3) MPEG-4 Part 2 (ISO/IEC 14496-2;... -
Page 36: Connecting A Bluetooth Device
Connecting a Bluetooth device Important information A maximum of 2 devices can be connected to the infotainment system at the same time. A maximum of 10 devices can be paired to the infotainment system. Only one connected device can be used for media streaming at a given time. Perform the following procedure to pair a Bluetooth device with the infotainment system. -
Page 37: Bluetooth Music Mode
BLUETOOTH MUSIC MODE Activating Bluetooth music mode • Press the MEDIA button. • Tap on the button. • Select the Bluetooth button to activate Bluetooth music mode. The external audio source can now be operated via the infotainment system. •... - Page 38 Note Depending on the Bluetooth device, activation of Bluetooth music mode and control of playback may differ. Requirements The following requirements must be met to use the Bluetooth music mode of the infotainment system: The Bluetooth function of the infotainment system must be activated. The Bluetooth function of the external Bluetooth audio source must be activated (see user handbook for the Bluetooth device).
-
Page 39: Aux Port
AUX PORT You can connect external audio sources at the AUX jack. Look at the vehicle documents to find the location of the AUX port. Note Not all vehicles have an AUX port. The AUX socket must always be kept clean and dry. For example, you can connect a portable CD player to the AUX input with a 3.5 mm plug. -
Page 40: Media Settings
MEDIA SETTINGS • Press the MEDIA button and tap on the icon The Media settings menu is displayed. Following menu items are available: Traffic news Enables or disables traffic announcements. Sound settings SOUND SETTINGS Menu opens. For more details see chapter "Introduction", sub- chapter "Sound settings"... -
Page 41: Telephone
TELEPHONE* *) Telephone and related settings are optional features for your device. Telephone function is also related to media streaming via Bluetooth. Note You can only connect Bluetooth mobile telephones to the infotainment system when a hands-free device is installed in the vehicle. You can use your mobile telephone through the infotainment system. -
Page 42: Bluetooth Connection
Bluetooth connection Bluetooth is a radio standard for the wireless connection of devices such as a smartphone or an MP3 player. To establish a Bluetooth connection to the infotainment system, the Bluetooth function of the Bluetooth device must be activated and the Bluetooth device is set to visible (detection mode). -
Page 43: Connection To Another Paired Device
For details, see the chapter "Media", sub-chapter "Bluetooth audio connection”, “Connecting a Bluetooth device" on page 36. Connection to another paired device • Tap in the BLUETOOTH SETTINGS menu on List of paired devices. A list of all Bluetooth devices paired with the infotainment system is displayed. ... -
Page 44: Handling Of Two Telephones
Handling of two telephones It is possible to connect 2 telephones at the same time. One is the primary telephone, one is the secondary telephone. The left side of the favourites tab shows information about the two telephones. Favourites, Call list, Phonebook and Messages will always come from the primary telephone. -
Page 45: Emergency Call
EMERGENCY CALL Note Sometimes it is not possible to make an emergency call due to a weak signal. Therefore, you should not rely on the mobile telephone for essential calls (e.g. a medical emergency). On some networks, you need a valid, properly set up SIM card in the telephone. -
Page 46: Operation
OPERATION When the Bluetooth connection has been established, you can perform the functions in your telephone through the infotainment system. Note You can use the mobile telephone in hands-free mode. When the Bluetooth connection is established between the mobile telephone and the infotainment system, the mobile telephone data are sent to the infotainment system. -
Page 47: Using The Phone Book
If "No phone" continually appears, check whether Bluetooth is activated and the telephone is connected to the infotainment system. No phone will appear in favourites tab if only music service is active. in list of paired devices to find out which service is active/passive. ... -
Page 48: Using Call Lists
• To view all the entries that begin with a certain letter, enter the letter. Note Tap on to delete an entry from display. The entry in your telephone is still existing. Using call lists Incoming, outgoing and missed calls are recorded in the call list. •... -
Page 49: Enter A Telephone Number
Enter a telephone number Tap on the icon in the TELEPHONE menu. The following screen is displayed. • To initiate a call, enter the desired telephone number. • Use icon to delete incorrect entries. • Tap on Call. The entered telephone number is dialled. Show matching contacts If the user enters a number, matching contacts from the phonebook or favourites are shown with its contact name. - Page 50 Reject call: • Tap the red button on the screen. A second incoming call If you receive a second call during an active call, a message with the telephone number or name (if available) is displayed. Note If your provider offers this service, you can hear call waiting for the second call.
-
Page 51: Functions During The Call
FUNCTIONS DURING THE CALL The TELEPHONE menu is displayed during the current call. Temporarily deactivate hands-free mode • Tap on icon The call can be continued only through the mobile telephone. To return to hands-free mode, • Tap again on icon Temporarily deactivate the microphone •... -
Page 52: Ending Call
Ending call Select the red button to end the call. PHONE BOOK SETUP If you have connected a mobile telephone with the infotainment system, your mobile phone book with telephone numbers and names (if available) is downloaded to the infotainment system automatically. Depending on how many numbers are in your phone book and the connected telephone, this may take several minutes. -
Page 53: Phone Book On The Sim / Telephone Memory
Phone book on the SIM / telephone memory There are two different phone books on mobile telephones - the one on the SIM card and the other directly on the mobile telephone. Note For details, see the instructions of your mobile telephone. Both phone books of the connected mobile telephone are downloaded to the infotainment system. -
Page 54: Display Text Messages
Display text messages Note This function is not provided by every mobile telephone. • Press the TELEPHONE button. • Tap on The TEXT MESSAGES menu is displayed. • Select a text message from the list. The text message is displayed. Note You can call the sender from a displayed text message. -
Page 55: Telephone Settings
TELEPHONE SETTINGS Note The TELEPHONE SETTINGS menu is only available if a Bluetooth device is connected to the infotainment system. • Press the TELEPHONE button and tap on the icon The TELEPHONE SETTINGS menu is displayed. Following menu items are available: Bluetooth BLUETOOTH SETTINGS menu opens. -
Page 56: Navigation
NAVIGATION* *) Available functionality of the navigation system is dependent on the map data content and may differ on the respective region. Traffic safety The infotainment system is designed for use in commercial vehicles. Specifications that are required for route guidance of commercial vehicles, such as height restrictions or maximum permissible loads, are considered in the route calculations, to the extent that these specifications are stored in the navigation data. -
Page 57: Advantages Of Tmc/Tpeg
The coverage of TMC/TPEG is increasing permanently. MAP DATA The map data is stored on a SD-card delivered with the navigation system. You can update the maps by using the updater found under http://scania.com/maps. Note 5-year subscription for SCANIA Map Updater is included. -
Page 58: Information On The Map Display
INFORMATION ON THE MAP DISPLAY If the navigation system is activated, the following information is displayed: Switch to open the menu MAP OPTIONS Destination/ next stopover Remaining distance to the destination/ next stopover Estimated time of arrival or remaining travel time to destination/ next stopover. Tap the time display to toggle between the arrival time and the remaining travel time. - Page 59 Status of the currently travelled road for your vehicle Icon Status Commercial vehicle-specific information on the road not available! Please watch street, no warning will be shown for vehicle profile violation! Route Displays the calculated route in map. A black and white chequered flag appears in map when the destination is in vicinity to the current position: as button below to orientate to the destination on the map.
-
Page 60: Navi Button And Menu Navigation
NAVI BUTTON AND MENU NAVIGATION • Press on the NAVI button to open the Navigation Screen. The Navigation Screen provides access to all navigation system functions for destination entry and navigation. Destination entry • Tap on the icon The following screen is displayed: The following menu options are available: Address Find POI (e.g. - Page 61 Note The navigation system only displays the letters which are possible to use for destination input. If there are different keyboard pages available for additional/ special letter, they are selectable by using the lower page selection button (e.g. 1/4, 2/4 etc.). It also predicts the input and simplifies input by interpreting for example an o input as ö...
- Page 62 Note If you do not enter any characters in the street name, you can skip the address input. • Tap on Skip. The destination is then set to the city centre. • Enter the desired house number or intersection. Note If you do not enter a house number, you can skip the address input.
-
Page 63: Confirm Route Menu
Confirm route menu The following informations are available in this map area. Distance to destination Estimated time to destination Route avoidance options Icon for the actual selected route type (Eco route, fast route or short route) Vehicle profile options The following options are available: Add stopover Tap this option to add a stopover. -
Page 64: Alternative Route
Destination and POI Options Note POI Options are enabled, if the address of the destination is assigned as POI. • Tap in menu CONFIRM DESTINATION on Options. Destination or POI Options are shown. Save destination Tap this option to save the displayed destination data in the saved destinations. Set as home address Tap this option to save the displayed destination as home address. -
Page 65: Poi - Point Of Interest
Notes Every alternative route is displayed with a star rating, a distance and driving time. The highest rated route is the one with the lowest fuel consumption. The map displays the overview of the alternative routes with the colour of the different route types. - Page 66 Regular POIs Use this option to display regular POIs (e.g. parking, night stop, restaurants etc.). Truck POIs Use this option to display truck specific POIs (e.g. truck parkings, truck repair shops, petrol/gasoline stations etc.). Dealers Use this option to display dealer specific POIs. ...
-
Page 67: Geo Coordinates
Geo Coordinates • In Navigation Screen press the NAVI button and tap on the icon The menu DESTINATION INPUT is displayed. • Tap on Coordinates Note Tap on Format to choose between DMS and decimal input. • Insert the geo coordinates (Latitude and Longitude) via numeric keypad. •... -
Page 68: Home Address
Home address You can use this option to save your own address and/or select the already stored home address as a new destination. Create home address • In Navigation Screen press the NAVI button and tap on the icon The menu DESTINATION INPUT is displayed. •... -
Page 69: Contacts
Contacts Note Only if a mobile telephone is connected to the infotainment system via Bluetooth and contains contact address data in a valid format. Please note the following information: The address in the mobile telephone must have separate fields for Country, City, Street and Postcode. -
Page 70: Select A Point On Map
SELECT A POINT ON MAP If no route guidance is active: • Select any point in map by touching the desired destination for 2 seconds. The map gets centred to this position. The confirm destination screen for the selected position is shown. Display location information Select this option to display the address/GPS coordinates of the current position. -
Page 71: Recent Destinations
RECENT DESTINATIONS Use this option to display a list of destinations that you have previously used for navigation. You can select an entry from the list and set it as a new destination. Selecting a previous destination • In Navigation Screen press the NAVI button. -
Page 72: Saved Destinations
SAVED DESTINATIONS • In Navigation Screen press the NAVI button. • Tap on the icon The NAVIGATION menu is displayed. • Tap on Saved destinations. The list of saved destinations is displayed. Note It is possible to store 20 destinations per user (driver ID). 100 different users are supported. -
Page 73: Options Whilst Route Guidance
OPTIONS WHILST ROUTE GUIDANCE Use this option to adjust the settings for route calculation / recalculation and navigation. • Press the NAVI button during a currently running route. • Tap on the icon The ROUTE OPTIONS menu is displayed. The following menu options are available: Stop guidance Tap on this option to cancel the current route guidance or remove stopover from... -
Page 74: Stop Guidance
Stop guidance Use this option to stop current navigation. If an additional stopover is currently set for navigation, you might receive the following message: - Should navigation be cancelled to the stopover and to the final destination, or - only to the stopover. Note If you only want to cancel navigation to a stopover, the navigation system re- calculates the route automatically to get you to your final destination. -
Page 75: Vehicle Profiles
Vehicle profiles The navigation system is adapted to heavy vehicles. The vehicle profiles can be changed all the time, even during active route guidance. You can store the characteristics of different vehicle combinations in up to 4 different profiles (e.g. with and without a trailer or with specific hazardous load). Based upon these characteristics the navigation system will calculate the best possible route. - Page 76 The navigation system is adapted to heavy vehicles. Therefor the supported navigation map data is equipped with truck related given street limitations. • Set the following vehicle properties: Width (e.g. narrow streets) Height (e.g. bridges) Length Number of axles 1-Axle weight Current weight Max.
-
Page 77: Avoid Options
In the menu HAZARDOUS LOAD you can select hazardous material by classes. Tapping an icon opens a description of the respective hazardous material class. If your vehicle carries hazardous loads, activate the respective checkboxes. It is possible to activate more than one class if several hazardous loads are transported. •... -
Page 78: Block Ahead
Note Toll and vignette roads are a form of road pricing for vehicles additionally to the road tax. Toll roads: Road pricing calculated on distance travelled Vignette: Permission for using roads for a certain period of time Note Sometimes (depending on the route) it is not possible to match every set truck profile and avoid option. -
Page 79: Voice Guidance
The route is recalculated. Note A blocked route will be marked in the map. After the blocked route has been detoured, the block road function will be deactivated automatically. Voice guidance Use this menu to turn the voice guidance on and off. •... -
Page 80: Manoeuvre List
Manoeuvre list • In Navigation Screen press the NAVI button. • Tap on the icon The ROUTE OPTIONS menu is displayed. • Tap on Manoeuvre list. The Manoeuvre list is displayed. The Manoeuvre list displays all manoeuvres in the calculated route, starting from the current location. -
Page 81: Manage Route
Manage route Note Manage Route is enabled if you have entered more than one destination. Use this menu to manage your route, for example, to change the order of your destinations on your route. This option shows you a list with all stopovers and the final destination. •... -
Page 82: Setup Button And Menu Navigation And Traffic
SETUP BUTTON AND MENU NAVIGATION AND TRAFFIC • Press on the SETUP button to open the SETTINGS menu. • Tap on the icon • Tap on Navigation and Traffic. The NAVIGATION SETTINGS menu is displayed. The NAVIGATION SETTINGS menu offers several settings for adjusting the navigation system. -
Page 83: Route Guidance
In 3D mode the terrain is rendered with height/elevation-data included (3D terrain) and the angle of the camera is adjusted to ground level. Auto zoom If you set this option, the map scale is adjusted automatically by the navigation system (increases and decreases) in order to ensure reliable navigation. You can choose between far, normal, near and off. -
Page 84: Vehicle Profiles
Show speed limit Use this option to enable the display of speed limits. In addition, you can specify whether an acoustic warning should also be issued and the level at which a warning should be issued if the speed limit is exceeded. Show lane guidance Use this menu to display lane guidance. - Page 85 • Enter latitude and longitude coordinates into the text file, separated by a comma (e.g. 9.9800000, 52.0150000). • Enter an arbitrary name for the contact point (e.g. “David's hangout”). • Save the text file (e.g. on the hard drive on your PC or notebook). Example: <kml>...
-
Page 86: Map Version
Navigation SD card You can order new navigation SD cards to get the most recent map data or you can download the latest maps. Visit http://scania.com/maps for more information. Risks to the unit Do not use a SD card which has cracks, is deformed or has been repaired with tape. -
Page 87: Replacing A Navigation Sd Card
Replacing a navigation SD card Note When you remove the SD card with map data while navigation is active, a popup informs you that navigation will not be available anymore until you re-insert the SD card with map data. After you confirmed the popup the home screen will be shown. -
Page 88: Traffic Information Menu
TRAFFIC INFORMATION MENU* *) Only available if navigation map data is inserted. Note Traffic messages shows you information about events received by RDS- TMC or (available with optional DAB radio function) DAB-TPEG. Based on this information the navigation system is capable to recalculate routes around time delaying traffic events. - Page 89 Show traffic events You can enable or disable the visibility of the selected event types in the navigation screen. Following options amongst others are possible: Traffic flow Accidents Closure Heavy traffic Heavy vehicles Informational Lane restrictions Roadworks Security Slow traffic Weather The navigation setup option Show traffic info completely enables/disables the visibility.
-
Page 90: Camera
CAMERA Note The camera system is optional and depends on the vehicle configuration. For further information please contact your dealer. Traffic safety The camera system is used to support visibility during forward and backward movement of your vehicle. But the camera can also be configured as a general camera and install it at a reasonable location around the vehicle. -
Page 91: Select Camera
Select camera You can use this option to select one of the two cameras. • Press the CAMERA button and tap on the icon The Camera settings menu is displayed. • Select a camera by tapping on camera preview. •... -
Page 92: Steering Wheel Remote Control
STEERING WHEEL REMOTE CONTROL* *) Steering wheel remote control is dependent on vehicle configuration. Note The steering wheel remote control function is optional and depends on the vehicle configuration. See separate manual of the remote control unit for connection details. You can operate the infotainment system with the buttons on the steering wheel. - Page 93 Button Settings Button Back Press and hold for at least one second to hang up an ongoing call. OK button Confirm Button Button Down Button Left Reject an incoming call Button Right Ignore an incoming call (mutes the incoming call signal)
-
Page 94: Mirrorlink
MIRRORLINK MirrorLink provides the integration of mobile devices into the vehicle, so that the screen and common applications of mobile devices are shown on the display. Note MirrorLink appears only when an MirrorLink supported mobile device is connected to the infotainment system via USB. Long press on TELEPHONE button activates MirrorLink. -
Page 95: Start Mirrorlink Application
Note To present an incoming call via MirrorLink the telephone must be connected to the infotainment system as primary telephone via Bluetooth. Additional a certified MirrorLink Telephone App must be installed. Most telephones currently do not support telephone calls via MirrorLink. MirrorLink is interrupted during a system update, e.g. -
Page 96: Carplay
CARPLAY ® CarPlay® enables the integration of iPhone® devices in the vehicle and the screen as well as shared applications from Apple devices are shown on the display. Note CarPlay® only appears when an Apple device is connected to the device's USB connection via a lightning connection. -
Page 97: Launch Carplay Apps
CarPlay® is interrupted when there are system messages (e.g. traffic information). CarPlay® is reactivated after the system message has finished. In order to quit CarPlay®, you have to select Scania. LAUNCH CARPLAY APPS • Tap on the icon to open the HOME menu. -
Page 98: Appendix
APPENDIX END USER LICENSE AGREEMENT FOR THE USE OF THE TRAVEL AND TRAFFIC INFORMATION SERVICES PROVIDED IN EUROPE SCOPE 1.1 This End User License Agreement ("EULA") contains the terms and conditions regarding your use of the Services (as defined below in section 2.6) provided by the Service Provider (as defined below in section 2.7) in the Territory (as defined below in section 2.8) and material limitations to your rights in that regard. - Page 99 providing the Services in the form as they were provided when you purchased the Product, which ever is the shortest. 3.2 There are no implied licenses granted under this EULA, and all rights save for those expressly granted to you above, shall remain with the Service Provider. INTELLECTUAL PROPERTY AND OTHER RIGHTS Title and all Intellectual Property Rights to or associated with the Services and/or the Data shall always be vested in the Service Provider, its licensors or other suppliers.
- Page 100 7.1 This EULA constitutes the entire agreement and understanding by and between you and the Service Provider. This EULA supersedes any prior and contemporaneous proposals, purchase orders, advertisements, and all other communications in relation to the subject matter of this EULA, whether oral or written.
- Page 101 CERTIFICATION INFORMATION EC-Declaration of Conformity Hereby, Harman Becker Automotive Systems GmbH, declares that this unit, Scania AUS4 is in compliance with the essential requirements and other relevant provisions of Directive 1999/5/EC. ECE type approval Infotainment system SCANIA AUS4 was reviewed by the directive UN/ECE R10 and registered and type approved by “snch“...
Need help?
Do you have a question about the AUS4 and is the answer not in the manual?
Questions and answers