Table of Contents
Advertisement
Advertisement
Table of Contents

Summary of Contents for Sunfire CRS-3
-
Page 2: Table Of Contents
Important Safety In struc tions 1. Read In struc tions. 2. Keep these Instructions. 3. Heed all Warnings. 4. Follow all Instructions. 5. Do not use this apparatus near water. 6. Clean only with a dry cloth. 7. Do not install near any heat sources such as radiators, heat registers, stoves, or other apparatus (including amplifi... -
Page 3: Introduction
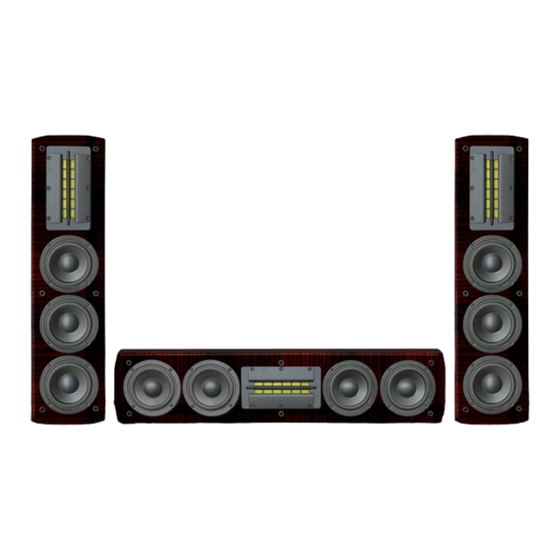
• 2 1/2 way, tapered array design • Magnetically shielded • Waveguide-loaded Neodymium ribbon • 4.5-inch High Back-emf drivers (three for the CRS-3, four for the CRS-3C) • 117 dB maximum output • 440 watts maximum power • Ebonized Rosewood fi nish •... -
Page 4: Overview
Bob Carver’s award-winning Amazing Loudspeaker from the late 1970s! The sound from the CRS-3 ribbon is deliberately focused in the forward direction, with very little sound going up or down - reducing refl ections off the ceiling and fl oor, that disturb the sense of space and imaging. -
Page 5: Rear Panel Features
Rear Panel Features CRS-3 Rear Connectors 1. Boundary Compensation Switch This switch compensates for bass and mid-bass loading that occurs when a loudspeaker is wall-mounted, com- pared to when it is away from a wall. Switch it to the left if your loudspeaker is close to a wall or other large objects that may cause refl... -
Page 6: Biamping
Biamping The loudspeakers have two sets of bind ing posts that can be used for biwiring or biamping. These posts are joined with bridge clips for normal operation. Make sure the bridge clips are re moved from the loudspeakers when you want to biamp or biwire them. -
Page 7: Biwiring
Biwiring In a biwire system, each loudspeaker is driven by one amplifi er channel, but separate speaker wire pairs are used for the woofer and ribbon connections. Make sure the bridge clips be- tween the woofer and ribbon posts are re moved from the loudspeak- ers when you want to biamp or biwire them. -
Page 8: Wall Mounting
We recommend that the ribbon section is positioned at a height close to ear-level, therefore you can fi t the CRS-3 loudspeakers with the ribbon at the bottom if necessary. The CRS-3C center loudspeaker can be fi... -
Page 9: Final Procedure
Mounting onto dry wall • Place the wall bracket in position on the wall. Use your pencil to mark the three holes. Use the built-in bubble level to make sure the bracket is level. • With a 3/8" drill bit, drill three through-holes into the marked posi- tions on the wall. -
Page 10: Loudspeaker Locations
The CRS-3C center loudspeaker can be mounted above or below the display, and the CRS-3 can be mounted at either side. Set the Boundary Compensation switch to "Room" if the loudspeakers are away from the walls, such as on speaker stands. - Page 11 The CRM-2 ribbon loudspeakers may be used as surround loudspeakers, or you can use the CRS-3 as shown in the following systems and illustrations. 5.1 Confi guration Place each surround loudspeaker an equal distance away from your central lis ten ing position, and keep them at least one or two feet above ear level (with you sitting down).
-
Page 12: Subwoofer Location
Subwoofer Location The best location for a single subwoofer can be found by following these steps: Place the subwoofer on your couch or favorite easy-listening chair. You can then either run a calibra- tion (noise) signal through it, or play some of your favorite music samples with heavy bass. -
Page 13: Crossover Adjustment
Crossover adjustment We recommend that you set your home theater processor's crossover to 80 Hz, and set the channels that use the Cinema Ribbon Trio loudspeakers to "small." • Your subwoofer receives frequencies below 80 Hz, from all loudspeakers whose size is set to small, in addition to the LFE channel: •... -
Page 14: Specifi Cations
Maximum Output 117 dB Impedance 6 ohms nominal Connections 2 pairs gold plated 5-way binding posts Finish Ebonized Rosewood Dimensions (with grill) CRS-3 Height 5.82" (148 mm) Width 24" (610 mm) Depth 3.75" (96 mm) Weight 15.8 lbs (7.2 kg) -
Page 15: Limited Warranty
Limited Warranty Sunfi re Corporation is proud of its prod ucts which have been built with care using ad vanced technology and premium com po nent parts. Your unit has been crafted to perform properly for many years. Sunfi re Corporation offers the following Warranty to you, the owner of a new Sunfi...


Need help?
Do you have a question about the CRS-3 and is the answer not in the manual?
Questions and answers