Table of Contents
Advertisement
Available languages
Available languages
Advertisement
Table of Contents

Related Manuals for Occhio air


Summary of Contents for Occhio air
- Page 1 »air« module Montageanleitung Mounting instructions...
-
Page 3: Table Of Contents
Hohlraum Cavity box Steuerung Control mit der » air « App with the » air « app mit dem » air « controller with the » air « controller ( optional ) ( optional ) Dimmen mit dem Dimming with the Lichtschalter ( optional ) light switch ( optional ) - Page 5 »air« module Montageanleitung...
-
Page 6: Sicherheitshinweise
Sicherheitshinweise Lesen Sie die Montage-/ Gebrauchs anweisung sorgfäl- tig durch, bevor Sie das » air « Dieses Zeichen macht Sie auf module installieren. Beachten Sie Situationen aufmerksam, bei die Sicherheitshinweise in dieser denen Sie direkt in das Licht der Anleitung genau und bewahren LED blicken könnten. -
Page 7: Produktbeschreibung
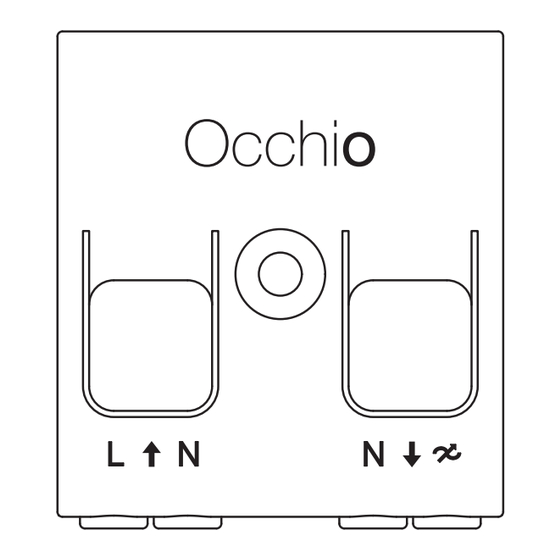
Produktbeschreibung Bluetooth Dimmermodul für phasenabschnittdimmbare Leuchten und Vorschaltgeräte, Montage in Hohlraum- oder Schalterdose. Maximaler Bedienkomfort und umfassende Steuerung via Blue- tooth 4.0 ( Bluetooth Low Energy ) . Schalten und dimmen von ein- zelnen Leuchten, Gruppen und Szenen. -
Page 9: Hinter Dem Licht Schalter
Montage hinter dem Licht schalter... - Page 10 Montage hinter dem Licht schalter »air« module Lichtschalter Einputzdose...
- Page 11 Die Blende des Lichtschalters entfernen. Anschließend die Befestigungs- schrauben herausdrehen. Achtung! Vor der Montage alle stromführen den Leitungen vom Stromnetz trennen und auf den Verlauf von Strom leitungen achten!
- Page 12 Montage hinter dem Licht schalter Den Schalter vorsichtig aus der Einputzdose entnehmen und die Verkabelung trennen. Die Kabelenden 5–6 mm abisolieren. Leitungsquerschnitt: 1 –1,5 mm 5–6 mm 1 –1,5 mm...
- Page 13 Kabel wie dargestellt mit dem » air « module verkabeln.
- Page 14 Montage hinter dem Licht schalter Das angeschlossene »air« module in der Einputzdose verstauen. Kabel nicht eingeklemmen! Den Lichtschalter wieder an der Wand befestigen und …...
- Page 15 … die Blende montieren. Das »air« module ist nun fertig montiert und kann mit der » air « App oder dem Lichtschalter gesteuert werden.
-
Page 17: Hohlraum
Montage Hohlraum... - Page 18 Montage Hohlraum Zwischendecke »air« module Vorschaltgerät * * nur bei LED und Niedervolt- Halogenleuchten Achtung! Vor der Montage alle stromführen den Leitungen vom Stromnetz trennen und auf den Verlauf von Strom leitungen achten!
- Page 19 1 –1,5 mm Vorschaltgerät aus der Zwischen- decke entnehmen und das »air« module wie abgebildet verkabeln. Vorschaltgerät und » air « module in Zwischendecke ver stauen, Zugentlastung sicher stellen und Leuchte montieren. Das »air« module ist nun fertig montiert und kann mit der »...
-
Page 21: Steuerung Mit Der » Air « App
Steuerung mit der » air « App... - Page 22 Steuerung mit der » air « App Die Occhio air Produkte lassen sich mit der »air« App einrichten und steuern, sie ist verfügbar für iOS- und Android-Geräte die im jeweiligen Store heruntergeladen werden kann. Nach dem Öffnen der App, werden...
-
Page 25: (Optional)
Steuerung mit dem » air « controller (optional) - Page 26 Steuerung mit dem » air « controller (optional) Occhio air controller Intuitiv bedienbare Fernbedienung mit vier programmierbaren Tasten ( Einrichtung via Occhio air App ) . Unabhängig von der App können einzelne Leuchten, Gruppen und Szenen gesteuert werden. Optio- nal mit Wandhalterung erhältlich.
- Page 27 Leuchten oder alle Leuchten steuern. dimmen. Szenen, Gruppen, einzelne Leuchten oder Zum Einrichten des Occhio air controllers wird die Occhio alle Leuchten faden *. air App benötigt. Eine Video- Kurzanleitung kann unter: www.occhio.de/daten/tutorials/ * Leuchten mit beidseitigem Lichtaustritt. air/de aufgerufen werden.
-
Page 29: Dimmen Mit Dem Lichtschalter (Optional)
Dimmen mit dem Lichtschalter (optional) - Page 30 Dimmen mit dem Lichtschalter (optional) Dimmen mit dem Lichtschalter Start Save < 1 Sek. 8 Sek. < 1 Sek.
- Page 31 Helligkeit erreicht ist. Die gewählte Helligkeit wird automatisch gespeichert. Wird der Lichtschalter nicht innerhalb von 8 Sekunden aus- und ein geschaltet, erreicht die Lichtintensität ihr Maximum. Achtung! Die Steuerung des Licht schalters ist nur mit dem » air « module möglich...
-
Page 33: Anhang
Anhang... -
Page 34: Info & Kontakt
Info & Kontakt Weitere Fragen beantwortet gerne Ihr Occhio Fachhändler www.occhio.de info @ occhio.de... -
Page 35: Technische Daten
( andere Konverter max. 52 W ) , HV Halogen oder HV LED max. 150 W, NV Halogen max. 60 W Zulässige Betriebsbedingung max. 30°C, nur im Innenbereich betreiben Prüfzeichen Entsorgung Bei örtlicher Entsorgungsstelle entsorgen. Das Occhio air module ist recyclebar; RoHS-konform. Nicht in den Hausmüll geben! - Page 37 »air« module Mounting instructions...
-
Page 38: Safety Instructions
Before any work on cool for at least 30 minutes. the luminaire and the » air « modu- le, always disconnect them from the power supply. -
Page 39: Product Description
Product description Bluetooth dimmer module for trailing-edge phase cut dimmable luminaires and power supply units; mounting in cavity box or light switch. Maximum ease of use and total control via Bluetooth 4.0 ( Bluetooth low energy ) . Switching and dimming of individual luminaires, groups and scenes. -
Page 41: Installation Behind The Light Switch
Installation behind the light switch... - Page 42 Installation behind the light switch »air« module light switch cavity box...
- Page 43 Remove the light switch frame. Then remove the fastening screws. Caution! Before installation, disconnect all power cables from the power supply and note the routing of the power cables!
- Page 44 Installation behind the light switch Carefully remove the switch from the cavity box and disconnect the cables. Strip the cable ends 5–6 mm. Cable cross-section: 1 –1.5 mm 5–6 mm 1 –1.5 mm...
- Page 45 Connect the cables to the » air « module as shown.
- Page 46 Installation behind the light switch Stow the connected »air« module in the cavity box. Do not jam the cables! Reattach the light switch to the wall and…...
- Page 47 … install the frame. The installation of the »air« module is now completed and can be controlled with the » air « app or the light switch.
-
Page 49: Cavity Box
Cavity box installation... - Page 50 Cavity box installation suspended ceiling »air« module power supply unit * * only for LEDs and low-voltage halogen luminaires Caution! Before installation, disconnect all power cables from the power supply and note the routing of the power cables!
-
Page 51: Control
Remove the power supply unit from the drop ceiling and connect the »air« module as shown. Stow the power supply unit and the » air « module in the drop ceiling, ensure that there is no tension on the cables and install the luminaire. -
Page 53: Control With The » Air « App
Control with the » air « app... - Page 54 Control with the » air « app Occhio air products can be set up and controlled with the »air« app; it is available for iOS and Android devices and can be downloaded at the particular store. After the app is opened, the lumi-...
-
Page 57: (Optional)
Control with the » air « controller (optional) - Page 58 (optional) Occhio air controller Intuitive remote control with four programmable buttons ( setup via Occhio air app ) . Individual lumi- naires, groups and scenes can be controlled regardless of the app. Available with optional wall mount. Maximum ease of use and total control via Bluetooth 4.0 ( Blue-...
- Page 59 Fades scenes, groups, individual luminaires or all To set up the Occhio air controller, the Occhio air app luminaires *. is required. A video quick start guide can be called up at www.occhio.de/daten/ * Luminaires with light outlets on both sides.
-
Page 61: Dimming With The Light Switch (Optional)
Dimming with the light switch (optional) - Page 62 Dimming with the light switch (optional) Dimming with the light switch start save < 1 sec. 8 sec. < 1 sec.
- Page 63 The selected brightness is automatically saved. If the light switch is not switched off and on within 8 seconds, then the light intensity reaches its maximum. Caution! The control of the light switch is only possible with the » air « module...
-
Page 65: Appendix
Appendix... -
Page 66: Information & Contact
Information & contact Your Occhio specialist retailer will gladly answer any other questions www.occhio.de info @ occhio.de... -
Page 67: Technical Data
HV LED max. 150 W, LV halogen max. 60 W Permitted operating conditions max. 30°C for indoor use only Test symbols Disposal Dispose of at a local disposal site. The Occhio air module is recyclable and RoHS compliant. Do not dispose of with the household waste! - Page 68 Occhio GmbH Wiener Platz 7 81667 München Fon +49-89-44 77 86 30 Fax +49-89-44 77 86 39 info @ occhio.de www.occhio.de...
Need help?
Do you have a question about the air and is the answer not in the manual?
Questions and answers