Table of Contents
Advertisement
Quick Links
Making cooking as much fun as eating
Please read this instruction manual. This will ensure that you
make use of all the technical benefits the cooker has to offer.
You will be given important safety information. You will then
be introduced to the individual components of your new
cooker and we will show you how to adjust it step by step. It
is quite simple.
The tables list the settings and shelf heights for numerous
well known dishes. All these dishes are tested in our cooking
studio.
In the unlikely event of a fault, look here for information on
how to rectify minor faults yourself.
A detailed table of contents will help you to find your way
around quickly.
Enjoy your meal!
Instruction manual
B 4542.0
en
9000 264 054
N091087
Advertisement
Table of Contents

Related Manuals for NEFF B 4542.0


Summary of Contents for NEFF B 4542.0
- Page 1 In the unlikely event of a fault, look here for information on how to rectify minor faults yourself. A detailed table of contents will help you to find your way around quickly. Enjoy your meal! Instruction manual B 4542.0 9000 264 054 N091087...
-
Page 2: Table Of Contents
Table of contents Important information ..... . . Before installation ......Safety information . - Page 3 Table of contents Steam cooking setting ..... . Setting procedure ......Proving setting .
- Page 4 Table of contents Troubleshooting ......Replacing the oven light ..... . . After sales service .
-
Page 5: Important Information
Important information Read this instruction manual carefully. Only then will you be able to operate your cooker safely and correctly. Please keep the instruction and installation manual in a safe place. Please pass on the instruction manual to the new owner if you sell the appliance. Before installation Transport damage Check the appliance after unpacking it. - Page 6 Hot oven Open the oven door carefully. Hot steam may escape. Never touch the internal surfaces of the microwave oven or the heating elements. There is a risk of being burnt. Children must be kept at a safe distance from the appliance.
-
Page 7: Reasons For Damage
Reasons for damage Baking tray, aluminium foil Do not place the baking tray on the oven floor. Do not or dishes on the oven floor cover it with aluminium foil. Do not place dishes on the oven floor. This will cause heat accumulation. The baking and roasting times will no longer be correct and the enamel will be damaged. -
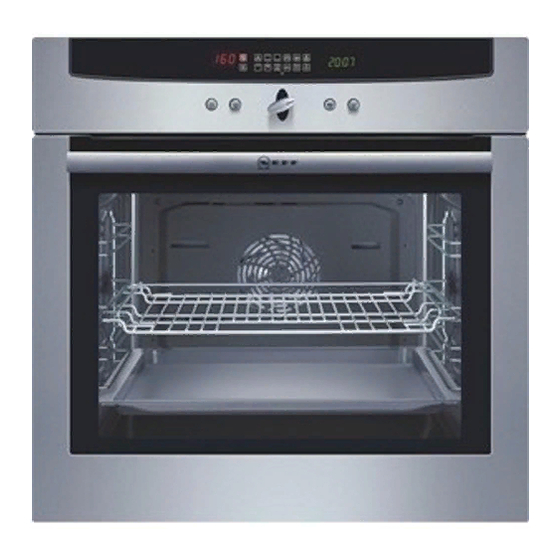
Page 8: Your New Cooker
Your new cooker Here you will learn more about your new oven. The control panel and its switches and indicators are explained here. The heating modes and the accessories included with your oven will be explained here. The control panel Details vary according to the appliance model. -
Page 9: Temperature Selector
Settings Full surf. area grill Thermo grilling Bread baking setting Pyrolysis Oven light The light comes on in the oven when you set the function selector. Temperature selector A default value appears if you have selected a type of heating using the function selector. Set the temperature or cleaning level required using the temperature selector. -
Page 10: Control Buttons And Display Panel
Control buttons and display panel Function button Ì Í This is used to select the clock Ò, the timer a, the cooking time ? and the end time !. Rotary knob This is used to set the clock, timer, cooking time or end time. The values set can be seen in the display panel. - Page 11 Top/bottom heating This ensures even distribution of heat onto the cake or roast from the top and bottom of the oven. This type of heating is best for sponge cakes in tins or for bakes. Top and bottom heating is also suitable for cooking lean joints of beef, veal and game.
- Page 12 Pizza setting For this, Bottom heating is switched on in addition to CircoTherm hot air. This type of heating is particularly suitable for fresh, juicy meals and for frozen foods. It is ideal for sweet strudel or frozen pizza and chips. Centre area grill Only the middle section of the grill heating element is switched on.
-
Page 13: Oven And Accessories
Bread baking setting With the bread baking setting, the heat in the oven is regulated to the optimum with CircoTherm hot air. The inside of the bread does not dry out and the crust becomes crisp. Oven and accessories The accessories can be inserted into the oven at 4 different heights. - Page 14 Enamelled baking tray for cakes and biscuits. Universal pan for moist cakes, pastries, frozen food and large roasts. It can also be used to catch dripping fat when you are grilling directly on the wire grill. Accessories may be purchased from the after sales service or from specialist shops.
-
Page 15: Cooling Fan
Note The baking tray or universal pan may distort while the oven is operating. This is caused by significant differences in temperature on the accessories. It may happen when the tray/pan is only part full or when frozen items have been placed on them, e.g. pizza. This distortion will disappear as baking, roasting or grilling proceeds. -
Page 16: Before Using For The First Time
Before using for the first time This section tells you everything you need to do before using the cooker for the first time. Heat the oven and clean the accessories. Read the safety instructions in the Important information" section. Firstly, check to see if the three zeros are flashing in the display. -
Page 17: Setting The Oven
Setting the oven There are various ways in which you can set your oven. The oven switches off automatically when the meal is Switching off the oven manually ready. The oven switches off You can leave the kitchen for a long time. automatically The oven switches on and You can set the oven so that you place the meal in the... -
Page 18: Switching Off The Oven Manually
Switching off the oven manually Example: Top/bottom heating t, 190 ºC 1. Select the desired type of heating using the function selector. The default value for this type of heating appears in the temperature display. 2. Use the temperature selector to set the temperature. -
Page 19: Switching The Oven Off Automatically
Switching the oven off automatically Make the settings as described in steps 1 and 2. Set the cooking time (duration) for your meal. You can set a maximum of 6 hours. Example: for a cooking time of 45 minutes 3. Press the Ì Í button until the ? cooking time signal begins to flash. -
Page 20: Switching The Oven On And Off Automatically
Switching the oven on and off Please remember that easily spoiled foods must not automatically be allowed to remain in the oven for too long. Example: the time is Set the oven settings as described in steps 1 to 4. 10:45 a.m. -
Page 21: Residual Heat Indicator
Residual heat indicator When you switch off the oven, the residual heat in the oven is indicated in the temperature display. The H symbol remains lit until the temperature has dropped to approximately 120 ºC. It then changes to h and goes out when the temperature is below 80 ºC. Using residual heat You can keep food warm in the oven using residual heat. -
Page 22: Steam Cooking Setting
Steam cooking setting The steam cooking setting is particularly suitable for cooking vegetables and fish, whilst still retaining all the nutrients and flavour. Only use the steam cooking setting with the System steamer. You can obtain this as an accessory from your local specialist retailer. Setting procedure The oven must be completely cooled down. -
Page 23: Proving Setting
Proving setting The proving setting is ideal for letting yeast dough rise. Setting procedure The oven must have fully cooled down. Never pour cold water into a hot oven. Only use ordinary tap water; do not use distilled water. Do not pour water into the oven when making yoghurt. - Page 24 Table The values in the table are average values. They may vary depending on the type and quantity of dough and the composition of the ingredients. Yeast dough Quantity of flour Proving time in minutes Cook until 500 g 20 25 Cook until 500 750 g 25 30...
-
Page 25: Time
Time When the oven is first connected or following a power cut, three zeros will flash in the display. Set the time. Setting procedure Example: 13:00 1. Press the Ì Í button until the Ò symbol begins to flash in the display. 2. -
Page 26: Timer
Timer You can use the timer as a kitchen timer. It operates independently of the oven. The timer has a special signal. This enables you to hear whether the timer or an oven cooking time has elapsed. You can also set the timer when the child proof lock is active. -
Page 27: Child Proof Lock
Child proof lock The oven has a child proof lock to prevent children switching it on accidentally. Locking the oven for a short time Locking the oven Turn the function selector anti clockwise from position 0 to Z and back again three times in quick succession. -
Page 28: Automatic Time Limiter
Automatic time limiter If you have forgotten to switch off the oven, the automatic time limiter will be activated. Oven operation will be interrupted. The temperature set determines when this will happen. If the oven is no longer heating up, 000 flashes in the display. -
Page 29: Setting Procedure
Before pyrolysis The oven must be empty. Take any accessories, ovenware and shelves out of the oven. For information about removing the shelves, see the Care and cleaning section. If you forget to take the shelves out of the oven, a signal sounds. -
Page 30: You Want Self Cleaning To Switch On And Off Automatically
The cleaning time has The ? duration symbol goes out. Do not switch off elapsed the function selector until the oven door can be opened. Calling up the duration and To call up the remaining duration ? or end time !: end time Press the Ì... -
Page 31: When The Oven Has Cooled Down
When the oven has cooled down Wipe away any remaining ash from inside the oven using a damp cloth. Hook the shelves back in place. To do this, please refer to the care and cleaning section. Note Under normal use, it is usually sufficient to clean the oven every two to three months. -
Page 32: Oven
Use stainless steel care products. Follow the manufacturer's instructions. Try out the product on a small area first, before using on the whole surface. Appliances with aluminium Use a mild window cleaning detergent. Wipe the area fronts with a soft window cloth or a fluff free micro fibre cloth, using a horizontal action without applying pressure. - Page 33 Cleaning the enamelled Use hot soapy water or a vinegar solution. surfaces of the oven It is best to use oven cleaner if the oven is very dirty. Only use oven cleaner in a cold oven. Note: Enamel is baked on at very high temperatures. This can cause some slight colour variation.
-
Page 34: Cleaning The Glass Panels
Cleaning the glass panels The glass panel on the oven door can be removed to assist in cleaning. Removal 1. Remove the oven door and lay it down on a cloth with the handle facing downwards. 2. Unscrew the cover at the top of the oven door. Turn the screws clockwise or anti clockwise to do this. - Page 35 Installation Ensure that the label right above" is upside down at the bottom left of both panels. 1. Slide in the glass panel backwards at an angle. (Fig. D) 2. Replace the seal again at the bottom of the panel. (Fig.
-
Page 36: Cleaning The Rails
Cleaning the rails The rails can be removed for cleaning. To unhook the rails: 1. Lift the rail at the front in an upwards direction 2. and unhook it. 3. Then pull the whole rail forward and take it out. Clean the rails using either washing up liquid and a sponge or a brush. -
Page 37: Troubleshooting
Troubleshooting Malfunctions often have simple explanations. Please read the following instructions before calling the after sales service: Problem Possible cause Comments/remedy The appliance does not work. Blown fuse Look in the fuse box and check that the fuse is in working order. The clock display flashes. -
Page 38: After Sales Service
Method 1. Switch off the oven fuse in the fuse box. 2. Place a tea towel in the cold oven to prevent damage. 3. Remove the glass cover. To do this, press back the metal tab with your thumb. Figure A. 4. -
Page 39: Packaging And Old Appliances
E number and FD number Please quote the E number (product number) and the FD number (production number) of your appliance when contacting the after sales service. The rating plate containing these numbers is found on the right, on the side of the oven door. You can make a note of these numbers in the space below to save time in the event of your appliance malfunctioning. -
Page 40: Baking
Baking Baking in baking tins Always place the baking tin in the centre of the wire rack. We recommend dark coloured metal baking tins. Notes The baking time is increased if you use a light coloured baking tin made of thin material or a glass dish, and the cake will not brown so evenly. -
Page 41: Baking Table
Baking table The details in the table are guidelines that apply to enamelled and dark coloured baking tins. The values may vary depending on the type and amount of dough/mixture and on the baking tin. Observe the notes in the table about preheating. We recommend that you set the lower of the specified temperatures the first time. - Page 42 CircoTherm Top/ hot air Q bottom heating t Baked goods Level Temp. in ºC Cooking Level Temp. in ºC time in minutes Sponge Swiss roll (preheat) 180 190 10 15 200 210 Fruit flan case 160 170 20 30 170 180 Sponge flan (6 eggs) 160 170 30 45...
-
Page 43: Baking With The Pizza Setting
Baking with the Pizza setting The details in the table are guidelines that apply to enamelled and dark coloured baking tins. The values may vary depending on the type and amount of dough/mixture and on the baking tin. Observe the notes in the table about preheating. We recommend that you set the lower of the specified temperatures the first time. -
Page 44: Baking Tips
Baking tips You wish to cook to your own Refer to the instructions in the tables for similar types of food. recipe. How to check that a sponge cake Approximately 10 minutes before the end of the baking time is cooked properly. given in the recipe, pierce the tallest point of the cake with a cocktail stick. -
Page 45: Meat, Poultry, Fish
Meat, poultry, fish Ovenware You may use any heat resistant ovenware. The universal pan is also suitable for larger roasts. Always place the ovenware in the centre of the wire rack. It is best to place hot glass dishes on a dry kitchen towel after removal from the oven. -
Page 46: Grilling
Grilling Care is required when grilling. Keep children at a safe distance. Always grill with the oven door closed. The pieces of food you are grilling should be of equal thickness. They should be at least 2 to 3 cm thick. This will allow them to grill evenly and prevent them from drying out. -
Page 47: Roasting Table
Roasting table The values in the table are average values. The values may vary depending on the type and amount of food and on the ovenware. CircoTherm Top/ hot air Q bottom heating t Roast Level Temp. in ºC Cooking Level Temp. -
Page 48: Grilling Table
Grilling table The values in the table are average values. The values may vary depending on the type and amount of food and on the ovenware. When using Thermo grill, turn large joints half way through the cooking time. When using the centre area and full surface area grill, turn food two thirds of the way through. -
Page 49: Tips For Roasting And Grilling
Grilled food Level Temperature Cooking time in ºC in minutes Full surface area grill g / centre area grill x Pork Fillet steaks (2 2.5 cm) max. 15 20 Shoulder steaks 20 25 Sausages 10 15 Beef Fillet steaks max. 15 20 Tournedos max. -
Page 50: Defrosting And Cooking Using Hot Air
Defrosting and cooking using hot air Q For defrosting and cooking frozen products, only Important notes use hot air mode. For all frozen food, always follow the instructions of the producer. When defrosted, frozen products (especially fish) normally need shorter cooking times than fresh products, because freezing acts as a sort of pre cooking. -
Page 51: Preserving
Defrost moist frozen cakes (with fruit filling) at 160 170 ºC for 30 50 minutes. Also wrap the cakes in aluminium foil, so that the filling does not dry out. Defrost and toast frozen toast (with topping) at 160 170 ºC for approx. 20 minutes. Frozen pizza: Please follow the instructions of the producer. - Page 52 The times specified in the tables are guidelines only. They can be influenced by the room temperature, the number of jars and the amount and temperature of the jar contents. Before you change settings or switch off the appliance, make sure that the contents of the jars are actually bubbling.
-
Page 53: Energy Saving Tips
Energy saving tips Only preheat the oven if it specifies in the recipe or in the table in the instruction manual that you should do Use non stick, black painted or enamelled tins. They absorb the heat especially well. If you have several cakes to bake it is best to bake them one after the other. -
Page 54: Acrylamide In Foodstuffs
Acrylamide in foodstuffs Which foods are affected? Acrylamide is mainly produced in grain and potato products heated at high temperatures, such as potato crisps, chips, toast, rolls, bread, baked goods (biscuits, gingerbread, cookies). Tips for keeping acrylamide to a minimum when preparing food General Keep cooking times to a minimum. -
Page 55: Test Dishes
Test dishes In accordance with DIN 44547 and EN 60350 Baking Observe the instructions on preheating. The values in the table are valid where rapid heat up P is not in use. Meal Type of heating Level Temp. in ºC Cooking time in minutes Viennese whirls (preheat) t Top/bottom heating... - Page 56 Grilling The values in the table apply to dishes placed in a cold oven. Meal Type of heating Level Temp. in ºC Cooking time in minutes Toast (preheat for g Full surf. area grill ½ 1 10 minutes) Universal pan with flat wire rack Beef steaks, 12 pieces g Full surf.
Need help?
Do you have a question about the B 4542.0 and is the answer not in the manual?
Questions and answers