Table of Contents
Advertisement
Advertisement
Table of Contents

Related Manuals for avertX ProConnect Series

Summary of Contents for avertX ProConnect Series
- Page 1 ProConnect High Definition Network Video Recorder User Manual...
- Page 2 The information in this publication is provided “as is” without warranty of any kind. The entire risk arising out of the use of this information remains with recipient. In no event shall AVERTX be liable for any direct, consequential, incidental, special, punitive, or other damages...
- Page 3 At AvertX’s discretion, not be blocked or covered. The product should not be placed in...
-
Page 4: Battery Explosion Caution Statement
13. Damage Requiring Service – Unplug the unit from the outlet Do not use volatile liquids, such as aerosol spray, near this product. Do not and refer servicing to qualified service personnel under the leave rubber or plastic objects in contact with this product for extended periods of time. - Page 5 • to three hours, the recorder will warm up and evaporate any moisture. Keep When this product is moved to a cool and humid location from a the recorder connected to the wall and moisture will seldom occur. warm location. •...
- Page 6 Circuit Overloading – Consideration should be given to the connection of the equipment to the supply circuit and the effect that overloading of the circuits might have on over current protection and supply wiring. Appropriate consideration of equipment nameplate ratings should be used when addressing this concern. Grounding –...
- Page 7 USERS OF THE PRODUCT ARE RESPONSIBLE FOR CHECKING AND COMPLYING WITH ALL FEDERAL, STATE, AND LOCAL LAWS AND STATUTES CONCERNING THE MONITORING AND RECORDING OF VIDEO AND AUDIO SIGNALS. AVERTX SHALL NOT BE HELD RESPONSIBLE FOR THE USE OF THIS PRODUCT IN VIOLATION OF CURRENT LAWS AND STATUTES.
-
Page 8: Table Of Contents
Default Administrator Username / Password ..............................18 First Time Wizard ......................................18 SETUP MENU ..............................................18 System Settings ........................................18 Cameras .......................................... 18 Advanced Camera Management ..................................25 Settings ........................................... 26 Networking ........................................31 Macros..........................................32 Sensor / Relay ......................................... 33 AvertX Connect ....................................... 35 35146AJ... - Page 9 How Do I Export Video from the Console with No OSD? ..........................48 How Do I View Exported Video Clips in AvertX Connect? ..........................48 How Do I Enable Email Alerts and push notifications for Motion, Sensor or Health Events? ................. 49...
-
Page 10: Introduction
AvertX’s powerful ProConnect Software recording software. • Online User Management via AvertX Connect • All AvertX ProConnect recorders are designed for deployment with Cloud video export and sharing AvertX Connect, allowing centralized administration of users, • Remote software updates with no need to be on-site permissions, and system settings. -
Page 11: Controls And Connections
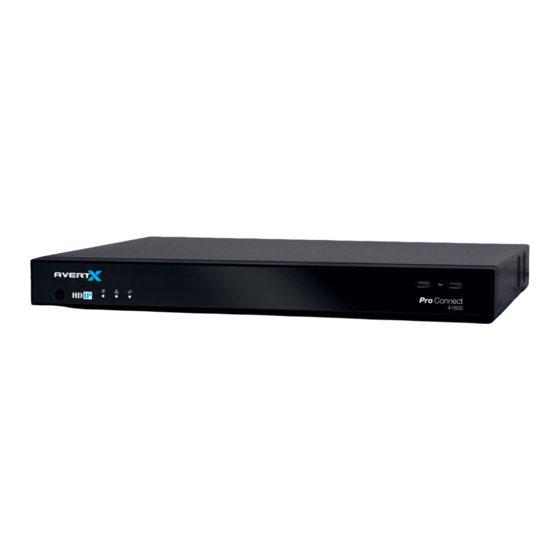
CONTROLS AND CONNECTIONS Generation 2 hardware shown. Ports and layout may vary slightly. ProConnect Front Panel USB 2.0 ProConnect Rear Panel (8 Channel) PoE Ports Internet NIC Alarm I/O Power Input USB 3.0 USB 2.0 Power Switch HD Out External Switch NIC 35146AJ... -
Page 12: Proconnect Rear Panel (16 Channel)
ProConnect Rear Panel (16 Channel) PoE Ports Alarm I/O Internet NIC Power Input Power Switch HD Out USB 3.0 USB 2.0 External Switch NIC 35146AJ... -
Page 13: Getting Started
Box Contents AvertX ProConnect recorders come with a power cord, keyboard and mouse. A Quick Start guide and other necessary documentation are also included. Identify the following components to make sure everything has been properly included with your new recorder. If any of the following items are missing, contact AvertX Pro Team Support at 855-228-3789 to arrange a replacement. -
Page 14: Keyboard Setup
Keyboard Setup Mouse Setup To attach the keyboard, connect the keyboard to a USB port located on To attach the mouse, connect the mouse to a USB port located on the the back of the recorder. back of the recorder. In this manual: Click means to position the mouse cursor over an item and to single click the left button. -
Page 15: Monitor Setup
Monitor Setup Connecting a Camera Using a PoE Port The ProConnect recorder is equipped with an on-board Power over These connections are available to connect a monitor: Ethernet (PoE) switch for use with PoE IP cameras. PoE cameras are connected to the recorder using the PoE switch and begin displaying video immediately with no manual configuration required. -
Page 16: Setting Up The Recorder For The First Time
SETTING UP THE RECORDER FOR THE TURNING ON THE RECORDER FIRST TIME Turn on the monitor connected to your recorder. Use the power switch on the rear of the recorder to turn the Plug the supplied power cord into the recorder. Do NOT connect recorder ON. -
Page 17: Web Interface System Requirements
Latest versions of Google Chrome, Apple Safari Broadband internet connection (25 Mb/s download, 5 Mb/s upload) Broadband internet connection (25 Mb/s download, 5 Mb/s upload) For more information about configuring AvertX Connect, see the AvertX Connect Account section of this manual. 35146AJ... -
Page 18: Installation And Setup
Username: admin Edit Sort Order Multi-Camera Edit Password: 1234 Note Once registered to AvertX Connect, your AvertX Connect Add Cameras credentials can be used to log in, in addition to the default credentials listed above. Camera List First Time Wizard... - Page 19 Search – Search for a camera in the Camera List. Delete or Disable [x] – Deleting a camera will remove the camera and all associated video from the recorder. To remove the camera but keep the video, select Mark as Disabled instead. Add Cameras Click Setup Under the System Settings tab, click Cameras.
- Page 20 Camera Auto-Discovery Note Cameras can be added using AvertX, ONVIF or RTSP ProConnect recorders automatically configure cameras attached to the protocols. If RTSP is selected, the stream URLs need to be onboard PoE switch. Cameras not connected to the PoE switch will input manually.
- Page 21 Title – Customizable camera name, seen on the Camera List and in the Live / Recording Live Screen. The Live Recording tab displays Recording Options, which determines State – Set the camera to Enabled or Disabled. when and how the camera will record. •...
- Page 22 Stream Configuration & Remote Viewing – This is where you Select to adjust the camera settings. designate what high, medium, and low-quality streams are. You can choose one of these as the recording stream, and the system Brightness – Depth of light and shadow in the image.* automatically chooses the highest res stream under 720x576 (D1) to Saturation –...
- Page 23 Motion AvertX cameras are set to register motion as events in the video timeline. By default, the entire camera will be configured as a motion area. You can customize areas of the field of view that will register motion events.
- Page 24 Check the manufacturers manual on how to enable audio on the IP camera. Note AvertX recommends consulting local and regional laws in your area regarding audio recording. Many areas have laws restricting or prohibiting audio recording in some or all locations without the consent of all parties.
-
Page 25: Advanced Camera Management
Adding Unsupported Cameras Advanced Camera Management Single and multi-sensor cameras that are not AvertX or ONVIF Cameras that are set to static IP addresses, third party cameras, and compatible must be added using the RTSP stream(s) of the camera. cameras not supported by ONVIF may not be detected automatically. -
Page 26: Settings
Remote Assist Session Settings The Remote Assist Session enables an AvertX Technical Support agent to remotely control your recorder, allowing them to assist you with General Settings troubleshooting your system. Default Language Select a default language for the system from the dropdown menu. - Page 27 This file can then be imported as needed to restore the Check the box to automatically log in to the live page. This allows the configuration options to the saved state. The AvertX Connect account recorder to boot directly into live display and be used as a live display information is not exported and will therefore need to be manually monitor.
- Page 28 Note Your ProConnect software will be preregistered in the factory The DSV utility will attempt to verify the exported file, and then present and can pull licenses from the cloud if connected to AvertX one of two findings: Connect. •...
- Page 29 AvertX Connect rather than on the Software Update local recorder. If the device is AvertX Connect enabled, it will be necessary to log in to AvertX By default, ProConnect will allow you to download and install updates Connect User Management to manage users who direct from AvertX Connect.
- Page 30 Add Local System User Click Setup , and then click Settings. Click the Local Users tab. Click Add Local System User. Enter the appropriate user information, and then designate a Username and Password. Check the appropriate box to designate a user Role. Note More than one user role can be selected.
-
Page 31: Networking
Check Add a time-based exception and enter a time range Networking and bandwidth limit if different than the default or determined bandwidth limit. Settings Add Excluded Subnets if any subnets should be excluded from the bandwidth limit. The Settings tab allows for manual ping of an IP address, edit ports, Click Save. -
Page 32: Macros
To power cycle the PoE camera: Click the Power Cycle icon in the row Diagnostics for the desired PoE camera. The diagnostics tab shows the operational status of various connections, ports, and relays for your recorder. This is a helpful tool for Macros troubleshooting. -
Page 33: Sensor / Relay
Setting Up an Action for a Previously Created Macro Holidays Under Take this action, select the desired schedule under the Add a Holiday Schedule dropdown. Click the Add a Holiday button. Select the action type under the Type dropdown. Type the name of the Holiday in the Name field. Select the command for the action under the Command dropdown. - Page 34 Associated Camera – Allows the association of a specific camera to a Relays sensor. Image Offset – The delay between the start of a sensor event and the time an event is captured Invert State – Inverts the state of the sensor. Setting Up A Sensor Relay Number –...
-
Page 35: Avertx Connect
Enter your AvertX Connect Recorder Registration Code found in AvertX Connect Account Settings. AvertX Connect is a cloud-based service that enables you to turn your recorder into a cohesive platform, with online user and recorder 2-Step Verification management features. Enabling 2-Step Verification in Account Settings in AvertX Connect To begin using AvertX Connect, you will need to create an AvertX sends a unique code to a user’s associated mobile device. -
Page 36: Power Options
SUPPORT TOOLS (LOCAL) for instructions on how to open ports on your particular router. Complete the AvertX Connect cloud relay as instructed above in Support tools are a set of utilities that allows you to complete setup or the Register ProConnect to Your AvertX Connect Account. -
Page 37: Live Screen Viewing Pane
LIVE SCREEN VIEWING PANE View Stream Feedback Main Menu Grid Mode Search Settings About Live View Full Screen Camera List Camera Tile Viewing Pane Note The recorder local Live Screen does not display the Camera The Live screen displays the camera list and live video. Customize the List. -
Page 38: Navigation Bar
Camera Tile – Individual tile for viewing live video from one camera. RIGHT-CLICK MENU Viewing Pane – Comprised of camera tiles and makes up the viewing space in the Live Screen Right-clicking on a live camera tile while viewing live or recorded video Full Screen –... -
Page 39: Customizing The Live Screen
CUSTOMIZING THE LIVE SCREEN How Do I Adjust the Grid of Camera Tiles in The Viewing Pane? How Do I Add / Remove Cameras from The The Live screen display can be adjusted to show live video for 1, 4, 9, or 16 camera tiles. -
Page 40: How Do I Enable And Control Ptz
How Do I Enable and Control PTZ? In the Live screen, click PTZ. Select the PTZ camera. Hold the left mouse curser down on the video pane and drag the arrow icon to move. How Do I Enable Fullscreen? In the Live screen, click the Fullscreen icon. Click the Fullscreen icon again to disable. -
Page 41: Performing A Search
Add Camera(s) to the Date / Time Search Viewing Pane PERFORMING A SEARCH When the Search Screen is opened, the cameras that were in the Viewing Pane in the Live Screen will appear, however, cameras can be Perform a Timebar Search or a Preview Search to review recorded arranged separately in the Search Screen to facilitate the desired video, including playback and export of images and video clips. -
Page 42: How Do I Perform A Timeline Search (Web Interface Only)
How Do I Perform a Timeline Search (Web Interface Only) Camera List Thumbnail Timeline Search Bar Export Event Timeline Export Search Search Search Manager 35146AJ... - Page 43 Timeline Search Bar Playback Controls Timeline Pause/ Timeline Play Play Previewer Stop Zoom Backward Forward Date and Time Skip Skip Picker Forward Backward Export Timeline Playback Search Speed Export Manager Date and Time Picker – Use to designate a date and time to search recorded video.
-
Page 44: How Do I Perform An Event Search (Web Interface Only)
Customize the Camera Tile Layout How do I Perform an Event Search (Web Interface Only)? Changing the layout of the viewing pane allows for viewing multiple cameras. All cameras will begin playback of recorded video at the time Event Search is ideal for reviewing sensor or relay events such as designated on the horizontal Timeline Search Bar. -
Page 45: How Do I Perform A Thumbnail Search (Web Interface Only)
How Do I Perform a Thumbnail Search (Web Interface Only) Video Interval Thumbnail Time Range Thumbnail Search Search Date and Time Number of Thumbnails Time Range On-Screen Display Toggle Picker Preview search is ideal for viewing before and after comparisons at user- determined intervals. -
Page 46: How Do I Export From Search
• Resulting video files can be saved locally OR remotely to your time. AvertX Connect account where they can be viewed and managed remotely. Select a Date from the Thumbnail Search Date Picker. On the Thumbnail Search Bar, click the Thumbnail Export Snapshot (Still Image) Locally Search Date Picker. -
Page 47: Export Archives Locally (Local Console Only)
Choose between Mobile Compatible and Original for Video Export Archives Locally (Local Console Only) Resolution. • Mobile Compatible exports video in 1080p unless the Note Local exports will require an attached USB storage device. primary recording stream is already at a lower resolution. ProConnect will only recognize USB storage devices in NTFS, ExFAT or FAT32 formats. -
Page 48: How Do I Export Video From The Console With No Osd
Export Video Clip to Cloud Video Archive How Do I View Exported Video Clips in AvertX Exporting a video clip remotely saves the clip in your AvertX Connect Connect? account. For more information regarding viewing exported video clips, see the How Do I View Exported Video Clips in AvertX Connect? AvertX Connect allows you to view video clips exported during a search. -
Page 49: How Do I Enable Email Alerts And Push Notifications For Motion, Sensor Or Health Events
If no source is selected, all cameras or sensors will trigger Email Alerts and Push Notifications for motion, sensor and health alerts event notification. are set through the ProConnect NVR and sent to the AvertX Connect cloud gateway for delivery. You will need a valid AvertX Connect account and access to a web browser with an internet connection. - Page 50 Enable Alerts in AvertX Connect: To enable email or push notification alerts to specific users, go to connect.avertx.com and Login. Click on Manage Users in the Main Menu. Click on the user you wish to receive alerts. In the User Profile, select Receive by Email or Receive by Push Notification (or both) for Health, Motion and Sensor Alerts.
- Page 51 All rights reserved. No part of this publication may be reproduced by any means without written permission from AvertX. The information in this publication is believed to be accurate in all respects. However, AvertX cannot assume responsibility for any consequences resulting from the use thereof.
Need help?
Do you have a question about the ProConnect Series and is the answer not in the manual?
Questions and answers