Advertisement
Quick Links
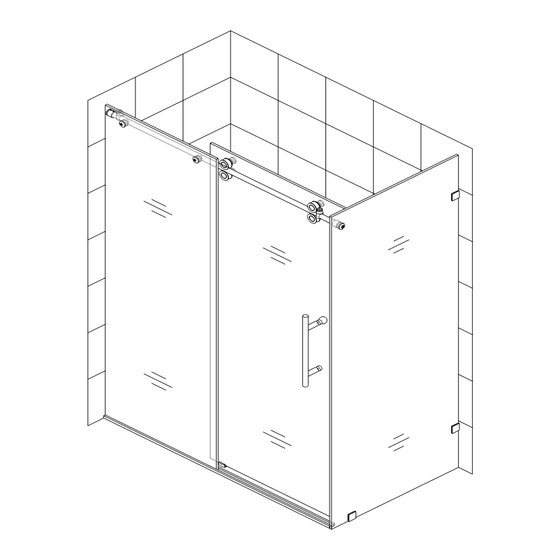
ENIGMA Shower Enclosure Installation Manual
Important
Please read carefully the following instructions before installing your shower door. If you have
any questions on this shower Enclosure installation - please call our technical support
specialists Monday to Friday 9:00AM – 5:00PM EST at 1-866-731-8378 Option 3 or e-mail our
technical support group at
support@BathAuthority.com
Our product may have changes without prior notice
Attention: This enclosure is extremely heavy and requires
professional installation.
Advertisement

Related Manuals for Dreamline ENIGMA


Summary of Contents for Dreamline ENIGMA
- Page 1 ENIGMA Shower Enclosure Installation Manual Important Please read carefully the following instructions before installing your shower door. If you have any questions on this shower Enclosure installation - please call our technical support specialists Monday to Friday 9:00AM – 5:00PM EST at 1-866-731-8378 Option 3 or e-mail our technical support group at support@BathAuthority.com...
-
Page 2: Tools Required
Building and plumbing codes vary by location, and DreamLine is not responsible for code compliance standards for your project. 3. Please ensure that prior to the installation the floor is leveled and solid. Also make sure the walls are at right angles. - Page 3 Round head screw ST6×45 Screw ST4.2×30 3pcs Allen keys 3, 4 and 5mm 1set Return glass panel After you have checked that all components are there, you will be ready to start the installation of your DreamLine shower enclosure. Rev. 1.1.
-
Page 4: Installation
Installation 1. Select the proper place to install the shower enclosure. Refer to the shower enclosure plan for dimensions. Mark out the threshold position on the floor. See fig. 1 for details. 2. Locate the Threshold (15) in the package and place it to the desired position. Mark the holes for drilling on the floor. - Page 5 6. Place the Guide block (12) on the floor and parallel it to Stationary glass panel with its edge flush with the glass vertical edge. Take a measurement to ensure the distance from the outer surface of the glass to the center line of the guide block is 2 3 /16″, hold it firmly and mark hole positions on the floor.
- Page 6 Fig. 1 Fig. 2 Fig. 3 Fig. 4 Rev. 1.1.
- Page 7 Fig. 5 Fig. 6 Fig. 7 Fig. 8 Rev. 1.1.
- Page 8 Fig. 9 Fig. 10 Fig. 11 Fig. 12 Rev. 1.1.
- Page 9 Fig. 13 Fig. 14 Fig. 15 Fig. 16 Rev. 1.1.
- Page 10 Fig. 17 Fig. 18 Fig. 19 Fig. 20 Rev. 1.1.
-
Page 11: Maintenance
Fig. 21 Maintenance 1. Tempered glass can be cleaned with nonabrasive bathroom cleaner or any glass cleaner you use elsewhere in your home. Rinse off any glass cleaner. Avoid striking it with any sharp or hard objects. Such damage can cause either immediate or delayed breakage of tempered glass. -
Page 12: Warranty
Any product replaced or repaired during the warranty period will be covered only for the remaining period of the original warranty. In no event will DreamLine be liable for costs of repair or replacement of any installation material, including but not limited to tiles, marble, etc.
Need help?
Do you have a question about the ENIGMA and is the answer not in the manual?
Questions and answers