Table of Contents
Advertisement
Quick Links
Advertisement
Table of Contents

Related Manuals for atiz BookDrive DIY


Summary of Contents for atiz BookDrive DIY
- Page 2 Under the copyright laws, this manual may not be copied, in whole or in part, without the written consent of Atiz. Atiz and BookDrive are trademarks of Atiz Innovation Co., Ltd., registered in the U.S. and other countries. Use of the Atiz logo or BookDrive logo for commercial purposed without the prior written consent of Atiz may constitute trademark infringement and unfair competition in violation of federal and state laws.
-
Page 3: Table Of Contents
Introduction ..................4 Copyright Notice ................. 4 Safety Precautions For Installation & Relocation ........4 Components ....................5 BookDrive DIY has the following components: ........5 Assembly Guide....................9 Steps to assemble: ................9 Dimension & Weight ..................14 System Requirements .................15 How to Install the Sofware ................16... -
Page 4: General Information
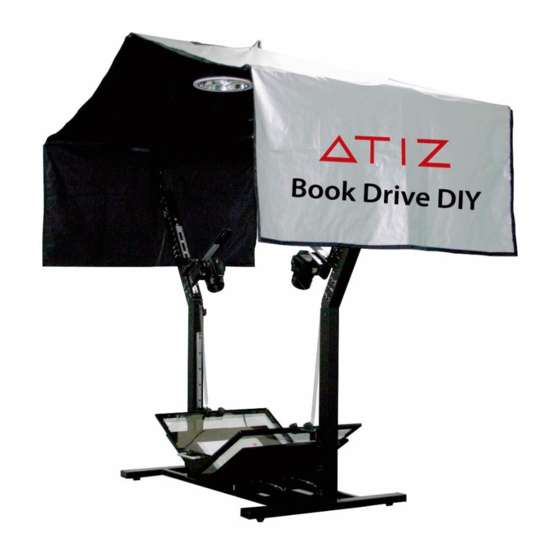
General Information Introduction Thank you for choosing BookDrive DIY (DIY), a digital camera-based book scanning solution. With the DIY, you are now able to create high-quality digital images or e- books. You don’t need to be a professional photographer, DIY lets you do that easily. -
Page 5: Components
Components Components BookDrive DIY has the following components: 1. Base 1 unit 2. Sliding sets (L, R) 2 units 3. Camera mounts (L,R) 2 units 4. Top bar (L,R) 1 unit 5. V-shaped transparent platen 1 unit 6. Lamps 2 units 7. - Page 6 Components 1. Base On top of the base is a V-shaped book cradle. 2. Sliding sets (L,R) They are the parts that help move the transparent platen up and down to press the book and make the page flat. 3. Camera mounts (L,R) Each camera is to be mounted on the camera mount.
- Page 7 Components 4. Top bar (L,R) This is the structure on the top of the platform. Two parts are to be connected to create a single long bar for use in hanging the lamps and the shade. 5. V-shaped transparent platen The purpose of the transparent platen is to keep the page flat during scanning.
- Page 8 Components Components 9. Shade Shade keeps most ambient light and reflections away. 10. Cameras 11. USB hub 12. USB cables 13. USB numeric keypad 14. Springs...
-
Page 9: Assembly Guide
Assembly Guide Assembly Guide Steps to assemble: Place the base on the table. Fasten the sliding sets (L, R) to the base as shown below. Tighten all three knobs on the front and the rear. Do the same on the inner side. - Page 10 Assembly Guide Do the same on the right side. Fix the V-shaped transparent platen with the sliding sets. Tighten 2 knobs with nuts at each left and right side. Rotate the top bar.
- Page 11 Assembly Guide Attach the lighting hanger to the top bar. Tighten the 2 knobs. Combine the top bar to the platform as shown below. Tighten the 4 knobs on each side. 10. Assemble the lamps to the lamp hanger.
- Page 12 Assembly Guide 11. Plug the AC cord into the lighting set. 12. Put the shade on the top bar.
- Page 13 Assembly Guide 13. Install the cameras and tighten the screws on both sides. 14. Install the springs on both sides.
-
Page 14: Dimension & Weight
Dimension & Weight Dimension & Weight Dimension: (L) 34” x (W) 21” x (H) 55” Weight: 40 kg. (88 lbs.) -
Page 15: System Requirements
System Requirements System Requirements Operating System Windows XP (Service Pack 2), Vista Pentium 1GHz or Better Minimum 512MB (2GB is recommended) Interface Hi-speed USB 2.0 Driver Canon Camera Driver Display 1,024 x 768 pixels/ High Color (16 bit) or Better Note: BookDrive Capture comes with 2 software packages: 1. -
Page 16: How To Install The Sofware
How to Install the Sofware How to Install the Sofware Installation Procedure Close any programs that are running and insert the Atiz software CD into the computer’s drive. If the installation panel does not appear automatically, please use the following procedure. - Page 17 H ow to In nstall th he Sofwa fter a few seconds s, you should see the following dialo og come up. elect Easy Instal lation. Two softw ware programs wil l be stalled. They are BookDrive Captur re software (for ca apturing mages) and BookD Drive Editor softwa...
- Page 18 H ow to In nstall th he Sofwa roceed to next ste ps by selecting ext.
- Page 19 H ow to In nstall th he Sofwa ease review the L icense Agreement t. If you agree, se elect “I gree” and click ext. ookDrive Capture software will be in nstalled.
- Page 20 H ow to In nstall th he Sofwa fter installation of BookDrive Captu re software is com mplete, select ose (to proceed t to install another software). Kofax Installat tion Manager will appear.
- Page 21 H ow to In nstall th h e Sofwa are...
- Page 22 H ow to In nstall th he Sofwa The We elcome screen to B BookDrive Editor w will appear. Review the License Agree ement. If you agr ree, select “I Agre ee” and hit Next.
- Page 23 H ow to In nstall th he Sofwa 10. Proceed d until the installa ation is complete. 11. It will a appear like this wh hen the installatio n of BookDrive Ed ditor is comple...
-
Page 24: How To Activate The Software
ow to In nstall th he Softw ware How to Install the Software Click Close and then 12. BookDr rive Capture and B BookDrive Editor s shortcuts will now w appear on your de esktop. 13. Remove e the disk from th he computer’s driv How to Activate the Software... - Page 25 ow to A Activate the Soft tware Afte er the software in stallation is comp plete, next step is to activate the so oftware. Double c click BookDrive Capture icon on desktop t open the e BookDrive Captu program After op pening the progra am, you will see th he following dialog...
- Page 26 H ow to A Activate the Soft tware Once yo ou have filled in t he Registration Co ode, click Get Act tivation Code F From The Intern...
- Page 27 H ow to A Activate the Soft tware You wil l be redirected to Atiz online regist ration page. Please f fill in your informa ation. Atiz wil l use this informa tion to contact yo ou in the future ab...
- Page 28 H ow to A Activate the Soft tware The info ormation will be s sent to Atiz server r. If your informat tion and the Registra ation Code are co rrect, you will rec ceive the Activatio on Code. Activation...
- Page 29 ow to A Activate the Soft tware How to Activate the Software The Act tivation Code is us sed to activate yo our copy of the sof ftware. Copy yo our Activation Cod de and paste it on n the Registration window.
-
Page 30: Bookdrive Capture
BookDrive Capture BookDrive Capture Introduction to BookDrive Capture The DIY package comes with BookDrive Capture and BookDrive Editor. BookDrive Capture is an application for controlling your cameras to capture images. BookDrive Editor is an application for post-scanning image processing. The User Interface BookDrive Capture tells you what the connected cameras are. -
Page 31: Camera Setting
ookDriv ve Captu amera Setting u can set up your r camera setting by using BookDri ive Capture softw ware. Click on “Se ettings” menu and choose “Camera Setting”. Plea ase set your came era configuration for the best imag e quality. - Page 32 BookDrive Capture Connected Cameras Choose your camera to change the settings. View Select the scale of sample picture in sample picture box. You can choose “Fit” to stretch the image or choose “Actual size” to view the 100% detail. Rotate Rotate image in sample picture box clockwise or anti-clockwise.
- Page 33 B ookDriv ve Captu This ima ge shows ca mera setting g using BookD DriveDIY. While you a are setting the cam meras you can tak ke a sample pictu re to check if you are ha ppy with setting After you finis shed setup click OK to finish...
- Page 34 BookDrive Capture Capture Tab The standard capture mode is Double Shoot (capture image from both cameras). To double shoot, simply press “Enter”. Test mode is used to take sample pictures (the images taken will be discarded). Press “+” to use this functionality. If your captured images are not good enough you can fix the most two previous images by recapturing double images to replace the preceding two images.
- Page 35 BookDrive Capture Help Tab You can find information about the BookDrive Capture and supported cameras on the About BookDrive Capture menu.
-
Page 36: The Control Panel
BookDrive Capture The Control Panel 1. Connected cameras: This dialog box shows the cameras controlled by BookDrive Capture. You can swap the cameras by clicking Invert. 2. Save As: This dialog box allows you to select the location where you want to save your images. You can change the file name, add the file prefix. - Page 37 BookDrive Capture More Info 1. Connecting the cameras You can connect you cameras to the PC directly by plugging to the PC USB port or you can first connect the camera to the USB hub and then connect the USB hub to the PC. You need to connect both cameras to the PC before you can capture an image.
- Page 38 BookDrive Capture Captured Image Window 4.1. Page Left: This caption informs you of the left page number. The page counter will automatically increase every time you capture. 4.2. Status Bar: This caption informs you of the current status of the capture session.
- Page 39 In the last chapter we introduced you to the BookDrive Capture program. Now it is time to start capturing images with your BookDrive DIY. Please follow the step-bystep procedure to guide you through the capturing process. Once you have installed the BookDrive DIY software the BookDrive Capture icon will automatically appear on your desktop.
- Page 40 BookDrive Capture Turn on the right camera first. The first connected camera images will display on the left side of screen (The right camera will take shots on the left and the left camera will take shots onthe right). Turn on the left camera next.
- Page 41 BookDrive Capture Choose the destination folder by clicking the “Browse” button (…) and selecting the desired folder. Press the “Capture” button and the image will appear in the window. Drag the cursor to create the red guideline.
- Page 42 When you have familiarized yourself with the BookDrive DIY you can use the automatic-capture feature by clicking the “Timed Capture” box. Adjust the countdown timer by clicking the “Plus” button toincrease time or the...
- Page 43 BookDrive Capture BookDrive Capture Start the automatic-capture process by clicking the “Capture” button.The program will automatically capture images until you click “Stop”. You can stop the automatic-capture process by clicking the “Stop” button and you can restart it by checking the “Timed Capture” check box. If you finish your capture session press the “Exit”...
-
Page 44: Bookdrive Editor
BookDrive Editor BookDrive Editor Once the book has been digitized with BookDrive Capture you can edit and enhance the images. We also provide BookDrive Editor, the software that helps align, cleanup and fit the images. BookDrive Editor performs: Cropping – By specifying a region, identified as an area of the page, you can neatly cut excessive background out of the images. -
Page 45: Key Features Of Bookdrive Editor 3
BookDrive Editor Key Features of BookDrive Editor 3 Rotation Rotates images to the correct orientation. De-skew Compensates for image skew during scanning, resulting in straight images. Auto Level Automatically adjusts to the level in the histogram of the images to make them their color look smoother. Crop Crops unwanted area of the images out. -
Page 46: Starting Bookdrive Editor
ookDriv ve Editor arting BookD Drive Editor Start Bo ookDrive Editor so oftware by double clicking the program m icon. The progra am will appear an d should look like this Previe ew Panel Source file (Left and right page) e main interface o f the program con nsists of the left a... - Page 47 ookDriv ve Editor start, you need to o add images to th he program. You c can do that by eit her selecting from m the menu or sim mply click its butto ere are many way s to add images t to the program: By selecting g from the menu.
- Page 48 ookDriv ve Editor w images are sorted and pu ut in an order? e software will aut tomatically sort th he selected image s based on their f file names. e ones with lower values will be on top. The ones wit th higher values w will at the tom.
- Page 49 ookDriv ve Editor ext step is to do settings. Clic Settings butto u will see the Sett ing window as sho own here: This s is the page whe re you set all the parameters to ma ake the program produce the fina al images to your...
- Page 50 BookDrive Editor The area that allows you to open, save, delete a Profile looks like this: Settings To enable any image operation, just press the icon representing the intended image operation. For example, this is what will appear if you want to enable image rotation. Image rotation is disabled.
- Page 51 BookDrive Editor Example:...
- Page 52 ookDriv ve Editor Deskew Compensa ates for image ske ew during scannin ng resulting in stra aight images. Sele Auto if you do on’t know the exa act degrees to rota ate. Alternatively , you can nually set a value e that you want th he image to be rot tated (between -1...
- Page 53 BookDrive Editor Crop Crops unwanted area of the images out The cropping setting area looks like this: Some available options under cropping image operation include: Load another image to see its thumbnail related to cropping. Preview of how output will look like after cropping and padding. Copy the parameters of the left page to the right.
- Page 54 BookDrive Editor Note: The red rectangle that marks a crop area can be moved by a mouse drag.
-
Page 55: Brightness And Contrast
BookDrive Editor Brightness and Contrast Allows the adjustment of brightness and the contrast of the images. Sharpen Sharpening makes images look sharper. It brings out details that were not there before. - Page 56 BookDrive Editor Black border removal Eliminates the black edges typically generated by scanners with black backgrounds. It also reduces the file size while improving legibility. De-speckle Helps eliminate noise such as speckles and streaks that are either present on the original document or generated during the scan.
-
Page 57: Background Removal
BookDrive Editor Background removal Removes the unwanted, dirty or dusty background from the document and leave only clean and clear background. Resize Images can be resized to any standard size or custom size. -
Page 58: Output File Selection
BookDrive Editor Output file selection • The available output format options are TIFF or JPEG. • Available compressions for TIFF are LZW, CCITT G3, CCITT G4 • Users can also select the level of compression for JPEG format by setting its quality level. - Page 59 ookDriv ve Editor Run b atch Once all the settings have e been made, it’s time to run the ba atch image processi ng operations. S imply hit the Run Batch button. If y you want to stop, click the same bu tton again.
- Page 60 Using BookDrive DIY Creating PDFs BookDrive Editor 3 can create PDFs or Multi-page TIFF by clicking the button. Once clicked, you will see the following window. Steps Click button. Select the images you want to export to PDF. Select the output format (PDF or TIFF) and other parameters.
-
Page 61: Using Bookdrive Diy
Using BookDrive DIY Using BookDrive DIY Steps in using BookDrive DIY Plug-in the lamps’ AC cables. Open BookDrive Capture software. - Page 62 Using BookDrive DIY While both cameras are being connected (but remain turned off) to the PC via USB cables, turn on the right camera first. Wait until BookDrive Capture recognizes it and the message, telling that the first camera is connected, is shown on the software screen.
-
Page 63: Camera Setup
Camera Setup Camera Setup The following steps will guide you to ensure that you set the cameras correctly. The most basic thing to remember is that the camera on the right captures the left pages while the camera on the left captures the right pages. Once you know this, when you see that the left images are crooked, the correct step is to adjust the position of the right camera, and vice versa. -
Page 64: Scenarios
Camera Setup Scenarios Left Image Right Camera If the top of the page is out of the CW Yaw (turn clockwise around a frame, vertical axis) If the bottom of the image is out CCW Yaw (turn counter-clockwise of the frame, around a vertical axis) If the image tilts to the left, CW Roll (turn clockwise around... - Page 65 Camera Setup Camera Setup Right Image Left Camera If the image tilts to the right, CCW Roll (turn counter-clockwise around a horizontal axis) If the top of the image is out of CCW Yaw (turn counter-clockwise the frame, around a vertical axis) If the bottom of the image is out CW Yaw (turn clockwise around a of the frame,...
- Page 66 Camera Setup Camera Setup Right Image Left Camera If the image tilts to the right, CCW Roll (turn counter-clockwise around a horizontal axis) If the image tilts to the left, CW Roll (turn clockwise around a horizontal axis)
-
Page 67: Maintenance
After use, please use the caps to cover the camera lenses. Try to use large piece of cloth to cover BookDrive DIY when it will not be in use for a long period of time.
Need help?
Do you have a question about the BookDrive DIY and is the answer not in the manual?
Questions and answers