Advertisement
Table of Contents
- 1 Table of Contents
- 2 Read this Page First
- 3 Water Softener Basics
- 4 Softener System Specifications
- 5 Softener System Dimensions
- 6 Unpack & Inspect Your Water Softener
- 7 Pre-Installation Instructions
- 8 Water Bypass
- 9 Programming Guide
- 10 Start-Up Instructions
- 11 Maintenance Instructions
- Download this manual
Installation, Service &
Operation Manual
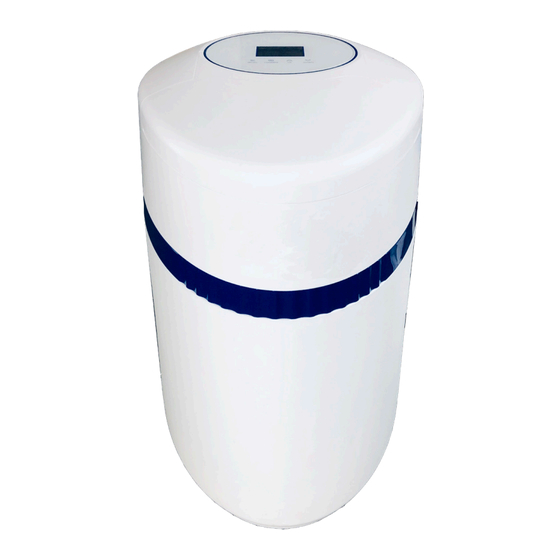
SWS Cabinet System
1. Read all instructions carefully before operation.
2. Avoid pinched O-rings during installation by applying (provided with install kit) NSF certified lubricant
to all seals.
3. This system is not intended for treating water that is microbiologically unsafe or of unknown quality
without adequate disinfection before or after the system.
Spectrum
Water Softener
TM
Advertisement
Table of Contents

Related Manuals for Spectrum SWS Series


Summary of Contents for Spectrum SWS Series
- Page 1 Spectrum Installation, Service & Operation Manual SWS Cabinet System Water Softener 1. Read all instructions carefully before operation. 2. Avoid pinched O-rings during installation by applying (provided with install kit) NSF certified lubricant to all seals. 3. This system is not intended for treating water that is microbiologically unsafe or of unknown quality...
-
Page 3: Table Of Contents
Spectrum Contents Table of Contents Read this page first Water Softener Basics Softener System Specifications Softener System Dimensions Unpack & Inspect Your Water Softener Pre-installation Instructions p.10 Water Bypass p.11 Programming Guide p.12 Start-up Instructions p.15 Maintenance Instructions p.17 Troubleshooting Guide... -
Page 4: Read This Page First
SPECTRUM guarantees that your new water softener is built of quality materials and workmanship. When properly installed and maintained, it will give years of trouble free service. • SPECTRUM reserves the right to change the specifications referred to in this literature at any time, without prior notice. Install Notes and Safety Messages... -
Page 5: Water Softener Basics
Spectrum 2. Water Softener Basics What is hard water and how it is softened The majority of water comes from groundwater sources. Rain water permeates layers of soil, clay, sand and rock and in the process picks up a number of minerals along the way. - Page 6 Spectrum 3. SPECTRUM Softener Specifications Performance Data Sheet & Specifications Model SWS-0.5M SWS-1.7M Regeneration Type UP Flow Ingegrated Meter in Bypass Hardness Removal 480,000mg 1,680,000mg Media Loaded Resin Quantity (L) Tank Size 10x15 10x44 Salt Storage Capacity (kg) Recommended Service Flow Rate (lpm)
-
Page 7: Softener System Specifications
Spectrum 4. Softener System Dimensions SWS-0.5M 472mm 370mm 511mm SWS-1.7M 370mm 472mm 511mm... -
Page 8: Unpack & Inspect Your Water Softener
Spectrum 5. Unpack & Inspect Your WAter Softener Inspect the water softener for any shipping damage. If damage is found, notify the transportation company and request a damage inspection. Damage to cartons should also be noted. Handle the softener unit with care. Do not drop the unit or set on sharp, uneven projections on the floor. -
Page 9: Pre-Installation Instructions
Spectrum 6. Pre-Installation Instructions Contact your local distributor to have a complete water analysis and check your water hardness from the water supplier, this will keep your softener in proper working order. Cold soft water Electrical panel Hard filtered water... - Page 10 Spectrum Tools Required for Installation: 1. Two adjustable wrenches. 2. Additional tools may be required if modifications to home plumbing are required. 3. Use copper, brass, or PEX pipe and fittings. 4. Some codes may also allow PVC plastic pipe. Refer to local codes.
-
Page 11: Water Bypass
Spectrum 7. Water Bypass For softener maintenance, you can isolate your water softener from the water supply using the bypass valve located at the back of the control. In normal operation the bypass is open with the ON/OFF knobs in line with the INLET and OUTLET pipes. To isolate the softener, simply rotate the knobs to the BYPASS position. -
Page 12: Programming Guide
Spectrum 8. Programming Guide Familiarise with Display Screen This function enters the basic set up information required at the time of installation. This function is to press and select one item to change and accepts the values if changed. This function is to scroll up or down the programming items and increase or decrease the values of the settings while in the programming mode. - Page 13 Spectrum Advanced Settings Display System regeneration based on System regeneration based on automatic calculation manual settings Parameter Description Time Current Time setting Region Unit of measure used, METRIC (litre) and US (gallon) options are available System language used on the valve display, 10 different language options in total for your choice Language English,Spanish,French,Russian,Turkish,German,Polish,ltalian,Dutch and Chinese.
- Page 14 Spectrum System Information Page When you enter system information setting, system key information can be viewed in this page. In ‘Total Regenerations: ‘Total Treated Water’and ‘Peak Flow Rate’ NOTE page, pressing and holding the ‘CONFIRM’ button for 3 seconds will reset the value to zero.
-
Page 15: Start-Up Instructions
Spectrum 9. Start-up Instructions 1. Add two litres of water into the cabinet at the time of installation. This is for the unit to achieve proper capacity in the first time of regeneration. 2. Plug the power transformer into an approved power source. Connect the power cord to the valve. - Page 16 Spectrum • Press CONFIRM key to confirm and press MENU key to have a manual regeneration NOTE If you select ‘DELAY’ option, the valve will start to regenerate at the closest day’s REGEN. TIME (default is 02:00) 5. Slowly open the inlet knob on the bypass valve with the bypass tool supplied and allow water to enter the unit.
-
Page 17: Maintenance Instructions
Spectrum 10. Maintenance Instructions Check the Salt Level Check the salt level monthly. Remove the lid from the cabinet or brine tank, make sure salt level is always above the brine level. Adding Salt Use only clean salt labeled for water softener use, such as crystal, pellet or nugget. The use of rock salt is discouraged because it contains insoluble silt and sand which builds up in the brine tank and can cause problems with the system operation. - Page 18 Spectrum Service the Control Valve DISASSEMBLY WHILE UNDER PRESSURE CAN RESULT IN CAUTION FLOODING. ALWAYS FOLLOW THESE STEPS PRIOR TO SERVICING THE VALVE. ELECTRIC SHOCK HAZARD. UNPLUG THE UNIT BEFORE REMOVING THE COVER OR WARNING ACCESSING ANY INTERNAL CONTROL PARTS Before Servicing 1.
- Page 19 Spectrum Replace Timer Wires Meter cable 1. If attached, 2. Remove the two 3. Remove the cover disconnect the meter screws from the valve of the valve and cable from the meter cover disconnect the wires attached on PCB 2 x screws...
- Page 20 Spectrum Replace Meter 2 x screws 2 x clips Meter cable 1. If attached, 2. Disconnect the bypass from the valve by removing clips disconnect the meter cable from the meter Meter support Coupling adaptor Meter 3. Remove the coupling 4.
- Page 21 Spectrum Replace Drain Line Flow Control Drain line elbow 1. Pull the drain line clip and remove the drain line elbow Drain line washer clip 2. Clean/replace drain line flow DLFC control (DLFC) Replace Brine Line Flow Control 1. Pull the brine line clip and...
- Page 22 Spectrum Replace Circuit Board 4 x screws 1. Follow steps 1 to 3 of Timer/Powerhead replacement 2. Remove all the connections of PCB 3. Remove the four scews from the PCB 4. Replace the PCB Replace Display Panel 2 x screws...
- Page 23 Spectrum 11. Troubleshooting Problem Possible Solutions Softener Delivers Hard Water A. Bypass valve is open A. Close bypass valve B. No salt in brine tank B. Add salt to brine tank and maintain salt level above water level C. Injector or screen plugged C.
- Page 24 Spectrum...
Need help?
Do you have a question about the SWS Series and is the answer not in the manual?
Questions and answers