
Related Manuals for Triton Maxi ETA300


Summary of Contents for Triton Maxi ETA300
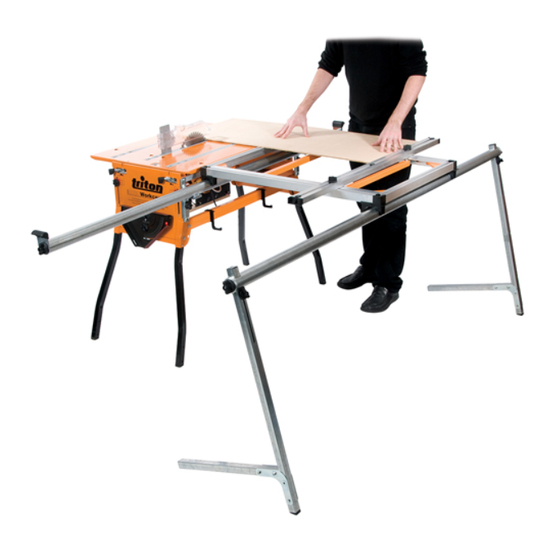
- Page 1 Maxi Sliding Extension Table ETA300 Operating and Safety Instructions www.tritontools.com...
-
Page 2: Parts List
Thank you for purchasing this Triton product. These instructions contain information necessary for safe and effective operation of this product. Please read this manual to make sure you get the full benefit of its unique design. Keep this manual close to hand and ensure all users of this product have read and fully understand the instructions. - Page 3 Fig. 1 Inset 2 Inset 3 Inset 1 Fig. 3 Fig. 2 Underside of table Parts List...
- Page 4 Fig. 4 Fig. 5 6.5mm (1/4”). Fig. 6 Parts List...
-
Page 5: Safety Instructions
SAFETY INSTRUCTIONS WARNING. Read all instructions. Read all b. Always use safety equipment: wearing eye safety warnings and all instructions. Failure protection, dust mask, non-slip safety shoes, to follow the warnings and instructions my hard hat and hearing protection used in appropriate conditions will reduce personal result in electric shock, fire and/or serious injury. - Page 6 NOTE: The tool must be used only for its prescribed the power tool. If damaged, have the power tool repaired before use. Accidents are caused by purpose. Any use other than those mentioned in poorly maintained power tools. this manual will be considered a case of misuse. The user and not the manufacturer shall be liable f.
- Page 7 STEP 4 Loosen the large round knobs and align the cut- outs in the clamps with the square cut-outs in the Plug the two smaller Inner Bearings (6) into the track. Insert the legs through the track cut-outs and corner blocks below the 380mm scale readings and tighten the large round knobs to clamp.
- Page 8 will be necessary to drill the lower holes through Adjust the Phillips the end panel flanges. If drilling, make sure you screws until the heads position the holes as shown in the inset in (Fig. 5), enter the rectangular to give you the full range of height adjustment in windows and the table the bracket.
- Page 9 Swing the fence Fig. 8 at the ends of the inner track will provide additional clamps around until support. For very large workpieces the Triton Multi- the hold-down feet stands, (Fig.11) are better suited, otherwise have 0verhang the someone assist you.
- Page 10 USE WITH A ROUTER TABLE (Fig. 15) and with the Edge planing and trenching can be performed in all workpiece in front modes of operation with a Triton Router Table. (Fig. 14) or behind the fence (Fig. 15). Assembly...
- Page 11 Edge Planing For planing long edges use the sliding table mode with the extension table fence positioned as For edge planing pieces up to 1220mm wide, any shown in (Fig. 19). Use the extension table fence length, use the Fixed Table position (Fig. 18). to align the workpiece, and set the router fence, if fitted, clear of the work.
-
Page 12: Purchase Record
12 MONTHS from the (unless indicated otherwise) for information on future date of original purchase, Triton will repair, or releases. Details provided will not be made available to at its discretion replace, the faulty part free of any third party.
Need help?
Do you have a question about the Maxi ETA300 and is the answer not in the manual?
Questions and answers