Table of Contents
Advertisement
Quick Links
Advertisement
Table of Contents

Related Manuals for ASTRO U 158


Summary of Contents for ASTRO U 158
- Page 1 Version 10-2018A...
-
Page 2: Table Of Contents
Warranty conditions........................page 07 Disposal.............................page 07 Description of performance .......................page 07 Connecting and installing the module ..................page 07 Quick start – starting operation of the U 158................page 09 “Status” menu..........................page 16 “Main” menu ..........................page 22 “Test generator” menu.......................page 24 “IP channel” menu ........................page 26 “IP RX”... -
Page 3: Before Starting Operation Of The Device
ASTRO Strobel Kommunikationssysteme Olefant 1-3 D-51427 Bergisch Gladbach (Germany) Tel.: (+49) 2204 405-0 All other parts of the software used with this product are subject to the copyright owned by ASTRO Strobel GmbH. Operating manual U 158 - Version 10-2018A... -
Page 4: Proper Use
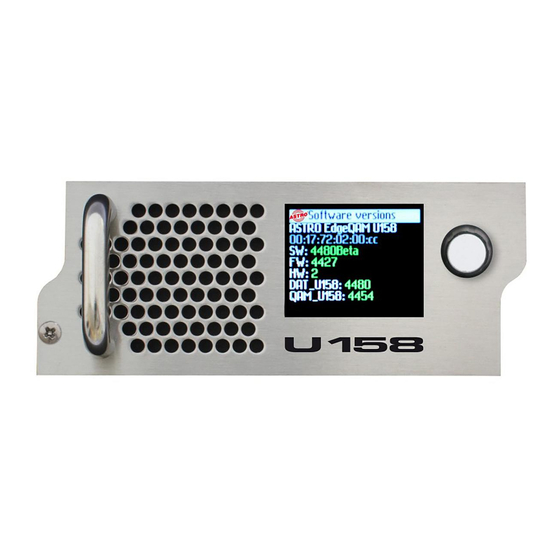
Operating manual The U 158 plug-in module and the U 100 base unit feature a CE marking. This confirms that the prod- ucts conform to the relevant EC directives and adhere to the requirements specified therein. Figure 1, top:... - Page 5 Turning the data knob [3] (fig. 2, above) allows you to navigate through the indi- vidual menu items in the U 158 display. Press the data knob to activate the display. The ASTRO logo will be the first display to appear following activation.
-
Page 6: Important Safety Information
Keep this operating manual for future use and for handover in the event of a change of owner or operator. A PDF version of this manual is available to download on the ASTRO website (there may be a more recent version). -
Page 7: Warranty Conditions
80395. Performance description The U 158 is a plug-in module, which is only intended for use in the base units U 100-230 and U 100-48. It can receive up to 8 MPEG data streams and channels encapsulated in accordance with Internet Protocol (IP). -
Page 8: Connecting And Installing The Module
U 100 base unit, is correct, you must plug a corresponding jumper into the circuit board on the backplane. Proceed as described in the following. [1] Left slot [2] Middle slot [3] Right slot Figure 2: Coding the backplane by plugging in the jumper page 8 Operating manual U 158 - Version 10-2018A... - Page 9 You can now install the backplane in the base unit. To do so, proceed as follows: [1, 2] Phillips-head screws [3] Cable for signal supply [4] Cable for power supply Figure 3: Installing the backplane in the base unit Operating manual U 158 - Version 10-2018A page 9...
- Page 10 You can push the backplane into the housing by applying light pressure. RGEBNIS The backplane is now connected and installed. Once installed, it should correspond to the figure at the left. page 10 Operating manual U 158 - Version 10-2018A...
-
Page 11: Quick Start - Starting Operation Of The U 158
Connecting the U 158 to a PC or laptop To be able to configure the U 158, you now need to connect the network sockets (Management A or Management B) on the backplane of the device (see figure at left) to your PC or laptop using a network cable. - Page 12 Only one user can be logged into the user interface of the U 158 at a time. The current user is displayed in the column at the left, below the menu.
- Page 13 More information on configuring the IP address can be found in the section “Configuring IP interfaces, IP management and base unit”. The signal flow in the U 158 The overview on page 10 shows the possible signal paths for the U 158. The specific signal flow can be divided into the following sub-areas: ...
- Page 14 Quick start - starting operation of the U 158 Figure 7: The signal flow in the U 158 page 14 Operating manual U 158 - Version 10-2018A...
- Page 15 Quick start - starting operation of the U 158 Configuring the IP receiver Now start configuring a signal path in the U 158. Start by clicking on the item “IP RX 1” in the web browser interface menu. You will now see the following table: Figure 8: Setting the source for the data stream Enter the IP address and port for the data source in the first line.
- Page 16 Quick start - starting operation of the U 158 Now click on the menu item “Statistics” in the menu at the left. Details about the transport stream re- ceived are provided in the “Ethernet RX” table. A TS rate of > 0 should be displayed. If this is not the case, check the receiver settings.
-
Page 17: Status" Menu
“Status” menu “Status” menu To have the current settings for the U 158 displayed, click on the Status item in the menu at the left. You can now see the overview shown in figure 13: Figure 13: Status display The following tables are displayed:... - Page 18 Figure 14: Status display - Ethernet The values for the following parameters are displayed and configured here respectively in accordance with the four connections on the backplane of the U 158 (Data A, Data B, Management A and Manage- ment B, see section “Device description”).
- Page 19 FEC: Forward error correction TS Rate: Data rate TSID ONID: Transport stream ID / original network ID Alias: Alias name For details on the parameters: see the section “IP RX menu” Operating manual U 158 - Version 10-2018A page 19...
- Page 20 Channel Frequency/Level: selected frequency/slected level Reference: Deviation from the calibrated value Status: Status of each channel (OK or OFF) Details on the parameters can be found in the section “Menu RF”. page 20 Operating manual U 158 - Version 10-2018A...
- Page 21 Supply 3.3 V: 3.3 V supply voltage Supply 5.5 V: 5.5 V supply voltage Supply 9 V: 9 V supply voltage Fan: Fan rotation speed Power Module: Functional status (OK or error message) Operating manual U 158 - Version 10-2018A page 21...
- Page 22 Number of left files NFILE Number of free descriptors NFD CPU load, averaged over XXs: CPU load 0.1 s CPU load 1 s CPU load 10 s page 22 Operating manual U 158 - Version 10-2018A...
-
Page 23: Main" Menu
Setting IP interfaces (administrator only) You can configure IP interfaces and activate or deactivate them using the table shown above (“IP inter- face settings”). The connection type is automatically identified and displayed by the U 158 (in this case: 1 GBit/s, full duplex). - Page 24 If you wish to save the current status to a separate memory, click on the “Save 2nd” button (below the tables). This current status is then saved to the SD card in the U 158. (Please note that prior to installing the module, an SD memory card must be plugged in;...
- Page 25 If you click the “Default” button, all settings except for the user and network settings for the data and management ports are reset to the delivery state. Click on the “Reboot” button to restart the unit with the last settings saved. Operating manual U 158 - Version 10-2018A page 25...
-
Page 26: Test Generator" Menu
“Test generator” menu The U 158 features an integrated test generator for a functional test when an input signal is not yet available. Null packets are generated with a preset packet ID. The maximum data rate that can be set totals 67 MBit/s. -
Page 27: Ip Channel" Menu
If you change the activation or deactivation status of inputs or outputs in one of the two tables, then click on the “Submit” button below the last table to save your changes. Click on “Reset form” to restore the original settings. Operating manual U 158 - Version 10-2018A page 27... -
Page 28: Ip Rx" Menu
If a priority level from the “Hot standby” group is allocated to a data stream, then this will continue to be requested even during network provider problems. As soon as the problem has been rectified, it switch- es back to this data stream. page 28 Operating manual U 158 - Version 10-2018A... - Page 29 If you activate the radio button “Multi PCR”, then the data rate is used for regulation. This is not possible for data streams with a variable bit rate. When the “SI Stream” button has been activated, the U 158 expects “Service Information Stream”-only reception, without PCR, on this receiver and adapts the minimum bit rate.
-
Page 30: Rf" Menu
IP receivers. The last item in the drop-down menu is the ASTRO test generator, which generates a digital radio program with a 1 kHz tone in the output channel which has been set. - Page 31 “de” (German), “fr” (French), “ru” (Russian) and “be” (Belgium) are available. If stored on the SD memory card, you can use the country code (e.g. “ru”) to activate a different channel list. Operating manual U 158 - Version 10-2018A page 31...
- Page 32 Figure 29: “RF Detector” table The U 158 features a level detector in the output. This level detector consistently measures the output level. When you click the “Set” button in the “Reference” column in the table “RF Channels” (further up), then the value entered in the modulation parameters is saved as a reference.
-
Page 33: Rf 1.X" And "Rf 2.X" Menu
The following settings can be entered individually. Standard: The U 158 is able to generate QAM channels in accordance with the DVB-C standard Annex A/C or in accordance with ITU-T J.83 Annex B. Depending on the standard selected, the selection options in the “Defaults”... - Page 34 Clicking the “Remove” button deletes entries with a marked checkbox again. PID Remapping: The U 158 provides a PID remapping function, which means that PIDs active on the input side can be renamed, and be added to the output data stream with a new PID. To set this type of filter, select a PID from the drop-down menu and then enter the new PID in the input field “Output-PID”...
-
Page 35: Ts Processing" Menu
If a service filter has been applied, then the PAT is adapted accordingly. Figure 34: “PAT processing” table Click on the “Submit” button below the table to save the changes. Click on “Reset form” to restore the original settings. Operating manual U 158 - Version 10-2018A page 35... - Page 36 8 seconds a complete NIT is generated. Click on the “Submit” button below the table to save the changes. Click on “Reset form” to restore the original settings. page 36 Operating manual U 158 - Version 10-2018A...
- Page 37 NIT; use NIT 1” mode having to be set on all RF ports. Figure 36: “Connected modules” table Click on the “Submit” button below the table to save the changes. Click on “Reset form” to restore the original settings. Operating manual U 158 - Version 10-2018A page 37...
-
Page 38: Nit" Menu
Constellation: Select the preferred modulation type from the drop-down menu. Symbol Rate: Enter the symbol rate in MS/s in the input field. Once you have configured all the parameters, click on the Add button to add the transport stream. page 38 Operating manual U 158 - Version 10-2018A... - Page 39 Click on the “Submit” button below the last table to save the changes. Click on “Reset form” to restore the original settings. If you click on the “Refresh” button, all information in the table is updated. Operating manual U 158 - Version 10-2018A page 39...
-
Page 40: Lcn" Menu
A selection of print views for the LCN table, the TV program overview and the radio program overview follows further down. Click on the respective button to have the print view displayed. page 40 Operating manual U 158 - Version 10-2018A... -
Page 41: Ssl Settings" Menu
There is a third table, “Key and certificate settings”, below this. Figure 45: “Key and certificate settings” table “ Operating manual U 158 - Version 10-2018A page 41... - Page 42 User key exists and fits crtificate and key to certificate? Does user certificate fit to generated key? Use user key and certificate Use user certificate and generated key Figure 46: Using the certificates/keys page 42 Operating manual U 158 - Version 10-2018A...
-
Page 43: User Settings" Menu
controller The password for all three users is “astro”. To change the access data for a user account, or to create a new one, enter the preferred user name in the input field User name. Then enter the preferred password in the input field New Password, and confirm it by typing it in the input field Retype New password again. - Page 44 Figure 49: White list administration The following parameters can be specified for four IP sources respectively: IP address Netmask page 44 Operating manual U 158 - Version 10-2018A...
-
Page 45: Ts Analyzer" Menu
If this is not the case, the link “No licence” will appear instead. Click on this, or the item “Licence” in the menu at the left to access the “Licensing” input mask (more detailed explanation of this is found in the section “Licensing”). Operating manual U 158 - Version 10-2018A page 45... -
Page 46: Licensing" Menu
A number of functions of the U 118 (e.g. the TS Analyzer) can only be used after being enabled by means of a licence key. The licence key with the respective function can be purchased from ASTRO. You will receive a licence key with which you can activate the functions using the web browser interface. -
Page 47: Update/Config" Menu
You will require an update archive for updating the device firmware. This can be downloaded from the ASTRO firmware server (address: “http://astro-firmware.de/Headend-Firmware/u1xx”). The file name of the archive required ends in “.up”. The name is comprised of the type designation of the device (U 118) and a four-digit version number. - Page 48 The action can only be carried out when the server path specified does actually exist. Furthermore, any firewalls that have been installed must be configured in a way that allows (T)FTP communication. page 48 Operating manual U 158 - Version 10-2018A...
- Page 49 Protocol: Activate the radio button “FTP” if you wish to use the more comprehensive FTP protocol. Activate the radio button “TFTP” if you wish to use the more basic TFTP protocol. FTP User name: This depends on the settings for the FTP server used (for astro-firmware.de e.g. “anonymous”). ...
-
Page 50: System Log" Menu
You can activate or deactivate filters for displaying the log entries here. To have messages from the corresponding category displayed, activate the checkbox allocated to the category. HINWEIS You can connect to higher-level management systems using the “Syslog” and “SNMP” parameters. page 50 Operating manual U 158 - Version 10-2018A... - Page 51 A maximum of 2,500 lines is displayed in the “Log files” table. The complete log file can be downloaded from the “Download Log Files” table by clicking on the file name XX.csv. Operating manual U 158 - Version 10-2018A page 51...
-
Page 52: Alarm Severities" Menu
To do so, click on the item “Alarm Severities” in the menu at the left. A set of tables for different parameter groups then appears: Figure 61: Alarm Severities The preset options for the alarm messages are identified by a green frame. Retaining these settings is recommended. page 52 Operating manual U 158 - Version 10-2018A... -
Page 53: Active Alarms" Menu
HINWEIS You can also access the “Active Alarm Table” by clicking the red point in the status line in the upper section of the user interface. Operating manual U 158 - Version 10-2018A page 53... -
Page 54: Statistics" Menu
The number of frames transmitted per transport stream in total or per second is displayed in lines 7 to 10 for each IP transmitter. The number of frames forwarded to the IP receiver (primary, secondary and tertiary respectively) are displayed in the last line. page 54 Operating manual U 158 - Version 10-2018A... - Page 55 (is only displayed when RTP is used). Out of range: The number of IP frames arriving in the wrong order and which could not be switched back due to an insufficient buffer depth. Operating manual U 158 - Version 10-2018A page 55...
-
Page 56: Network" Menu
To hsve a list of operating manuals, XML-Files and license texts displayed, click on „Documentation“. in the menu at the left. The following overview will now appear: Figure 66: Menu „Documentation“ To open a file, just click on the desired item. page 56 Operating manual U 158 - Version 10-2018A... -
Page 57: Troubleshooting
Check whether the signal cable is connected correctly, and that there are no breaks or short circuits in the connectors. If the problem cannot be resolved, please contact the ASTRO customer service. Maintenance and repair The device must not be opened other than for repair purposes. Repairs may only be carried out at the factory or at workshops, or by persons, authorised by ASTRO Strobel GmbH. -
Page 58: Technical Data
W / VA 1 power supply unit, 3 modules: 122,2 / 134,2; 2 power supply units, 3 modules: 140,2 / 157,5 Dimensions 1 HU, 19 inch Ambient temperature °C 0 … +45 page 58 Operating manual U 158 - Version 04-2018A... - Page 59 Technical data Operating manual U 158 - Version 04-2018A page 59...
- Page 60 Internet: www.astro-kom.de All the information contained in this document has been checked in good faith. The ASTRO company cannot be held liable for any damage or injury arising in connection with the use of these operating instructions. Operating manual...
Need help?
Do you have a question about the U 158 and is the answer not in the manual?
Questions and answers