
Related Manuals for Hi-flying Elfin-EW1 Series


Summary of Contents for Hi-flying Elfin-EW1 Series
- Page 1 Operation Guide Elfin-EW1X Elfin-EW1X RS232/RS485 to Wi-Fi Operation Guide V 1.0 Elfin-EW10 Elfin-EW11 http://www.hi-flying.com/ - 1 -...
-
Page 2: Table Of Contents
ERVER EST IN ......................12 3.3. STA W IRELESS ETWORKING ....................... 16 3.4. TCP S STA M ERVER EST IN APPENDIX A:REFERENCES......................... 20 A.1.T ............................20 OOLS A.2.S V8 ............................20 MARTLINK A.3.M ..........................20 PPLICATION http://www.hi-flying.com/ - 2 -... -
Page 3: Elfin-Ew1X Evk
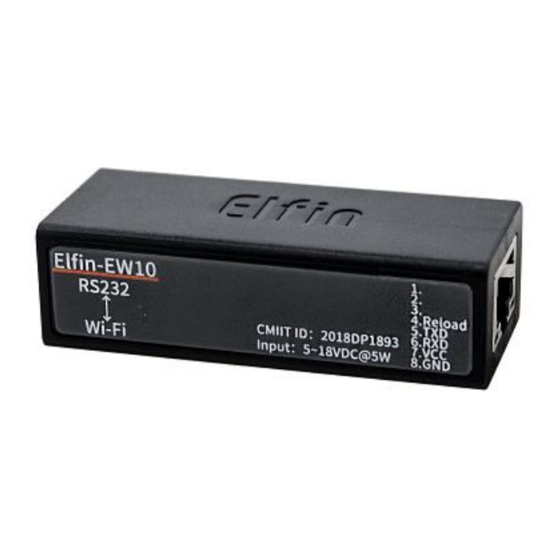
Elfin-EW10 is RS232 interface and Elfin-EW11 is RS485 interface. The EVK include the following attachment. ⚫ Elfin-E1X product ⚫ Screw driver ⚫ RJ45 to Terminal Transform(4PIN or 8PIN) 1.1. Elfin-EW10 4PIN Connector 1.2. Elfin-EW11 4PIN Connector http://www.hi-flying.com/ - 3 -... -
Page 4: Elfin-Ew10 8Pin Connector
Operation Guide Elfin-EW1X 1.3. Elfin-EW10 8PIN Connector 1.4. Elfin-EW11 8PIN Connector 1.5. Elfin RJ45 Cable The RJ45 cable can be done as following picture. http://www.hi-flying.com/ - 4 -... -
Page 5: Serial Setting
Operation Guide Elfin-EW1X 2. SERIAL SETTING 2.1. Serial Tool SecureCRT Download adddress:http://www.hi-flying.com/index.php?route=download/category&path=1_4 Decompress file and find executable program, then open. Click quick start button to create connection. 2.2. Configure Serial Parameter Protocol:Serial Port: Actual connection port(search by “My PC”->”Device Manager”->”Port(COM and LPT)”. As figure: Notes: Elfin-EW1X the default serial data is as above and user can modify device working parameter by IOTService. -
Page 6: Test Example
STA can not transfer data to each other) The structure is t shown as below: IP:10.10.100.254 PLC Device Laptop Phone Tablet IP:10.10.100.100 IP:10.10.100.101 IP:10.10.100.102 Step 1:The product default AP SSID is “EW1X_+MAC(last 4 characters)”. It can also search by cli “show” command. Figure is as below: http://www.hi-flying.com/ - 6 -... - Page 7 Operation Guide Elfin-EW1X Step 2:PC connect to product AP as following picture. Step 3: Open network connection and connect to Elfin-EW1XAP from Step 1. http://www.hi-flying.com/ - 7 -...
-
Page 8: Tcp Server Test In Ap Mode
TCP Server (port 8899) for use. TCP&UDP test tool can be downloaded from our website: ⚫ DestIP:IP address of device which can be found by IOTService. ⚫ Port:Port of TCP Server which can be found by IOTService or set by users own. http://www.hi-flying.com/ - 8 -... - Page 9 Operation Guide Elfin-EW1X http://www.hi-flying.com/ - 9 -...
- Page 10 ◼ After successful connection, the left turns to be green arrow, yellow if fails. Step 3:Open serial tool according to following parameters(115200 baud rate as default) Step 4:Data transmission between TCP and UART is as following. http://www.hi-flying.com/ - 10 -...
- Page 11 Operation Guide Elfin-EW1X http://www.hi-flying.com/ - 11 -...
-
Page 12: Sta Wireless Networking
< 1.5s) to make it in Smartlink config mode. See appendix Smartlink V8 APP for detail. The following is the final device find step for IOS and Android. After the Smartlink config successed, the product works in STA mode and connect to router. http://www.hi-flying.com/ - 12 -... - Page 13 Operation Guide Elfin-EW1X Method Two: PC connect to product AP, and use IOTService tools. The steps are as folloging ⚫ Set to STA mode. http://www.hi-flying.com/ - 13 -...
- Page 14 Operation Guide Elfin-EW1X ⚫ Scan and choose one AP need to connect and input the key. http://www.hi-flying.com/ - 14 -...
- Page 15 Do restart operation. And then PC connect to the router and check the product STA connection. The following show product Wi-Fi connection is OK. Note: If change product network mode, it needs restart to be valid. http://www.hi-flying.com/ - 15 -...
-
Page 16: Tcp Server Test In Sta Mode
Step 1:Open TCP&UDP test tool and generate TCP connection as following steps. Device has already created a TCP Server(port 8899) for use. TCP&UDP test tool can be downloaded from the website: ◼ DestIP:Destination IP address. ◼ Port:Destination Port. http://www.hi-flying.com/ - 16 -... - Page 17 Operation Guide Elfin-EW1X Step 2:Click Connect to create TCP connection http://www.hi-flying.com/ - 17 -...
- Page 18 Operation Guide Elfin-EW1X ◼ After successful connection, the left turns to be green arrow. Step 3:Open serial tool according to following parameters (115200 baud rate as default) Step 4:Mutual data transmission between TCP and serial port. http://www.hi-flying.com/ - 18 -...
- Page 19 Operation Guide Elfin-EW1X http://www.hi-flying.com/ - 19 -...
-
Page 20: Appendix A:references
Operation Guide Elfin-EW1X APPENDIX A:REFERENCES A.1.Test Tools IOTService Configure Software: http://www.hi-flying.com/index.php?route=download/category&path=1_4 A.2.Smartlink V8 http://www.hi-flying.com/download-center-1/applications-1/download-item-smartlink-v8 A.3.More Application http://www.hi-flying.com/download-center-1/application-notes-1/download-item-industry-products- application-manual-20180415 http://www.hi-flying.com/ - 20 -...
Need help?
Do you have a question about the Elfin-EW1 Series and is the answer not in the manual?
Questions and answers