Advertisement
Instructions for use
Transport, storage, recommendations for installation and instructions for initial operation of
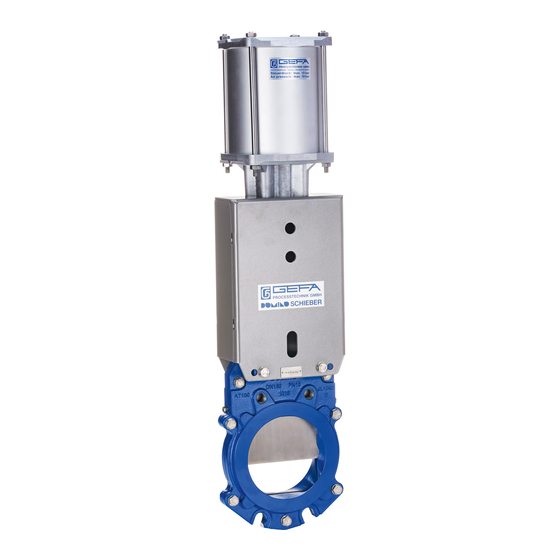
DOMINO valves
Valves with compact transverse seal
Series AT 100 / 150 / 200 / 300 / 400 / 600
1.
Transport
2.
Storage
3.
Installation
3.1
Safety recommendations
3.2
Removal of additional corrosion preventative
3.3
Preservation of EKB (epoxy powder coating) and special painting
3.4
Protection of the valve
3.5
Place of installation
3.6
Position of installation
3.7
Direction of flow
4.
Mounting
5.
Initial operation
5.1
General measures
5.2
Shutting off powdery or granular media
5.3
Control pressure / use of control media
5.4
Pneumatically-operated valves
5.5
Hydraulically-operated valves
5.6
Electrically-operated valves
5.7
Bitumen valves
6.
Recommendations for the maintenance of DOMINO valves
6.1
Readjusting the seal
6.2
Minor leaks
6.3
Lubrication of valves
6.4
Cleaning
7.
Final remarks
\AT-Betriebsanleitung (GB) (GR) 16.06.2011
Instructions for use
DOMINO valves
AT 100 / 150 / 200 / 300 / 400 / 600
1 / 6
Advertisement
Table of Contents

Summary of Contents for Gefa Domino AT 100 Series
- Page 1 Instructions for use DOMINO valves AT 100 / 150 / 200 / 300 / 400 / 600 Instructions for use Transport, storage, recommendations for installation and instructions for initial operation of DOMINO valves Valves with compact transverse seal Series AT 100 / 150 / 200 / 300 / 400 / 600 Transport Storage Installation...
- Page 2 Instructions for use DOMINO valves AT 100 / 150 / 200 / 300 / 400/ 600 Transport, storage, recommendations for installation and instructions for initial operation of DOMINO valves Transport The transportation of the valves to their final destination (building site) must be done in a solid box adapted to the size of the valve taking into account the type of transport as well as any applicable regulations.
- Page 3 Instructions for use DOMINO valves AT 100 / 150 / 200 / 300 / 400/ 600 Removal of additional corrosion preventative Before the final installation of the valves, any corrosion preventative that has been applied as per section 2.2 above must be thoroughly removed. All parts, and in particular the valve plate, spindle and piston rod, must be free of dust and dirt and, if necessary, well lubricated with a suitable lubricant before being used for the first time.
- Page 4 Instructions for use DOMINO valves AT 100 / 150 / 200 / 300 / 400/ 600 Initial Operation General measures Before finally putting the valves into service, all the important elements (plate, spindle, piston rod, etc.) must be cleaned thoroughly. Any damage to the plate, especially to the seal as a result of sand-blasting debris or welding beads, external rust, etc., is not covered by the warranty.
- Page 5 Instructions for use DOMINO valves AT 100 / 150 / 200 / 300 / 400/ 600 Check the phase sequence when connecting the power supply. The path switch and torque switch cannot operate if the phase sequence is wrong. The electrical actuator may not be operated unless the torque and limit switch function correctly. The torque set at the factory must not be changed.
- Page 6 Instructions for use DOMINO valves AT 100 / 150 / 200 / 300 / 400/ 600 Lubrication of valves Valves with hand-wheel operation The spindle must always be kept well greased and free of dirt. The greasing points on the hand wheel bearing must be regreased regularly depending on the conditions of operation and use.
-
Page 7: General Information
Operating Instructions Maintenance / Sealing replacement DOMINO knife gate valves series AT 1. General information 1.1 Maintenance work may only be carried out by qualified and authorised people. 1.2 Routine valve maintenance is not necessary. However, the spindle (piston rod in the case of pneumatic or hydraulic cylinders) must always be well greased and free of soiling. - Page 8 Maintenance / Sealing replacement DOMINO knife gate valves series AT 4. Preparing the front body part 4.1 Cut the cross-sealing (if appropriate scraper or base as well) acsealing to the groove length. Make the narrow ends of the sealing fit the shape of the groove radii using a suitable tool (e.g.
- Page 9 Maintenance / Sealing replacement DOMINO knife gate valves series AT Insert the round seal in the bore holes below the cross- sealing groove. Sharpen the ends of the round seal if necessary for this. 5.3 Insert the gate in such a way that the chamfer is pointing downwards.
-
Page 10: Pressure Test
Maintenance / Sealing replacement DOMINO knife gate valves series AT 6. Mounting the halves of the housing 6.1 Place the front body part on the prepared rear body part. 6.2 Remove the retaining fixture. The front body part and the rear body part must be in true alignment.


Need help?
Do you have a question about the Domino AT 100 Series and is the answer not in the manual?
Questions and answers