
Related Manuals for Foscam HUNTVISION P2


Summary of Contents for Foscam HUNTVISION P2
- Page 1 User Manual For more detailed instruc�ons, please visit foscam.com/downloads. For more specific assistance, please feel free to drop us an E-mail at: support@foscam.com...
-
Page 2: Table Of Contents
1.2.1 Front Panel 1.2.2 Rear Panel 1.2.3 Indicator Light Status 1.3 Key Features 2. Ini�al Installa�ons 2.1 Setup by Foscam App 2.2 Setup by a Web Browser 2.2.1 Hardware Installa�on 2.2.2 Connect to Camera 3. Access to Your Camera 3.1 Access from a Web Browser 3.1.1 Access from Local Area Network... - Page 3 3.1.3 Remote Access Methods ● WAN IP Access Se�ng ● DDNS Access Se�ng 3.2 Access from Foscam App 3.2.1 Local Area Network Access 3.2.2 Remote Access 3.3 Other Access Method 4. Features and Se�ngs 4.1 WiFi Configura�on 4.2 Storage 4.2.1 SD Card 4.2.2 FTP...
-
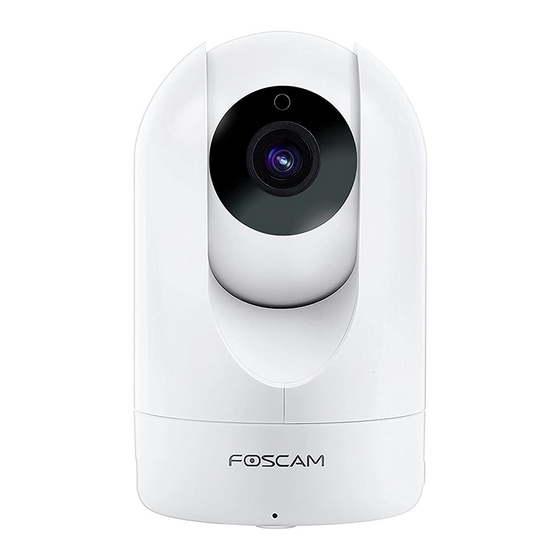
Page 4: Descrip�On
1. Descrip�on Please verify all contents received are complete according to the Package Contents listed below. 1.1 Package Contents IP Camera WiFi Antenna Moun�ng Bracket Ethernet Cable Power Adapter Expansion Screws User Manual Quick Start Guide 1.2 Physical Descrip�on 1.2.1 Front Panel ●... -
Page 5: Rear Panel
1.2.2 Rear Panel ● 10/100 Mbps RJ-45 port for wired connec�on LAN: ● DC 5V/2A power supply Power: Loud Speaker ● Built-in speaker Speaker: ● Used to connect external wireless antenna Antenna: Network light Power Antenna Power light 1.2.3 Indicator Light Status The flashing status of the power light and Network light are shown in the following table. -
Page 6: Key Features
2.1 Setup by Foscam App You can download Foscam App for your smartphone from APP Store or Google Play Store so that you can easily set up and manage your Huntvision products. For detailed instruc�on, please check the Quick Start Guide. -
Page 7: Hardware Installa�On
‘Wired connec�on succeed’. 2.2.2 Connect to camera Equipment Search Tool Visit Foscam official website ‘foscam.com/tools’, then Camera Name IP Address Device ID Type you can find the ‘Equipment Search Tool’; Download H�p://192.168.**.**:88... - Page 8 Donwload and install the plugins for your browser (IPWebComponents.exe). NOTE: During the plugins installa�on, your browser will be required to close, and a�er installa�on completed, you will need to double click the camera in the search tool list again. Now you can log in your camera, the default username is admin, and there is no password;...
-
Page 9: Access To Your Camera P6
● Now you have logged in the camera system! 3. Access to Camera A�er you finished the ini�al installa�on for your camera, you can login your camera for your daily use and se�ngs. *If you want to access to your camera via a local area network (LAN), please make sure your App or computer and your camera are connected to the same network;... -
Page 10: Basic Se�Ngs For Remote Access
3.1.1 Access to Camera in a Local Area Network By using the Equipment Search Tool, you can have a quick and easy access to your camera. Equipment Search Tool Double click your camera in the device list and your Camera Name IP Address Device ID Type... - Page 11 For the specific func�on descrip�on and se�ng methods, please check your router’s User Manual or contact with your router’s customer service. a). If your router supports UPnP func�on Go to the UPnP func�on page in your router system, and make sure that the UPnP func�on is Enable.
-
Page 12: Sta�C Ip Address Se�Ng P9
The default HTTPS port of your camera is 443; Server IP Address is the IP Address your router assign to your camera; If you need to access to several cameras remotely, you will need to add different Port Forwarding services and assign different ports for each camera. -
Page 13: Ddns Access Se�Ng
h�ps:// WAN IP: HTTPS port No. You can acquire your WAN IP by visi�ng h�p://www.wha�smyip.com from your browser; The default HTTPS port No. is 443. For example, if your WAN IP is 58.541.***.**, your WAN IP access address will be h�ps://58.541.***.**:443; Type this address in your web browser, and you will be able to locate the camera login page. - Page 14 (curently we can only support some third partey DDNS servers, please check the server list in DDNS Server sec�on). Click Get My DDNS Now to start the Foscam DDNS applica�on process. *During the applica�on process, you will need to login with your Foscam Cloud account, and this Foscam Cloud account is the Foscam account you sign up via App;...
-
Page 15: Local Area Network Access
3.2 Access to Camera via Foscam App You can have a easy access to your camera by using Foscam App from your smartphone. If you want to access to your camera remotely, please make sure that your camera is connected to the Internet. - Page 16 Step 4. Add your camera by alterna�ve method *If you have your camera around you, you can also scan the QR code to add camera to your Foscam App, and you can find the QR code from the bo�om of your camera.
- Page 17 Choose one of these methods men�oned above, and type in the according paremeters; Tap Add to complete the se�ngs. NOTE: A�er you completed these se�ngs, Foscam App will require you to login the camera with the camera’s user name and password, if you didn’t set any username or password before, the default username should be...
-
Page 18: Other Access Method P15
3.3 Other Access Methods Huntvision products also support other access methods for you to login your camera. ● VMS: This is also a Foscam so�ware designed for computer use, and you can visit foscam.com/downloads to get the latest version so�ware;... - Page 19 ● Configurate the WiFi from a Web Browser Access to your camera from a Web Browser, and go to the Se�ngs page, click Network tag, and select Wireless Se�ngs. Step 1. Scan the available WiFi connec�on Click Scan bu�on on the Wireless Se�ngs page, and the camera will start to scan all the WiFi connec�ons;...
-
Page 20: Storage
Huntvision products support several storage methods for you to store your video recordings and snapshots. 4.2.1 SD Card Huntvision P2/P4 supports Micro SD card, and you can find the SD card slot in the camera; The storage supports maximum 128GB. -
Page 21: Ftp
Complete these informa�on and click Save bu�on. 4.2.3 Foscam Cloud If you have ac�vated your Foscam Cloud Service, your alarm recordings will be stored at the Foscam Cloud Server at the same �me, which you can visit myfoscam.com for details. 4.2.4 Foscam NVR Products Huntvision cameras are also compa�ble with Foscam NVR products;... -
Page 22: Device Local Storage
4.2.5 Device Local Storage If you use Foscam App to access to your camera, your manual recordings and snapshots will be stored at your smartphone; and if you access to your camera from a web browser or VMS, your manual recordings and snapshots will be stored at your computer. -
Page 23: Mail Se�Ngs
4.3 Mail Se�ngs If you want the camera to send emails when a mo�on is detected, here Mail will need to be configured first. ● Access to your camera from a Web Browser, and go to Se�ngs > Network > Mail Se�ngs. - Page 24 The alarm video will be stored at the storage loca�on you set up for this camera (You can only store the alarm video at your camera’s SD Card or your FTP, but if you ac�vate your cloud service, the alarm video will be stored at Foscam Cloud server at the same �me).
-
Page 25: Sound Detec�On
NOTE: You will need to setup the storage loca�on for alarm videos first, and your alarm videos can be only stored at camera’s SD card, FTP and Foscam Cloud, please check page 17 to page 19 in this User Manual for how to setup a storage loca�on for your camera. -
Page 26: Other Se�Ngs
Se�ngs: ● This is your Foscam App se�ngs, where you can turn on the Touch ID for Signning in, WiFi only for Streaming, subscribe Foscam mails or manage the device list displaying displayed on the App’s home page; ●... - Page 27 P2/P4 Foscam *Tap icon on the camera that you want to manage and you can access to the camera page. Tap this bu�om to turn on/off the mic on the camera, and if you turn it on, you can hear the sound from your smartphone (Please make sure that your smartphone is not in the Mute mode);...
- Page 28 My Plan: You can purchase a Foscam Cloud Service plan here for your cameras. Share Camera: You can share your camera to your family member who own Foscam account. Camera Info: You can view or rename your camera, and view the UID/MAC ID/Firmware Version of the camera.
-
Page 29: Se�Ngs In A Web Browser
We recommend that you change the password of your camera regularly, using a Security Settings: combina�on of numbers, le�ers and special characters. Tap this bu�on to sync camera with the smartphone �me. Sync Time: You can manage IR LED based on a schedule if IR LED is in Scheduled mode. IR LED Schedule: You can turn on/off... - Page 30 Setup Wizard: You will go to “Setup Wizard” automa�cally a�er your first-login, and you can refer 2.2 Setup by a Web Browser to setup the camera. Status: Status contains four columns: Device Informa�on, Device Status, Session Status and Log, it will show you various informa�on about your camera.
-
Page 31: Faq
● Why can’t I connect to my P2P camera remotely using the Foscam App? Foscam P2P cameras allow users to connect camera remotely using Foscam app without extract setup like port forwarding. When it is unable to connect remotely, below �ps can help to establish the connec�on: Step 1: Update app and camera’s firmware to latest version;... - Page 32 Step 7: Verify the P2P feature of the camera is enable; Login to the camera via a web browser on a computer connected to the same LAN. Navigate to Se�ngs > Network > P2P and verify the feature is enabled; Step 8: Lower the bit rate and frame rate of the live video feed from the camera;...
- Page 33 Always Ac�ve. Close Firefox and re-launch the browser. A�empt to login to the camera. NOTE: Firefox version above 52 has blocked Foscam plugin completely, please use Internet Explorer instead. ● Why my camera doesn’t show in the Equipment search tool ? This is usually because camera doesn’t get an IP in same network segment as the computer.
- Page 34 (leave password blank). ● How do I add a Foscam camera back to the Foscam App a�er a change in the network was made? The type of change could be a replacement router or the network was moved to a different loca�on,as well as changing the network name or password for security purposes.
- Page 35 Guide for detail instruc�on for WiFi configura�on. ● Why am I not receiving alarm push no�fica�ons on the Foscam App? Step 1: Be sure the firmware of the camera is running the latest version and the Foscam App has been updated to the latest version;...
Need help?
Do you have a question about the HUNTVISION P2 and is the answer not in the manual?
Questions and answers