Table of Contents
Advertisement
Quick Links
Advertisement
Table of Contents

Subscribe to Our Youtube Channel
Related Manuals for D-D The Aquarium Solution P1


Summary of Contents for D-D The Aquarium Solution P1
- Page 1 P1 Dosing Pump Q U I C K S T A R T G U I D E...
-
Page 2: Specifications
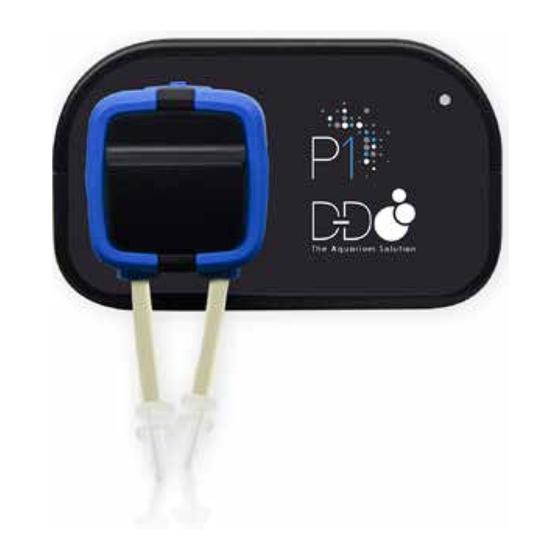
D-D The Aquarium Solution warrants to the original purchaser only that the P1 Dosing Pump will be free from defects in material and workmanship under normal use for a period of one year provided that the product is installed and used properly and consistent with the product manual. - Page 3 Attach the dosing pump head to the main unit by lining up the centre of the dosing head onto the shaft on the front of P1 unit and push the head in until it snaps into place. You can install the head with the tubing up, down, left or right to suit your particular setup.
- Page 4 To create or assign an P1 pump to a group, just tap on the three dots to the right of the P1 pump and tap on ‘Group Select’. Type in or select your already created group name.
- Page 5 CALIBRATION After connecting to the P1 Pump, the next step in the process is to calibrate it. Tap on the pump name to load the configuration page. Now tap on ‘Settings’ located on the upper right-hand corner. Now select ‘Flow Calibration’.
- Page 6 At the top of the screen you will see the container section. This is a really handy section that allows you to approximate how much solution there is left in the container based on your current dosing schedule. In order for this to work correctly, you must enter the volume of your container to the best of your ability.
- Page 7 FOLLOW US FOR INSPIRATION! .com/theaquariumsolution TheAquariumSoln www.theaquariumsolution.com...
Need help?
Do you have a question about the P1 and is the answer not in the manual?
Questions and answers