Table of Contents

Related Manuals for Aiphone JO-1MDW


Summary of Contents for Aiphone JO-1MDW
- Page 1 JO-1MDW Master monitor station OPERATION MANUAL Read this "Operation Manual" prior to usage to ensure safe and correct operation. Keep this in a safe place for future reference. The illustrations used in this manual may differ from the actual ones.
-
Page 2: Precautions
Voltage within some internal components may cause electrical shock. • Aiphone will under no conditions be liable for damage occurring due to the 7. Do not disconnect the station. Electric shock could result. -
Page 3: Table Of Contents
Table of Contents PRECAUTIONS ............2 SETTINGS Settings list ................ 28 PREPARATION Adjusting screen brightness......... 29 System confi guration ............4 Changing the sound settings ........30 Adjusting receiving volume .......... 30 Part names and functions ..........5 Adjusting ringtone volume ........... 30 Operation panel ............... -
Page 4: Preparation
Mobile device 呼出 親機 PS18 住宅用火災警報器または JO-DVF コールボタン Master monitor station Video door station JO-1MDW External unit such as lighting equipment Maximum number of each device available in a system Device Max. number Video door station Master monitor station Mobile device... -
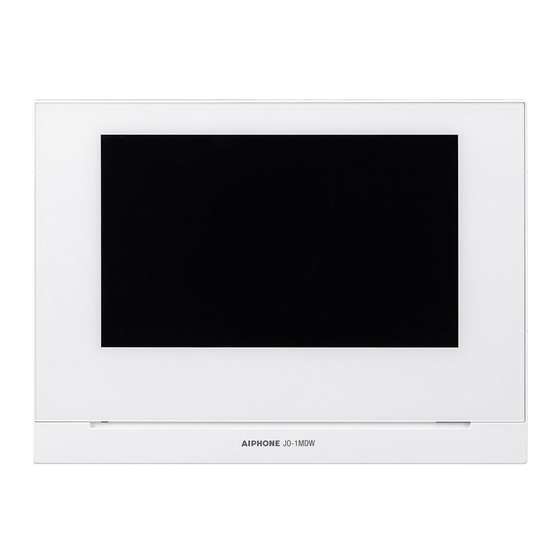
Page 5: Part Names And Functions
PREPARATION Part names and functions Operation panel Remove protective fi lm before use. Color LCD touchscreen See the next page for details. Wireless LAN antenna B Wireless LAN antenna A Button position guide for Button position guide for the visually-impaired the visually-impaired RESET button Press this button to reboot... -
Page 6: How To Read Screen
PREPARATION How to read screen The screen of the station is a touchscreen. Simply tap the icons or buttons displayed on the screen. The following are examples of typical screens and icons. * The displayed screens and icons may differ depending on the devices connected to this system. ■... -
Page 7: Initial Set-Up
PREPARATION Initial set-up ■ To correct date and time Setting the current date and time Correct the current date and time any time by following the When the station is powered up for the fi rst time, set the procedure below. current date and time. -
Page 8: Preparing A Microsdhc Card
Should this occur, reformat the card. Aiphone is not responsible for the performance of a microSDHC • card. -
Page 9: Formatting A Microsdhc Card
PREPARATION Formatting a microSDHC card MicroSDHC card may require to be formatted when used with the station for the fi rst time. * Previously formatted microSDHC card may not work with the station. Be sure to format a microSDHC card using the station. -
Page 10: Connecting With A Mobile Device
Be sure to set the current date and time on the station in advance. If the set time differs from the current time for more than 1 month, the • Aiphone app may not work correctly. Up to 8 mobile devices can be registered to the station. -
Page 11: Connecting The Station With Wi-Fi
PREPARATION Connecting the station with Wi-Fi Press the WPS button on the Wi-Fi router, and then tap There are two connecting methods available. • Auto Connect (WPS) • Manual Setup Connecting using "Auto Connect (WPS)" Connection between the master monitor station and This method connects to a Wi-Fi network using the "Wi-Fi wireless router is established automatically. - Page 12 PREPARATION Tap Wi-Fi . Confi gure the settings for each item. > < to change the page of the item list. The setting items will be shown. Confi gure the settings for each item. Item Description SSID Tapping the entry field displays the keyboard. (→...
-
Page 13: Connection Check
PREPARATION Connection check Confi rming the current network settings Confi rm the current network settings when the network > → From the MENU screen, tap connection is unstable. Other Settings . → > → From the MENU screen, tap → Other Settings . -
Page 14: Enabling Or Disabling The Network Connection
PREPARATION Enabling or disabling the network Selecting the antenna connection Antenna of the station can be selected according to the reception status or the location of the station or Wi-Fi router. If necessary, disable or enable the network connection. > >... - Page 15 PREPARATION Using the keyboard Full keyboard Alphanumeric input mode (lower case) Cursor Backspace key (yellow highlight) Cancel and return to Applies the inputted value and the previous screen. closes the keyboard Switches to the alphanumeric Moves the cursor input mode (upper case). Symbol input mode Alphanumeric input mode (upper case) Switches to the alphanumeric input mode...
-
Page 16: Connecting A Mobile Device With A Wi-Fi Router
To continue confi guring the settings, tap Tap Register / Delete Apps App Info . → Aiphone intercom app information is shown on the screen. Operation with a mobile device Cannot use the intercom app without agreement. Search "Intercom App Type B" and download the Aiphone INTERCOM APP Type B. - Page 17 PREPARATION Read the screen for the End User Licence Operation with a mobile device Agreement carefully and tap Next . Tap Start at the bottom of the instruction . Confi rmation with the station One-time password will be shown. Operation with the station >...
-
Page 18: Deleting The Mobile Device From The Station
PREPARATION Deleting the mobile device from the Enter the user name of the mobile device and station. tap Register . Name is limited to 12 characters. > → From the MENU screen, tap → Other Settings . A message will appear asking whether or not to proceed. Enter user name ... -
Page 19: Using The Station Receiving A Call
USING THE STATION Receiving a call When receiving a call from a door station • The ringtone sounds. • The video at the door station is displayed. • Automatic recording begins. Answering a call ■ To answer the call ■ To end the communication Speak to the visitor. -
Page 20: Operation During Receiving A Call Or Communication
USING THIS STATION Operation during receiving a call or communication Changing the display to the full-screen Adjusting the screen brightness mode The brightness adjusting bar will be shown. The display size is extended and the icons are hidden from the screen. to adjust the screen brighter, and to adjust the screen darker. -
Page 21: Communication Using Touch-To-Talk
USING THIS STATION Communication using touch-to-talk Recording Touch-to-talk is a method of communication in which manual ■ Automatic recording control of incoming and outgoing audio is used. Touch-to-talk The station automatically records video and sounds at the door is recommended in loud or noisy environments. station after the elapse of a certain period of time after receiving a call. -
Page 22: Monitoring The Door Station
USING THIS STATION Monitoring the door station From the MENU screen, tap Video and audio from the door station will be received at the master monitor station. Audio from the master monitor station is muted. To end monitoring, tap The monitoring will end automatically after the elapse of about 60 seconds from the start of monitoring. -
Page 23: Playing Recordings
USING THIS STATION Playing recordings Screens and icons ■ Recording list The recordings are shown in order. * When a microSDHC card is installed, only the recordings in a microSDHC card will be shown. To display the recordings stored in the built-in memory, remove the microSDHC card. : Shows this recording is not Recorded date and time protected. -
Page 24: Playing Recordings
USING THIS STATION Playing recordings Protecting recordings Protect recordings from being accidentally overwritten. From the MENU screen, tap To protect a recording on the recording list From the MENU screen, tap The recording list screen will be shown. of the recording to protect. The recording list screen will be shown. -
Page 25: Deleting A Recording
USING THIS STATION ■ To cancel the protection of the currently- Deleting a recording selected recording NOTE: A protected recording cannot be deleted. To delete, the protection While in standby, tap must be removed. Tap OFF . To delete a recording Protect ■... -
Page 26: To Delete All Recordings
In order to play a recording on a PC, a special tool for recording • and playback is necessary. It can be downloaded from the Aiphone website (www.aiphone.net). The timestamp of the exported recordings will be displayed in • Coordinated Universal Time (UTC). -
Page 27: Notifi Cation
USING THIS STATION Notifi cation Checking for updates. From the MENU screen, tap The notification list will be shown. Tap Check of the notifi cation to view. The details of the notification will be shown. The mark shows this notifi cation has not been confi... -
Page 28: Settings
SETTINGS Settings list The following are all of the available settings. These settings can be adjusted at any time. Relevant Item Details page Brightness Adjusts the screen brightness. Volume Receive Adjusts the receiving volume. Ringtone Adjusts the incoming ringtone volume. Touch sounds Enables or Disables the touch sound made whenever the touchscreen is used. -
Page 29: Adjusting Screen Brightness
SETTINGS Adjusting screen brightness Settings 1 to 5 Default From the MENU screen, tap The SETTINGS 1/2 screen will be shown. Tap Brightness . The brightness adjusting bar will be shown. to adjust the screen brighter, and to adjust the screen darker. ... -
Page 30: Changing The Sound Settings
SETTINGS Changing the sound settings Adjusting receiving volume Enabling/Disabling the touch sound Settings 1 to 3 Enable (ON) or disable (OFF) the touch sound made whenever Default the touchscreen is used. → Volume From the MENU screen, tap Settings ON/OFF →... -
Page 31: Changing The Time Settings
SETTINGS Changing the time settings Setting the current date and time to apply changes. ( → P. 7) When one of the following time zone is set, the daylight saving time setting is automatically applied, so set Daylight Saving Time to None ( → P. 32). Selecting the display format of the date and time List of time zones... -
Page 32: Setting Daylight Saving Time
SETTINGS Setting daylight saving time Changing the display Set whether to utilize daylight saving time (+1(h)) or not language (None). ( → P. 7) Settings Description None Daylight saving time is not utilized. +1(h) Daylight saving time is utilized for 1 hour. Setting the talk Date/Time →... -
Page 33: Setting Of Door Release/Option
SETTINGS Setting of Setting of notifi cation door release/option Set whether to display the door release icon and option output Set whether to display (ON) the notifi cation LED when a new icon on the MENU screen. notifi cation arrives. Door release Option output Settings... -
Page 34: Other Settings
SETTINGS Other settings ATTENTION: While confi guring the settings in "Other Settings", the station will not respond to an incoming call and will not sound ringtone. Registering/Deleting a mobile Tap Video Quality . device OTHER SETTINGS 1/2 • Downloading the App to the mobile device Register / Delete apps microSDHC card ( →... -
Page 35: Viewing Station Information
SETTINGS Confi guring the settings for automatically Viewing station information updating the station View a notifi cation for updating the fi rmware of the station. If an To enable the automatic update, the station must be update is available, continue to update the station. It is also connected to the network. -
Page 36: Confi Guring Network Settings
SETTINGS Confi guring network settings Confi rming the related regulations • Connecting using "Auto Connect (WPS)" ( → P. 11) > → From the MENU screen, tap • Connecting using "Manual Setup" ( → P. 11) Other Settings . → •... -
Page 37: Administrator Settings
SETTINGS Administrator settings Setting Door Release duration These settings had been completed at the system installation. Settings 1 to 30 (sec.) Do not change the settings. Default Exporting the log fi le to the microSDHC > card → From the MENU screen, tap Other Settings . -
Page 38: Setting Option Output Duration
SETTINGS Restoring all settings to the factory Setting Option Output duration default Settings 1 to 30 (sec.) This operation also deletes all the recordings including Default protected ones. > → From the MENU screen, tap > → From the MENU screen, tap Other Settings . -
Page 39: For Proper Use Of The Station
FOR PROPER USE OF THE STATION Updating a fi rmware of the station The fi rmware of the station must be updated periodically. The following methods are available for updating. • Automatic update through the network. • Receiving a notifi cation for available updates through the network. •... -
Page 40: Updating The Station By Using A Microsdhc Card On Which The Newest Version Of The Fi Rmware Is Stored
Use this method when the station is not connected to the network. In advance, download the newest version of the fi rmware from the Aiphone website to a microSDHC card. Install a microSDHC card on which the newest version of the fi rmware is stored. -
Page 41: Troubleshooting
FOR PROPER USE OF THIS STATION Troubleshooting If issues with the station occur, refer to the following information to determine whether the issue can be corrected by the suggested testing and solutions. For further help and assistance, contact your installer or service provider. Problem Cause Solution... -
Page 42: Specifi Cations
Regulations This device complies with part 15 of the FCC Rules. Operation Hereby, Aiphone Co., Ltd. declares that the radio equipment is subject to the following two conditions: (1) This device may type [JO-1MDW] is in compliance with Directive 2014/53/EU. -
Page 43: Warranty
Warranty Aiphone warrants its products to be free from defects of material and workmanship under normal use and service for a period of 2 years after delivery to the ultimate user and will repair free of charge or replace at no charge, should it become defective upon which examination shall disclose to be defective and under warranty.
Need help?
Do you have a question about the JO-1MDW and is the answer not in the manual?
Questions and answers
How can I keep the camera on?