Table of Contents
Advertisement
Quick Links
Advertisement
Table of Contents
Troubleshooting

Related Manuals for AEA Technology, Inc. E20/20


Summary of Contents for AEA Technology, Inc. E20/20
- Page 1 Step Time Domain Reflectometer E20/20 Step TDRs and Avionics TDR all models...
- Page 2 AEA Technology, Inc. is copyrighted and may not be copied or altered in any way without the written consent from AEA Technology, Inc. E20/20 TDR , Avionics TDR , ETDR PC Vision and the AEA Logos are trademarks of AEA Technology, Inc.
-
Page 3: Table Of Contents
Table of Contents Warnings and Precautions………………………………… Section 1 Getting Started Operating Guidance Documents ……………………………………….. Keypad and LCD Display …………………………………………… Connector Configurations …………………………………………… Measurement Screen…………………………………………………. Keypad …………………………………………………………………. ON/OFF Key ……………………………………………. Soft Reset ……………………………………………. Hard Power Down ……………………………………. Arrow, Escape & Enter Keys ……………………………. - Page 4 Example Twisted Pair Cable Traces …………………… Testing Single Wires in a Harness ………………………………………. Testing Power Cables or Other Cables with Large Gauge Conductors Other E20/20 Step TDR Applications …………………………………… Advance Testing Features ……………………………………………….. Z Scale Function …………………………………………………… Zoom Function ……………………………………………………..
- Page 5 Section 4 – E20/20 TDR Trace Memory and Cable Lists Introduction ………………………………………………………………. Saving and Recalling Traces……………………………………………. General ……………………………………………………………. Saving traces ……………………………………………………… Recall traces ……………………………………………………… Deleting Traces …………………………………………………… Restore prior settings ……………………………………………. Editing the TDR’s Cable List ……………………………………………. General ……………………………………………………………. Edit Cable List Instructions ………………………………………...
- Page 6 Instrument Return Instructions …………………………………………. Contact Us ………………………………………………………………… Return Material Authorization (RMA) Number ………………………… Appendices Specifications ……………………………………………………………… Twisted Pair Wiring and Connection Guide ……………………………. Accessories List …………………………………………………………… TDR LCD and ETDR PC Vision Trace Resolution Tables …………… Extreme Cold Weather Operations………………………………………...
- Page 7 WARNING Explosive atmosphere testing was accomplished on our TDRs to meet MIL-SPEC 810G, Method 511.5, Procedure 1. The E20/20 TDR and Avionics TDR are free of any internal ignition sources. However, the following ignition sources are a potential spark hazard and appropriate precautions apply:...
-
Page 8: Section 1 Getting Started
Both the E20/20 TDRs and Avionics TDR operate essentially the same. Differences between these TDRs will be pointed out in all the documents where appropriate. Most differences are identified in the Appendices. Basic and Advanced Training for the E20/20 TDR’s and Avionics TDR is ® available in Microsoft Power Point Format on the CD included with the TDR and our web site at www.aeatechnology.com. -
Page 9: Keypad And Lcd Display
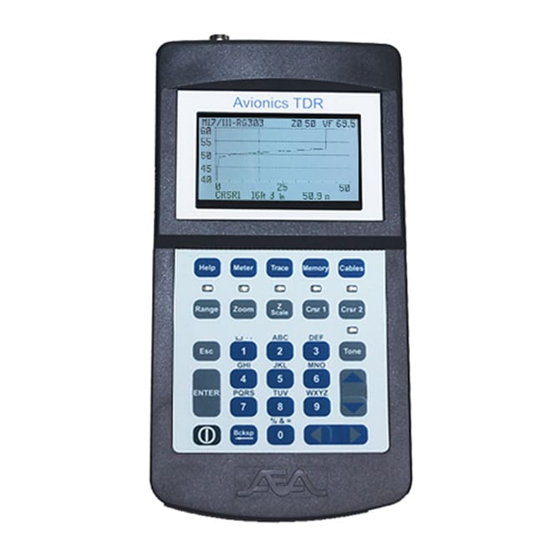
Keypad and Display Top Connectors - See Figure 1-2 for all available connector combinations Ruggedized ABS Plastic Case Quarter VGA Backlit LCD Escape Key Exits menus Measurement Screen or one level up in Menu Keys menus. Changes are Function Keys with saved active LED indication ENTER Key... -
Page 10: Connector Configurations
Top End Connector Configurations (figure 1-2) E20/20N TDR Part Number 6021-5000 – Broadcast Cable List and N-to-BNC adapter included. E20/20F Network (F and RJ-45 Connectors) Part Number 6021-5041 – CATV Cable List Part Number 6021-5042 – Telco Cable List E20/20B Network (BNC and RJ-45 Connectors) Part Number 6021-5053 –... -
Page 11: Measurement Screen
Measurement Screen (figure 1-3) Figure 1-3 Keypad ON/OFF key – Press once to turn the TDR on. This will restore all the previous settings from the last time it was turned off. Press once to turn the TDR off. Soft Reset Step 1. -
Page 12: Hard Power Down
Hard Power Down If the firmware hangs up during operation the TDR may not power down with a 1 second press of the ON/KEY. In this case press and hold the key for at least 10 seconds. When released, the TDR should power down. If a Hard Power Down is required, perform a Soft Reset on the first power on to ensure proper operation. -
Page 13: Menu Keys
Menu Keys General – Menus are designed to make TDR setups and cable selection easy as possible. When making selections in different menus pressing the next desired menu key will jump directly from the current menu to the new menu. It is not necessary to escape back to the Measurement Screen after work in each menu to save the changes and select another menu. -
Page 14: Trace
Both the BATTERY MENU and DATE/TIME are sub-menus selected by pressing the right arrow key when the cursor is next to that item. The BATTERY MENU permits setting BATTERY SAVER ON/OFF, BATTERY TYPE, and BATTERY MA-HR. The DATE/TIME menu is for setting the current date and time. See Section 2 in this manual for full details on both sub-menus. -
Page 15: Cable
Cables key opens a menu for selecting cable types from a list, editing the list, manually creating a new cable, searching a displayed cable trace for correct velocity, sampling a cable to find its velocity, or changing distance unit between feet or meters. The Cables key’s menu is shown in Figure 1-8. Figure 1-8 Function Keys General - All the function keys activate and de-active with one press. -
Page 16: Zoom
Zoom Key – When active, this key will zoom on Cursor 1 or Cursor 2. If both cursors are on-screen, Zoom will center on the last Cursor key pressed (the active Cursor). When Zoom is active use the ◄►keys to control the zoom span. Pressing the ◄... -
Page 17: Tone
Tone Key – This key activates tones for either coax or twisted pair cables based on INPUT CHANNEL selection in the METER menu. Use standard twisted pair or coaxial cable inductive amplifiers (probes) to detect the tones on the cable. NOTE: Toning works ONLY when operating on batteries. -
Page 18: Section 2 Setup And Basic Operation
This requires adjusting the pulse width and/or gain control on those TDR’s to clearly see longer cables and faults further away. Step TDR’s, like the E20/20 TDR and Avionics TDR, transmit continuous wave sweeps on the cable and interpret the reflections to provide more detailed information on the condition of the cable. -
Page 19: Impedance Affects
Figure 2-1 Figure 2-1 is a representation of the sweep sent by a Step TDR. The wave is uniform at any range setting and the TDR calibrates to the range selected by the user and the cable’s velocity factor used. The result is accurate measurements both in distance and fault amplitude. -
Page 20: Velocity Factor (Vf)
Figure 2-3 Velocity Factor A cable’s velocity factor (VF) is also designed in at the time of manufacture. VF is expressed as a fraction of the speed of light in a vacuum [c]. A VF of 0.677c indicates that a transmitted wave travels along that cable at 67.7% the speed of light in a vacuum. -
Page 21: Setup Wizard
Use the Escape key to 1. Save changes and exit the menu to the Measurement Screen. 2. Exit back up one menu level 3. Exit a completed step in Setup Wizard and go on to the next step 4. Exit Cable Table without changing selection 5. -
Page 22: Manual Setups
Manual Setups In addition to the Setup Wizard, the Help key has Help text on the following subjects: Menu Operation, The Cable, The Test Leads and Key Functions. To enter any of these subjects be sure no Function Key is active (no LEDs lit) and no menu open. -
Page 23: Battery Menu
NiMH cells are used this menu selection should be in alkaline or none to prevent attempting to charge the cells. CAUTION – The E20/20’s smart charger is not designed for charging Lion cells. Attempting to do so may result in damaged cells, damage the instrument and potentially cause a fire. -
Page 24: Charger Status
selecting a battery type of alkaline or none. The charger will need one complete charge or discharge period to compute the new cell’s run time. Run time = N/A – Normal indication when the TDR is on external power. BATTERY STATUS Displays the cells’... -
Page 25: Trace
The “Trace” menu permits viewing or setting all of the following Measurement Screen options: Z SCALE (OHMS) – Impedance scales: 20, 50, 100, 200, 500, and 1,000 Ohms. The best starting point is a scale that places the cable’s impedance (Z ) about mid-scale on the display. -
Page 26: Test Lead Null
Figure 2-6A In figure 2-6A the micro fault at about 25 feet (5 Ohms) may not be service affecting. The micro fault at 55 feet (12 Ohms) is most likely service affecting. Anything over 15 Ohms is certain to affect service. Figure 2-6B In figure 2-6B there are two small faults. -
Page 27: Noise Filter
NOISE FILTER Use ◄► to turn ON or OFF the filter. When ON this filter reduces unwanted noise signature on the cable’s trace. This menu provides for two ways to select a cable: 1. From a pre-stored Cable List of up to 64 cables. 2. -
Page 28: Velocity Search
the alpha-numeric keypad and press to save and exit back to the Cables menu. Press at Cables menu to return to the Measurement Screen. VELOCITY SRCH. This feature permits adjusting a cable’s Velocity Factor (VF) manually to get the end of the cable or a known event on the cable’s trace to match a known length measurement or measurement on a cable plat. -
Page 29: Selected Cable
Use the ◄►keys to switch between FEET & METERS. SELECTED CABLE Displays the selected cable for final review prior to Pressing to exit to the Measurement Screen. The TDR will re-calibrate to the new cable type’s impedance (Z ) and Velocity Factor (VF) prior to measuring. Measurement Screen and Controls Figure 2-7 Figure 2-7 is an example of the measurement screen. -
Page 30: Cable Type
Cables Crsr 1 Crsr 2 Figure 2-8 Figure 2-8 shows the Measurement Screen and “Cable” menu which controls the cable type selected. Once selected, it will display at the top of the Measurement Screen. The “Crsr 1” and/or “Crsr 2” keys used with the ◄►keys control the active cursor, which in this screen is Cursor 1 only. -
Page 31: Tone
NOTE: When the differential reading from the active cursor is from the left to the right the differential range readings will be positive. When the differential reading from the active cursor is right to left the differential range readings will be negative. -
Page 32: Section 3 Test And Measurement Setups
Section 3 – Test and Measurement Setups Introduction Sections 1 and 2 in this manual and the TDRs’ Basic Guide describe the TDR, menus, Function keys, and provide a general background on how the TDR operates. This section of the manual will expand on that information to provide: •... -
Page 33: Coax Cable Parameters
or female connector via matched 4-6ft (1- 2m) coax lead BNC female BNC type None or double male if required BNC female N type BNC male to N male or female connector via matched 4-6ft (1- 2m) coax lead to keep strain off the BNC connector BNC female... - Page 34 SWR (Standing Wave Ratio). All systems will have some VSWR, but when measured, a low ratio is better (1:1.25 in radio systems or less is generally good). All systems have their designed maximum acceptable VSWR. If a cable’s impedance is not within its specifications or the cable has deviations due to damage, poor connections, moisture, etc.
-
Page 35: Velocity Factor
Figure 3-2 The Cable List in the TDR contains various cable types and their impedances. The Cable Menu also has an option to enter a cable type, Z and VF manually. When a specific cable type is selected or entered, it will set the TDR’s Z to that impedance value. - Page 36 and/or connectorized, VF deviations can begin to affect the cable’s overall VF. As long as quality installation practices are used per the cable and connector manufacturer’s recommendations these will be minimal. Older cable installations, depending on application and location, can suffer from wear and tear, abuse, moisture intrusion, etc.
-
Page 37: Loop Resistance
Loop Resistance Loop resistance is defined as the DC resistance of the two conductors in a cable as measured by an Ohm meter at one end and having a zero Ohm short between the conductors at the opposite end of the cable. In the case of a coax cable, that would be a short between the center conductor and shield. -
Page 38: Coax Cable Connections
AN204 – Impedance Shifts AN210 – Cable Resistance (Coax) AN220 – Cable Resistance (Twisted Pair) The application notes are included on the enclosed E20/20 TDR and Avionics TDR CD or are available on our web site at http://www.aeatechnology.com/software/application-notes. Coax Cable Connections In most cases, coax cable is connected directly to the TDR or through a connection adapter. - Page 39 10, a bit map capture of the TDR’s LCD, to note the bump in the trace just to the right of the cursor. If the leads are un-twisted this impedance bump will be much larger. Once through the alligator leads the E20/20 will return the trace to the nominal 50 Ohms impedance in the cable under test.
- Page 40 Figure 3-8 Figure 3-9 Figure 3-10...
-
Page 41: Example Coax Cable Traces
Example Coax Cable Traces The following are examples of good and faulted traces for coax cables: Good 50 Ohm Test Lead – figure 3-11 Figure 3-11 Good 50 Ohm cable about 53 feet (16.2m) – figure 3-12 Figure 3-12... - Page 42 50 Ohm coax with series resistive fault – figure 3-13. Cursor 2 (left cursor) marks the fault, a step up in impedance that never lets the trace return to normal and stays added to the total impedance and loop resistance. RG-174 is a small diameter coax with a high loop resistance due to the thin center conductor, hence the more dramatic dribble-up in the trace.
- Page 43 75 Ohm drop cable with a low impedance lead in and poor barrel connector – figure 3-15. Figure 3-15 75 Ohm drop from the premise to an aerial tap at 60ft (18.3m) – figure 3-16. The up bump and arced upward trace at the tap is typical of the electronics in the tap. TDR’s can’t see through electronics so they produce either a gentle roll down or up depending on the impedance from the circuits.
-
Page 44: Twisted Pair Test Setups
Other telecommunications connection points include 66 and 110 blocks, cross-connect boxes, pedestals and splice points. All the E20/20 TDR Network models also include an RJ-45-to-two pairs of telco clips (aka Popper Clips for the developer J.S.Popper, Inc.). -
Page 45: Twisted Pair Cable Parameters
E20/20 TDRs with only an N or BNC connector can be connected to twisted pair wire and tested as well as using the RJ-45 connector found on Network models. Both the N and BNC models are provided with BNC-to-alligator clips test leads. - Page 46 Scale Figure 3-17 Figure 3-18 The Cable List in the TDR contains various cable types and their impedances. The Cable Menu also has an option to enter a cable type, Z and VF manually. When a specific cable type is selected or entered, it will set the TDR’s Z to that impedance value.
-
Page 47: Velocity Factor
Velocity Factor (VF) This parameter has a numbers of names all referring to the speed at which an AC signal will travel on a particular cable. It’s also known as VP or VoP – Velocity of Propagation and NVP – Nominal Velocity of Propagation. The velocity is expressed as a fraction of the speed of light in a vacuum. -
Page 48: Loop Resistance
will be converted to distance using this VF. In figure 3-20 the Cursor 1 is marking the start of the cable after the test lead and Cursor 2 is marking the open end of the cable at 300ft (91.4m) based on a VF of 67.0c. If the VF is set correctly, that distance will be correct. - Page 49 Nominal Premise TIA Cat 5 and 6 Loop Resistances (ISO Class D and E) Wire Gauge Loop Resistance per Loop resistance per 328 ft (100m) 100ft (30m) 24 AWG (0.5mm) 19 Ohms 6.0 Ohms While the Ohm meter requires a zero Ohm short be placed on the conductors at the far end of the cable, the TDR does not.
-
Page 50: Twisted Pair Cable Connections And Pair Selection
AN220 – Cable Resistance (Twisted Pair) The application notes are included on the enclosed E20/20 TDR and Avionics TDR CD or on our web site at http://www.aeatechnology.com/software/application-notes. Twisted Pair Cable Connections and Pair Selection In most cases twisted pair cable is connected directly to the TDR’s RJ-45 input and pair selection is made using the Meter menu and INPUT CHANNEL: by pressing the ►... - Page 51 Whenever the Telco Test Leads or other alligator clip leads are connected, the twist in the leads ends and the cable pair under test should remain as close as possible as in figure 3-24. This reduces any impedance bumps to their minimum at the connection points as shown in figure 3-25.
- Page 52 E20/20 TDR and Avionics CD or from our web site at www.aeatechnology.com. The other way to connect a cable to the RJ-45 port is directly using either an RJ-45 (4 pair), RJ-12, (3 pair), or RJ-11 (2 pair) connectors. This type of connection negates having any impedance bump at the start of a trace.
- Page 53 Figure 3-28 The example in figure 3-29 is the same connection as figure 3-28, but with the alligator clips and wire pair separated. The impedance bump caused by the separation is clearly visible on the LCD. Figure 3-29...
-
Page 54: Example Twisted Pair Cable Traces
Example Twisted Pair Cable Traces The following are examples of both good and faulted twisted pair cables. Good 370ft (112.8m) twisted pair cable with open end – Figure 3-30. Some noise is showing on the trace as un-terminated cable un-shielded cable is also an antenna. - Page 55 Twisted pair cable with a bad splice – Figure 3-33. Too much untwist at the splice. Figure 3-33 Wet twisted pair cable – Figure 3-34. Wet sections always show a dramatic dip in the impedance. Additionally the VF in the wet zone drops to some unknown value so distances from the start of the wet zone, 95ft (29m), on are not valid even after the wet section as the cable dries out and impedance returns to normal.
- Page 56 Figure 3-35 Figure 3-36 Split Pair’s occur when one wire from one pair becomes crossed with one wire from and adjacent pair in a multi-pair cable – Figure 3-37. Since the adjacent pairs make looser contact in the cable jacket the impedance will rise after the split.
- Page 57 Cat 5e cable pair. TIA 568-C requirement is less than 20 Ohms for that length. The reading is accomplished by marking the desired section using Cursors 1 and 2. The Cursor ∆ (difference) will display that section’s loop resistance. Figure 3-39 High loop resistance –...
- Page 58 Measuring cable on a reel or in a box (spooled cable). One factor that can lead to a higher than normal loop resistance reading and display an erratic trace close to the TDR is measuring the cable while it is spooled or coiled up, even loosely. In that form the TDR signals create minor interference with each other.
-
Page 59: Testing Single Wires In A Harness
reflections on the pair. In the Advance Features section, we will cover methods to take a closer look at the trace and ensure the cable has the highest quality. Figure 3-43 Testing Single Wires in a Harness Testing single wires in a harness can be accomplished, but generally requires a good wiring diagram of the harness with pin-to-pin connection information. - Page 60 2. Compare the length of the two single wires to ensure it matches the wiring diagram’s “Cut Length” for the wires or a best-as-possible measurement of the installed harness start to end. Remember, if one of the two wires is shorter than the other, the shorter wire is the electrical end of the pair.
- Page 61 Figure 3-45 Figure 3-46 Figure 3-47 is an example of two single wires terminating in equipment at the far end. Note the slower upward trend and flattened trace at the end. In some cases the trace will roll off slowly down or be flat at about 100 Ohms as the TDR’s signal is absorbed by an impedance matching device in the equipment.
-
Page 62: Testing Power Cables Or Other Cables With Large Gauge Conductors
Testing Power Cables or Other Cables with Large Gauge Conductors The E20/20 Step TDR can be used to measure power cables and other cables with relatively large conductors, but with some limitations. Previously in Sections 2 and 3 the subject of “Dribble-Up” or the addition of the cable’s loop resistance to the impedance over length was discussed. -
Page 63: Other E20/20 Step Tdr Applications
The examples shown so far have mostly been full traces and impedance scales about twice the cable’s Z . The following features in the E20/20 TDR and Avionics TDR are designed to enhance the trace and provide improve the accuracy of measurements. They include: •... -
Page 64: Zoom Function
When a cable type is selected. its impedance becomes the TDR’s Z setting. If the Z Scale is raised to a higher setting the cable trace will be depressed in the display. However, when the Z Scale is reduced the TDR will keep the Z setting in the center of the trace and lower scale will be plus and minus half it’s value. - Page 65 Range (Feet) Resolution 0.5 inch 0.5 inch 2.5 inches 5 inches 8 inches 1 inch 1,000 2 inches 2,000 4 inches 5,000 20ft 8 inches 10,000 41ft 6 inches 20,000 83ft 4 inches Range Resolution (Meters) 1 cm 2 cm 4 cm 8 cm 20 cm...
- Page 66 To activate and use the Zoom function, use the following steps and refer to figures 3-51 (pre-zoom) and 3-52 (zoom to 20ft on Cursor 1): 1. Place at the point to center the Zoom (last cursor pressed will be the “active cursor” and used) 2.
-
Page 67: Start Distance
You can shift control between the two cursors as required. The LEDs and LCD legends operate as usual to indicate which cursors are in use and which one is active. key once and use the ◄► keys to To restore Zoom operation press the control the zoom range. -
Page 68: Test Lead Null
Figure 3-53 Figure 3-54 is an example Measurement Screen with 10ft (3m) of Start Distance (off-set). Note the Range Scale at the bottom of the trace is now set for 10 to 60ft (3-18.3m). The upward spike in the trace indicates the open end of the cable. - Page 69 Figure 3-55 Use the following steps to turn ON or set up Test Lead Null (refer to figure 3-55): 1. Press the 2. Move the menu cursor to TEST LEAD NULL. 3. Press the ► to turn Null ON, or press to set a new test lead null.
- Page 70 2. If Start Distance other than zero is entered and Test Lead Null is turned ON at the same time, the Test Lead Null will take effect after the Start Distance (off- set). Example: With a Range set to 20ft (5m), a Start Distance of 10ft (3m) is entered, and Test Lead Null of approximately 3ft (1m), the display will actually start at approximately 13ft (4m).
-
Page 71: Micro Fault Locating
Test Lead Null and Start Distance – Recommend performing the Test Lead Null first, then set the Start Distance. This is required in the case where the Start Distance is longer than the test lead. Micro Fault Locating Micro Fault locating is designed to expose potential service affecting faults hard to detect on coax cables using the normal impedance trace. -
Page 72: Noise Filter
Figure 3-59 Figure 3-60 Noise Filter Electromagnetic Interference (EMI) or noise is everywhere in our environment unless you are in a Faraday Cage or similar shielded room. Cables, particularly unconnected cables, are also antennas. The type and amount of EMI they pick up will be determined by the type of cable, coax or twisted pair, quality of shield grounding. - Page 73 Noise or Signal Detection: Leave Noise Filter OFF – With normal operation and the noise filter OFF the E20/20 TDR is a good detector for CATV signal, reverse ingress on drops, hard line, or at the premise. In other applications it will detect improperly grounded antenna leads, or ungrounded/poorly grounded shielded twisted pair cables.
-
Page 74: Velocity Search And Sample A Cable
TDR. Some signal may remain on the cable when measuring close to the amplifier, but faults will still be visible. The quasi-square wave power (60 or 90VAC) must be removed from CATV cable before using the E20/20 TDR. Velocity Search and Sample a Cable “Velocity Search”... - Page 75 use Cursor 1 or Cursor 2 (active cursor upon entry will be available) and the ◄►keys to mark the distance on the display to the known distance for the end of the cable or to a known event on the cable. This mark may not align with the displayed trace’s end of the cable or event on the cable.
-
Page 76: Sample A Cable
NOTE: When a modified VF is obtained, write it down on paper and use the Cable menu’s PICK/EDIT LIST to enter the new cable type. To modify an Bcksp existing cable on the list, select the cable type and press the key. - Page 77 Figure 3-68 Press the key to go to numeric entry screen. If measuring in feet, enter the feet first, press again and enter the inches of the sample cable. If measuring in meters, enter the meters to three decimal places. Then press again to go to the SAVE RESULTS? (accept or decline) screen as shown in Figure 3-69.
- Page 78 Application Notes. All our TDR Application Notes can be found on the enclosed CD or on-line at www.aeatechnology.com by clicking on “Application Notes” in the “Literature and Software” tool bar menu. Application Notes referring to the 20/20 Step TDR are also applicable to the E20/20 Step TDR.
-
Page 80: Section 4 - E20/20 Tdr Trace Memory And Cable Lists
Section 4 – Trace Memory and Cable Lists Introduction This section of the operator manual covers operations in the Memory menu which includes: • Saving Traces • Recalling traces • Deleting Traces • Recalling traces to use as instrument setups •... -
Page 81: Saving Traces
Saving Traces Press the key to access the memory functions shown in figure 4-1. Figure 4-1 To save the current trace press the ►key at “SAVE” and the menus will guide you to enter a name for the trace as shown in figure 4-2. Figure 4-2 Use the alpha-numeric keypad to enter the trace name. -
Page 82: Recall Traces
When the name is complete (11 characters maximum) press the key to save the trace with the name. The date and time will be saved automatically along with the cable’s impedance, velocity, trace data and all the TDR’s current setups. When the trace has been saved, the TDR will return to the Measurement Screen. -
Page 83: Deleting Traces
The available actions are shown at the bottom of the LCD as follows: – Press to call a context sensitive help screen with directions about this screen’s available actions. Press Help a second time to return to this screen. – Press to recall the highlighted trace. This action will return the TDR to the Measurement Screen with the selected trace as in the example shown in figure 4-4. - Page 84 key. If you are not sure about deleting the trace press the key to abort the deletion process. NOTE: There is no “UNDELETE” feature in the TDR. Be sure saved traces have been uploaded to a PC and archived or are absolutely not required prior to deleting.
-
Page 85: Restore Prior Settings
Restore Prior Settings When a trace is recalled from the memory, the TDR must be restored to the settings used at the time the trace was saved. If you desire to return to the original settings being used before one or more traces were recalled, press the key to access the memory functions menu shown in Figure 4-5. -
Page 86: Edit Cable List Instructions
1. Edit the list on the TDR by either modifying an existing cable or entering a new cable. 2. Upload and modify the TDR’s Cable List in ETDR PC Vision software or download another factory default list, or a custom list as developed in ETDR PC Vision. - Page 87 original cable’s data and re-edit that cable. It can also be restored using ETDR PC Vision software. Refer to Section 5 for those instructions. Use the ▲▼keys to scroll up or down one cable at a time or the ◄► keys to scroll up or down one page at a time to reach the cable to be modified or and Bcksp open slot.
- Page 88 Use the alpha-numeric keypad to change the velocity factor value and press to accept and move to the ENTER CABLE DESCRIPTION screen shown in figure 4-10. Figure 4-10 Use the alpha-numeric keypad to change the cable description (same actions described earlier in this section for naming traces) and press to accept and move to the entry confirmation screen shown in figure 4-11.
- Page 89 The edited or new cable will now appear on the Cable List for selection and use as desired. As a reminder – If you edit the TDR’s Cable List in the field and wish to preserve that list, use ETDR PC Vision’s Cable List tab to upload the TDR’s list and save it on the PC under a user entered name.
-
Page 90: Section 5 - Etdr Pc Vision Software
, 8.0 , 8.1 , and 10 NOTE: TDR PC Vision (for 20/20TDR models) and ETDR PC Vision (for E20/20 TDR and Avionics TDR models) can reside on the same PC. However, they must be used with their respective instrument models: E20/20 TDR or Avionics TDR –... -
Page 91: Run Etdr Pc Vision
Downloading from AEA Technology’s web site – Go to www.aeatechnology.com. In the tool bar at the top of the home page, position the mouse pointer on “Literature and Software” then click on “Software” in the drop down menu. Locate the “ETDR PC Vision” software and click on “Download.” Follow your operating system’s instructions to save the downloaded file to a desired folder. -
Page 92: Get Trace Tab
the “Get Trace” tab shown in figure 5-2. During the connections process this window will show “Searching for TDR” and “Connecting to TDR” status updates. Get Trace Tab Figure 5-2 The “Plot Current Trace” and “Plot Archived Trace” buttons should be active (black font). -
Page 93: Connection Error Correction
Connection Error – If ETDR PC Vision can not locate the TDR or if the TDR can not establish a COM Port connection link, go to the COM Port Utilities tab as shown in figure 5-3 which offer a list of suggested common issues to correct the connection. - Page 94 Figure 5-4 NOTE: If you plan to connect multiple TDRSs (one at a time at different times) to the same PC refer to “Preventing Auto Increment of the Serial Port When Using the AEA E2020 TDR USB Serial Interface” later in this section. If the only work to be done with the TDR involves uploading current traces or archived traces, continue working with the “Get Trace”...
-
Page 95: Stored Traced Tab
Stored Traces Tab Refer to figure 5-5. With communications established between the PC and the TDR all the available functions in ETDR PC Vision’s “Stored Traces” tab are available: 1. Upload and view a list of stored traces from the TDR 2. -
Page 96: Open Trace Plot
“Archive Selection” – This feature is designed to directly archive traces highlighted on the uploaded list or to archive all the traces in the uploaded list. When a single trace is archived on the PC from the graphical plot, the trace, by default, takes the name of the plot uploaded or edited in the graphical plot. -
Page 97: Plot Controls
Graphic Plot – The graphic plot will open to a Z Scale and Range based on the plot information uploaded from the TDR’S’s stored trace. See “Chart Axes” paragraph under “Plot Controls” to adjust the graph’s scales. If the trace was saved in feet it will open the graph in feet. - Page 98 Chart Tool Bar File – Similar to most Window’s File menus, see figure 5-7. Figure 5-7 Archive – Opens two options: 1. Archive the current plot (graph and data) as it appears. 2. Open a previously archived plot Export Graphics – Opens a sub menu to export the graphics as BMP, JPG, GIFF, or TIFF files.
- Page 99 Save Settings As… – Permits saving the chart settings to a file for later use. Loading Settings… – Opens a file browser sub-window to select a previously saved chart setting. Chart Axes – Opens a Chart size control sub-window to select/deselect Autoscale and manually rescale the chart.
- Page 100 Figure 5-9 Plot Color – Click to open a sub-menu of colors to choose from for the trace’s line color. Plot Points – Turns ON or OFF the individual plot points as small black squares. Traces uploaded in feet will have 1920 plot points. Traces upload in meters will have 2000 plot points.
-
Page 101: Tdr Setups Tab
TDR Setups Tab The “TDR Setup” figure 5-10 is used to upload, edit, and download TDR setups to the TDR. The edited setups can be uploaded directly to the TDR or stored on the PC for later recall and upload. NOTE: When this tab initially opens the values shown will be grey fonts indicating they are not current data or values set in the TDR. -
Page 102: Cables Tab
setups are saved along with the display plot whether a cable is attached or not. To recall and use this particular setup on the TDR press “Memory” and ► key at “Recall.” Use ▲▼ arrows to highlight the saved trace (setup) by name and press ENTER to recall. -
Page 103: Working Without The E20/20 Tdr Connected
Write Cable List File - Opens a Windows standard “Save File” sub-window to save the Cable List shown in the tab. Selected Cable Values – Use to enter the “Cable Description” (16 characters max), Z (impedance) and VF (Velocity Factor, aka VP, VoP, or NVP) of a cable you desire to add or edit on the cable list. -
Page 104: Ftdi Driver Installation
Technology CD: Step 1 – Close ETDR PC Vision software and disconnect the TDR from the PC. Step 2 – Be sure the E20/20 TDR and Avionics TDR CD is inserted in the CD drive. Step 3 – Power on the E20/20 TDR and connect it to the PC. If Windows offers “New Device Detected”... -
Page 105: Preventing Auto Increment Of The Serial Port
Preventing Auto Increment of the Serial Port When Using the TDR USB Serial Interface Introduction Each USB serial port interface chip inside the TDRs contains their own unique serial number. The FTDI drivers used in the TDR assign a serial port to the device (TDR) based on this serial number. - Page 106 2. Locate the folder “HKEY_LOCAL_MACHINE” and expand it (click on its + square). You may wish to collapse all folders first to make it easier to locate the folders of interest. 3. Under the HKEY_LOCAL_MACHINE folder find and expand the “SYSTEM”...
-
Page 107: Choosing A Different Com Port
Choosing a different COM port If a different COM port assignment is desired, manually reassign the COM port. This reassignment will remain in place after rebooting the PC. The directions to find the device drivers are slightly different for Win7 and Vista, but the procedure is similar. -
Page 108: Default Locations For Data Files Supplied With Etdr Pc Vision
CD or as part of the download. Please take a few minutes to read this file concerning the changes in the version. NOTE: TDR PC Vision (for 20/20TDR models) and ETDR PC Vision (for E20/20 TDR and Avionics TDR models) can reside on the same PC. However, they must be used with their respective instrument models: E20/20 TDR and Avionics TDR –... -
Page 109: Software Technical Support
This page intentionally left blank... -
Page 110: Section 6 - Warranty, Troubleshooting Guide, Maintenance, And Service Returns
Limited Warranty AEA Technology, Inc., warrants to the original purchaser that the E20/20 TDR or Avionics TDR shall be free from defects in material or workmanship for a period of one year from the date of shipment. All units returned to the factory, delivery charges prepaid, and deemed defective under this warranty, will be replaced or repaired at this company’s option. -
Page 111: External Dc Power
External DC Power If you wish to power the TDR from an external DC source (other than the AEA Technology’s wall adapter), ensure it meets the following requirements: • 2.1 mm (+) center pin DC power connector. • Minimum 12 VDC (650 ma) •... -
Page 112: Tdr Troubleshooting Guide
Wiping dry with a soft lint free cloth will improve appearance over air drying. Contact Us If you have any questions concerning instrument maintenance, cleaning or care, please contact AEA Technology at 1-800-258-7805 M-F 7:00am – 4:30pm PST or by email at techsupport@aeatechnology.com. TDR Troubleshooting Guide Symptom Possible Causes... -
Page 113: Etdr Pc Vision Troubleshooting Guide
ETDR PC Vision Software Troubleshooting Guide Symptom Possible Cause(s) Correction TDR and PC 1.TDR is OFF or not in 1. Turn TDR ON to show Measurement Screen. Measurement Screen and “Disconnected” 2. USB Cable not try again. in “Connection connected 2. -
Page 114: Instrument Return Instructions
2. Align all cells polarity per Reversed. battery case Diagram. Specifications Specifications for the E20/20 TDR /Avionics TDR are contained in Appendix A. Accessories Accessories for the E20/20 TDR/Avionics TDR are contained in Appendix C Instrument Return Instructions Contact Us... - Page 115 number to include on the package addressing. The RMA number will tell everyone at AEA Technology handling your instrument exactly what to do, who to contact about repair costs, and who to return the instrument to when repairs are completed. It makes the entire process go smoothly and efficiently. Be sure to include your RMA number with the return address (shown on the back of this manual).
- Page 116 Appendix A E20/20 TDR Specifications Characteristic AEA Technology E20/20 TDR and Avionics TDR Specifications Distance Range 0-13,250ft (3,300m) @ VF =.660c 0-20,000ft (5,000m) @ VF =.999c Resolution: TDR in feet = span/240 or 1/2 in @ 10ft span ETDR PC Vision in feet =...
- Page 117 Characteristic AEA Technology E20/20 TDR and Avionics TDR Specification Display Plots Impedance Scales Zo +10, +25, +50, +100, and 0-200, 500, or 999 Ohms Range Scales: Feet 0-10, 20, 50, 100, 200, 500, 1,000, 2,000, 5,000, 10,000, and 20,000ft Meters...
- Page 118 Characteristic AEA Technology E20/20 TDR and Avionics TDR Specification Trace Export USB-Serial. AEA supplied PC software and USB Cable included PC Software "ETDR PC Vision" software included for trace upload, storing, printing & export. Cable List management & download, Memory Catalog...
- Page 119 Characteristic Avionics TDR Kit’s Hard Case Specifications FOD Protection Custom foam for item securing and lid label for item ID and locating Transportation ATA 300, Category 1 rated Size 18.1 x 13.7 x 6.9 inches (48 x 35 x 18cm) Weight 11.5lbs (5.2Kg) with TDR and all accessories...
- Page 120 Appendix B RJ-45 Input Channel Translation Table to Cable Pairs, Pins and Wires Authority Wire Map Scheme Jack/Plug Wiring Color Code 20/20 TDR Pins Input Channel Coaxial Connector Coaxial Alternative Red/Black Lead COAX Technology Red/Black Clips 4 & 5 RJ45 CH A Accessories Green/Black Clips 3 &...
- Page 121 Appendix C See models pictured below for correct identification with accessory lists on following pages. E20/20N TDR – part number: 6021-5000 E20/20F Network TDR CATV – part number: 6021-5041 E20/20F Network TDR Telco – part number: 6021-5042 E20/20B Network TDR VDV/RF – part number: 6021-5053 Avionics TDR –...
- Page 122 E20/20 TDR Accessories The following is a list of E20/20 TDR replacement an optional accessories available at the time of printing. To see the complete list of accessories, description and pictures visit our web site, position mouse pointer on the tool bar at “Products” and click on “Accessories” in the drop down menu.
- Page 123 0010-0218 USB Cable, A-to-Mini B 0070-1208 Quick Start Guide 6021-3010 Basic Guide 6021-3020 E20/20 & Avionics TDR CD 6021-1220 BNC-to-Alligator Clips 0070-1221 BNC Coax Test Lead 0070-1500 (standard with Avionics Kit only) RJ45-RJ45 Test Lead 0070-1219 (standard with Avionics Kit only) BNC-to-Pins &...
- Page 124 Appendix D TDR and ETDR PC Vision Resolution Tables TDR range resolutions TDR LCD ETDR PC Vision Range Feet Resolution Resolution inches Feet inches Feet 0.50 0.06 1.00 0.13 2.50 0.31 5.00 0.63 10.00 1.25 2.08 3.13 1,000 4.17 6.25 2,000 8.33 1.04...
- Page 125 Appendix E Cold Weather Operation Background Operating the E20/20 TDR or Avionics TDR at colder temperatures will bring some noticeable changes. The LCD screen will slow down and the contrast will require higher than normal contrast settings (11+) to make the screen visible.
- Page 126 5933 Sea Lion Place, Suite 112 Carlsbad, CA 92010 Tel: 1-800-258-7805 or +1-760-931-8979 Fax: +1-760-931-8969 www.aeatechnology.com...
Need help?
Do you have a question about the E20/20 and is the answer not in the manual?
Questions and answers