
Related Manuals for Abriblue OPEN Classic


Summary of Contents for Abriblue OPEN Classic
- Page 1 OUT OF POOL AUTOMATIC SAFETY COVER OPEN Classic Installati on instructi ons Please read carefully and keep for subsequent consultati on Version 02/2013 AE-12-004-4GB/05-2014...
- Page 2 This manual must then be given to the pool owner along with the safety and user instructi ons so that it is available for subsequent use. The advice given in this leafl et is taken from the experience of AS POOL (ABRIBLUE): with over 55,000 automati c covers since 1995.
-
Page 3: Table Of Contents
3/20 - Installati on instructi ons for the OPEN Classic out of pool automati c safety cover CONTENTS 1. Preparing the pool 1.1 Electric connecti ons and cable passages 1.2 Building work 1.3 Squaring checks 2. Delivery and Recepti on 2.1 Delivery... -
Page 4: Preparing The Pool
Installati on instructi ons for the OPEN Classic out of pool automati c safety cover - 4/20 1. Preparing the pool 1.1 Electric connecti ons and cable passages 1.1.1 Electric box power supply Fig. 1 Prepare a 230 V power supply using an R2V3G2.5 mm²... -
Page 5: Building Work
5/20 - Installati on instructi ons for the OPEN Classic out of pool automati c safety cover 1.2 Building work 1.2.1 Concrete belt Fig. 3 Plan a concrete belt using a 350 Kg cement per m concrete mix with a size of w 25 cm x h 40 cm x l 100 cm using at least 0.10 m... -
Page 6: Delivery And Recepti On
Installati on instructi ons for the OPEN Classic out of pool automati c safety cover - 6/20 2. Delivery and Recepti on 9.2 10.2 11.2 12.2 9.6 10.6 11.6 12.6 2.1 Delivery Fig. 6 2.1.1 Plan the presence of 2 to 6 persons, or use a 0.8m... -
Page 7: Assembling The Roller
7/20 - Installati on instructi ons for the OPEN Classic out of pool automati c safety cover 3. Assembling the roller 80Nm 80 Nm 3.1 Off set plate opti on: assembly on the post Fig. 8 3.1.1 Assemble the off set plates on the posts, consider this plate as a template for the rest of the installati on 3.1.2 Place the screws in the 15 mm plugs in order to... -
Page 8: Placing The Roller On The Pool
Installati on instructi ons for the OPEN Classic out of pool automati c safety cover - 8/20 3.2.8 Fig. 12 If the posts cannot be placed tightly, install a blocking ring which should be ordered from us. 3.3 Placing the roller on the pool 3.3.1 Check that the shaft and the posts are level... -
Page 9: Placing The Threaded Rods
9/20 - Installati on instructi ons for the OPEN Classic out of pool automati c safety cover 3.6 Placing the threaded rods Fig. 16 Prepare the threaded rods so that they protrude 17 17mm 17 mm mm above the post. -
Page 10: Adjusti Ng And Ti Ghtening The Posts
Installati on instructi ons for the OPEN Classic out of pool automati c safety cover - 10/20 3.9 Adjusti ng and ti ghtening the posts Fig. 20 40Nm 40 Nm 3.9.1 Fig. 20 Mount the lower M8 nuts in the right order (for the... -
Page 11: Electric Connecti Ons
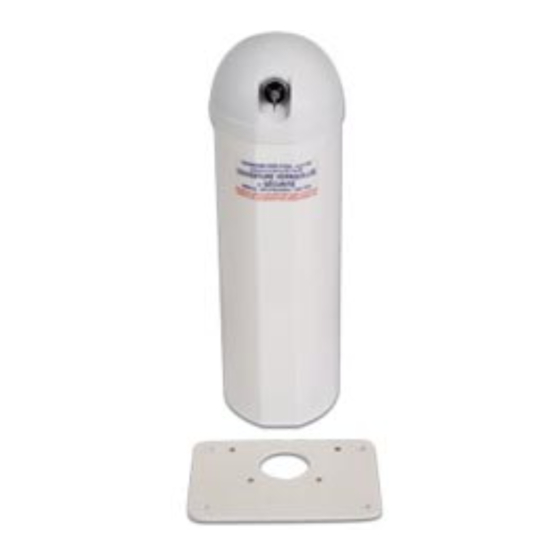
11/20 - Installati on instructi ons for the OPEN Classic out of pool automati c safety cover 4. Electric connecti ons Have the electric connections made by a qualifi ed technician in compliance with current standards. T N P Fix the transformer box in the technical room. -
Page 12: Assembling The Slats
Installati on instructi ons for the OPEN Classic out of pool automati c safety cover - 12/20 5. Assembling the slats Special care needs to be taken when handling the slats. Shearing can cause irreparable damage to the caps. This is why they must not be assembled by threading. -
Page 13: Installing The Stair Slats
13/20 - Installati on instructi ons for the OPEN Classic out of pool automati c safety cover 5.5 Installing the stair slats Fig. 28 Centre the stair cover in its housing and assemble it to the rest of the cover by making a notch in the double male hook on either side of the stairs in order to leave the space for the cap on the base stair slat. -
Page 14: Fixing The Apron To The Pool
Installati on instructi ons for the OPEN Classic out of pool automati c safety cover - 14/20 5.7 Fixing the apron to the pool Fig. 30 For IMM'AX, IMM'AX Solar Energy, IMM'BOX, VEESIO, NO STRESS, BANC Classic and BANC Solar Energy slatt ed covers, place the safety systems only on the width opposite the roller. -
Page 15: Fixing With The Coverlock System
15/20 - Installati on instructi ons for the OPEN Classic out of pool automati c safety cover 5.9 Fixing with the Coverlock system. Fig. 35 Make sure to positi on the harpoons and triggers in relati on to one another to obtain perfect alignment and correct operati on. - Page 16 Installati on instructi ons for the OPEN Classic out of pool automati c safety cover - 16/20 5.9.6 Fig. 40 Before opening, press on the lug and pull simultaneously upwards to remove the trigger. 5.9.7 Fig. 41 Open the cover to disconnect the system.
-
Page 17: Run Stop Adjustments
17/20 - Installati on instructi ons for the OPEN Classic out of pool automati c safety cover 6. Run stop adjustments 6.1 End of unrolling Fig. 44 6.1.1 Find the 2 end of run adjustment screws on the motor located between the post and the roller tube by pivoti ng the end of run cover. -
Page 18: Test Instructi Ons In The Event Of A Malfuncti On
Installati on instructi ons for the OPEN Classic out of pool automati c safety cover - 18/20 7. Test instructi ons in the event 7.1.9 If a voltage is not present or a value is diff erent, check again making sure that... -
Page 19: Direct Check Of The Motor
19/20 - Installati on instructi ons for the OPEN Classic out of pool automati c safety cover 7.3.5 Measure 24 V DC between the 3 and the 1 when the key is turned in one directi on 7.3.6 Measure 24 V DC between the 3 and the 2 when the key is turned in the other directi on 7.4 Direct check of the motor... -
Page 20: Checks
Installati on instructi ons for the OPEN Classic out of pool automati c safety cover - 20/20 8. Checks 9. Recepti on of the cover by the end user Check the following points relati ng to standard NF P 90-308 and check that the cover operates correctly:... - Page 21 ABRIBLUE LINE Slatted covers Safety instructi ons and user guide for automati c pool covers Please read carefully and keep available for later use Version 02/2013 AE-012-138-3GB/05-2014...
-
Page 22: Safety Advice
Safety instructi ons and user guide for automati c pool covers - 2/8 CONTENTS 1. Safety Advice 2. Advice for use 3. Upkeep advice 4. Maintenance advice 5. Winterisati on advice 6. Guarantee Compliance certi fi cates 1. Safety Advice WARNING: The pool can consti tute a serious danger to your children. -
Page 23: Advice For Use
• Remove all floating objects that could hinder the in order to avoid deforming it. correct operati on of the ABRIBLUE cover during its closure, and lock the access to the pool using the • It is essenti al, for safety reasons, to remove the key blocking straps. -
Page 24: Upkeep Advice
15° between the outside air and the water in order to prevent them from warping The maintenance of the ABRIBLUE automati c cover (case of a highly heated pool in a cold environment: is at the expense and under the responsibility of the mountain for example). -
Page 25: Maintenance Advice
AS POOL (ABRIBLUE) does not communicate directly with the pool owners. 5 For the IMM'Box: remove the key between the Have the automati c cover serviced by a swimming shaft and the motor or remove the motor. -
Page 26: Winterisati On Advice
Safety instructi ons and user guide for automati c pool covers - 6/8 6. Guarantee 5. Winterisati on advice Our one year guarantee only covers the replacement Winterisati on advice is described below, however, it is or the repair of a defecti ve part as well as all defects the installer's responsibility to recommend a soluti on or faults in the context of the installation, use, depending on the availability of the customer and the... - Page 27 The offi cial guarantee is in the slatt ed cover's container with the commissioning documents. This guarantee must be returned to the address below within eight days of the commissioning of the product. It gives the right to an extension of the guarantee for the Abriblue slatt ed cover motors to three years as from the commissioning date.
- Page 28 ............................................................................................................................................................................................................................................................................................................................................................................................ Product: COVER Range Company: AS POOL Address: zac de la Rouvelière F-72700 SPAY- LE MANS Tel.: +33 (0)811 901 331 Fax: +33 (0)243 479 850 contact@abriblue.com contact@abriblue.com www.abriblue.com www.abriblue.com...
Need help?
Do you have a question about the OPEN Classic and is the answer not in the manual?
Questions and answers