Advertisement
Mounting Heater
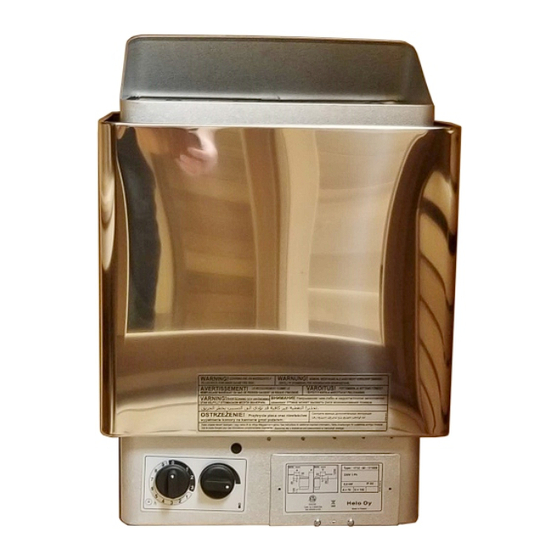
See template and heater mounting instruction packed in box with heater.
Drill four 9/64" holes to fasten the heater to the wall. Install two ¼" x 1 ¹⁄ "
hex head lag screws with two washers on each screw (supplied with the
heater) into the upper two holes. Tighten these screws until their heads are
about 1/8" from the wall surface. The screws must be threaded through the
wall into a framing member or backing board to support the heater weight.
Hang the heater on the two upper screws. Locate the two ¼" x 1" hex head
lag screws (supplied with the heater) then install them into the two lower
mounting holes. Tighten to lock the heater in place.
Electrical Access:
1. Remove the bottom cover from under the heater.
2. Remove the lower right cover to access electrical connections.
Electrical Connection of Heater
The sauna heater must be connected to the supply voltage by a qualified
electrician.
Must use 90°C rated wiring with copper wire. Heater must be grounded!
Route the feed wires through the holes provided in the bottom of the heater
and connect wires under the screw terminals. See chart below for correct
wire size.
Heaters are dual rated for 230volt and 240volt, single phase.
Table below shows 240 volt North American Standards:
HEATER MODEL /
Phase
Voltage
Product Number
1
230
CUP 30
1712-30-171809
1
240
1
230
CUP 45
1712-45-171809
1
240
1
230
CUP 60
1712-60-171809
1
240
1
230
CUP 80
1712-80-171809
1
240
1
230
CUP 90
1712-90-171809
1
240
72-0115
10/04/18
Saaku Sauna (Helo CUP)
QSG (Quick Start Guide)
Amps
Breaker
Size (AWG)
13.0
20
13.3
20
17.4
20
18.3
20
23.9
30
25.0
30
31.7
40
33.3
40
36.1
50
50
37.9
240V / 1 Phase
3,0 kW - 9,0 kW
1
2
3
4
5
6
L1
L2
90 ° Wire
kW
12-2 W/G
3.0
12-2 W/G
3.2
10-2 W/G
4.0
10-2 W/G
4.4
10-2 W/G
5.5
10-2 W/G
6.0
8-2 W/G
7.3
8-2 W/G
8.0
8-2 W/G
8.3
8-2 W/G
9.1
1 2 3
2
1
3
2
1
L1
L1 55
4 5 6
1.
2.
3.
1. Power input
2. N/A
3. N/A
314 SKSM 218 A
B1 B2 B3
A1 A2 A3
70146
21
Advertisement
Table of Contents

Subscribe to Our Youtube Channel
Related Manuals for TyloHelo Saaku CUP 30


Summary of Contents for TyloHelo Saaku CUP 30
- Page 1 Saaku Sauna (Helo CUP) QSG (Quick Start Guide) Mounting Heater See template and heater mounting instruction packed in box with heater. Drill four 9/64" holes to fasten the heater to the wall. Install two ¼" x 1 ¹⁄ " hex head lag screws with two washers on each screw (supplied with the heater) into the upper two holes.
- Page 2 Saaku Sauna (Helo CUP) QSG (Quick Start Guide) Timer The sauna heater is controlled by multi-stage timer. The timer is set by twisting the knob clockwise to desired setting. 1-3 refers to the run time(1, 2, or 3 hour duration). 0 position.
-
Page 3: Section 1: General Information
INSTALLATION AND OPERATING INSTRUCTIONS Page 1 WARNING Do not take a sauna if using alcohol, drugs or medications. Pregnant women or persons with poor health should consult their physician before using any sauna. Caution re hazard: Do not use the sauna room for drying clothes, bathing suits, etc. - Page 4 INSTALLATION AND OPERATING INSTRUCTIONS Page 2 DIAGRAM 1 MOUNTING BRACKET LOCATION AND TO MINIMUM DISTANCE TO COMBUSTIBLE MATERIAL (1” = 25.4 mm) (Upper Bench) 1 ¼” 14 3/8" B Guard Rail Screws Use the long screws in the upper holes of the mounting bracket Recheck your distances from the heater MINIMUM to combustible materials to be sure you...
- Page 5 INSTALLATION AND OPERATING INSTRUCTIONS Page 3 WARNING SECTION 2: MOUNTING OF SAUNA HEATER Fire sprinkler systems used For ease of operation, the heater controls may be mounted on the front or inside any sauna room should either side. If the controls are relocated, this should be done before be properly rated for sauna mounting the heater to the wall.
- Page 6 INSTALLATION AND OPERATING INSTRUCTIONS Page 4 DIAGRAM 3 DIAGRAM 4 THREE HOUR HEATING ZONE AND 9 HOUR DELAY TIMER MOVING THE CONTROLS This area from "OFF" to 3 is the "Heat Zone”. This is the only time the heater is on. HEAT ZONE Off...
-
Page 7: Section 4: Electrical Hook-Up
INSTALLATION AND OPERATING INSTRUCTIONS Page 5 WARNING SECTION 4: ELECTRICAL HOOK-UP Electrical installation must be made by a licensed electrician in accordance Do not locate benches over with the National Electrical Code and local regulations. heater. Minimum clearance of ceiling above heater 44". Remove the electrical cover on the bottom front right corner of the heater. - Page 8 INSTALLATION AND OPERATING INSTRUCTIONS Page 6 DIAGRAM 6 Lämpövastukset, Värmeelement, Tennid, Heating elements, Teho, Effekt Heizeelement, Resistores Térmicos, Éléments chauffants, Input, Potencia Elementy grzewcze, Topné prvky Leistung, Moc ТЭНы, Vöimsus,Wejscie 230V Puissance, Výkon SEPC 62 SEPC63 SEPC 64 SEPC 65 SEPC 65B 1000W 1500W 2000W...
- Page 9 INSTALLATION AND OPERATING INSTRUCTIONS Page 7 SECTION 7: HIGH LIMIT CONTROL (RESET BUTTON) The sauna heater has a built-in high limit control, which automatically turns off the heater if the temperature inside in the sauna room rises to an abnormally high level. The reset button can be accessed next to thermostat. To restart the heater, let the heater cool and turn the timer down to zero (off), then push the reset button on the bottom of the heater.
- Page 10 INSTALLATION AND OPERATING INSTRUCTIONS Page 8 DIAGRAM 7 DIAGRAM 8 TYPICAL PRE-CUT WALL CONSTRUCTION HEATER SCREEN (GUARD RAIL) 1/2" wallboard 2x4" framing min 1 ¹⁄ ” (30 mm) berglass insulation foil vapor barrier T&G soft wood 1/2" wallboard Heater Guard DIAGRAM 9 DIAGRAM 10 Correct Placement...
- Page 11 INSTALLATION AND OPERATING INSTRUCTIONS Page 9 WARNING SECTION 9: WARNING PLACARDS Intentionally Left Blank For safety purpose sauna door must open out and not lock. Never use a wood stain, seal or preservative on the inside of your sauna room. SECTION 10: ROOM CONSTRUCTION Light xtures get very hot For safety and reliability, the following rules must be addressed.
- Page 12 INSTALLATION AND OPERATING INSTRUCTIONS Page 10 DIAGRAM 11: ROOM TEMPERATURES Typical Ceiling Height Notes: Temperatures vary in a sauna room by height and distance from heater. Ceiling 90°C / 190° F Ventilation will help reduce it but will not eliminate temperature variations. Head Height The hottest part of the room is always at 70°C / 160°...
-
Page 13: Section 11: Ventilation
INSTALLATION AND OPERATING INSTRUCTIONS Page 11 SECTION 11: VENTILATION VENTILATION In a sauna, the air should be changed about 6 times an hour. This can be achieved by making a vent opening (fresh air inlet) in the sauna wall directly below the heater. The air outlet must opposite side of the room high on the wall.
Need help?
Do you have a question about the Saaku CUP 30 and is the answer not in the manual?
Questions and answers