Table of Contents
Advertisement
Advertisement
Table of Contents

Subscribe to Our Youtube Channel
Related Manuals for ATV aDrums EXS-3


Summary of Contents for ATV aDrums EXS-3
- Page 1 EXS-3 User’s Manual...
-
Page 2: Table Of Contents
Important Information about Use . . . . . . . . . . . . . . . . . . . . . . . . . . . . . . . . . . . . . . . . . . . . . . . . . . . . . . . . 34 Before using aDrums EXS-3 be sure to read ‘5 Important Notices’ p .33 . -
Page 3: Setup
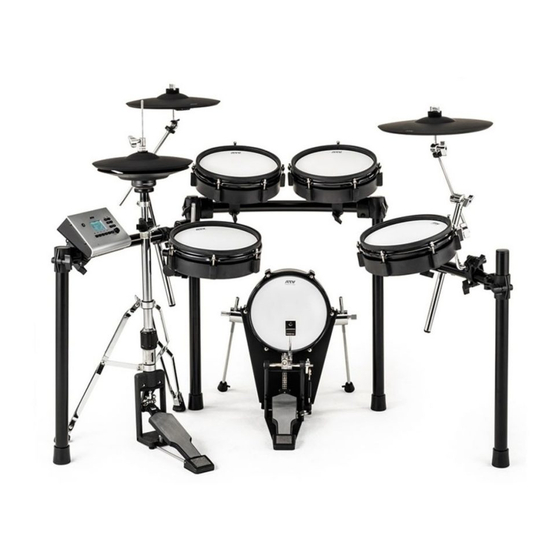
Setup Package Contents This product includes the following items . Spurs for Kick Pad x2 Crash Cymbal Pad Ride Cymbal Pad Kick Pad Hi-hat pad Snare Pad Tom Pads x3 AC adapter for hi-hat pad Quick Start Guide SD memory card Cable tie xD3 drum sound Drum key... -
Page 4: Assembly Guide
Setup Assembly Guide Connect tubes A to F as the figure right shows . *A corresponding label (A to F) is attached to each tube . Insert tube A into the tube C clamp Tube C *Securely tighten the clamp bolt Tube A Insert tube A and tube B into the clamps at the ends of tube D Tube D... - Page 5 Setup Insert tube A and tube B into the clamps at the ends of tube F Tube F Stand R 70mm Tube A *Securely tighten the Tube B clamp bolts Attach tube E clamps to stands L and R Tube E Stand L Stand R...
- Page 6 Setup Attach the cymbal boom arms *Securely tighten all bolts Attach the L-arm to the clamp (1) and the snare to the L-arm (2) *Securely tighten all bolts *Adjust the tension of the pad head using the included tuning key .
- Page 7 Setup Attach the tom L-arms to the clamps (1) and the toms to the L-arms (2) as shown *Securely tighten all bolts *Adjust the tension of the head using the tuning key included in the package . Attach the cymbal pads to the boom arms. Crash cymbal Ride cymbal Do not over tighten the wing-nuts .
- Page 8 Setup Attach the hi-hat cymbals AC adapter for hi-hat optical sensor (bottom cymbal) . Switch “On” (light is lit) . *This AC adaptor can be used worldwide . Please connect the adaptor to a plug attachment (several types included) that is correct for the country of use .
- Page 9 Setup Attach the xD3 drum sound instrument *After completing the assembly verify that all the bolts are securely tightened .
-
Page 10: Top Panel
[5] Button = LOAD TRACK –––––––––––––––––––––––––– DRUM KIT –––––––––––––––––––––––––– Buttons for which there are no 承認: 設計: 図面番 Mori corresponding menu items are unlit . . HOME 名称: MENU 2017.3.27 ENTER 発行:ATV株式会社 公差:±0.3 承認: 設計: 図面番 Mori SONG 2017.3.27 VARIATION 発行:ATV株式会社 公差:±0.3... -
Page 11: Rear Panel
Setup xD3 Rear Panel SD CARD Insert the included SD card that contains song data . Additional songs can also be The xD3 can be connected to a stored and loaded . The SD card is also used MIDI OUT Mac or Windows PC, allowing MIDI to back-up and import xD3 sound data . -
Page 12: Getting Ready
1 Getting Ready Connecting Audio Equipment In order to use the xD3, you will need the following items . • Headphones or powered speakers, etc . You can play along with your own songs by connecting a music player’s stereo line output to the xD3’s AUDIO IN jack . -
Page 13: Zones Supported By The Xd3'S Trigger Inputs
1 Getting Ready Zones supported by the xD3’s trigger inputs xD3 trigger Choke Supported zone Notes method input KICK Head Input hardware is only single-trigger capable . Side stick sound function can be enabled, see the user’s manual . SNARE Head,Rim (Only available on the snare input .) TOM 1... -
Page 14: Setup - Trigger Settings
1 Getting Ready Trigger Settings These settings are used to optimize the performance of the xD3 by calibrating the unit’s triggering sensitivity in response to signals from the pad sensors . Setting up the sensitivity of triggers is important when using the equipment for the first time or when changing the type of pad . -
Page 15: Cross-Talk Cancel Wizard
1 Getting Ready Cross-talk Cancel Wizard Follow the onscreen instructions and strike the indicated pad 3 times with powerful hits. Indicated Pad OK Display *If you press [RETRY], the strikes you made so far will be erased and you can start over . When "OK"... -
Page 16: Setup - Utility Functions
*Depending on the backup type, all or selected data in the xD3 will be deleted . Use to import drum kit data downloaded from the ATV Sound Import Kit Store to the xD3 . This enables you to expand the number of drum p.20... - Page 17 1 Getting Ready Backup Save Help Screen Save Display Use the value knob to select "File Name" and press the [ENTER] button. Enter the backup file name. Move the file name cursor position left < or right > by pressing buttons [4] and [5] below . Turn the value knob to an select an alphanumeric character .
- Page 18 1 Getting Ready Backup Load Delete Backup Load Backup Help Screen Display CAUTION When a backup is loaded, some or all of the data stored in the xD3 will be overwritten and deleted . This depends on the backup type . Use the value knob to select a backup file stored on the SD card.
- Page 19 1 Getting Ready Deleting a Backup File From the Utility tab of the Setup menu, use the backup load function to select and delete a backup file stored on the SD card . Use the value knob to select a backup file stored on the SD card. Below 'Loading Items' the backup file type is displayed.
- Page 20 ID does not match, the following message is displayed: "This xD3 doesn't have a permission to import "xxxx" ." ATV SOUND STORE This is a website where additional sounds for the xD3 can be purchased for download .
- Page 21 1 Getting Ready SD Card Format Format CAUTION Formatting the SD card will delete all its data . Insert the SD card into the xD3 drum module. Press the [5] (FORMAT) button. A confirmation screen will display prompting you to either proceed with formatting (YES) or cancel the process (NO) and return to the previous screen .
-
Page 22: Performing
2 Performing CLICK Home Screen The Home screen is displayed after turning on the power . Press the [1] (HOME) button from any screen to return to the Home Screen . The Home Screen is displayed when playing the drums . TRACK ––––––––––––––––––––––––––... -
Page 23: Changing The Drum Kit
2 Performing ENTER Changing the Drum Kit MENU MENU Press one of drum kit buttons [1]—[5]. LIST The drum kit saved for each button is loaded . –––––––––––––––––––––––––– DRUM KIT –––––––––––––––––––––––––– *It takes several seconds to load the drum kit . When the drum kit name is displayed, you can start playing. -
Page 24: Using The Metronome
2 Performing SONG VOLUME Using the Metronome Press the [ ] button. The metronome will start and the button LED will flash at the set tempo . ENTER MENU Use the value knob to adjust the tempo. MENU SONG VOLUME The tempo range is 20 - 300 BPM . -
Page 25: Menu Functions And Settings
3 Menu Functions and Settings Other xD3 functions and settings are accessible from the main menu screen . Press the [ENTER/MENU] button from the Home Screen. The menu will be displayed . Turn the value knob to select a menu item. Press the [ENTER] button to access the selected function or settings. -
Page 26: Song
3 Menu Functions and Settings SONG In the song screen, you can select a song for playback, adjust the volume level of a song, enable song looping, and set song markers . Screen display when a song is not playing. Song Number / Name Loop 'On' Icon... - Page 27 3 Menu Functions and Settings Loop setting When you enable the loop feature, the selected song will 'loop' and play repeatedly . When playback is stopped, press the [3] (LOOP) button to turn the loop function on / off. When song looping is enabled, a loop icon is displayed . Markers For each song you can set up to 9 markers at any position in the song .
- Page 28 3 Menu Functions and Settings Playing user audio files (wav) The xD3 supports the playback of wav format audio files (see below) . This enables you to copy your own wav files to the SD card and play them using the xD3's song function . Supported Format File Type Windows Wave (RIFF)
-
Page 29: Metronome
3 Menu Functions and Settings METRONOME In the metronome screen, various settings for the metronome can be selected and adjusted . These settings are described in the table below . Help Screen Tap Tempo Use the value knob to select a setting to adjust. Tempo Tempo in beats per minute (BPM) . -
Page 30: Recording
3 Menu Functions and Settings RECORDING The record screen enables you to record your drum performances; either solo, or while playing along to a song . The recording feature is a great tool for reviewing song performances . It can also be used create quick demo tracks that you can record onto an external device connected to the xD3's audio outputs . -
Page 31: Inst Level (Adjusting The Volume Of Each Pad)
3 Menu Functions and Settings INST LEVEL (Adjusting the volume of each pad) In this screen you can adjust the volume level of each pad for the selected drum kit . Strike the pad that you want to adjust the volume level for. -
Page 32: Detailed Information
4 Detailed Information Specifications Electronic Drum Sound Module Model: xD3 Item Specification AUDIO OUTPUT: L/R, mono ¼ inch (6 .35mm) jack x2 PHONES: stereo ¼ inch phone type AUDIO INPUT: stereo, 3 .5mm TRS jack MULTI-TRIGGER INPUT: dedicated multi-connector, 25 PIN D-sub to individual ¼ inch TRS plugs Terminals and Jacks CRASH 2 TRIGGER INPUT: ¼... -
Page 33: Important Notice
EXS-3, instrument or other goods and assets . Before using aDrums EXS-3, be sure to read all the safety information below . About the symbols About warnings and cautions "Caution": Calls your attention to a point of... -
Page 34: Important Information About Use
• This product incorporates audio / sound data contents in stereo equipment, mobile phone, or other electric devices . which ATV and third parties own copyrights . Using and Otherwise, the instrument, TV or radio may generate noise . copying these materials without permission (except for personal and other uses permitted by the copyright law) is •... - Page 35 . For korrekt behandling, indsamling og genbrug skal du kontakte dit lokale kommunekontor, affaldsstation eller butikken, hvor du købte produktet . ATV EUROPE LDA. Rua 28 de Janeiro, nr . 350 – Fração CC-11, Centro Empresarial Candal Park...
- Page 36 © 2019 ATV Corporation All rights reserved. 2019 Rev.02...
Need help?
Do you have a question about the aDrums EXS-3 and is the answer not in the manual?
Questions and answers