Table of Contents
Advertisement
Advertisement
Table of Contents

Related Manuals for Faro ALYA


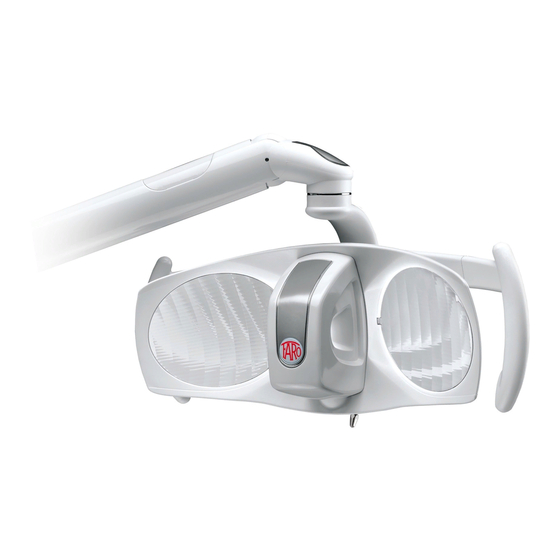
Summary of Contents for Faro ALYA
- Page 1 INSTALLATION AND USER’S MANUAL - EN ALYA Edition 2.0 Sept 2018 Pag. 1 di 32...
-
Page 2: Table Of Contents
4.2.2 Dental Light / Dental Light Head Head WITH PROXIMITY ..........21 4.2.3 Light / Complete light with Theia Tech / “ALYA” head WITH REMOTE CONTROL ....21 4.2.4 “ALYA” with Syncro command for “pairing” with Room Light ..........21 MAINTENANCE .......................... -
Page 3: Safety Requirements
SAFETY REQUIREMENTS Dear Customer, FARO hopes you enjoy your work with the new high quality light. For safe work and to take full advantage of the performance of the product, read carefully this manual before using the device. In particular, follow all the warnings and the notes given. -
Page 4: Symbols On The Pakaging
The device must never be modified without written authorization of FARO S.p.A. For maintenance only original FARO’s spare parts are allowed. Fail to comply with this warning will immediately make decay the warranty and the conformity of the product to international regulations and directives on Medical Devices. - Page 5 INSTALLATION AND USER’S MANUAL - EN ALYA Warnings against electrical danger and fire Do not use the light if any part of it is damaged. Installation of the device must only be carried out by qualified personnel. The dental light must be installed on a specific control and power supply device, such as dental units, or with an electrical system that meets standard IEC 60364-1 and “national installation...
-
Page 6: Storage And Use: Environmental Provisions
INSTALLATION AND USER’S MANUAL - EN ALYA STORAGE AND USE: ENVIRONMENTAL PROVISIONS The device in the original packaging can be transported and stored for a maximum period of 15 weeks if the following environmental conditions are met: • Environmental temperature from -20°C to + 70°C •... -
Page 7: General Features
Visual comfort. In the version with light on the rear arm called “Alya with Theia Tech” the light source is composed of a series of LED whose light passes through a beam diffuser for distribution in the area below. -
Page 8: Description Of The Parts
INSTALLATION AND USER’S MANUAL - EN ALYA The “Theia Tech” light version also has a local command intended only to provide on/off on the fixed arm. Once the local command is switched on, the light automatically synchronises with the level of intensity. If the light of the head is switched off, the light on the rear arm switches on to maximum intensity. -
Page 9: Device Installation
INSTALLATION AND USER’S MANUAL - EN ALYA The identification of the variant of Alya supplied is managed through the speaking Part Number used. The part number is made of 9 digits. In the table below is explained the meaning of the digits. -
Page 10: Dimensions
INSTALLATION AND USER’S MANUAL - EN ALYA DIMENSIONS Take care to leave free space around the light in order to avoid interference with fixed obstacles. The free space can be determined by the following dimensions: DENTAL LIGHT INSTALLATION 3.2.1 General Electrical requirements... -
Page 11: Safety Working Loads
Tab 1 – Requirements for electrical connection and compliance with IEC/EN 60601-1. Check the packaging contains the following parts: - Dental light / Dental Light Head (in the required version) - Sheet to download for site instructions www.faro.it/download 3.2.2 Safety working loads... -
Page 12: Remote Cable Connection
Warnings for electrical danger and suspended masses - The device has to be installed by specialized technicians only - The light has to be installed with FARO applications only. - The light is supplied with rotation limit switch between the fix and the mobile arm. - Page 13 INSTALLATION AND USER’S MANUAL - EN ALYA 3.2.6.1 Installation procedure A After having fixed as reference point the chair centre (A). install at a distance of 650mm and 150mm, according to the directions given in the figure. B. Unfit the flange (7) by removing the nuts (12) and washers (11).
- Page 14 INSTALLATION AND USER’S MANUAL - EN ALYA G. Calculate the proper length of the column (14), according to the formula L=H-DHC-1020 mm. Cut the exceeding column (14) part on the side were NO LATERAL BORES ARE PRESENT H. Insert them column (14) in the flange (7) and mark on the column (14) the position of the bores on the flange (7).
- Page 15 INSTALLATION AND USER’S MANUAL - EN ALYA R. Slip - from the top - inside the column (14) a traction cord. S. Connect the lamp conductor to the traction cord. T. Fit the lamp on the column (14) and fix it with the three screws (19); make sure the bores of the bushing (20) match the screws seat on the column (14) and tighten.
-
Page 16: Wall Mounting
INSTALLATION AND USER’S MANUAL - EN ALYA 3.2.6.3 Electrical drawing – ceiling mounting without transformer 3.2.7 Wall mounting Warnings for electrical danger and fall of suspended masses The device must be installed by specialized tecnicians The power supply in the room where the fitting must be installed must be always switched off. - Page 17 INSTALLATION AND USER’S MANUAL - EN ALYA A. Once the fastening point has been established with reference to the center of the chair (See fig.A-B), make three holes on the wall of diameter D 14 in correspondence with the holes in the wall application (3), paying attention to the perpendicularity between hole and wall.
-
Page 18: Floor Mounting
INSTALLATION AND USER’S MANUAL - EN ALYA 3.2.8 Floor mounting Warnings for electrical danger 1. Pin and suspended masses 2. Bush 3. Screw NB1. The device must be installed by 4. Column specialized technicians 5. Caps NB2. The power supply inside the room 6. -
Page 19: Headlight Installation
Warning for danger of suspended mass falling Only use screws supplied by FARO. Screw in the safety screws together. Before removing the nut (G) ALWAYS remove the safety screw F. NEVER unscrew the nut (G) with the screws F mounted. -
Page 20: Electrical Requirements
INSTALLATION AND USER’S MANUAL - EN ALYA 3.3.2 Electrical Requirements The requirements for correct installation of the head are as follows: Power Supply cables Power Supply requirements Type Conformity Supply Device 60601-1 17-24 Vac Transformer complies with IEC/EN Component The medical 50/60 Hz 60601-1 third edition. -
Page 21: Switching On/ Off And Adjust The Light Intensity
“ALYA” with Syncro command for “pairing” with Room Light Where provided, Alya can be connected by wireless connection to the Faro Room Light, in order to create a synchronized lighting system, called "Syncro". The procedure to create this connection is called “pairing”. -
Page 22: Maintenance
Alya lamp, the illumination value will immediately be updated. • If the Alya lamp is turned off, the environment lamp will remain switched on at the illumination value in use. -
Page 23: Cleaning
Eco Jet-1 (Cattani Group) / Sporekin Plus DS (Ims srl) / Zefirol Quick (Molteni Dental) / Durr FD366 Sensitive In case of wrong chemicals are used, rinse the surfaces with water and contact the FARO Service. Edition 2.0 Sept 2018... -
Page 24: Sterilization Of The Handles
Decontamination and disinfection Before sterilising the handles, they must be decontaminated and disinfected. To disinfect, Faro has tested the following products for disinfection: Eco Jet-1 (Cattani Group) / Sporekin Plus DS (Ims srl) / Zefirol Quick (Molteni Dental) / Durr FD366 Sensitive Attention - danger of plastic breaking The handles cannot be disinfected by thermo-disinfection. -
Page 25: Troubleshooting
INSTALLATION AND USER’S MANUAL - EN ALYA TROUBLESHOOTING Acoustic signals OpL** = Beep 30 seconds OTP* = Beep 30 seconds * OTP: LED Overtemperature ** OpL: Open LED detected Quick Guide to problems Edition 2.0 Sept 2018 Pag. 25 di 32... -
Page 26: 10 Techcnical Specification
Type of radiation Visible lights Typical distribution of illuminance Typical Spectral Distribution (*) Typical optical values subjected to tolerances Measurement performed at 700 mm distance. Contact Faro for the correct procedure for the measurement. Edition 2.0 Sept 2018 Pag. 26 di 32... -
Page 27: Electrical Drawings
INSTALLATION AND USER’S MANUAL - EN ALYA 10.1 ELECTRICAL DRAWINGS 10.2 Electronic Board in the Head 10.3 Electronic Board in the Rear Arm (present only with Theia Tech) Edition 2.0 Sept 2018 Pag. 27 di 32... -
Page 28: Electrical Scheme - Dental Light With Transformer (230 V Ac; 240 V Ac) Joystick
INSTALLATION AND USER’S MANUAL - EN ALYA 10.4 Electrical Scheme - Dental Light with Transformer (230 V ac; 240 V ac) Joystick Edition 2.0 Sept 2018 Pag. 28 di 32... -
Page 29: Electrical Scheme - Dental Light - Without Transformer Joystick
INSTALLATION AND USER’S MANUAL - EN ALYA Electrical Scheme - Dental Light – Without Transformer Joystick 10.5 Edition 2.0 Sept 2018 Pag. 29 di 32... -
Page 30: Electrical Scheme - Dental Light Equipped With Secondary Light On Rear Arm (Theia Tech)
INSTALLATION AND USER’S MANUAL - EN ALYA 10.6 Electrical Scheme - Dental Light equipped with secondary light on rear arm (Theia Tech) Edition 2.0 Sept 2018 Pag. 30 di 32... -
Page 31: Electrical Scheme - Dental Light Only Head
INSTALLATION AND USER’S MANUAL - EN ALYA 10.7 Electrical Scheme - Dental Light only Head Edition 2.0 Sept 2018 Pag. 31 di 32... - Page 32 INSTALLATION AND USER’S MANUAL - EN ALYA Edition 2.0 Sept 2018 Pag. 32 di 32...
Need help?
Do you have a question about the ALYA and is the answer not in the manual?
Questions and answers