Table of Contents
Advertisement
Quick Links
Advertisement
Table of Contents

Related Manuals for HOUNO CombiSlim II C


Summary of Contents for HOUNO CombiSlim II C
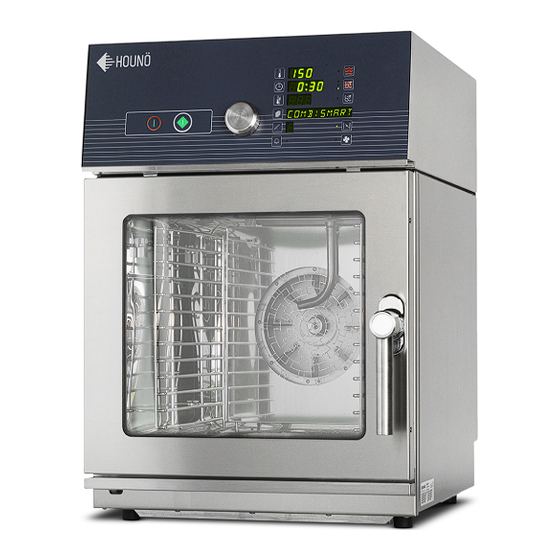
- Page 1 HOUNÖ User manual CombiSlim II C Version 1.1 x 10-2014...
-
Page 2: Table Of Contents
TABLE OF CONTENTS INTRODUCTION IMPORTANT SAFETY INFORMATION SAFETY INSTRUCTIONS Ready for use Maintenance and repair OPERATION PANEL SETTINGS Setting of temperature Setting of time Setting of core temperature (optional extra) Programmes Entering and changing text Entering and changing data in steps DESCRIPTION OF FUNCTIONS Hot air Preheating... - Page 3 TABLE OF CONTENTS INDICATIVE CORE TEMPERATURES Indicative core temperatures for beef, veal, pork and lamb Indicative core temperatures for fish LOW-TEMPERATURE AND LONG-TIME ROASTING Indicative bactericidal holding times USER MENU CLEANING Cleaning the oven chamber Cleaning the Oven Exterior TROUBLESHOOTING 26 SAFETY 29 SERVICE AND REPAIR 30 WARRANTY...
- Page 4 4 COMBISLIM USER MANUAL C...
-
Page 5: Introduction
The latest version of the manual can be downloaded from www.houno.com. At our website www.houno.com, you will find a great deal of information about HOUNÖ and our extensive range of CombiSlim combi ovens. -
Page 6: Important Safety Information
IMPORTANT SAFETY INFORMATION IMPORTANT SAFETY INFORMATION The following icons are used throughout this manual to draw special attention to safety related information. The service personnel should observe and/or act according to the infor- mation in order to obtain the best possible function of the oven. The service personnel must observe and/or act according to the infor- mation in order to avoid any personal injury or damage to the oven. -
Page 7: Safety Instructions
SAFETY INSTRUCTIONS SAFETY INSTRUCTIONS Ready for use When the oven is correctly installed, read this manual carefully before the oven comes into service. This manual should be kept handy to persons using the oven. Always place trays filled with hot liquid in the bottom runners of the oven chamber to avoid spilling the hot liquid on yourself when you take the tray out of the oven chamber. -
Page 8: Operation Panel
OPERATION PANEL OPERATION PANEL Main switch Turn switch On/off TEMPERATURE SETTING. Press once and HOT AIR 30-250°C. All modes and set temperature with TURN SWITCH. all optional extras are described on Enter by pressing symbol again. following pages. Preheating up to 300°C is a standard feature on models TIME SETTING. -
Page 9: Settings
SETTINGS SETTINGS Setting of temperature Press TEMPERATURE key once and set temperature with turn knob. Confirm by pressing TEMPERATURE key again. Setting of time Press TIME key. Time flashes. Choose desired time (hours and minutes) with turn knob. If the knob is turned all the way down to 0, ” -:--” (continuous operation) appears in the display. -
Page 10: Programmes
SETTINGS The computer calculates an average temperature thus ensuring that the core temperature is 100% correct. If the probe is inserted incorrectly, the advanced technology notifies you at once. The probe is inserted vertically in the thickest part of the product. When preparing products of very different sizes, you get a uniform quality by inserting the sensor in the smallest product and then moving it to a larger product when the core temperature alarm sounds. -
Page 11: Entering And Changing Data In Steps
SETTINGS To leave text editing without storing, press ALARM. The original text reappears. To delete the entire text, press the programmes key and ALARM simultane- ously for 2 seconds. When a key or the turn knob is idle for 20 seconds, the oven returns to select programme Entering and changing data in steps... -
Page 12: Description Of Functions
DESCRIPTION OF FUNCTIONS DESCRIPTION OF FUNCTIONS Hot air 30-250°C The hot air operating mode can be used for roasting, grilling, baking and gratinating. We recommend that you keep the damper open when roasting products at very high temperatures. It is possible to roast breaded products such as breaded fish and breaded pork chops. -
Page 13: Combismart
DESCRIPTION OF FUNCTIONS CombiSmart 30-250°C CombiSmart is a function for humidity control which allows you to adjust the humidity level in 10 steps (10-100). Press the damper key and adjust the level by turning the turn knob. Confirm the setting by pressing the damper key again. The control lamp next to the damper key will be on. -
Page 14: Manual Humidity Pulsing
DESCRIPTION OF FUNCTIONS Manual humidity pulsing When you press the key for STEAMING in the HOT AIR mode, you add humidity to the oven chamber. Humidity is added for as long as the key is held down. Steaming 30-120°C Can be used for steaming of all types of vegetables, pasta, rice, meat, eggs and the like. If the oven chamber is 100% loaded with frozen products, hard root vegetables or meat, it will take a little longer until the oven chamber is completely filled with humidity, and the preparation time will be longer than if the oven chamber is only half full. -
Page 15: Fan Speed
DESCRIPTION OF FUNCTIONS Fan speed Set the FAN speed by pressing the fan key and turn the knob. A fan speed between 20 and 50% is recommended for the baking of puff pastry, Danish pastry, cakes and small products as well as in the Delta-T and Cook-and-Hold modes. You may add 1 –... -
Page 16: Semi-Automatic Cleaning
SEMI-AUTOMATIC CLEANING SEMI-AUTOMATIC CLEANING Cool down oven chamber to 60°C. Press the programmes key and cleaning appears in the display. Press ON. Press ON When the alarm sounds (after 10 minutes) and add soap appears in the display, open oven door and spray detergent into oven chamber. Close oven door and the programme continues. -
Page 17: Indicative Core Temperatures
INDICATIVE CORE TEMPERATURES INDICATIVE CORE TEMPERATURES Indicative core temperatures for beef, veal, pork and lamb Subject Temperature Cuts of saddle, tenderloin and ham 60-65°C Roast of saddle, ham 65°C Cuts of meat containing a great deal of connective tissue, 80°C such as neck, brisket and shoulder Paté... -
Page 18: Indicative Core Temperatures For Fish
INDICATIVE CORE TEMPERATURES Meat containing a great deal of connective tissue, such as shoulder, brisket and neck, needs to be heated for a long time before it is sufficiently tender – for instance, a holding time of 30 – 90 minutes at a core temperature of 65-75°C (then it is ”low-temperature tenderising”... -
Page 19: Low-Temperature And Long-Time Roasting
LOW-TEMPERATURE AND LONG-TIME ROASTING LOW-TEMPERATURE AND LONG-TIME ROASTING Indicative bactericidal holding times Long-time roasting Roasting at a temperature between 110 and 150°C. Slow heating produces meat that is uniformly cooked. Low-temperature roasting Can be described as roasting below 100°C, the core temperature of the roast and the oven temperature being almost the same. - Page 20 LOW-TEMPERATURE AND LONG-TIME ROASTING Keeping qualities and indicative legal requirements from the Danish Ministry of Health The keeping qualities of heated meat vary a great deal according to the way the meat is packed while stored – from a few days for small cuts of meat to several weeks for sous-vide products.
-
Page 21: User Menu
USER MENU USER MENU To enter the user menu, press ALARM for 5 seconds while you are in the manual mode. The display briefly shows ”USER MENU”. The core temperature display shows ”b” and the number of the value to be set (see below). You leave the user menu by turning the turn knob beyond ”0”. - Page 22 USER MENU Value Function Description Interior light Press STEP: 0 = continuously on / 5 = off after 5 min. / 1 (B model) = continuously on but off when door open / 6 = off after 5 min. but off while door open. Current 0 = desired temperature / 1 = current temperature.
- Page 23 USER MENU Value Function Description Save all Press ALARM to make a backup of all settings in all modes and programmes. Retrieve all Press ALARM to retrieve all settings saved in all modes and programmes. Retrieve Press ALARM and retrieve all programmes preset by the ori-ginal menu manufacturer.
-
Page 24: Cleaning
CLEANING CLEANING Daily cleaning of the oven is recommended for hygienic reasons and to avoid interrup- tions of operation. The design of the HOUNÖ ovens allows quick and easy cleaning. The oven chamber is made of all-welded stainless steel, which makes it splash proof. You will therefore find the easy-to- use handshower, very suitable for interior cleaning. -
Page 25: Cleaning The Oven Exterior
CLEANING Cleaning the Oven Exterior 1. Use a soft, damp cloth and a liquid detergent to clean the oven cabinet on the outside, 2. Clean the door sealing around the door, 3. Treat the surface with HOUNÖ STEEL OIL to protect it. The steal oil is available from your supplier.(0.5 litre: part No. -
Page 26: Troubleshooting
TROUBLESHOOTING TROUBLESHOOTING If you experience issues with your oven, try the following solutions. Error Code Problem Possible solution Generator too hot The generator thermo switch has tripped. Press the button under the oven to reconnect. Oven too hot The oven chamber thermo switch has tripped. - Page 27 TROUBLESHOOTING Error Code Problem Possible solution SSR too hot The solid-state relay is too hot. Clean the inlet filter at the bottom of the panel. Contact authorized service personnel. Generator too hot The temperature of the steam generator is higher than 130°C. If the error recurs, contact authorized personnel to descale.
- Page 28 TROUBLESHOOTING Error Code Problem Possible solution Door sensor defective The door sensor does not work properly. The oven does not stop operating when the door is opened. The oven can still be used. Try to calibrate the door sensor. Water pressure too low Check that the water is turned on.
-
Page 29: Safety
SAFETY SAFETY Please read the safety instructions carefully. • Ensure that installation is carried out by authorized installation and service personnel only. • Read, understand, and follow the instructions for use. • Place trays filled with hot liquid at the bottom runners of the oven chamber and practice extreme caution when removing the tray from the oven chamber. -
Page 30: Service And Repair
SERVICE AND REPAIR SERVICE AND REPAIR • This advanced oven is subject to annual service. Contact the local Hounö Service Agent to plan regular update and maintenance or make a service contract. • All maintenance and repair should be carried out by authorized installation and service personnel only. -
Page 31: Warranty
The warranty covers the oven cabinet and spare parts. There is a special 10-year warranty on the exterior door glass. The warranty takes effect from the date of installation. To view the full terms of the warranty and to register, go to www.houno.com/ warranty/. - Page 32 HOUNÖ A/S ALSVEJ 1 DK-8940 RANDERS SV DENMARK T: +45 8711 4711 E: houno@houno.com www.houno.com PART OF...
Need help?
Do you have a question about the CombiSlim II C and is the answer not in the manual?
Questions and answers