
Related Manuals for HOUNO Combislim CPE series


Summary of Contents for HOUNO Combislim CPE series
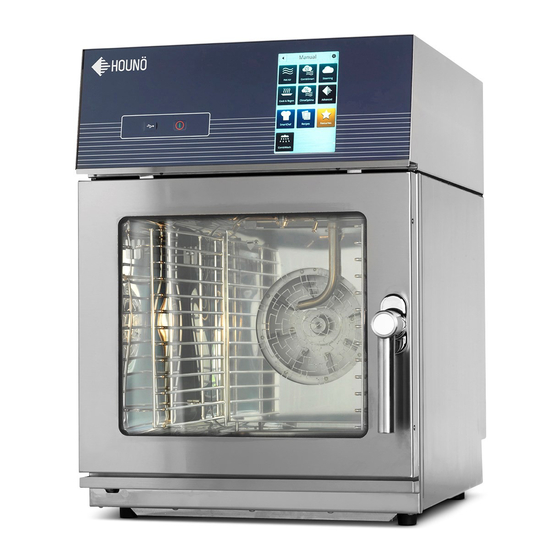
- Page 1 HOUNÖ SERVICE MANUAL English Combislim CPE Models Software Version 1_5_2 07/2017 CAUTION: Read these instructions before servicing the oven...
-
Page 2: Table Of Contents
TABLE OF CONTENTS INTRODUCTION UTILITY CONNECTIONS STANDARDS AND CODES IMPORTANT SAFETY INFORMATION SAFETY INSTRUCTIONS Ready for use Menu tree LOCATING THE SERIAL NUMBER OF THE OVEN 10 USING THE SMARTTOUCH DISPLAY ® Basic Operations SETTINGS MENU 12 CHANGING SETTINGS ON THE USER MENU 20 Setting the Oven Light Setting the Screen Saver... - Page 3 TABLE OF CONTENTS Specifying Middle East Specific Settings Update Platform Enabling Demo Mode Demo Mode Acceleration. Load Help From USB Touch sensitivity CLEANING 42 Cleaning the oven chamber Cleaning the Oven Exterior Cleaning Behind the Filter Housing Cleaning the Air Filter WATER LAYOUT 46 I/O BOARD LED 48 FREQUENCY INVERTER 49...
- Page 4 4 SERVICE MANUAL...
- Page 5 Please make the manual available to all who service and maintain the oven and retain it for future reference. The latest version of the manual can be downloaded from www.houno.com. Note that this document is subject to change without notice.
-
Page 6: Utility Connections
UTILITy CONNECTIONS IMPORTANT UTILITY CONNECTIONS WARNING: Improper installation, adjustment, alternation, service or maintenance can cause THE SERVICE INSTRUCTIONS CONTAINED HEREIN ARE FOR THE USE OF QUALIFIED property damage, injury INSTALLATION AND SERVICE PERSONNEL ONLy. INSTALLATION OR SERVICE By OTHER or death. Read the in- THAN QUALIFIED PERSONNEL MAy RESULT IN DAMAGE TO THE OVEN AND/OR INJURy TO stallation, operation and THE OPERATOR. - Page 7 STANDARDS AND CODES STANDARDS AND CODES U.S. and Canadian installations The installation must conform with local codes, or in the absence of local codes, with the National Fuel Gas Code, ANSI Z223.1/NFPA 54, or the Natural Gas and Propane Installation/service Code, CSA B149.1, as applicable. Installation/service must conform with local codes, or in the absence of local codes, with the National Electrical Code, ANSI/NFPA 70-Latest Edition and/or Canadian National Electric Code C22.1 as applicable.
-
Page 8: Important Safety
IMPORTANT SAFETy INFORMATION IMPORTANT SAFETY INFORMATION The following icons are used throughout this manual to draw special attention to safety related information. The service personnel should observe and/or act according to the infor- mation in order to obtain the best possible function of the oven. The service personnel must observe and/or act according to the infor- mation in order to avoid any personal injury or damage to the oven. -
Page 9: Safety Instructions
SAFETy INSTRUCTIONS SAFETY INSTRUCTIONS Ready for use When the oven is correctly installed, read this manual carefully before the oven comes into service. This manual should be kept handy to persons using the oven. Always place trays filled with hot liquid in the bottom runners of the oven chamber to avoid spilling the hot liquid on yourself when you take the tray out of the oven chamber. -
Page 10: The Oven
LOCATING THE SERIAL NUMBER OF THE OVEN LOCATING THE SERIAL NUMBER OF THE OVEN When you order parts or request service for your CombiSlim oven, you need the oven’s Serial Number, you can find the Serial Number and Type information on the right-hand corner post of the oven as shown in the illustration. -
Page 11: Display
USING THE SMARTTOUCH® DISPLAy USING THE SMARTTOUCH ® DISPLAY The SmartTouch display provides a friendly and easy way for you to operate and interact with the CombiSlim oven. you simply use the pads of your fingertips to perform the opera- tions. -
Page 12: Settings Menu
SETTINGS MENU SETTINGS MENU Before you can start the maintenance process or change settings, you have to open the Settings Menu. • On the Main Menu, touch the gear wheel icon to enter the Settings Menu. Role Access rights User Access to the User menu SuperUser Access to the User and SuperUser menus... -
Page 13: Menu Tree
SETTINGS MENU Menu tree • Main menu • User menu • SuperUser menu • Technician menu Main menu Recipes Favourites Manual Advanced USER MENU SUB LEVEL PARAMETER MENU Oven light continuous - 5min Screen saver 1min - 1hour Language 25 different languages Setup clock Set min - hour - date Software version... - Page 14 SETTINGS MENU SUPER SUB LEVEL SUB LEVEL PARAMETER USER MENU MENU MENU SETTINGS Sounds Finished Sound file 138 sound files Recipe notification Repeat 1-100 repetitions Racktimer finish Door open Volume 0-100% Probe missing Insert product Repeat delay 0,5sec - 60,0 sec Error Timer start Playback rate...
- Page 15 SETTINGS MENU SUPER SUB LEVEL PARAMETER USER MENU MENU SETTINGS Adjustments Cook and hold offset 3 - 10 degrees Delta T offset 10 - 70 degrees Cook and Regen pulse interval 3 - 24 sec Proving pulse interval 12 - 44 sec Proving pulse length Calibrate Calibrate front door...
- Page 16 SETTINGS MENU SUPER USER SUB LEVEL PARAMETER MENU MENU SETTINGS USB system report Generate system report Install new software Application update Restart oven Restart oven yES - NO License manager Purchase the license codes Keypad from HOUNÖ to unlock/activate Advanced racktimer special features.
-
Page 17: Menu
SETTINGS MENU TECHNICIAN SUB LEVEL PARAMETER MENU MENU SETTINGS Test function Oven test Main contactor Exhaust Heat Drain Cooling fan Oven light Door 1 (open - closed) Oven temperature (C/F°) Drain temperature (C/F°) Exhaust (open - closed Fan test High left High right Low Left Low right... - Page 18 SETTINGS MENU TECHNICIAN SUB LEVEL PARAMETER MENU MENU SETTINGS Miscellaneous test External vent Core temp C/F° C/F° C/F° I/O temp (C/F°) CPU temp (C/F°) Oven setup Oven number input Enter serial number HO - BL - LE - LA - DI - KB Oven size S2306-S1,06-S1,10 Wash system...
- Page 19 SETTINGS MENU TECNICIAN SUB LEVEL PARAMETER MENU MENU SETINGS Adjustments Oven temp offset -10 +10 Core temp offset -10 +10 Core temp sous vide -10 +10 Detergent conversion 10 - 30 ML/S Rinse Aid conversion 10 - 30 ML/S Settings Fan Speed alarm yes - No Need rinse...
-
Page 20: Setting The Oven Light
CHANGING SETTINGS ON THE USER MENU CHANGING SETTINGS ON THE USER MENU you change the basic settings from the User Menu. • On the Settings Menu, touch the User button. Setting the Oven Light To set oven light, touch Oven light. Drag your finger up or down to select Continuous or 5 min., and then touch OK. -
Page 21: Superuser Menu
CHANGING SETTINGS ON THE SUPERUSER MENU CHANGING SETTINGS ON THE SUPERUSER MENU you can access the following areas on the super user display. • Sounds (See Setting Alarm Sounds on page 21) • Settings (See Changing Settings on page 28) •... -
Page 22: Changing Settings
CHANGING SETTINGS ON THE SUPERUSER MENU Set the desired sound properties. For each event, you can specify the following properties. Property What it does Sound Set Used to select the desired sound set for the alarm. The default sound set is Android. Sound File Used to select the specific sound from the set. -
Page 23: Changing Settings
CHANGING SETTINGS ON THE SUPERUSER MENU Changing Settings The following describes the settings you can change via the SuperUser Menu. HACCP Logging you can specify whether you want the oven to automatically store and save HACCP (Hazard Analysis and Critical Control Points) data about the preparation process. If you enable this option, you can access information about production time and duration as well as production temperature and core temperature. -
Page 24: Changing Settings
CHANGING SETTINGS ON THE SUPERUSER MENU Core probe warning. Give an alarm if core probe is missing. Temp unit. Chuse between Celsius or Fahrenheit. Volume system. This parameter setup the application to Metric or US. Hardness Unit. This parameter set up the aplicatio to Cook To Perfection, CTP tolerance and CTP threshold. -
Page 25: Changing Settings
CHANGING SETTINGS ON THE SUPERUSER MENU Time Format you use the Time format setting to specify whether you want the oven to use a 24-hour time format or a 12-hour time format. The default setting is 24. On the SuperUser display, touch Settings, and then touch Time format. Drag your finger up or down to select 24 or 12, and then touch OK. -
Page 26: Adjustments
CHANGING SETTINGS ON THE SUPERUSER MENU Date Format you use the Date format setting to specify how you want the date displayed. The default setting is DD-MM-YYYY. On the SuperUser display, touch Settings, and then touch Date format. Drag your finger up or down to select DD-MM-YYYY or MM-DD-YYYY, and then touch OK. -
Page 27: Changing Settings
CHANGING SETTINGS ON THE SUPERUSER MENU Cook and Regaen pulse interval you use the Reheat pulse interval setting to specify the interval in seconds between injections of water during the regeneration process. The injection itself lasts 1/10 of a second. The default setting is 8 seconds. On the SuperUser display, touch Adjustments, and then touch Reheat pulse interval. -
Page 28: Calibrating The Oven Door Sensor
CHANGING SETTINGS ON THE SUPERUSER MENU Calibrating the Oven Door Sensor you use the Calibrate setting to calibrate the oven door sensor. The oven door sensor has been calibrated prior to delivery, but we recommend that you calibrate the oven after the oven has been installed in its proper location and when the CPU has been replaced. -
Page 29: Logs And Statistics
CHANGING SETTINGS ON THE SUPERUSER MENU Logs and Statistics you can use the logs and statistics to see which processes failed and when they failed. Fault Log The Fault log displays the latest thirty errors in a list with the most recent error on top. On the SuperUser display, touch Logs and statistics, and then touch Fault log. -
Page 30: Changing Settings
CHANGING SETTINGS ON THE SUPERUSER MENU Water meter The water meter functions is used to display and setup the amount of water consumed and set up the Hydro shield filters. Total counter displayed the amount litres consumed. 2. Trip counter displayed the amount of litres consumed since last reset. Filter Hardness setting of the inlet water, so the CPU can calculate the capacity of the Hydro shield filter. -
Page 31: Usb System Report
This function will stor a datalog of events, on to a usb stick if a software problem continiue causing problem after the oven have ben updated to the latest version. Log file is to be send to Logfile@Houno.com. This function is to be used on demand from HOUNÖ tecnical support and the . Install new software This function updates the application. -
Page 32: Technician Menu
SETTINGS AND FUNCTIONS IN THE TECHNICIAN MENU SETTINGS AND FUNCTIONS IN THE TECHNICIAN MENU you can access the following areas on the Technician Menu. • Test Functions (See Using the Test Functions on page 32) • Oven setup (See Changing the Oven Set-up on page 35) •... - Page 33 SETTINGS AND FUNCTIONS IN THE TECHNICIAN MENU Testing the Oven On the Technician display, touch Test functions, and then touch Oven. Touch each button in turn to test the functions. The button turns green if the component is active. At the bottom of the display the status of a number of input functions is displayed.
- Page 34 SETTINGS AND FUNCTIONS IN THE TECHNICIAN MENU Testing the CombiWash Function On the Technician display, touch Test functions, and then touch Wash. Touch each button in turn, to determine whether the detergent and rinse aid pumps are working properly. The Water button tests whether the solenoid valve is working properly.
- Page 35 SETTINGS AND FUNCTIONS IN THE TECHNICIAN MENU Miscellaneous test On the Technician display, touch Test functions, and then touch Miscellaneous. Touch External vent, to test if the external ventilation is working. The outlet is named terminal no.2. When external ventilation is activated, the outlet is active during program performance and until 10 minutes after the program has completed.
- Page 36 SETTINGS AND FUNCTIONS IN THE TECHNICIAN MENU Testing the Alarm This function tests the thermo-switch circuit. On the Technician display, touch Test functions, and then touch Main alarm. Touch Main contactor. If all status values are displayed in green and the status is On, it indicates that the alarm is working properly.
-
Page 37: Changing The Oven Set-Up
SETTINGS AND FUNCTIONS IN THE TECHNICIAN MENU Changing the Oven Set-up Oven serial number Input Enter the serial number from the Type shield on the rightside of the oven 0000-00000 This function is for the private label costumers. Default setting is HO (HOUNÖ) Specifying the Oven Type On the Technician display, touch Oven setup, and then touch Oven type. - Page 38 SETTINGS AND FUNCTIONS IN THE TECHNICIAN MENU Drain cooling This function set up the drain cooling mode settings. To optimise and reduce the amount of water send in to drain for cooling. Function Description Off No drain cooling. On - when using water. On - All functions Auto Humidity On the Technician display, touch Oven setup, and then touch Auto humidity.
-
Page 39: Making Temperature Adjustments
SETTINGS AND FUNCTIONS IN THE TECHNICIAN MENU Making Temperature Adjustments Use this function to adjust the oven or the core temperature offsets. This is useful when the temperature should correspond with the temperature of a 3rd party probe. The default setting is 0. -
Page 40: Changing Oven Settings
This function will update the software version in the CPU to the latest version to optimise the functionality of the oven. The latest Software version is available on our webpage at WWW.HOUNO.com. Install the latest software version on a usb stick. -
Page 41: Enabling Demo Mode
SETTINGS AND FUNCTIONS IN THE TECHNICIAN MENU Enabling Demo Mode When you want to use the oven for demonstration purposes, you should enable demo mode. When demo mode is enabled, the heating elements and the steam generator will not be switched on when the oven is running. On the Technician display, touch Demo Mode. -
Page 42: Cleaning
CLEANING CLEANING Daily cleaning of the oven is recommended for hygienic reasons and to avoid interruptions of operation. The design of the HOUNÖ ovens allows quick and easy cleaning. The oven chamber is made of all-welded stainless steel, which makes it splash proof. you will therefore find the easy- to-use handshower (optional extra), which is located under the front panel, very suitable for interior cleaning. -
Page 43: Cleaning The Oven Exterior
CLEANING Cleaning the Oven Exterior Use a soft, damp cloth and a liquid detergent to clean the oven cabinet on the outside, 2. Remove the door sealing to clean under and around the door, 3. Treat the surface with HOUNÖ STEEL OIL to protect it. The steal oil is available from your supplier.(0.5 litre: part No. -
Page 44: Cleaning The Air Filter
CLEANING Cleaning the Air Filter The air filter is located in the filter housing at the back of the top panel, it is removed by lifting ot out of the the slot where it sits. The filter should be cleaned on a weekly basis. you can clean the filter manually or in a dishwasher. - Page 45 CLEANING SERVICE MANUAL 45...
-
Page 46: Water Layout
WATER LAyOUT WATER LAYOUT 46 SERVICE MANUAL... - Page 47 WATER LAyOUT WATER LAYOUT Component position and description. Item Description Rinse-Detergent pump Water pressure switch Rinse-Detergent pump Solenoid valve Washing rotor Injection steam Seal between oven cavity and drain box Drip tray Drain cooling nozzle Ø mm drain ventilation tube Rubber hose connecting the ventilation tube to the drain box.
-
Page 48: I/O Board Led
I/O BOARD LED I/O BOARD LED Description of LED connections on the I/O board. No Colour Volt Plug. Pin DESCRIPTION Green Main Voltage to main contactor ok. Green ER5 J14 Pin 5 Voltage fan alarm switch ok Green ER4 J14 Pin 4 Voltage oven overheating switch ok. -
Page 49: Frequency Inverter
FREQUENCy INVERTER FREQUENCY INVERTER When replacing the frequency inverter.: Always check that the frequency invertor potenti- ometers and dip switches are set up correct. To gain access to the potentiometer for adjustment the small transparent hatch with a small screwdriver. as shown in the drawing. ADJUSTMENT OF THE 3 POTENTIOMETERS OF THE FREQUENCY INVERTER Motor i nom This potentiometer controls the current output of the frequency... -
Page 50: Error Codes
ERROR CODES ERROR CODES ERROR CODE DESCRIPTION Oven too hot. Fan too hot. Drain too hot. Oven sensor defective. Core probe not connected. Drain sensor defective. I/O board to hot. Internal error. No communication. Invalid recipe. Program terminated. Oven too hot. Error in alarm. -
Page 51: Troubleshooting Error Codes
TROUBLESHOOTING ERROR CODES TROUBLESHOOTING ERROR CODES Troubleshooting procedure step by step on error codes. If the oven displays an error code, try the solutions below before contacting HOUNÖ technical service. After each step is carried out, be sure to test if the oven is working again. Error Code 4 The overheating switch of the oven chamber is off because the oven chamber temper- ature has risen above 350°C/662°F. - Page 52 ERROR CODES Error Code 5 The fan motor is too hot (above 120°C/248°F). Let the motor cool off for about 20-30 minutes and then try turning it on again. Steps Check list Solution Go to the test menu (main alarm) to see which information is displayed.
- Page 53 ERROR CODES Error Code 7 The temperature sensor in the oven chamber is broken. The oven cannot be used until the error has been corrected. Steps Check list Solution Go to the test menu (oven) to see which temperature is displayed. Check the cable and the cable plugs and change the plug if necessary.
- Page 54 ERROR CODES Error Code 10 The temperature sensor in the drain is broken. The oven can still be used, but the error has to be corrected as soon as possible. Steps Check list Solution Go to the test menu (oven) to see which temperature is displayed.
- Page 55 ERROR CODES Error Code 16 The IO board temperature has risen above 60°C/140°F. Steps Check list Solution Go to the test menu to see which infor- mation the computer displays. Check whether the ambient temperature is Move the oven if necessary, too high.
- Page 56 ERROR CODES Error Code 21 Invalid program. The program you have chosen is not supported by the oven. Steps Check list Solution Go to the USB key function. Download the program combination that matches this oven type. Error Code 22 Program interrupted.
- Page 57 ERROR CODES Error Code 28 An invalid combination of the mains alarm has been detected. The mains alarm is not displayed correctly. Steps Check list Solution Go to the test menu (alarm test) to see which one of the over heat safety switches is not sending a feedback signal to the I/O board connector J14.
- Page 58 ERROR CODES Error Code 34 The water pressure is too low. (less then 1,5 bar) Steps Check list Solution Pull a wire one of the water pressure switch If yES: replace the sensor. to check if the signal changes to yES Check that the water is turned on.
- Page 59 ERROR CODES Error Code 39 There is insufficient memory to run the selected operation. Steps Check list Solution If possible, delete some HACCP files. Error Code 40 The IO board temperature has been too high. Note that this is a warning. If the temperature continues to rise, the oven will stop and display error code 16.
- Page 60 ERROR CODES Error Code 44 Exhaust error. At every start up the CPU makes the valve run a reference round. Steps Check list Solution Use the technicians test menu, oven test. Test if the exhaust valve works and the switch sends a signal back to the CPU. If the motor is rotating the valve but there If exhaust signal changes in is no on/off signal from the switch.
- Page 61 ERROR CODES Error 71 Core probe warrning Steps Check list Solution Go to technician test menu and check if one is showing a different the feedback values from the three pt100 value then the rest, replace sensors in the core probe core probe.
- Page 62 ERROR CODES Error 83 Filter change needed. Steps Check list Solution The filter capacity has reached its Replace filter. capacity limit. Error 84 User ignored filter change. Steps Check list Solution User has ignored to change the Hydro Change the Hydro Shield Shield water filter.
-
Page 63: Service And Repair
SERVICE AND REPAIR SERVICE AND REPAIR • All maintenance and repair should be carried out by authorized installation and service personnel only. Installation or service by other than authorized personnel may result in damage to the oven and/or injury to the operator. •... - Page 64 2. The warranty period can be postponed up to 6 months to start at the installation date. Register the oven at HOUNÖ’s website www.houno.com to validate the extended parts warranty. The unit must be registered within 8 weeks from the date of installation.
- Page 65 SERVICE AND REPAIR 7. The warranty does not cover incorrect installation . This applies to defects and damage in connection with the use of soiled, aggressive water, sub-standard gas, or electricity with unsuitable voltage or current. a. Water quality must be verified during installation and if required, appropriate filter must be applied and cartridge replaced as specified.
- Page 66 HOUNÖ A/S ALSVEJ 1 DK-8940 RANDERS SV DENMARK T: +45 8711 4711 E: houno@houno.com www.houno.com www.hounoshop.com PART OF...
Need help?
Do you have a question about the Combislim CPE series and is the answer not in the manual?
Questions and answers