
Related Manuals for VHF Z4


Summary of Contents for VHF Z4
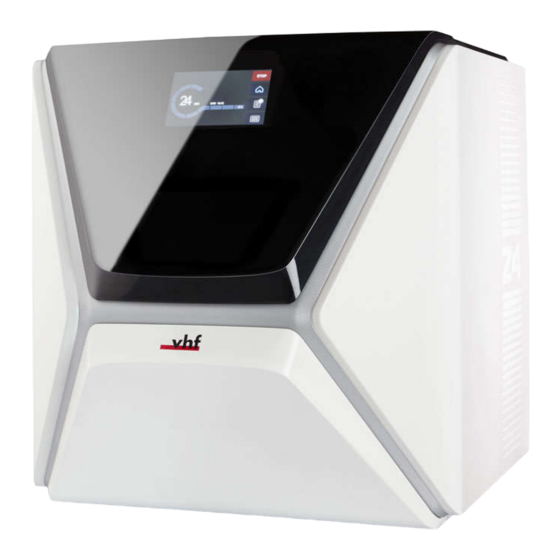
- Page 1 Original Operating Instructions Originalbetriebsanleitung Instrucciones de uso originales Mode d’emploi d’origine Istruzioni d’uso originali dentalportal.info...
-
Page 3: Table Of Contents
Exchanging the coupling of the cooling liquid tank Opening closing the multi-purpose drawer Exchanging the view window wiper The user interface on the touchscreen Updating the software and firmware The Home section of the touchscreen Original Operating Instructions: Z4 Version: 12/5/2018... - Page 4 EN 4 Contents Updating the firmware of the machine Updating DentalCAM DentalCNC Maintenance table 9 Disposal Disposing of the cooling liquid Disposing of the machine 10 Troubleshooting Index Original Operating Instructions: Z4 Version: 12/5/2018...
-
Page 5: Welcome
EN 5 Welcome 1 Welcome Information to make work more efficient Thank you for your purchase of this Z4 dental Important information without any danger for machine. The machine is delivered to you with pride people or objects and confidence. It was produced using the latest tech- niques and strict quality control. -
Page 6: General Safety Instructions
EN 6 Z4 – General safety instructions 2 General safety Do not touch the machine and especially the instructions cables with wet or damp hands. Check the environment of the machine and all accessible internal areas daily for leaked liquid and... - Page 7 EN 7 Z4 – General safety instructions Health risks through constant moving or during machining. malpositioning if your working environment is not sufficiently ergonomic While in any “Service Mode”: Everyone within reach of the machine must wear pro- Over the long run, an improper or one-sided posi- tective eye wear.
-
Page 8: Operating Regulations
EN 8 Z4 – Operating regulations 3 Operating regulations Do not manufacture implants or parts of objects that are designed to have contact with implants. These parts include parts of two-part abutments If you violate the following regulations, you may lose which contain the connection geometry for the your entitlement to benefits. -
Page 9: Transportation And Storage
EN 9 Z4 – Operating regulations Transportation and storage Install the transport lock. For this, follow the cor- responding steps on the supplement in reverse WARNING order. Ensure that the housing of the machine is com- Injuries caused by unsafe transportation pletely closed. -
Page 10: Machine Overview
Z4 – Machine overview 4 Machine overview Rear side of the machine With your Z4 you can process blanks of different mater- ials to create high quality objects for the dental sector. You can find a list of the materials which you can process with the machine in the manufacturing soft- ware. -
Page 11: Touchscreen
EN 11 Z4 – Machine overview Touchscreen Working chamber The screen in the working chamber door of your You can mount blanks and insert tools into the machine responds to touch. You can use it to operate working chamber. This is where the blanks are the machine by selecting icons on the user interface processed. -
Page 12: Multi-Purpose Drawer
EN 12 Z4 – Machine overview Multi-purpose drawer Sound emission The multi-purpose drawer contains the cooling liquid The actual sound emission of the machine varies tank and up to 5 tool magazines. You can unlock the heavily depending on the manufacturing material and multi-purpose drawer via the touchscreen and then the machining conditions. -
Page 13: Location Of The Identification Plate Serial Number
EN 13 Z4 – Machine overview Location of the identification plate serial number The identification plate of the machine contains identi- fying information such as the serial number. You can find the identification plate and machine serial number at the following location: . -
Page 14: Technical Data
EN 14 Z4 – Machine overview Technical data Removable Dishwasher-safe Base system Flow sensor for monitoring the flow of the cooling liquid Connections Dimensions: (W/D/H): Footprint: approx. 400 x 305 mm Power connection: 100 – 240 V AC, 50/60 Hz including Housing fully closed: approx. -
Page 15: Installing The Machine
EN 15 Z4 – Installing the machine 5 Installing the machine 1 x Machine Z4 1 x Cleaning brush Checking the scope of delivery 5 x Tool magazine inserts 1 x Power cable Unpack the machine and ensure that you have... -
Page 16: Choosing The Installation Site
EN 16 Z4 – Installing the machine Choosing the installation site Distances to maintain The installation site must meet the following criteria: NOTICE Firm and even surface, must be able to carry the Damaging of the machine if safety weight of the machine (66 kg) - Page 17 EN 17 Z4 – Installing the machine Machine installation (schema) Wired connection WiFi connection Original Operating Instructions: Z4 Version: 12/5/2018...
-
Page 18: Establishing The Electric Connection
EN 18 Z4 – Installing the machine Establishing the electric con- Removing the transport lock nection Before operating the machine for the first time, you must remove the transport lock. The transport lock NOTICE prevents the spindle from getting damaged during transport. -
Page 19: Cad Computer Network Integration
EN 19 Z4 – Installing the machine CAD computer network integ- Internal CAM computer ration The machine is equipped with an internal CAM computer running the manufacturing software The CAD / CAM integration workflow is as follows: DentalCAM DentalCNC. Manufacturing data is trans-... -
Page 20: Accessing The Cam Computer
EN 20 Z4 – Installing the machine Accessing the CAM computer If a local network is not available, connect the CAD computer to the Ethernet port of the NOTICE machine with an Ethernet cable. Ensure that the internal CAM computer of the... - Page 21 EN 21 Z4 – Installing the machine Overview CAM computer access data Accessing Windows on the CAM computer ® using a Remote Desktop connection Following you find the access data for the internal ® CAM computer as a quick reference.
- Page 22 EN 22 Z4 – Installing the machine Accessing the CAM computer via hardware You are prompted to enter the login credentials. You can directly connect a monitor and / or USB Enter the following login credentials: devices to the CAM computer.
- Page 23 EN 23 Z4 – Installing the machine Accessing the DentalCAM DentalCNC Activate the interface of the CAM computer with installation folder the connected input device (e. g. mouse, key- board, touch display). You can access the DentalCAM DentalCNC install- ®...
-
Page 24: Integrating The Cad With The Cam / Cnc Software
EN 24 Z4 – Installing the machine Integrating the CAD with the CAM / CNC Access the CAM computer via the Remote software Desktop application or direct hardware con- nection. The integration details depend on the used CAD ® Configure Windows on the CAM computer for application. - Page 25 EN 25 Z4 – Installing the machine TRIOS Design Studio Activate the CAD/CAM integration activated option. This CAD application uses the standard DentalCAM folder for sending objects to the machine. Activate the Integrated CAM computer option. Integration overview: If you want to change the language of the...
- Page 26 Confirm your choice. Locate the Supported mills and printers section. The Z4 must be listed in this section. If it isn t, you may need to obtain a license from 3shape for the Z4. . 20 – T UPPORTED MILLS AND PRINTERS SECTION IN...
- Page 27 EN 27 Z4 – Installing the machine exocad ChairsideCAD The following happens: This CAD application uses a designated shared data A network drive is mapped to the shared folder on the CAM computer for sending jobs to the data folder on the CAM computer.
- Page 28 EN 28 Z4 – Installing the machine Dental Wings Chairside CAD CAD/CAM integration: Data transfer folder label. Setting up exocad ChairsideCAD This CAD application uses a designated shared data folder on the CAM computer for sending jobs to the ®...
- Page 29 EN 29 Z4 – Installing the machine The following happens: CAD/CAM integration: Data transfer folder label. Setting up Dental Wings Chairside CAD A network drive is mapped to the shared data folder on the CAM computer. On the CAD computer, open Dental Wings Chair- For this, the first available drive letter on the CAD side CAD.
- Page 30 EN 30 Z4 – Installing the machine . 23 – S PECIFYING THE OUTPUT PATH IN ENTAL INGS HAIRSIDE Save your changes. From now on, Dental Wings Chairside CAD auto- matically suggests exporting dental objects into the specified folder. Do not manually change the folder or else the CAM computer will not find the jobs.
-
Page 31: Operation: Preparing Jobs
EN 31 Z4 – Operation: Preparing jobs 6 Operation: Preparing Starting the machine jobs NOTICE Short-circuit hazard when the machine is Before you can machine blanks, you need to prepare too cold the machine. The corresponding jobs must have been... -
Page 32: Starting The Machine With A Tool In The Collet Chuck
EN 32 Z4 – Operation: Preparing jobs Starting the machine with a tool in the collet chuck Under some circumstances like a power outage, there can be a tool in the collet chuck of the spindle when you start the machine. You need to remove the tool from the collet chuck before you can use the machine. -
Page 33: Shutting Down The Machine
EN 33 Z4 – Operation: Preparing jobs Shutting down the machine DANGER Danger of an electric shock if unplugging the power cable before switching off the machine If you unplug the power cable while the main power switch is still in “ON” position, residual voltage in the power cable may cause you to suffer from an electric shock. -
Page 34: Opening Closing The Working Chamber Door
EN 34 Z4 – Operation: Preparing jobs Opening closing the working The connection to DentalCNC may fail for the chamber door following reasons: The start of DentalCNC is delayed because of NOTICE ® Windows updates. The CAM computer encountered a hardware / Damaging of the machine by operating the software problem. -
Page 35: Opening Closing The Multi-Purpose Drawer
EN 35 Z4 – Operation: Preparing jobs Opening closing the multi-pur- pose drawer NOTICE Damaging of the machine by operating the multi-purpose drawer inappropriately If you open the multi-purpose drawer by force, if you do not maintain it properly or if you do not remove leaked cooling liquid, the machine may get damaged. -
Page 36: The User Interface On The Touchscreen
EN 36 Z4 – Operation: Preparing jobs The user interface on the touch- screen With the touchscreen, you can operate the main func- tions of the machine: Controlling basic machine functions Managing and executing jobs Viewing the progress of the current job... -
Page 37: The Jobs Section Of The Touchscreen
EN 37 Z4 – Operation: Preparing jobs . 34 – J OBS SECTION Job details and patient information . 33 – H OME SECTION IN Required blank type Check box for the required tool magazine Job details and patient information... -
Page 38: The Tools Section Of The User Interface
EN 38 Z4 – Operation: Preparing jobs Exchanging the cooling liquid and The Tools section of the user interface cleaning the tank NOTICE Damages caused by wet machining with unsuitable cooling liquid Wet machining without suitable cooling liquid can damage the machine, tools and blanks. -
Page 39: Exchanging Or Filling In The Cooling Liquid
EN 39 Z4 – Operation: Preparing jobs Tap out the strainer basket into the collecting con- tainer. You can use water or compressed air to fur- ther clean the strainer basket. The strainer basket is completely void of machin- ing residues. - Page 40 EN 40 Z4 – Operation: Preparing jobs Remove dirt and foreign bodies from the coup- ling of the cooling liquid tank and the counterpart in the machine. . 38 – T HE COUPLING OF THE TANK AND ITS COUNTERPART COLORED GREEN Insert the cooling liquid tank with the help of the guide rail into the multi-purpose drawer.
-
Page 41: Managing Tools
EN 41 Z4 – Operation: Preparing jobs Managing tools touchscreen displays the required magazine for each job and whether it is mounted into the working NOTICE chamber. The machine can change tools automatically during Damaging of the spindle or the tool... - Page 42 EN 42 Z4 – Operation: Preparing jobs Tools with expired tool life values display in The maximum tool life values that you can actu- red. ally achieve with your tools depend on many Each circle is assigned to a specific position of factors, such as the quality of the tools, the the corresponding magazine.
-
Page 43: Mounting Exchanging Tool Magazines
EN 43 Z4 – Operation: Preparing jobs Mounting exchanging tool magazines NOTICE Damage of the tool magazines and tool magazine holder If you tilt tool magazines while mounting them, or if tool magazines or the tool magazine holder are not . - Page 44 EN 44 Z4 – Operation: Preparing jobs . 49 – T HE ARROWS TO SWITCH BETWEEN JOBS . 47 – R EMOVING THE PROTECTIVE CAP LEFT AND USING THE The touchscreen displays the required tool SCREW magazine and if it is mounted into the working chamber.
- Page 45 EN 45 Z4 – Operation: Preparing jobs . 51 – T HE COLOR CODE ON THE TOUCHSCREEN LEFT AND ON THE TOOL MAGAZINE ARE IDENTICAL Ensure that the contact surfaces of the tool magazine holder and the tool magazine are clean.
-
Page 46: Mounting Removing Blanks
EN 46 Z4 – Operation: Preparing jobs Mounting removing blanks The machine can process the following blanks: Blocks, max. size: 40 x 20 x 20 mm (L/D/H) Prefabricated abutments requires extra equipment You can obtain extra equipment from customer service. -
Page 47: Operation: Executing Jobs
EN 47 Z4 – Operation: Executing jobs 7 Operation: Executing Starting jobs via the touchscreen jobs Following you find the workflow for selecting, checking and executing jobs. Overview To open the Jobs section, select the depicted icon. NOTICE Jobs section displays. The details of the next queued job display. - Page 48 EN 48 Z4 – Operation: Executing jobs Verify that the elements [2], [3], [4] display as required: Ensure that the mounted blank corresponds to [2] (if not: Ž Mounting removing blanks – on page 46 displays in [3], mount the correct tool magazine ( Ž...
-
Page 49: Aborting Machining
EN 49 Z4 – Operation: Executing jobs Aborting machining The job is marked as finished and no longer dis- plays in the Jobs section. You can cancel machining at any time. You need to restart the job with a new blank. You cannot continue... -
Page 50: How To Proceed In Case Of A Job Interruption
EN 50 Z4 – Operation: Executing jobs How to proceed in case of a job inter- The tool was damaged or worn ruption The tool was put into the wrong tool magazine position or was manually inserted into the If the job was interrupted, the touchscreen displays a spindle at the wrong time. -
Page 51: Emergency Opening Of The Working Chamber Door
EN 51 Z4 – Operation: Executing jobs Emergency opening of the work- ing chamber door The working chamber door should move sluggishly, but evenly. If the movement is jerky or the working chamber door gets WARNING stuck, do not use excessive force. -
Page 52: Removing The Back Panel Cover
EN 52 Z4 – Operation: Executing jobs Removing the back panel cover Emergency opening of the multi- purpose drawer You need to remove the back panel cover of the machine for an emergency release of the multi- In case of a longer power failure, you can manually purpose drawer. -
Page 53: Maintenance And Do-It-Yourself
EN 53 Z4 – Maintenance and do-it-yourself 8 Maintenance and do- Where to get service? it-yourself Customer service is your main contact for all service related questions. They will provide you with spare parts, maintenance tips and they will perform preventive maintenance for you on request. -
Page 54: Using The Maintenance Section
EN 54 Z4 – Maintenance and do-it-yourself Use the circles in the first column to determine Using the maintenance section how much time remains until the task is due: For your convenience, the machine lists all basic main- The numbers in the circles show how many oper-... -
Page 55: List Of All Maintenance Tasks
EN 55 Z4 – Maintenance and do-it-yourself List of all maintenance tasks Performing maintenance tasks The following maintenance tasks and illustrations can Maintenance section contains interactive on- display on the touchscreen: screen guides for every maintenance task. To perform the maintenance tasks you need to use the respective... -
Page 56: Leaving The Maintenance Section
EN 56 Z4 – Maintenance and do-it-yourself The internet version may contain newer information than this document. . 66 – QR CODE To mark the task as complete, select the depicted icon. . 65 – I NTERACTIV E ON SCREEN GUIDE FOR MAINTENANCE TASK... -
Page 57: Cleaning The Working Chamber
EN 57 Z4 – Maintenance and do-it-yourself Cleaning the working chamber Performing the weekly cleaning Have ready: The cleaning brush for the blank Cleaning the working chamber includes the following holder. components: Remove the tool magazine from the working Measuring key chamber. -
Page 58: Cleaning The Collet Chuck
EN 58 Z4 – Maintenance and do-it-yourself Cleaning the collet chuck The grease for the collet chuck of the spindle and for the collet chuck of the blank holder is the same item. NOTICE Damaging of the spindle when cleaning... - Page 59 EN 59 Z4 – Maintenance and do-it-yourself Insert the measuring pin into the collet chuck with one hand and keep holding it. Screw the col- let chuck with the knurled nut in your other hand tightly into the spindle. Turn the knurled nut as far as you can so that the collet chuck is properly seated in the spindle.
-
Page 60: Cleaning The Nozzle Plate
EN 60 Z4 – Maintenance and do-it-yourself Cleaning the nozzle plate Cleaning the collet chuck of the blank holder You should clean the nozzle plate every time you clean the collet chuck. The grease for the collet chuck of the spindle Have the interdental brush ready. - Page 61 EN 61 Z4 – Maintenance and do-it-yourself NOTICE Insert the bit of the torque screwdriver into the collet chuck and hold it in place. Damaging of the collet chuck when Put the torque screwdriver on the bit and using the wrong grease or applying the...
-
Page 62: Rinsing The Cooling Liquid Circuit
EN 62 Z4 – Maintenance and do-it-yourself Rinsing the cooling liquid circuit To remove foreign bodies from the cooling liquid system of your machine, you need to rinse the system. Start the rinsing program by selecting the cor- responding entry in the... -
Page 63: Exchanging The Carbon Filter
EN 63 Z4 – Maintenance and do-it-yourself Exchanging the carbon filter Remove the fine filter by stretching the top end a bit and straightly pulling it off the filter with both The cooling liquid tank of your machine is equipped hands. -
Page 64: Cleaning The Housing
EN 64 Z4 – Maintenance and do-it-yourself Cleaning the housing NOTICE Damaging of the housing when using an unsuitable cleaning agent If you use an unsuitable cleaning agent and/or cleaning tool for cleaning the machine housing, the surface or the adhesive foil can get damaged. -
Page 65: Calibrating The Axes
EN 65 Z4 – Maintenance and do-it-yourself Replacing the tool magazine Remove the defective fuse and replace it with a inserts new fuse. If you do not have a replacement fuse ready, take When tool magazine inserts are worn, they should be the replacement fuse from the right side of the replaced. -
Page 66: Exchanging The Coupling Of The Cooling Liquid Tank
EN 66 Z4 – Maintenance and do-it-yourself Exchanging the coupling of the cooling liquid tank Empty the cooling liquid tank. Unscrew the filter in the cooling liquid tank with your hand. Put the filter aside. . 88 – I NSERTING AN INSERT INTO A TOOL MAGAZINE... -
Page 67: Exchanging The View Window Wiper
EN 67 Z4 – Maintenance and do-it-yourself Exchanging the view window Insert the spare coupling into the designated wiper opening as shown in the following figure. The view window wiper removes liquid from the back of the view window when the working chamber door opens and closes. -
Page 68: Updating The Software And Firmware
EN 68 Z4 – Maintenance and do-it-yourself Updating the software and firm- ware Updating the firmware of the machine The firmware is the internal control software of your machine. New versions may introduce new functions and improve existing ones. New firmware versions come as part of new versions of DentalCNC. -
Page 69: Maintenance Table
EN 69 Z4 – Maintenance and do-it-yourself Maintenance table Several times per day Task Recommended interval Procedure / Parts Tool illustration Checking the cooling liquid If the flow rate is insufficient Visual check; exchange liquid if necessary Once per day... - Page 70 EN 70 Z4 – Maintenance and do-it-yourself When necessary Task Recommended interval Procedure / Parts Spare part illustration Updating the software and firmware When an update is available Ž page 64 Cleaning the housing Microfiber cloth, Water, Mild Ž page 64...
-
Page 71: Disposal
9 Disposal Copyright Distribution or duplication of all content is only Disposing of the cooling liquid allowed by written consent of vhf camfacture AG. This includes reproduction by presentation and broad- When disposing of the cooling liquid / machining casting. -
Page 72: 10 Troubleshooting
(green check mark in the check box). Switch on the machine at the main power switch. Original Operating Instructions: Z4 Version: 12/5/2018... - Page 73 Are the tool magazine inserts worn? Are the liquid nozzles in the working chamber clogged? If applicable: Replace the tool magazine inserts with new ones. If applicable: Clean the nozzles with the inter-dental brush. Original Operating Instructions: Z4 Version: 12/5/2018...
- Page 74 I have exchanged the tool magazine inserts and now there are no holes for the tools anymore Tool magazine inserts are delivered without drilled holes for tools. You drill them with the machine. Contact customer service. Original Operating Instructions: Z4 Version: 12/5/2018...
-
Page 75: Index
Frequently Asked Questions ..72 Wear parts ..53 Front side of the machine ..10 Maintenance section ..54 Maintenance table ..69 Manufacturing software ..8 Home section ..36 Measuring key ..57 Original Operating Instructions: Z4 Version: 12/5/2018... - Page 76 Tool magazine ..43 Color codes ..41 Letters ..41 Tool magazine inserts ..65 Tools section ..38 Touchscreen ..11 Cancel jobs ..49 Home section ..36 Jobs section ..37 Original Operating Instructions: Z4 Version: 12/5/2018...
Need help?
Do you have a question about the Z4 and is the answer not in the manual?
Questions and answers