Table of Contents
Advertisement
Advertisement
Table of Contents

Related Manuals for Puregas P4200PM


Summary of Contents for Puregas P4200PM
- Page 1 P4200PM / P5000PM Remote Air Dryer User’s Guide P012649 – Rev B...
-
Page 3: Welcome & Congratulations
1. Welcome & Congratulations Congratulations on your purchase of a new PUREGAS P4200PM / P5000PM Air Dryer! We here at PUREGAS are very proud of our products and we are committed to providing you with the best value and service possible. -
Page 4: Table Of Contents
PUREGAS, LLC P4200PM / P5000PM Remote Air Dryer User’s Guide 3. Table of Contents 8.12 Connecting to Common Alarm Terminal 1. Welcome & Congratulations ......3 Block ............... 31 8.13 Reconfiguring the Common Alarm ..31 2. Introduction ............. 3 ... - Page 5 PUREGAS, LLC P4200PM / P5000PM Remote Air Dryer User’s Guide 11.6 Compressor Assembly Parts ....61 13.13 Can’t Create a Compressor Excessive 11.7 Accessories for Your Dryer ....62 Run Time Alarm ..........72 11.8 Ordering Parts from PUREGAS ..... 63 ...
-
Page 6: Safety & Warning Information
PUREGAS, LLC P4200PM / P5000PM Remote Air Dryer User’s Guide 4. Safety & Warning Information This section contains general information about safety and warning points to consider and adhere to during installation, operation, and maintenance of your air dryer. PLEASE READ THIS SECTION BEFORE PERFORMING ANY OPERATION OR PROCEDURE ON YOUR AIR DRYER. - Page 7 PUREGAS, LLC P4200PM / P5000PM Remote Air Dryer User’s Guide CAUTION! Proper Installation & Maintenance as outlined in this User’s Guide is extremely important to ensure the reliability and longevity of the equipment as well as prevent damage or personal injury.
-
Page 8: Overview & Specifications
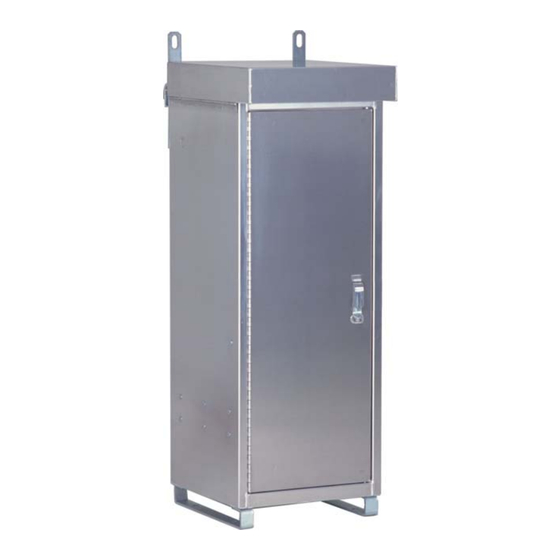
5. Overview & Specifications 5.1 Product Description The P4200PM / P5000PM Air Dryer from PUREGAS is designed to intake wet ambient air and remove the moisture for delivery to applications requiring a constant, on-demand source of dry, pressurized air. This process is fully automatic and will remain consistent with minimal required periodic maintenance. -
Page 9: Technical Specifications
PUREGAS, LLC P4200PM / P5000PM Remote Air Dryer User’s Guide 5.3 Technical Specifications P4200PM P5000PM Output Capacity Normal: 2,600 SCFD continuous 3,000 SCFD continuous Maximum: 4,200 SCFD emergency 5,000 SCFD emergency Power Requirements 110 - 125 VAC, 1 Phase, 50/60 Hz... -
Page 10: Dryer Function Overview
PUREGAS, LLC P4200PM / P5000PM Remote Air Dryer User’s Guide 5.4 Dryer Function Overview Component Description Compressor Compresses drawn in ambient air. Precooler Cools compressed air prior to drying function. Unloader Valve Relieves excess compressor head pressure. Heatless Dryer Removes moisture from compressed air. -
Page 11: Installing Your Dryer
PUREGAS, LLC P4200PM / P5000PM Remote Air Dryer User’s Guide 6. Installing Your Dryer 6.1 Safety & Warning Information WARNING! Internal surfaces may be hot. Use care when coming into contact with internal components as there is a potential for some of these components to become hot when in operation or standby. -
Page 12: Before You Begin
6.2.3 Verify the installation location of the air dryer: 6.2.3.1 Well secured location 6.2.3.2 PUREGAS recommends the air dryer be mounted a minimum of one (1) foot from the ground. 6.2.3.3 Ambient temperature lower than 120°F (85° F optimal). -
Page 13: Included Contents
PUREGAS, LLC P4200PM / P5000PM Remote Air Dryer User’s Guide 6.2.3.4 Meets the following power requirements: 110 - 125 VAC, 50/60 Hz Minimum 30 amp service with a 25 amp slow blow fuse If hard-wiring directly, minimum of 14 AWG wire must be used 6.2.4 Notify the alarm center of the installation and potential for alarms during the... -
Page 14: Installation Steps
PUREGAS, LLC P4200PM / P5000PM Remote Air Dryer User’s Guide 6.5 Installation Steps 6.5.1 Remove all shipping materials and hardware. NOTE: If ANY SHIPPING DAMAGE is detected, file a claim with the shipping company prior to continuing the installation procedures. - Page 15 PUREGAS, LLC P4200PM / P5000PM Remote Air Dryer User’s Guide 6.5.4 Remove the ship-loose contents package. 6.5.5 Pull out and rotate the quick pins ¼ turn to lock in the Open position. 6.5.6 Pull the Compressor Tray out. 6.5.7 With a 7/16” wrench remove the shipping blocks from under the compressor plate.
- Page 16 PUREGAS, LLC P4200PM / P5000PM Remote Air Dryer User’s Guide 6.5.10 Place the dryer at the operating location. NOTE: Close the front door if necessary. 6.5.11 Verify that the dryer is powered OFF. 6.5.12 Depress the latches and lower the front panel.
- Page 17 PUREGAS, LLC P4200PM / P5000PM Remote Air Dryer User’s Guide 6.5.15 With a screwdriver, wire power to the terminal block of the dryer. 6.5.16 Reinstall the terminal block cover. 6.5.17 Tighten the strain relief. 6.5.18 Remove dust plug and connect the air supply line to the dryer Outlet Pressure port.
- Page 18 PUREGAS, LLC P4200PM / P5000PM Remote Air Dryer User’s Guide 6.5.21 Set the System Pressure: 6.5.21.1 Lower the front panel. With Compressor running: 6.5.21.2 Pull the Capacity Control Valve knob out. 6.5.21.3 Turn the knob until the reading on the pressure gauge is 50 PSI.
- Page 19 PUREGAS, LLC P4200PM / P5000PM Remote Air Dryer User’s Guide 6.5.22 Set the Outlet Pressure: 6.5.22.1 Close the front panel. 6.5.22.2 Loosen the Outlet Pressure Regulator Locknut. 6.5.22.3 Turn knob until Outlet Pressure (OUTP) reading is at the desired setting.
- Page 20 PUREGAS, LLC P4200PM / P5000PM Remote Air Dryer User’s Guide With Compressor running: 6.5.23.2 Use a 1-inch paint brush to dab soapy water on the air fitting or hose connection to be tested. If air bubbles appear at the connection, this indicates that air is leaking from the connection.
-
Page 21: Installation Checklist
No alarms are present. 7. Registering Your Dryer Please take a moment to register your PUREGAS P4200PM / P5000PM Air Dryer. Registering is necessary to activate the Limited Warranty on your product. Once you register, you are eligible to receive free technical support, as well as updates concerning your PUREGAS products. -
Page 22: Operating Your Dryer
PUREGAS, LLC P4200PM / P5000PM Remote Air Dryer User’s Guide 8. Operating Your Dryer 8.1 Safety & Warning Information WARNING! Extreme care should be exercised to avoid contact with live electrical circuits. Many procedures performed during installation, operation, testing, and maintenance of this air dryer require the equipment to be running, creating a situation for potential electrical shock. -
Page 23: Connecting Air Lines To The Dryer
PUREGAS, LLC P4200PM / P5000PM Remote Air Dryer User’s Guide 8.2 Connecting Air Lines to the Dryer 8.2.1 Remove dust plug from the back of the Dryer and connect the air supply line to the dryer Outlet Pressure port. 8.3 Powering the Dryer ON & OFF... -
Page 24: Opening Doors And Panels
PUREGAS, LLC P4200PM / P5000PM Remote Air Dryer User’s Guide 8.4 Opening Doors and Panels 8.4.1 Open the Front Door. 8.4.2 Depress the latches and lower the Front Panel. 8.4.3 Remove wing nut and washer. Open Top Cover. Page 24 of 79... -
Page 25: Sliding The Compressor Tray Out
PUREGAS, LLC P4200PM / P5000PM Remote Air Dryer User’s Guide 8.5 Sliding the Compressor Tray Out 8.5.1 Pull out and rotate the quick pins ¼ turn to lock in the Open position. 8.5.2 Pull the Compressor Tray out. 8.6 Depressurizing the Dryer 8.6.1 Open the Front Door (section 8.4.1). -
Page 26: Setting The System Pressure
PUREGAS, LLC P4200PM / P5000PM Remote Air Dryer User’s Guide 8.7 Setting the System Pressure 8.7.1 Open the Front Door (section 8.4.1). 8.7.2 Lower the Front Panel (section 8.4.2). With Compressor running: 8.7.2.1 Pull the Capacity Control Valve knob out. -
Page 27: Setting The Outlet Pressure
PUREGAS, LLC P4200PM / P5000PM Remote Air Dryer User’s Guide 8.8 Setting the Outlet Pressure 8.8.1 Open the Front Door (section 8.4.1). 8.8.2 Loosen the Outlet Pressure Regulator Locknut. 8.8.3 Turn knob until Outlet Pressure reading is at the desired setting. -
Page 28: Identifying Control Board Components
PUREGAS, LLC P4200PM / P5000PM Remote Air Dryer User’s Guide 8.9 Identifying Control Board Components Component Description Humidity Indicators Indicates the level of the dryer’s Humidity <2% - >15% Humidity Sensor Connector for the Humidity Sensor Ground Lug Board Ground Common Alarm TB Open on Alarm –... -
Page 29: Setting The Low Pressure Alarm Set Point
PUREGAS, LLC P4200PM / P5000PM Remote Air Dryer User’s Guide 8.10 Setting the Low Pressure Alarm Set Point 8.10.1 Open Front Door (section 8.4.1). 8.10.2 Loosen the Outlet Pressure Regulator Locknut. 8.10.3 Turn knob until Outlet Pressure reading is at the desired alarm setting. -
Page 30: Setting The Compressor Run Time Alarm30
PUREGAS, LLC P4200PM / P5000PM Remote Air Dryer User’s Guide 8.10.7 Turn Low Pressure Adjustment slowly clockwise until Low Pressure LED begins to blink. NOTE: The blinking LED indicates a conditional alarm. After 5 minutes the LED will illuminate solid indicating a latched alarm. -
Page 31: Block
PUREGAS, LLC P4200PM / P5000PM Remote Air Dryer User’s Guide 8.12 Connecting to Common Alarm Terminal Block NOTE: The Common Alarm Socket is wired as a CLOSE ON ALARM. 8.12.1 Open Front Door (section 8.4.1). 8.12.2 Locate the Common Alarm Terminal Block. -
Page 32: Testing Your Dryer
PUREGAS, LLC P4200PM / P5000PM Remote Air Dryer User’s Guide 9. Testing Your Dryer 9.1 Safety & Warning Information WARNING! Extreme care should be exercised to avoid contact with live electrical circuits. Many procedures performed during installation, operation, testing, and maintenance of this air dryer require the equipment to be running, creating a situation for potential electrical shock. -
Page 33: Measuring Compressor Amp Draw
PUREGAS, LLC P4200PM / P5000PM Remote Air Dryer User’s Guide 9.2 Measuring Compressor Amp Draw WARNING! Internal surfaces may be hot. Use care when coming into contact with internal components as there is a potential for some these components to become hot when in operation or standby. -
Page 34: Measuring Voltage To Compressor
PUREGAS, LLC P4200PM / P5000PM Remote Air Dryer User’s Guide 9.3 Measuring Voltage to Compressor WARNING! Extreme care should be exercised to avoid contact with live electrical circuits. It is highly recommended that you remove all jewelry before performing any procedures. -
Page 35: Measuring Incoming Voltage
PUREGAS, LLC P4200PM / P5000PM Remote Air Dryer User’s Guide 9.3.6 Use a Voltmeter to measure the voltage: 9.3.6.1 Place the probes in the openings of wire #s 3 and 4 of the power connector. The voltage should measure 110 - 125 VAC. -
Page 36: Measuring Voltages At Solid State Relay
PUREGAS, LLC P4200PM / P5000PM Remote Air Dryer User’s Guide 9.4.4 Use a Voltmeter to measure the voltage: 9.4.4.1 Place the probes between the Circuit Breaker and terminal insulation so that they touch the metal contacts. The voltage should measure 110 - 125 VAC. - Page 37 PUREGAS, LLC P4200PM / P5000PM Remote Air Dryer User’s Guide With the Compressor running: 9.5.4 Use a Voltmeter to measure across the AC terminals. Should measure 0 VAC. 9.5.5 Use a Voltmeter to measure across the DC terminals. Should measure 5 - 24 VDC.
-
Page 38: Testing Consistent Heatless Dryer Cycling
PUREGAS, LLC P4200PM / P5000PM Remote Air Dryer User’s Guide 9.6 Testing Consistent Heatless Dryer Cycling With the Compressor running: 9.6.1 Open Front Door (section 8.4.1). 9.6.2 Open Front Panel (section 8.4.2). 9.6.3 Locate the Heatless Dryer and remove Mufflers. -
Page 39: Testing Unloader Valve
PUREGAS, LLC P4200PM / P5000PM Remote Air Dryer User’s Guide 9.6.5 Re-install the purge mufflers. 9.6.6 Close Front Panel. 9.6.7 Close Front Door. If the Heatless Dryer is not cycling consistently as described, see section 13.8 for troubleshooting information. 9.7 Testing Unloader Valve With the Compressor running: 9.7.1 Open Front Door (section 8.4.1). - Page 40 PUREGAS, LLC P4200PM / P5000PM Remote Air Dryer User’s Guide 9.7.4 Place your hand behind the Unloader Valve fitting to feel for air flow. Air should NOT flow from this fitting continuously. Air should only be released in a short burst when the compressor shuts off.
-
Page 41: Measuring Heatless Dryer Solenoid Voltage
PUREGAS, LLC P4200PM / P5000PM Remote Air Dryer User’s Guide 9.8 Measuring Heatless Dryer Solenoid Voltage With the Compressor running: 9.8.1 Open Front Door (section 8.4.1). 9.8.2 Open Front Panel (section 8.4.2). 9.8.3 Locate the Heatless Dryer Cycle Timer. The timer has three (3) sets of terminals (from left-to-right): “53VDC”... -
Page 42: Testing Fan
PUREGAS, LLC P4200PM / P5000PM Remote Air Dryer User’s Guide 9.9 Testing Fan NOTE: To test the fan, the cabinet temperature must be above 85 9.9.1 Open Front Door (section 8.4.1). 9.9.2 Open Front Panel (section 8.4.2). 9.9.3 Place your hand below the... -
Page 43: Testing Cabinet Heater
PUREGAS, LLC P4200PM / P5000PM Remote Air Dryer User’s Guide 9.10 Testing Cabinet Heater NOTE: To test the heater, the cabinet temperature must be below 40 9.10.1 Open Front Door (section 8.4.1). 9.10.2 Power the air dryer OFF (section 8.3). -
Page 44: Testing Compressor On/Off Cycling
PUREGAS, LLC P4200PM / P5000PM Remote Air Dryer User’s Guide 9.11 Testing Compressor ON/OFF Cycling 9.11.1 Open Front Door (section 8.4.1). 9.11.2 Locate the Tank Pressure Gauge. With Compressor running: 9.11.3 Verify the compressor shuts down when the Tank Pressure Gauge reaches 50.0 PSI. -
Page 45: Testing Compressor Excessive Run Time Alarm
PUREGAS, LLC P4200PM / P5000PM Remote Air Dryer User’s Guide With Compressor NOT running: 9.11.4 Verify the compressor turns on when the Tank Pressure Gauge falls to 25.0 PSI. 9.11.5 Close Front Door. If the Compressor Cycling fails either test described, it indicates a problem with the Control Board which may need to be replaced. -
Page 46: Testing Humidity Alarm And System Shutdown
PUREGAS, LLC P4200PM / P5000PM Remote Air Dryer User’s Guide 9.12.5 After 3:00 minutes (unless adjusted to a different Set Point by the user), the Run Time Alarm LED should illuminate 9.12.6 Press the RESET Button. 9.12.7 Reconnect Outlet Tube. - Page 47 PUREGAS, LLC P4200PM / P5000PM Remote Air Dryer User’s Guide 9.13.4 Unscrew and remove the Humidity Sensor from the Humidity Block. 9.13.5 Reinstall outlet tube. 9.13.6 Green Humidity and Bypass Indicators will darken once the Humidity reading reaches 10.0% or higher.
-
Page 48: Testing Humidity Open Circuit, Bypass Valve, And Shutdown
PUREGAS, LLC P4200PM / P5000PM Remote Air Dryer User’s Guide 9.13.10 Press the RESET Button to clear the Humidity alarm. 9.13.11 Close Front Panel. 9.13.12 Close Front Door. If you are unable to create a Humidity/Shutdown Alarm as described, see section 13.7 for troubleshooting information. - Page 49 PUREGAS, LLC P4200PM / P5000PM Remote Air Dryer User’s Guide 9.14.4 Humidity and Bypass Indicators will darken. 9.14.5 Verify that the Open Humi LED flashes and the Bypass Valve opens. 9.14.6 After 5 minutes the Open Humi LED illuminates solid and the dryer goes into SHUTDOWN mode.
-
Page 50: Testing Low Outlet Pressure Alarm
PUREGAS, LLC P4200PM / P5000PM Remote Air Dryer User’s Guide 9.15 Testing Low Outlet Pressure Alarm 9.15.1 Open Front Door (section 8.4.1). 9.15.2 Make note of the current Outlet Pressure reading. 9.15.3 Loosen the Outlet Pressure Regulator Locknut. 9.15.4 Turn knob until Outlet Pressure reading is below 6.5... - Page 51 PUREGAS, LLC P4200PM / P5000PM Remote Air Dryer User’s Guide 9.15.5 Lower the Front Panel (section 8.4.2). 9.15.6 Verify the Low Pressure LED flashes. After 5 minutes the LED will illuminate solid indicating a latched alarm. 9.15.7 Press the RESET Button to clear the Humidity alarm.
-
Page 52: Testing Air Fittings & Hoses For Leaks
PUREGAS, LLC P4200PM / P5000PM Remote Air Dryer User’s Guide 9.16 Testing Air Fittings & Hoses for Leaks NOTE: This is a general procedure that can be applied to any fitting or hose that has air pressure in it. DO NOT SOAP TEST THE HUMIDITY SENSOR. -
Page 53: Maintaining Your Dryer
P4200PM / P5000PM Remote Air Dryer User’s Guide 10. Maintaining Your Dryer In order to ensure that your P4200PM / P5000PM Air Dryer continues to operate efficiently and reliably, PUREGAS recommends performing the following maintenance procedures at the specified Six Month intervals. - Page 54 PUREGAS, LLC P4200PM / P5000PM Remote Air Dryer User’s Guide WARNING! Internal surfaces may be hot. Use care when coming into contact with internal components as there is a potential for some of these components to become hot when in operation or standby.
-
Page 55: Six Month Maintenance
PUREGAS, LLC P4200PM / P5000PM Remote Air Dryer User’s Guide 10.2 Six Month Maintenance MODEL: P4200PM / P5000PM LOCATION NAME: SERIAL NUMBER: ADDRESS: DATE INSTALLED: Maintenance Interval (Months) Procedure Section Install 6 Month Maintenance Kit ... -
Page 56: Replacement Parts & Accessories
PUREGAS, LLC P4200PM / P5000PM Remote Air Dryer User’s Guide 11. Replacement Parts & Accessories 11.1 Upper Section Parts Recommend Description Part Number Quantity Spare Outlet Pressure Gauge See section 11.2 for detail. Trigger Latch See section 11.2 for detail. -
Page 57: Front Panel Assembly Parts
PUREGAS, LLC P4200PM / P5000PM Remote Air Dryer User’s Guide 11.2 Front Panel Assembly Parts Recommend Description Part Number Quantity Spare Front Panel Assembly P012589 (1) Humidity Bypass Valve P012663 (1) Humidity Sensor P011380 Flow Meter Assembly P012778 ... -
Page 58: Internal Cabinet Parts
PUREGAS, LLC P4200PM / P5000PM Remote Air Dryer User’s Guide 11.3 Internal Cabinet Parts Recommend Description Part Number Quantity Spare Resistors (270K) B142 Tank Heatless Dryer Assembly - P4200PM P012831 See Section 11.4 for detail. P5000PM P012608 Lightning Arrestor P011788... -
Page 59: Heatless Dryer Assembly Parts
PUREGAS, LLC P4200PM / P5000PM Remote Air Dryer User’s Guide 11.4 Heatless Dryer Assembly Parts Recommend Description Part Number Quantity Spare Heatless Dryer Assembly - P4200PM P012831 P5000PM P012608 (2) Desiccant Tower P20040312 Cycle Timer P010530F1 Solenoid Valve In Kit P200499S. See Section 11.7 for detail. -
Page 60: Lower Section Parts
PUREGAS, LLC P4200PM / P5000PM Remote Air Dryer User’s Guide 11.5 Lower Section Parts Recommend Description Part Number Quantity Spare Compressor Assembly - P4200PM P012829 See Section 11.6 for detail. P5000PM P012617 Discharge Hose P05069 Temperature Sensor 8298 Common Alarm Terminal Block Wire Harness –... -
Page 61: Compressor Assembly Parts
PUREGAS, LLC P4200PM / P5000PM Remote Air Dryer User’s Guide 11.6 Compressor Assembly Parts Recommend Description Part Number Quantity Spare Compressor Assembly - P4200PM P012829 (1) P5000PM P012617 Compressor (Only) - P4200PM P013256 P5000PM P012878 Wire Harness (Male End) -
Page 62: Accessories For Your Dryer
PUREGAS, LLC P4200PM / P5000PM Remote Air Dryer User’s Guide 11.7 Accessories for Your Dryer Recommend Description Part Number Spare P4200PM Six Month Maintenance Kit (2) P012907 Includes air intake filter, compressor mufflers, and purge mufflers. P5000PM Six Month Maintenance Kit ... -
Page 63: Ordering Parts From Puregas
User’s Guide and will not be covered. Please refer to the information included with the specific replacement part for this instruction. Once you have identified your required parts and accessories, contact the PUREGAS Inside Sales / Service department to order: (800) 521-5351 (option 2) Fax –... -
Page 64: Service & Repair
PUREGAS, LLC P4200PM / P5000PM Remote Air Dryer User’s Guide 12. Service & Repair Only PUREGAS can offer factory direct rebuilds backed by a 6 month factory warranty. 2 week turnaround time Estimates available upon request Minimum service charge fee applies 12.1 Services Offered... -
Page 65: Troubleshooting Your Dryer
PUREGAS, LLC P4200PM / P5000PM Remote Air Dryer User’s Guide 13. Troubleshooting Your Dryer 13.1 Before You Call PUREGAS PLEASE READ THIS SECTION FIRST. It is important that you use the following sections in order to diagnose and attempt to fix the problem with your air dryer before placing a call to PUREGAS Technical Support. - Page 66 PUREGAS, LLC P4200PM / P5000PM Remote Air Dryer User’s Guide WARNING! Extreme care should be exercised to avoid contact with live electrical circuits. Many procedures performed during installation, operation, testing, and maintenance of this air dryer require the equipment to be running, creating a situation for potential electrical shock.
-
Page 67: Air Dryer Won't Power On
PUREGAS, LLC P4200PM / P5000PM Remote Air Dryer User’s Guide 13.3 Air Dryer Won’t Power ON Possible Cause Check Corrective Action POWER Circuit Verify POWER Circuit Move POWER Circuit Breaker in OFF position Breaker is in ON Breaker to ON position position (section 8.3) -
Page 68: High Humidity
PUREGAS, LLC P4200PM / P5000PM Remote Air Dryer User’s Guide 13.6 High Humidity CAUTION! Do not test the Humidity sensor with an ohm meter or apply any DC voltage. This will render the Humidity Sensor defective. Possible Cause Check Corrective Action... -
Page 69: Can't Create A High Humidity Alarm / Shutdown
PUREGAS, LLC P4200PM / P5000PM Remote Air Dryer User’s Guide 13.7 Can’t Create a High Humidity Alarm / Shutdown These troubleshooting steps assume that the Humidity Sensor is removed from the Humidity Block during the Testing Humidity Alarm and System Shutdown (section 9.13) procedures. -
Page 70: Compressor Doesn't Operate
PUREGAS, LLC P4200PM / P5000PM Remote Air Dryer User’s Guide 13.9 Compressor Doesn’t Operate Possible Cause Check Corrective Action Defective compressor Measure voltage to If voltage is good, compressor replace compressor (section 9.3) (section 11.6) or send it in for repair (section 12. -
Page 71: Compressor Excessive Amp Draw
PUREGAS, LLC P4200PM / P5000PM Remote Air Dryer User’s Guide 13.11 Compressor Excessive AMP Draw Possible Cause Check Corrective Action Restriction in air line Remove Discharge Hose If measurement is from compressor (see below 11.0 amps, trace section 11.5 for location... -
Page 72: Alarm
PUREGAS, LLC P4200PM / P5000PM Remote Air Dryer User’s Guide 13.13 Can’t Create a Compressor Excessive Run Time Alarm Possible Cause Check Corrective Action Compressor Excessive Verify Excessive Allow the compressor Run Time Alarm set Compressor Run Time to run longer than the... -
Page 73: Contacting Puregas Technical Support
PUREGAS, LLC P4200PM / P5000PM Remote Air Dryer User’s Guide 13.15 Contacting PUREGAS Technical Support Please read the Before You Call PUREGAS section (13.1) Once you have exhausted all of the potential problems and solutions covered in the Troubleshooting Your Dryer section, and you still require further assistance to correct... -
Page 74: Appendix
PUREGAS, LLC P4200PM / P5000PM Remote Air Dryer User’s Guide 14. Appendix 14.1 Wiring Diagram Page 74 of 79 P012649 – Rev B... - Page 75 PUREGAS, LLC P4200PM / P5000PM Remote Air Dryer User’s Guide Page 75 of 79 P012649 – Rev B...
-
Page 76: Set Point Limits And Defaults
PUREGAS, LLC P4200PM / P5000PM Remote Air Dryer User’s Guide 14.2 Set Point Limits and Defaults 14.2.1 System Adjustments Minimum Maximum Default Unit of Description Value Value Value Measurement System Pressure 48.0 52.0 50.0 Outlet Pressure 30.0 20.0 14.2.2 Alarm Set Points... -
Page 77: Limited Warranty Agreement
This warranty shall not apply to any PUREGAS product which shall have been repaired or altered in any way by anyone other than PUREGAS or authorized personnel so as to affect, in our judgment, its proper functioning or reliability, neither will it apply to any product which has been subject to misuse, negligence, or accident. -
Page 78: Contacting Puregas
PUREGAS, LLC P4200PM / P5000PM Remote Air Dryer User’s Guide 16. Contacting PUREGAS 16.1 General PUREGAS, LLC 226A Commerce Street Broomfield, Colorado 80020 (800) 521-5351 (303) 427-3700 Fax – (303) 657-2233 info@puregas.com www.puregas.com 16.2 Sales (800) 521-5351 (option 2) Fax – (303) 657-2205 sales@puregas.com... -
Page 79: Notes
PUREGAS, LLC P4200PM / P5000PM Remote Air Dryer User’s Guide 17. Notes ________________________________________________________________________ ________________________________________________________________________ ________________________________________________________________________ ________________________________________________________________________ ________________________________________________________________________ ________________________________________________________________________ ________________________________________________________________________ ________________________________________________________________________ ________________________________________________________________________ ________________________________________________________________________ ________________________________________________________________________ ________________________________________________________________________ ________________________________________________________________________ ________________________________________________________________________ ________________________________________________________________________ ________________________________________________________________________ ________________________________________________________________________ ________________________________________________________________________ ________________________________________________________________________ ________________________________________________________________________ ________________________________________________________________________ ________________________________________________________________________ ________________________________________________________________________ ________________________________________________________________________ ________________________________________________________________________ ________________________________________________________________________ ________________________________________________________________________ ________________________________________________________________________...
Need help?
Do you have a question about the P4200PM and is the answer not in the manual?
Questions and answers