Advertisement
Available languages
Available languages
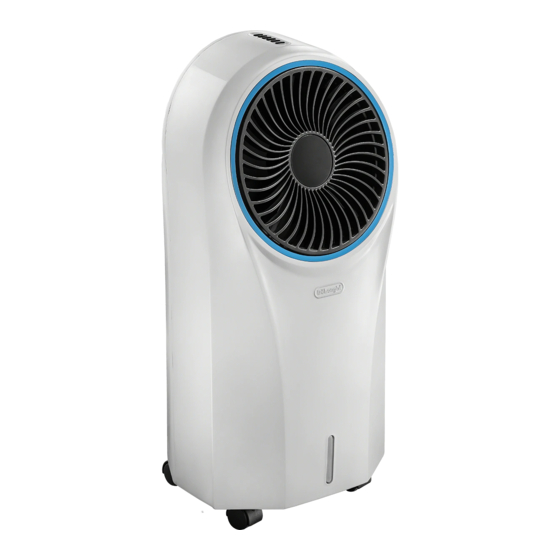
EVAPORATIVE COOLER
Instructions for use. Keep these instructions
Visit www.delonghi.com for a list of service centers
CLIMATISEUR À ÉVAPORATION
Mode d' e mploi . Conservez cette notice
Visitez www.delonghi.com pour y voir une liste
descentresderéparationproches dechez vous.
CARACTÉRISTIQUES ÉLECTRIQUES
ENFRIADOR EVAPORATIVO
Repase y guarde estas instrucciones.
Lea cuidadosamente este instructivo
Visite www.delonghi.com para ver la lista
decentrosdeservicioscercanosausted.
CARACTERISTICAS ELECTRICAS:
EV250
near you.
ELECTRIC CHARACTERISTICS
120 V~ 60 Hz
120 V~ 60 Hz
antes de usar su aparato.
120 V~ 60 Hz
Advertisement
Table of Contents

Related Manuals for DeLonghi EV250


Summary of Contents for DeLonghi EV250
- Page 1 EV250 EVAPORATIVE COOLER Instructions for use. Keep these instructions Visit www.delonghi.com for a list of service centers near you. ELECTRIC CHARACTERISTICS 120 V~ 60 Hz CLIMATISEUR À ÉVAPORATION Mode d’ e mploi . Conservez cette notice Visitez www.delonghi.com pour y voir une liste descentresderéparationproches dechez vous.
- Page 2 page 6 page11 pág.19...
-
Page 4: Important Safeguards
not fit fully in the outlet, reverse the plug. If it Importantsafeguards still does not fit, contact a qualified electrician. • Use this appliance only as described in this Do not attempt to defeat this safety feature. instruction manual. • Donot useextensioncables. As with any electrical appliance, the instructions •... - Page 5 D3. “AUTO OFF” (see B6) 1. DESCRIPTION D4. Fan speed (see B2) 1.1 Description of the appliance (A) D5. Fan mode selection (see B4) A1. Rotating vent D6. Cooler/Humidifying. Press to select or deselect the function A2. Water level indicator A3.
- Page 6 2.2 Cooler/Humidifying Fill the water tank before selecting this function. Extract the water tank (fig. 4) and fill with MAX 4.5L (152 oz) of fresh tap water (do not overload the water tank: see water level indicator A2). Put the ice box/pack in the freezer and leave it in until it is frozen (fig.
-
Page 7: Selectingthe Fanmode
Swing Press the button (B5 or D2)once to activate the rotating vent (fig. 12). 2.3 Selectingthe fanmode The appliance can be set for 3 different fan modes: 1. NORMAL- Press the button (B2 or D4) to select the fan speed; Press again to exit swing mode. -
Page 8: Refilling The Water Tank
• fully extract the tank and proceed to fill it. Once the tank is filled: If you want to exit the “Auto off” function, repeatedly press the • if necessary, dry the tank housing; button (B6 or D3) until “00” is displayed: symbol fla- •... - Page 9 Changing the battery of the remote control • Remove the battery holder on the back of the remote con- trol (fig. 21); • Wash thoroughly the cooling pad with water; then leave it to completely dry and reassemble the filtersin its housing (fig.
-
Page 10: Troubleshooting
• - Increase the separation between the equipment and This device complies with Part 15 of the FCC Rules. Ope- receiver. ration is subject to the following two conditions: (1) this device may not cause harmful interference, and (2) this - Connect the equipment into an outlet on a circuit dif- device must accept any interference received, including ferent from that to which the receiver is connected. - Page 11 PROBLEM CAUSE SOLUTION Remote control does not work Remote control battery is incorrectly in- Check the battery is correctly inserted fol- serted in the battery compartment lowing the polarity guide inside the battery compartment. Remote control battery is exhausted Replace with a new battery If replacing new battery in the correct position Damaged remote control doesnot work, contact Customer Service...
- Page 12 4. TROUBLESHOOTING Below is a list of some of the possible malfunctions. If the problemcannot be resolved as described, contact Customer Service. PROBLEM CAUSE SOLUTION No discharge of air Cord is not plugged in Make sure power cord is plugged in and the swi- tchisON Power isnot ON Turn the unit ON by pressing the...
- Page 13 The unit does not respond Damaged control panel on unit Try to activate the unit with the remote control If the unit responds, then the control panel on the unit may be experiencing problems: contact Customer Service If neither the remote control or the control panel isworking,contactCustoner Service If “Cooler/Humidifier”...
- Page 14 • Este producto está equipado con una clavija de Advertencias corriente alterna polarizada (una clavija con un • Use este electrodoméstico sólo como se indica polo con dimensiones mayores que las del otro). en este manual de instrucciones. Como con Esta clavija se inserta sólo en un sentido en el cualquier electrodoméstico, las instrucciones tomacorriente.
-
Page 15: Instrucciones De Uso
• ADVERTENCIA: No usar con cualquier aparato que 1.3 Descripción del display (C) C1. Visor programación“auto OFF”(autoapagado) tieneun controlde velocidadde estado solido. “Enfriamiento/humidificación”activo • Este producto cumple con la concentración C3. “Ionizador” activo (siempre encendido, ya que la función máxima permisible de ozono de 0.050 partes está... - Page 16 Pulse la tecla (B3 o D6): el símbolo correspondiente se enciende en el display (fig. 5). El aire atraviesa el dispo- sitivo de enfriamiento y sale refrescada, contribuyendo de esta forma a disminuir la temperatura del ambiente; 2.1 Seleccione la velocidad de ventilación Pulse la tecla (B2oD4);...
- Page 17 3. SLEEP- Pulse una vez la tecla MODE (B4 o D5). El aparato funciona automáticamente 30 minutos a velocidad MÁX, luego 30 minutos a velocidad MED: continúa a velocidad MÍN (fig. 11). Vuelva a meter el depósito de agua, encienda el aparato y seleccione la función “Enfriamiento/Humidificación”: el aire emitido por el aparato será...
-
Page 18: Limpieza Y Mantenimiento
Procedimientoaconsejadoparallenareldepósito: 1. Saque parcialmente el depósito de agua (fig. 4) y llénelo con un MÁX de 4,5 l de agua fresca del grifo usando una jarra. Use siempre agua del grifo, no sobrecargue nunca el depósito: verifique el indicador de nivel de agua (A2); 2. - Page 19 Limpie el filtro antipolvo y el panel 4.2 Limpieeldepósitode agua evaporador Nota: Limpie con regularidad el filtro antipolvo. La frecuencia con la Apague el aparato y déjela reposar durante dos minutos antes de que efectúa la limpieza debe establecerse de acuerdo con el retirar el cajón para permitir que el exceso de agua vuelva al tanque.
-
Page 20: Si Algo No Funciona
Please note: correct the interference by one or more of the following • If you change or dispose the remote control, the bat- measures: tery must be removed and disposed of according to local - Reorient or relocate the receiving antenna. recycling regulations. - Page 21 PROBLEMA POSIBLE CAUSA SOLUCIÓN Olores y agua coloreada El aparato es nuevo En el primer uso, el aparato tendrá un olor que se disiparáunas pocas horas después del usoinicial. El color en el agua también se disipará después dealgunosusos. Algas o moho debido a partes húmedas. Compruebe el panel evaporador (A11), el depós- En condiciones muy húmedas, las algas ito de agua extraíble (A7) y otras partes del si-...
- Page 22 De’Longhi Appliances via Seitz, 47 31100 Treviso Italia www.delonghi.com...
Need help?
Do you have a question about the EV250 and is the answer not in the manual?
Questions and answers