
Related Manuals for King Canada KC-5005R


Summary of Contents for King Canada KC-5005R
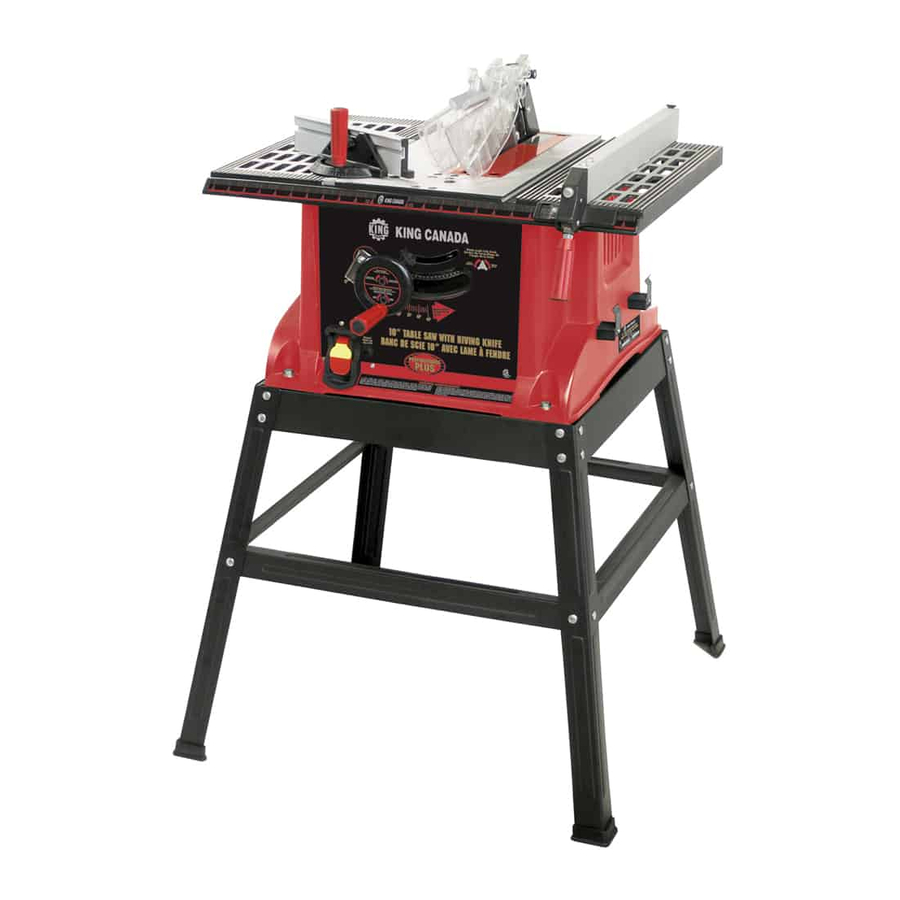
- Page 1 KING CANADA 10” TABLE SAW WITH RIVING KNIFE MODEL: KC-5005R INSTRUCTION MANUAL COPYRIGHT © 2011 ALL RIGHTS RESERVED BY KING CANADA TOOLS INC.
-
Page 2: Warranty Information
LIMITED TOOL WARRANTY King Canada makes every effort to ensure that this product meets high quality and durability standards. King Canada warrants to the original retail consumer a 2-year limited warranty as of the date the product was purchased at retail and that each product is free from defects in materials. - Page 3 GENERAL & SPECIFIC SAFETY INSTRUCTIONS 1. KNOW YOUR TOOL Follow instructions for lubricating and changing accessories. 17. DISCONNECT TOOLS. Read and understand the owners manual and labels affixed to the tool. Learn its application and limitations as well as its specific Before servicing, when changing accessories or attachments such potential hazards.
-
Page 4: Electrical Information
ELECTRICAL INFORMATION WARNING! ALL ELECTRICAL CONNECTIONS MUST BE DONE BY A QUALIFIED ELECTRICIAN. FAILURE TO COMPLY MAY RESULT IN SERIOUS INJURY! ALL ADJUSTMENTS OR REPAIRS MUST BE DONE WITH THE TABLE SAW DISCONNECTED FROM THE POWER SOURCE. FAILURE TO COMPLY MAY RESULT IN SERIOUS INJURY! POWER SUPPLY 120V GROUNDED OUTLET CURRANT... -
Page 5: Getting To Know Your Table Saw
Locks the tilt mechanism after the blade is adjusted to desired tightening the lock handle. ALWAYS SECURELY LOCK IT position. WHEN IN USE. MODEL KC-5005R Blade diameter 10” Depth of cut at 45° 2 1/2” Depth of cut at 90°... -
Page 6: Assembly And Adjustments
ASSEMBLY & ADJUSTMENTS ASSEMBLING STAND Assemble the stand using Fig.4 as reference. Loosely attach the legs (A) Fig.4 on the outside of the top (B) and bottom braces (C) as shown using carriage bolts (D) and hex. nuts (E). Place stand on a level surface and tighten all hex. - Page 7 ASSEMBLY & ADJUSTMENTS RAISING/LOWERING RIVING KNIFE 1) Unlock the riving knife lock lever (A) Fig.7 by pivoting it upwards (vertical position). 2) Push the riving knife (B) towards the lock lever to disengage it from its positioning pins/slots. 3) Pull the riving knife upwards until its bottom mounting holes engage the positioning pins and the riving knife is above the saw blade.
- Page 8 ASSEMBLY & ADJUSTMENTS MOUNTING RIP FENCE ON TABLE & ADJUSTMENTS Position the rip fence from the outside on the table saw table so that the rear clip (A) Fig.11 engages under the table and the clamping body (A) Fig.12 engages the front groove of the table saw as shown.
-
Page 9: Changing Blade
ASSEMBLY & ADJUSTMENTS CHANGING BLADE Warning! Disconnect power cord from power source before installing/changing blade. 1. Uninstall the blade guard and anti-kickback fingers assembly from the riving knife. Then remove the table insert (A) Fig.14 to gain access to the blade arbor. 2. -
Page 10: Push Stick Construction
ADJUSTMENTS RAISING AND TILTING BLADE The height of the saw blade is adjusted by turning the handwheel (A) Fig.18. Turning the handwheel clockwise will lower the blade and counterclockwise will raise the blade. As a general rule, set the blade height 1/8” above the top of your workpiece. -
Page 11: Operation
OPERATION SAFETY PRECAUTIONS BEFORE OPERATION The operation of power tools involves a certain amount of hazard for the operator. Before attempting regular work we recommend you get the feel of operations using scrap lumber to check settings. Read entire instructions before you start to cut workpiece. Always pay attention to safety precautions to avoid personal injury. -
Page 12: Maintenance
1. Elevation, support rods, and gears. 2. Sliding rails and supports. 3. Table locking cams (Front & Rear). PARTS DIAGRAM & PARTS LISTS Refer to the Parts section of the King Canada web site for the most updated parts diagram and parts list.
Need help?
Do you have a question about the KC-5005R and is the answer not in the manual?
Questions and answers