
Related Manuals for Roche MagNA Pure Compact Instrument


Summary of Contents for Roche MagNA Pure Compact Instrument
- Page 1 MagNA Pure Compact Instrument Addendum 5 to Operator’s Manual, Version 1.3 Software Version 1.1 July 2016 For general laboratory use.
- Page 3 Issued by Underwriters Laboratories, Inc. (UL) for Canada and the US. Equipment de Laboratoire / ‘Laboratory Equipment’ is the product identifier as shown on the type Laboratory Equipment plate. MagNA Pure Compact Instrument – Addendum 5 to Operator’s Manual, Version 1.3...
- Page 4 If you have any questions regarding the MagNA Pure Compact System Instrument, please contact your Roche Diagnostics representative. Published by Roche Diagnostics GmbH Sandhofer Straße 116 68305 Mannheim Germany © 2013 Roche Diagnostics 08055211001 1 0716 For general laboratory use. MAGNA PURE, LIGHTCYCLER, AND TAQMAN are trademarks of Roche.
- Page 5 MagNA Pure Compact Instrument Addendum 4 to Operator’s Manual, Version 1.3 Software Version 1.1 November 2013 For general laboratory use.
- Page 7 Instruments has been removed for serial numbers starting with MPCC1550. If you have any questions regarding the MagNA Pure Compact System, please contact your Roche Diagnostics representative. To call, write, fax, or email us, visit the Roche Applied Science homepage at www.roche-applied-science.com...
- Page 8 Updated Information for the MagNA Pure Compact Instrument Please note the following correction to the MagNA Pure Compact Operator’s Manual: The floppy disk drive on the MagNA Pure Compact Instruments starting with serial number MPCC1550 has been removed. Old Version...
- Page 9 Updated Information for the MagNA Pure Compact Instrument The MagNA Pure Compact Operator’s Manual is corrected as shown below: Section Current Version Changes 8 Disk Drive Section 8 Disk Drive no longer valid. A 3.3.1 8 Disk Drive The disk drive allows the operator to...
- Page 10 Updated Information for the MagNA Pure Compact Instrument Section Current Version Changes B 4.2 As new or updated purification To upload new protocols, use a USB Upload of protocols are created, they may be storage device. New Updated added to the MagNA Pure...
- Page 12 Published by Published by Roche Diagnostics GmbH Sandhofer Straße 116 68305 Mannheim Germany © 2013 Roche Diagnostics 1 1113 For general laboratory use. MAGNA PURE, LIGHTCYCLER, AND TAQMAN are trademarks of Roche.
- Page 13 MagNA Pure Compact Instrument Addendum 3 to Operator’s Manual, Version 1.3 Software Version 1.1 August 2012 For general laboratory use.
- Page 14 Germany If you have any further questions regarding this matter, please do not hesitate to contact your Roche Diagnostics representative. To call, write, fax, or email us, visit the Roche Applied Science home page, http://www.roche-applied-science.com and select your home country.
- Page 15 Information regarding the MagNA Pure Compact Instrument Operator’s Manual Version 1.3 Versatile Nucleic Acid Purification - Smart. Small. Simple...
- Page 16 If you have any further questions regarding this matter, please do not hesitate to contact our Technical Services Department at your best convenience. To call, write, fax, or email us, visit the Roche Applied Science home page, http://www.roche-applied-science.com and select your home country. Country-specifi c contact information will be displayed.
- Page 17 All peripheral devices that are connected to the MagNA Pure Compact Instrument must comply with safety standard IEC 60950 for information technology equipment, or with IEC 61010-1, UL 61010-1 for laboratory instruments. Important Information regarding the MagNA Pure Compact Instrument Operator’s Manual...
- Page 18 70% ethanol solution or any acceptable PCR laboratory cleaner. Turn the instrument power Off and disconnect or unplug the power cord before cleaning the instrument. Important Information regarding the MagNA Pure Compact Instrument Operator’s Manual...
- Page 19 Information regarding the MagNA Pure Compact Software Update 1.1.2 Versatile Nucleic Acid Purification - Smart. Small. Simple...
- Page 20 Please read the following information, which updates information given in the MagNA Pure Compact Instrument Operator’s Manual! Dear valued user of the MagNA Pure Compact Instrument, In March 2009, Roche Applied Science introduced an updated version of the MagNA Pure Compact Software: Version 1.1.2. This latest version: fi...
- Page 21 Important Information regarding the MagNA Pure Compact Instrument Operator’s Manual Versatile Nucleic Acid Purification - Smart. Small. Simple...
- Page 22 Please Note: the sentence “Equipment to be connected must fulfi ll the standards set by IEC 950 (Information security in technical equipment, including electronic business machines).”, should be disregarded. Important Information regarding the MagNA Pure Compact Instrument Operator’s Manual...
- Page 23 Drop Resistance IEC 68-2-32 Test ED; withstands DIN EN 60068-2-32 Test ED; repeated drops from 1.8 m onto a withstands repeated drops from 1.8 m concrete surface onto a concrete surface Important Information regarding the MagNA Pure Compact Instrument Operator’s Manual...
- Page 24 Leakage Test Leakage Test Counter and Reminder Counter and Reminder Error Log Error Log O-ring Exchange O-ring Exchange Liquid Waste Discard Liquid Waste Discard UV Decontamination UV Decontamination Create Problem Report Important Information regarding the MagNA Pure Compact Instrument Operator’s Manual...
- Page 25 G6PDH, HPRT, ALAS, and _2-microglobulin.) The level of expression of an appropriate endogenous IC should not vary with the experimental conditions or treatments to be compared. Important Information regarding the MagNA Pure Compact Instrument Operator’s Manual...
- Page 26 Chapter C Chapter C: User Maintenance Leakage Test, page 72 Current Version Changes New Screenshot Leakage Test, page 73 Current Version Changes New Screenshot New Screenshot Important Information regarding the MagNA Pure Compact Instrument Operator’s Manual...
- Page 27 Chapter C 1.2.2 O-Ring Exchange, page 77 Current Version Changes New Screenshot 1.2.2 O-Ring Exchange, page 78 Current Version Changes New Pictures New Pictures New Pictures Important Information regarding the MagNA Pure Compact Instrument Operator’s Manual...
- Page 28 Chapter C Current Version Changes New Pictures New Pictures New Pictures Important Information regarding the MagNA Pure Compact Instrument Operator’s Manual...
- Page 29 Chapter C 1.2.2 O-Ring Exchange, page 79 Current Version Changes New Pictures New Pictures New Pictures New Pictures New Pictures Important Information regarding the MagNA Pure Compact Instrument Operator’s Manual...
- Page 30 2. Exchange: Hepa Filter HEPA Filter Cleaning Instructions and UV Decontamination UV Decontamination, page 85 Current Version Changes New Screenshot Important Information regarding the MagNA Pure Compact Instrument Operator’s Manual...
- Page 31 Roche representative, have this ready or make sure the remote service information ready, or ensure that the option is enabled. remote service option is enabled. New Screenshot Important Information regarding the MagNA Pure Compact Instrument Operator’s Manual...
- Page 32 Roche password, contact your local Roche Diagnostics representant and you will Diagnostics representative and you will receive a new one. receive a new one. Important Information regarding the MagNA Pure Compact Instrument Operator’s Manual...
- Page 33 03 788 300 001 03 788 270 001 Trademarks MAGNA PURE, LIGHTCYCLER, MAGNA PURE, LIGHTCYCLER, LC, COBAS, and TAQMAN are trademarks HYBPROBE, COBAS and TAQMAN are of Roche. trademarks of Roche. Important Information regarding the MagNA Pure Compact Instrument Operator’s Manual...
- Page 34 User Maintenance Create a Problem Report For troubleshooting by a Roche representative, error messages and confi guration fi les can be exported to a Problem Report. The Problem Report is a zipped fi le containing log, confi guration and version fi les.
- Page 35 MagNA Pure Compact Operator’s Manual Instrument Version 1.0 Software Version 1.1 www.roche-applied-science.com...
-
Page 37: Table Of Contents
Table of Contents Table of Contents Prologue Page Intended Use of the Instrument........................5 Contact Adresses ..............................5 Revision History................................ 5 Marks of Conformity .............................. 6 How to Use this Manual ............................7 Symbols used in the Manual..........................8 General Overview Page Specification of the Instrument .........................11 General Information..............................11... - Page 38 Use of Internal Controls ..........................66 Function of Internal Control..........................66 How to program the instrument for an internal control................. 66 Data Transfer to or from the MagNA Pure Compact Instrument ..........67 Data Transfer to other Instruments.........................67 Upload of New or Updated Purification Protocols..................67...
- Page 39 Prologue...
- Page 40 MagNA Pure Compact Operator’s Manual - Version 1.3...
-
Page 41: Prologue
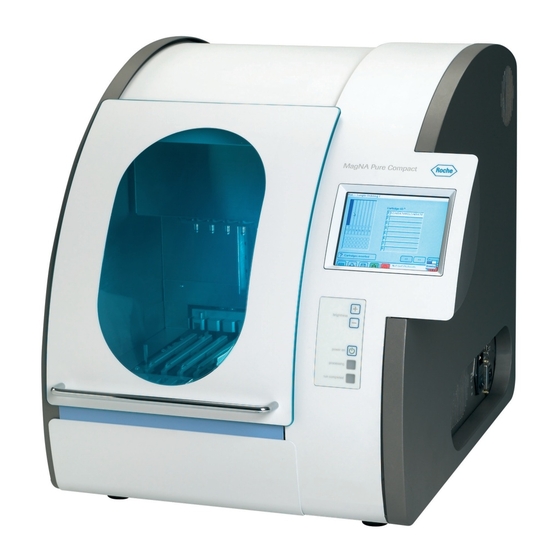
Prologue Intended Use of the Instrument The MagNA Pure Compact Instrument is a robotic workstation for the automated prepa- ration of nucleic acids from a broad variety of sample materials (e.g., mammalian blood, serum, plasma, or blood cells; cultured cells; tissue) with the assistance of specially designed MagNA Pure Compact reagent kits. -
Page 42: Marks Of Conformity
Intended Use of the Instrument Marks of Conformity Marks of Conformity The MagNA Pure Compact Instrument had been investigated according to: IEC 61010-1, 2nd Edition ("Safety requirements for electrical equipment for measurement, control and laboratory use; Part 1: General requirements") EN 61326:1997 + A1:1998 + A2:2001 Class B ("Electrical equipment for measurement,... -
Page 43: How To Use This Manual
How to Use this Manual Important: Before operating the MagNA Pure Compact Instrument, be sure to read and understand the warnings, cautions and safety requirements in this manual. Failure to follow the instructions contained in this manual may have hazardous consequences. -
Page 44: Symbols Used In The Manual
Intended Use of the Instrumentl Symbols used in this Manual Symbols used in this Manual Symbol Heading Description WARNING This symbol is used to indicate that non- RISK OF DANGER compliance with instructions or procedures may lead to physical injury or even death or could cause damage to the instrument. -
Page 45: General Overview
General Overview... - Page 46 MagNA Pure Compact Operator’s Manual - Version 1.3...
-
Page 47: Specification Of The Instrument
Specifications of the Instrument General Information General Overview Specifications of the Instrument Do not use the equipment in a manner not specified by the manufacturer. Otherwise, the protection provided by the equipment might be impaired. General Information Cat. No. 03 731 146 001 Dimensions W 540 mm;... -
Page 48: Operating Environment
Specifications of the Instrument Operating Environment Operating Environment Temperatures allowed during -25°C to +70°C transportation/storage/packaging Temperatures allowed during +18°C to +30°C operation Pollution Degree: 2 Indoor use Maximum relative humidity 80% (for operating temperatures up to 31°C); decreases linearly to 50% for operating temperatures up to 40°C Altitude up to 2000 m... -
Page 49: Installation Of The Instrument
Installation of the Instrument Shipping The MagNA Pure Compact Instrument is shipped in a styrofoam container surrounded by a cardboard box. Before opening it, inspect the container carefully for damage. Report any damage to your local Roche Diagnostics office before accepting the unit. -
Page 50: Additional Items Required For Operation And Maintenance
Additional Required Items for Operation and Maintenance Additional Items Required for Operation and Maintenance 2.3.1 Operating Reagents Before operating the MagNA Pure Compact Instrument for the first time, you must have one of the following reagent kits: Cat. No. Purification Kit For Preparation Of... -
Page 51: Maintenance Items
O-rings should be changed. For details please see the Maintenance section in Chapter C. There is an O-Ring Exchange Tool available, which simplifies the O-ring changing pro- cess. Please contact your local Roche Diagnostics representative if you need O-rings changed or want one of these tools. General Overview... -
Page 52: Setup
2.4.1 Selecting a Location The MagNA Pure Compact Instrument requires very little setup. Choose for the MagNA Pure Compact Instrument a clean, dry, level, stable surface within 3 m of a compatible electrical outlet. To ensure proper ventilation, leave 10 cm of space behind the instrument and 15 cm at each side of the instrument. -
Page 53: Software Setup
Action Software Screen Turn on the MagNA Pure Compact Instrument by pressing the Power On button on the front of the instrument. During initialisation/self test of the system components the start-up screen appears. - Page 54 Installation of the Instrument Setup Action Software Screen Basic Settings Program the actual time and date by pressing the buttons next to the time and date displays. A pop up window opens to allow you to set the correct values. Touch the Up and Down buttons (to the right of each number) to change the values for hours and minutes (see figure).
- Page 55 Installation of the Instrument Setup Action Software Screen To specify the default laboratory name that will be mentioned with all generated data, touch the Laboratory Name field, then use the pop-up virtual keyboard to type the laboratory name into the field. Alarm Settings To specify the types of alarm that the instrument software should give, as well as the loudness of each alarm, touch appropriate buttons on the "Acoustic Signals“...
- Page 56 To enter a new type of sample material type a new name into the entry field below the material list. Select the Add button to add the new name to the Material List. The MagNA Pure Compact Instrument is now ready for use. MagNA Pure Compact Operator’s Manual - Version 1.3...
-
Page 57: Description Of The Instrument
When it is purifying DNA, the basic operations of the instrument are: For details on the purification kits (provided in prefilled cartridges) please refer to their pack inserts. All kit pack inserts can be obtained at the Roche home page: http:// www.roche-applied-science.com... -
Page 58: Description Of The Instrument
Description of the Instrument Description of the Instrument Description of the Instrument 3.3.1 Front View of the Instrument 1 Housing Painted sheet metal housing contains the main body of the instrument and protects it from electromagnetic influences, chemicals, and UV-light. 2 Front Door The nozzle head can only be moved after the instrument door is closed and locked. - Page 59 Description of the Instrument Description of the Instrument 3 Nozzle Head The nozzle head moves over the processing stage up and down (vertically along the z- axis). It carries the pipetting unit, the sensor unit and the magnet unit. The pipetting unit consists of 8 independent working air-filled plungers, each connected to a nozzle (1) which takes up the Reaction Tip.
- Page 60 Description of the Instrument Description of the Instrument 6 Buttons for Setting Screen Contrast By pressing the + and – buttons, you can set the brightness of the touch screen. 7 Status Indicator LEDs and Power On Button The instrument is turned on pressing the "power on" button. Three LEDs indicate the current status of the instrument: The green LED of the "power on"...
-
Page 61: Detailed View
Description of the Instrument Description of the Instrument 3.3.2 Detailed view 1 Nozzle Head The nozzle head performs all pipetting steps. Its 8 nozzles can hold up to 8 reaction tips per time. It also contains the tip-loss & clot-detection system (pressure sensor). 2 Magnet Unit The magnet unit contains permanent magnets and can move forward and backward from the rear of the chamber. - Page 62 Description of the Instrument Description of the Instrument 3 Heating Block The heating block has two independantly working units for two dedicated wells (for the lysis and elution step) per one reagent cartridge. These wells are separated from each other and from the wells with ambient temperature by a little distance. 4 Tip Rack The tip rack holds up to 8 Tip Trays, each carrying 2 large tips, 1 small tip, and a dispos- able piercing tool, which pierces the aluminum foil on every cartridge well before purifi-...
-
Page 63: Back View Of The Instrument
Description of the Instrument Description of the Instrument 3.3.3 Back View of the Instrument Description of Instrument Backmber Instrument Part Description 1 Exhaust fans with HEPA filter The housing is cooled by air. The instrument has air inlets with dust filters on both sides of the instrument. -
Page 64: Sides Of The Instrument
Description of the Instrument Description of the Instrument 3.3.4 Sides of the Instrument Description of Right Side of Instrument 1 Air Inlet Air inlet for electronic compartment, with dust filter. 2 Air Outlet Air outlet for electronic compartment. 3 Main Switch Use the Main Switch to turn the instrument on and off, e.g. - Page 65 The serial port might be used for additional external devices for LIMS. 9 USB Ports There are two USB ports, USB 1 and USB 2 port, can be used for any accessories that are not included with the MagNA Pure Compact Instrument. Description of Left Side of Instrument 1 Air Inlet Air Inlet for the processing area with dust filter.
-
Page 66: Magna Pure Compact Accessories
Description of the Instrument Description of the Instrument 3.3.5 MagNA Pure Compact Accessories All MagNA Pure Compact Accessories described below can be ordered separately. For ordering information see chapter C, Ordering Guide. 1 Cartridge Rack The cartridge stage holds the cartridge rack, where the individual prefilled reagent/pro- cessing cartridges (up to 8 per purification run) are inserted. - Page 67 Description of the Instrument Description of the Instrument 3 Elution Tube Rack The Tube Rack also contains a separate rack for elution tubes. The Elution Tube Rack will sit on the tube rack, after both have been equipped. The two holes of the Elution Tube Rack match with the two pins of the tube rack.
- Page 68 Description of the Instrument Description of the Instrument 5 Waste Tank The instrument contains an integral waste tank, where liquid waste accumulates during each purification run. It can hold all the liquid waste from one purification run. Note: To avoid contamination, always remember to empty the waste tank after every purification run.
- Page 69 Description of the Instrument Description of the Instrument Scanner Specifications Power Supply 5 VDC ±5% Consumption 250 mA operating, 330 mA max.; 250 µA sleep mode Max. Resolution 0.076 mm (3 mils) Scan Rate 270 scans/sec. Min. Print Contrast Ratio Reading Angle Skew: ±80°, Pitch: 65°, Tilt ±35°...
-
Page 70: Position And Meaning Of Warning Labels
Description of the Instrument Description of the Instrument 3.3.6 Position and Meaning of Warning Labels Symbol Location Meaning Heating Block The heating block reaches temperaturs of 100°C. Do not touch the block during and directly after purification. If you touch the block, it may burn you. -
Page 71: How To Operate The Magna Pure Compact Instrument
How to Operate the MagNA Pure Compact Instrument... - Page 72 MagNA Pure Compact Operator’s Manual - Version 1.3...
- Page 73 Handling the MagNA Pure Compact Software Once the MagNA Pure Compact Instrument is turned on, the integral computer controls all instrument operations. The instrument is operated by the touch-screen and the bar- code scanner only. The menus on the instrument touch-screen will guide you through instrument set up and operation.
- Page 74 Table 1: Overview of self-test Note: If the self-test is not passed and the remedy as described in the section about errors and troubleshooting does not help, please contact your local Roche representative. Note: Besides the start up self-test, the instrument will automatically perform a self-test after a certain period of instrument inactivity.
-
Page 75: Overview Of Main Menu Screen
6. Status Indicator The right portion of the Title Bar shows the current status of the instrument. For a list of possible statuses, see table 3 at the end of this section. How to Operate the MagNA Pure Compact Instrument... - Page 76 Handling the MagNA Pure Compact Software Overview on Main Menu Screen Symbol Name Function Keyboard Brings up a virtual keyboard. Only active when a text box that allows typed entries is high- lighted. Regular set of symbols (mostly lower case) for virtual keyboard (shift off): Alternate set of symbols (mostly upper case) for virtual keyboard (shift on):...
- Page 77 O-ring Exchange Liquid Waste Discard UV Decontamination Service Performing specialized service Not described in this Used by Roche service operators only functions Operator’s Manual. Table 4: Overview of menu and submenu structure How to Operate the MagNA Pure Compact Instrument...
-
Page 78: Flow Diagram For Preparation Of A Purification Run
Handling the MagNA Pure Compact Software General Workflow for Preparation of a Purification Run Flow Diagram for Preparation of a Purification Run: Workflow Scan cartridge barcode and insert cartridge Selecting purification protocol Insert tip trays Insert sample [Insert tubes for internal control] Insert elution tubes Run the purification... -
Page 79: Performing A Purification Run
Dispose of unused reagents and waste in accordance with country, federal, state, and local regulations. Material Safety Data Sheets (MSDS) are available upon request from the local Roche office. Use sterile, disposable, nuclease-free pipette tips to avoid microbial and nuclease con- tamination. - Page 80 Performing a Purification Run Warnings and Precautions when handling the Tip Trays: Check that piercing tool and reaction tips are placed correctly in the Tip Trays before use. Handle Tip Trays with care to prevent tips or piercing tool from falling out of the tray. Should this happen, discard the respective tip tray and tips.
- Page 81 Commonly used endogenous ICs include so-called housekeeping gene mRNAs. (Note that Roche Applied Science offers several LightCycler® Housekeep- ing Gene Sets for the detection of human housekeeping genes, incl. G6PDH, HPRT, ALAS, and 2-microglobulin.) The level of expression of an appropriate endogenous IC...
-
Page 82: Purification
To change the password associated with a particular operator name, touch the Change Password button. A pop-up window will open to allow you to enter the new password. MagNA Pure Compact Operator’s Manual - Version 1.3 How to Operate the MagNA Pure Compact Instrument... - Page 83 Handling Software programming Open the front door of the MagNA Pure Compact Instrument and remove all the racks you will need for the run: a. Cartridge Rack Pull the handle towards you to lift the Processing Stage. Pull the stage towards the front of the instrument to move the pin on the front of the stage to the top (wide part) of the keyhole in the Cartridge Rack.
- Page 84 The Next button (b) will now be active. Touch this button to confirm the information on this screen and go to the next programming screen. MagNA Pure Compact Operator’s Manual - Version 1.3 How to Operate the MagNA Pure Compact Instrument...
- Page 85 The Next button will now be active. Touch this button to confirm the information on this screen and go to the next programming screen. MagNA Pure Compact Operator’s Manual - Version 1.3 How to Operate the MagNA Pure Compact Instrument...
- Page 86 ORDERING SCREEN 2) screen and go to the next programming screen (SAMPLE ORDERING SCREEN 4). Go to Action 10 below. MagNA Pure Compact Operator’s Manual - Version 1.3 How to Operate the MagNA Pure Compact Instrument...
- Page 87 Result: As you fill in the "Internal Control ID" field for each control, the corresponding position in the reagent layout will change from green (active) to dark blue (installed in instrument). Insert the Tube Rack with sample and internal controls into the MagNA Pure Compact Instrument. Touch the "IC Tubes inserted" confirmation button.
- Page 88 The instrument will sound an alarm when the run is finished. (See Chapter A for information on setting this alarm.). MagNA Pure Compact Operator’s Manual - Version 1.3 How to Operate the MagNA Pure Compact Instrument...
- Page 89 Liquid Waste Discard button displayed on the RESULT screen b. via the Maintenance Menue as described on the following pages in chapter B. 2.2 MagNA Pure Compact Operator’s Manual - Version 1.3 How to Operate the MagNA Pure Compact Instrument...
-
Page 90: Liquid Waste Discard
Start button will become active. Touch this button to make the instrument start transferrring liquid waste from the cartridges to the Waste Tank. MagNA Pure Compact Operator’s Manual - Version 1.3 How to Operate the MagNA Pure Compact Instrument... - Page 91 Remove the Waste Tank and empty. After confirmation the Close button appears. Touch the Close button to return to the MAIN MENU or MAINTENANCE Screen. MagNA Pure Compact Operator’s Manual - Version 1.3 How to Operate the MagNA Pure Compact Instrument...
-
Page 92: Use Of Internal Controls
IC. (See the pack inserts of these reagent kits for details). How to program the instrument for an internal control The IC may be added to the run of the MagNA Pure Compact Instrument in either of two ways:... -
Page 93: Data Transfer To Or From The Magna Pure Compact Instrument
Data Transfer from or to the MagNA Pure Compact Instrument Data Transfer to other Instruments Data Transfer to or from the MagNA Pure Compact Instrument The data from the result screen can be saved to a disk. In future applications with the LightCycler System and COBAS TaqMan 48 Analyzer these data files can be transferred to the respective instruments. - Page 94 MagNA Pure Compact Operator’s Manual - Version 1.3...
-
Page 95: Maintenance And Trouble Shooting
Maintenance and Trouble Shooting... - Page 96 MagNA Pure Compact Operator’s Manual - Version 1.3...
-
Page 97: User Maintenance
There should be documented also regular checks of the system performance. If you need assistance in creating such ring-binder, please contact your local Roche representative. As well it is advisable to document there or in the MagNA Pure Software documentation all operators and used reagent kit lot no.s in order to be able to perform an optimal trou-... - Page 98 User Maintenance Leakage Test After each Leakage Test, do one of the following: If the Leakage Test shows Then ... that the O-rings... are leaking and need to be changed change the O-rings (as described in Section C.1.2.2). perform the Leakage Test again, to make sure the new O-rings are working correctly.
- Page 99 User Maintenance Leakage Test Put 8 new Tip Trays (from the Roche Tip Tray Kit) into the Tip Tray Rack. Pipet 1 ml water into each of 8 Sarstedt tubes, then insert the tubes into row 1 (Sample Tube row) of the Tube Rack.
- Page 100 User Maintenance Leakage Test Instrument actions during the Leakage Test: At the beginning of the test, the robotic arm picks up the tips and moves to the Sample/Internal Control Tube Rack. The arm aspirates 1 ml of water plus an additional 100 µl of air from the sample tubes.
-
Page 101: O-Ring Maintenance
User Maintenance O-ring Maintenance O-ring Maintenance Purpose of O-rings: The O-rings hold the reaction tips on the nozzles of the Nozzle Head. They also form an airtight seal around the top of the reaction tips to prevent leakage and ensure accurate pipetting. After a time, O-rings may wear out and cause the reaction tips to either leak or be poorly attached to the nozzles. -
Page 102: O-Ring Exchange
User Maintenance O-ring Maintenance 1.2.2 O-ring Exchange If you believe (or a Leakage Test [see above] indicates) that the O-rings are damaged or worn out, use the O-ring exchange tool to replace them with new ones. Description of the O-ring Exchange Tool MagNA Pure Compact Operator’s Manual - Version 1.3... - Page 103 User Maintenance O-ring Maintenance Execution of the O-ring Exchange On the touch-screen, access the MAIN MENU Screen. Touch the Maintenance button. Result: The MAINTENANCE Screen appears. Touch the O-Ring Exchange button. Result: The O-RING EXCHANGE Screen appears. Maintenance and Trouble Shooting...
- Page 104 User Maintenance O-ring Maintenance With the O-Ring Exchange Tool, remove the O-rings as shown below: Place the pin of the O-Ring Exchange Tool into the hole of a nozzle: Insert the pin into the nozzle as deeply as possible. While maintaining the position of the pin, move the O-ring pusher toward the pin until it is inserted into the groove in the nozzle.
- Page 105 User Maintenance O-ring Maintenance While holding the O-ring on the Exchange Tool with your thumb, pull the entire O- ring changer downward, away from the nozzle. The O-ring is now removed from the nozzle: Grease the new O-rings as described in Section C.1.2.1 above. Note: Lubricating the O-rings before placing them on the nozzles is important to ensure correct reaction tip uptake and alignment.
- Page 106 User Maintenance O-ring Maintenance Press Back to go back to the MAINTENANCE Menue On the O-RING EXCHANGE Screen, do one of the following: If ... Then ... you have successfully changed touch the OK button to confirm the O-ring the O-rings exchange.
-
Page 107: Service Maintenance
Service Maintenance Service Maintenance We recommend that a Roche Diagnostics service engineer perform the first Service Main- tenance of the instrument one year after the instrument is installed. Subsequently, this Service Maintenance should be performed annually. Note: Service Maintenance may only be performed by a Roche Diagnostics service engi- neer. -
Page 108: Counter And Reminder
Remote Control and Host Your Roche service representative is able to perform some of the service and trouble- shooting via the remote control function. For this purpose there are two buttons Remote Control and Host available in the Maintenance Menu. -
Page 109: Cleaning Instructions And Uv Decontamination
Handle and dispose of infectious material according to local safety guidelines. Cleaning The surface of the MagNA Pure Compact Instrument as well as removable internal parts should be cleaned on a weekly basis with a lint free cloth moistened with deonized water. - Page 110 Never clean the cartridge rack in a diswasher. All other removeable accessories are dishwasher proof. Always use only detergents that are compatible with the instrument’s surface. If in doubt, please contact your local Roche representative! MagNA Pure Compact Operator’s Manual - Version 1.3...
-
Page 111: Uv Decontamination
Cleaning Instructions and UV Decontamination UV Decontamination UV Decontamination After cleaning the Reagent/Sample Stage with bleach and water/ethanol, sterilize the instrument with UV light, as follows: Close the instrument door and touch the UV Decontamination button on the MAINTENANCE Screen. On the DECONTAMINATION SETUP Screen that appears, use the Up and Down buttons to set the decontamination... -
Page 112: Error Codes And Trouble Shooting Guide
This option can be accessed via the button Error Log in the Maintenance Menu. In case you want to trouble shoot an error together with a local Roche representant, have these informations ready or make sure the remote service option is enabled. -
Page 113: Instrument Error Codes
Error Codes and Trouble Shooting Guide Instrument Error Codes Instrument Error Codes Valid for Software Version 1.1 and higher Error Error Error Information Explanation Action Code Message (displayed on information screen) 1 to 99 [diverse Internal error Shut down instrument messages] at main switch and restart system. - Page 114 Error Codes and Trouble Shooting Guide Instrument Error Codes Error Error Error Information Explanation Action Code Message (displayed on information screen) 3509 Different kit Mixing up of different kit Mixing up of different kit Make sure that only one kit types mixed.
- Page 115 Error Codes and Trouble Shooting Guide Instrument Error Codes Error Error Error Information Explanation Action Code Message (displayed on information screen) 3523 Hepa filter fan Hepa filter fan sensor Hepa filter fan sensor is not Restart system. If problem sensor failed. malfunction.
- Page 116 Error Codes and Trouble Shooting Guide Instrument Error Codes Error Error Error Information Explanation Action Code Message (displayed on information screen) 3555 No protocol No valid protocol for the No valid protocol for the Restart sample ordering files found entered cartridge ID found. entered cartridge ID found.
- Page 117 Error Codes and Trouble Shooting Guide Instrument Error Codes Error Error Error Information Explanation Action Code Message (displayed on information screen) 3572 Large Tip No large Tip was detected in No large Tip was detected in Check if tip tray has been missing referenced channel number.
- Page 118 Error Codes and Trouble Shooting Guide Instrument Error Codes Error Error Error Information Explanation Action Code Message (displayed on information screen) 3589 Sample ID Cartridge ID input is ID input for sample tube is Check correct position of missing in missing.
- Page 119 Error Codes and Trouble Shooting Guide Instrument Error Codes Error Error Error Information Explanation Action Code Message (displayed on information screen) Errors during Self Test (in pop-up windows) 5601 Door is open Instrument Door was open Close Door tightly and (5601).
-
Page 120: Trouble Shooting Guide
Check O-rings of nozzle head Reaction tips not attached Call Roche service for Easy Teaching correctly to the nozzles Instrument misadjusted. Clumping of beads Too much sample material was used Reduce amount of sample material to the values or beads in eluate recommended in the pack insert. - Page 121 Error Codes and Trouble Shooting Guide Trouble Shooting Guide Problem Possible cause Recommendation Poor (RT-) PCR Too much nucleic acid in PCR Check nucleic acid concentration in the eluted sam- performance / ples and adjust amount of eluate per PCR. Optimum: poor sensitivity e.g.
-
Page 122: Documentation
Documentation Documentation Touch the Documentation button on the Main Menu screen to search for certain parameters of a purification run: You can search for Run ID Sample ID Elution ID Date Lot. No. or you can call up the data from the previous run by using the Last Run button. - Page 123 Documentation For viewing details of this run, select it on the touch-screen and touch the Select but- ton. The result screen of the respective run will be displayed and can be printed or saved to a disk or LIMS. Maintenance and Trouble Shooting...
-
Page 124: Administrator Authorization
During the administrator authorization the pass- word will be displayed hidden, to guarantee confidentiality. In case you should forget the administrator password, contact your local Roche Diagnostics representant and you will receive a new one. -
Page 125: Ordering Guide
Related Products Ordering Guide Related Products These products are not available from Roche Applied Science, but recommended for use with the MagNA Pure Compact Instrument. Tubes for Maintenance and Internal Control If needed, we recommend the following Sarstedt Tubes for use with MagNA Pure Com- pact Instrument only. -
Page 126: Magna Pure Compact System Products
Notice To Purchaser ‡ The purchase of this product does not convey any licenses or other rights for the perfor- mance of PCR. MAGNA PURE, LIGHTCYCLER, COBAS, and TAQMAN are trademarks of Roche. MagNA Pure Compact Operator’s Manual - Version 1.3... - Page 127 Index Index Index word page Administrator.........................19, 98 Alarm Settings........................19 Barcode........................31, 48, 54 Barcode Scanner...................24, 24, 24, 37, 48 Basic Settings........................18 Cartridge Rack ....................23, 30, 48, 48 Cleaning..........................83 COBAS TaqMan 48 Analyzer ....................67 Data Transfer........................67 Decontamination ......................83, 83 Disk Drive..........................24 Drip Tray ........................31, 84 Drop Catcher......................25, 32, 58, 84 Easy Teaching ........................16 Elution Rack.........................60...
- Page 128 Index Index word page Nozzle Head......................23, 23, 64, 71 O-ring .........................15, 23, 71, 71 O-ring Exchange ......................... 76 Operator ..........................19 Password ........................46, 98 Piercing Tool........................15, 26 Pipetting Accuracy ......................12 Power On Button ......................24, 37 Pressure Sensor........................25 Print .............................
- Page 130 Roche Diagnostics GmbH Roche Applied Science 68298 Mannheim Germany...
Need help?
Do you have a question about the MagNA Pure Compact Instrument and is the answer not in the manual?
Questions and answers