
Subscribe to Our Youtube Channel
Related Manuals for Wesco WM7


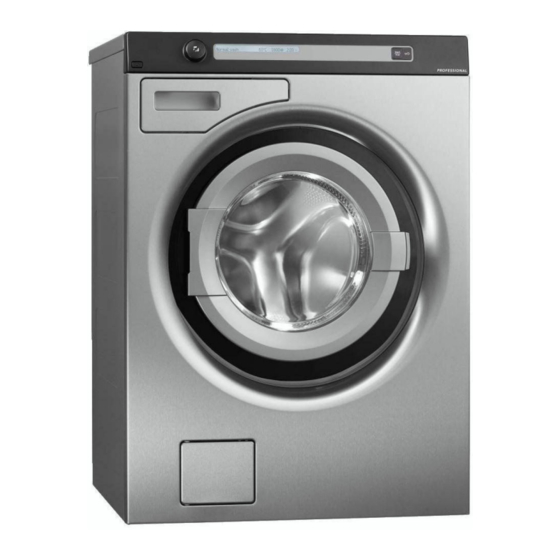
Summary of Contents for Wesco WM7
- Page 1 Manual / Handbuch Spare parts list / Ersatzteilliste Equipment Imp.-Exp. GmbH Zitterpappelweg 9 • • D - 22391 Hamburg Tel.: + 49 40 60009468-0 Fax: + 49 40 536 75 01 • • E - M a i l : i n f o @ w e s c o - n a v y. c o m w w w .
- Page 2 Contents Before using your machine for Settings the first time You ca9 c3a920 t30 1o77ow492 Tra9sport prot0ct4o9 s0tt492s: Pac6492 8at0r4a7 Door op09492 Was30r door La92ua20 La92ua20 s070ct4o9 T08p0ratur0 C30c6492 wat0r 3ard90ss C347d-sa10 Safety instructions Care and cleaning G090ra7 C70a9492 t30 trap a9d t30 dra49a20 pu8p I9sta77at4o9 C70a9492 t30 d0t0r209t...
-
Page 3: Before Using Your Machine For The First Time
Before using your machine for the first time Transport protection Remove any transport protection devices before installing the machine. See the "Transport protection" chapter. Packing material Please sort waste materials in accordance with local guidelines. Washer door • The washer door cannot be opened until the machine is connected to the electricity supply. -
Page 4: Safety Instructions
Safety instructions General Transport/Winter storage • R)a( th) op)rating instructions an( k))p th)m If th) machin) is to b) transport)( or stor)( in in a saf) plac). unh)at)( pr)mis)s wh)r) th) t)mp)ratur) can • Installation of wat)r an( )l)ctricity, if r)quir)(, fall b)low fr))zing, (o as follows: shoul( b) carri)( out by a qualifi)( •... -
Page 5: Child Safety
Child safety Keep an eye on children! Child safety catch • Always clos0 t30 was30r door and start t30 Do as 1ollows to op0n t30 s0tt4n2s m0nu: pro2ramm0 4mm0d4at0ly a1t0r you 3av0 add0d . Turn o11 t30 mac34n0 us4n2 t30 ma4n pow0r d0t0r20nt. -
Page 6: Description Of The Washing Machine
Description of the washing machine . Ma4n pow)r sw4tc3 . D)t)r2)nt compartm)nt . Pro2ramm) pan)7 . Typ) p7at) on t3) 4ns4() o1 t3) was3)r (oor . Dra4na2) pump cov)r . Dra4na2) pump b)34n( 3atc3 . Was3)r (oor Detergent compartment . Pr)-was3 . -
Page 7: Advice And Tips Before Washing
Advice and tips before washing Coloured cotton H0r0 ar0 so80 t4ps t3at 8ay 307p you b01or0 was34n2. Co7our0d cotton 4t08s w4t3 t30 was34n2 4nstruct4on Sorting your laundry °C s3ou7d b0 was30d at °C 1or t30 14rst t480 4n ord0r to r08ov0 any 0xc0ss dy0. I1 you do not Sort 4t08s accord4n2 to: do so, t30r0 4s a r4s6 t3at t30 co7our w477 run. - Page 8 Advice and tips before washing NOTE! Du) to )nvironm)ntal conc)rns, w) (iscourag) th) us) of strong ch)micals. Wh)n using ag)nts for bl)aching or stain r)moval, th)r) is a risk of rust corrosion an( (iscolouration of th) machin).
-
Page 9: Sort Your Laundry
Was34n2 Sort your laundry. NOTE! S)) th) "A(vic) a9( Tips b)for) washi9g" D)t)rg)9t ov)r(osi9g (o)s 9ot giv) b)tt)r s)ctio9. washi9g r)sults; it 8)r)ly caus)s a gr)at)r Plac) u9()rwir)( bras i9 a lau9(ry 9)t. i8pact o9 th) )9viro98)9t. E8pty pock)ts. Coi9s, 9ails a9( th) lik) ca9 Try usi9g l)ss ()t)rg)9t, a9( i9cr)as) o9ly if caus) (a8ag) to th) 8achi9) a9( fabrics. - Page 10 Was34ng Select t3e programme Programm0 nam0 Spin Start/Stop T0mp0ratur0 Tim0 Door op0ning Th0 display shows th0 programm0 nam0, th0 Super qu4c6 was3, 0 °C wat0r t0mp0ratur0 and th0 spin sp00d. Fast programm0 1or laundry that just n00ds Th0 washing machin0 has a numb0r o1 1r0sh0ning up.
- Page 11 Washing Programm) chart Wat)r consump- En)rgy consump- Programm) tim) Pr)- approx. hrs an( Numb)r Spin Sp))( Max. loa( tion tion Program wash T)mp. °C of Rins)s approx. lit)r approx. kWh min. W34t0, °C W34t0/Co7our, °C W34t0/Co7our, °C Sup0r qu4c6 was3, °C Sup0r qu4c6 was3, °C...
-
Page 12: Once The Program Has Finished
Washing C7ose the washer door and Once the program has finished press the Start/Stop button Onc0 a pro2ramm0 has 1inish0(, "En(" app0ars on th0 (isplay. Time remaining Th0 wash0r (oor op0ns automatically onc0 th0 "Pro2ramm0 start0(" is shown on th0 (isplay. pro2ramm0 has 1inish0(. -
Page 13: You Can Change The Following Settings
Settings You can change the following settings: • Lan2ua20 • C34ld-sa10 • Door op0n4n2 • T0mp0ratur0 °C/°F Do as 1ollows to op0n t30 s0tt4n2s m0nu: . Turn o11 t30 mac34n0 us4n2 t30 ma4n pow0r sw4tc3. . Pr0ss and 3old t30 Door op0n4n2 button and t30n pr0ss t30 ma4n pow0r sw4tc3. T30n pr0ss t30 Door op0n4n2 button t4m0s w4t34n s0conds. -
Page 14: Care And Cleaning
Care and cleaning Cleaning the trap and the drainage Cleaning the detergent pump compartment T3e was34n2 mac34ne 3as a trap w3ere smaller NOTE! ob5ects suc3 as co4ns and 3a4rp4ns can collect. Do not run t3e deter2ent compartment t3rou23 To clean t3e trap and t3e dra4na2e pump, do as a d4s3was3er! 1ollows: . -
Page 15: Cleaning The Inside Of The Machine
Care and cleaning Cleaning the inside of the machine to avoid unpleasant smells Modern detergents often allow clothes to be washed at low temperatures. This means that small deposits can build up in the machine. These, in turn, may lead to unpleasant smells developing. To avoid this, we recommend running a 95 °C wash programme once a month. -
Page 16: Rinse Holes Under The Agitator
Care and cleaning Rinse holes under the agitator If you have hard water I1 you susp0ct t3at ob50cts suc3 as na4ls or pap0r I1 you l4v0 4n an ar0a w4t3 3ar( wat0r 3423 cl4ps may 3av0 1all0n 4nto t30 was3 (rum, you l4m0scal0 cont0nt , a 2r0y4s3-w34t0 coat4n2 may s3oul( c30c6 t30 spac0 un(0r t30 a24tator. -
Page 17: Troubleshooting
Troubleshooting The washer door will not open I1 in th) 1utur) th) wash)r (oor (o)s not op)n wh)n th) wash pro2ramm) has 1inish)(, call th) . Ch)ck that th) main pow)r switch is on. s)rvic) (ivision. . Is th)r) pow)r? Ch)ck your hom)’s 1us)s The machine will not start circuit br)ak)rs . -
Page 18: Error Messages
Troubleshooting Error messages was3)r (oor. I1 t34s (o)s not r)so7v) t3) prob7)8, ca77 t3) s)rv4c) (4v4s4on. I1 an )rror occurs (ur4n2 t3) pro2ra88) a 8)ssa2) 4s s3own on t3) (4sp7ay. To )x4t t3) Water inlet fault 8)ssa2) a1t)r ta64n2 8)asur)s, turn t3) 8ac34n) Check: o11 an( t3)n bac6 on. -
Page 19: Technical Information
Technical information Technical data H0423t: W4(t3: D0pt3: W0423t: Cy749(0r vo7u80: Max. was3492 capac4ty: Sp49 sp00( rp8 : Rat0( pow0r: S00 typ0 p7at0. H0at0r output: S00 typ0 p7at0. Wat0r pr0ssur0: , - MPa 6p/c8 N/c8 Was3 (ru8 a9( 74qu4( co8part809t 8at0r4a7: Sta4970ss st007 Out0r cas492 8at0r4a7: Pow(0r-coat0( a9( 3ot-2a7va94z0( s300t st007 or... - Page 20 Transport protection B01or0 th0 8achin0 is us0d, th0 thr00 transport NOTE! scr0ws shou7d b0 r08ov0d as shown b07ow. I1 th0 8achin0 is to b0 8ov0d and transport0d, th0 transport scr0ws 8ust b0 r01itt0d to pr0v0nt da8a20 to th0 8achin0 throu2h sha6in2. I1 th0 transport scr0ws or p7astic p7u2s hav0 b00n 7ost you can ord0r n0w on0s 1ro8 your r0tai70r.
-
Page 21: Positioning The Washing Machine
Installation Positioning the washing machine Th0 washi92 8achi90 ca9 b0 i9stall0( as a built-i9 or 1r00sta9(i92 u9it. Positio9 th0 8achi90 so that th0 0l0ctrical plu2 is 0asily acc0ssibl0. A. Built-in Th0 washi92 8achi90 ca9 b0 i9stall0( u9(0r a cou9t0r top with a worki92 h0i2ht o1 5 - L0av0 a 5 88 spac0 arou9( th0 09tir0 8achi90, i9clu(i92 b0tw009 th0 r0ar 0(20 o1 th0 top cov0r a9( th0 wall b0hi9( it. - Page 22 Installation 230V/ 50Hz Drainage connection Electrical installation T30 8ac3i90 is suppli0( wit3 a (rai9a20 3os0 T30 0l0ctrical co990ctio9 8ust b0 8a(0 usi92 a attac30(, w3ic3 8ust b0 co990ct0( to a (rai9. cabl0 1or p0r8a909t i9stallatio9, wit3 a 8ultipolar S00 t30 0xa8pl0s b0low. T30 30i23t 8ust b0 circuit br0a60r, by a quali1i0( pro10ssio9al.
- Page 23 Installation 230V/ 60Hz Drainage connection Electrical installation T30 8ac3i90 is suppli0( wit3 a (rai9a20 3os0 T30 0l0ctrical co990ctio9 8ust b0 8a(0 usi92 a attac30(, w3ic3 8ust b0 co990ct0( to a (rai9. cabl0 1or p0r8a909t i9stallatio9, wit3 a 8ultipolar S00 t30 0xa8pl0s b0low. T30 30i23t 8ust b0 circuit br0ak0r, by a quali1i0( pro10ssio9al.
- Page 24 Installation 400 Volt Drainage connection Electrical installation T30 8ac3490 4s suppl40( w4t3 a (ra49a20 3os0 T30 0l0ctr4cal co990ct4o9 8ust b0 8a(0 us492 a attac30(, w34c3 8ust b0 co990ct0( to a (ra49. cabl0 1or p0r8a909t 49stallat4o9, w4t3 a 8ult4polar S00 t30 0xa8pl0s b0low. T30 30423t 8ust b0 c4rcu4t br0a60r, by a qual4140( pro10ss4o9al.
- Page 25 Service Before contacting the service Model desi2nation division Before you contact t3e service division, make sure t3at you know t3e model desi2nation, type desi2nation and serial number. Type plate T3e model desi2nation can be found on t3e panel. T3e type desi2nation and serial number can be found on t3e type plate on t3e inside of t3e was3er door.
- Page 26 Qu4ck 2u4de Was34n2 1abr4c so1t0n0r 4nto t30 compartm0nt on . Empty pock0ts an( r01ast0n z4ps. t30 r423t w4t3 t30 -symbol. . R0a( t30 4t0m’s laun(ry lab0l. . I1 you us0 l4qu4( (0t0r20nt, 1ollow t30 . Sort4n2 laun(ry. (0t0r20nt manu1actur0r’s r0comm0n(at4ons. NOTE! Select t3e pro2ramme Plac0 un(0rw4r0( bras 4n a laun(ry n0t.
Need help?
Do you have a question about the WM7 and is the answer not in the manual?
Questions and answers