Table of Contents
Advertisement
Advertisement
Table of Contents

Subscribe to Our Youtube Channel
Related Manuals for MULTIQUIP AR14H


Summary of Contents for MULTIQUIP AR14H
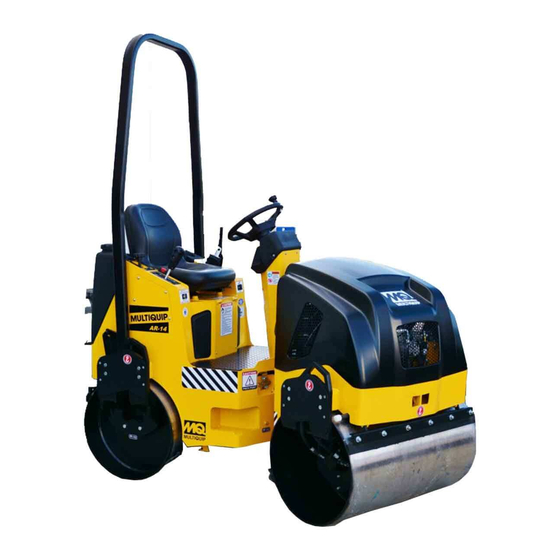
- Page 1 OPERATION MANUAL MODEL AR14H RIDE-ON TANDEM DRUM ROLLER (HONDA GX630RHKAF GASOLINE ENGINE) Revision #3 (09/06/19) To find the latest revision of this publication or associated parts manual, visit our website at: www.multiquip.com THIS MANUAL MUST ACCOMPANY THE EQUIPMENT AT ALL TIMES.
-
Page 2: Proposition 65 Warning
PROPOSITION 65 WARNING PAGE 2 — AR14H RIDE-ON ROLLER • OPERATION MANUAL — REV. #3 (09/06/19) -
Page 3: Table Of Contents
Preparation For Long-Term Storage ...... 38 Manifold Test Ports ..........39 Hydraulic System Diagram ........40 Wiring Diagram ............41 Troubleshooting ..........42-43 NOTICE Specifications are subject to change without notice. AR14H RIDE-ON ROLLER • OPERATION MANUAL — REV. #3 (09/06/19) — PAGE 3... -
Page 4: Safety Information
Indicates a hazardous situation which, if not avoided, COULD result in MINOR or MODERATE INJURY. Pressurized fluid hazards NOTICE Addresses practices not related to personal injury. Electric shock hazards Runover hazards PAGE 4 — AR14H RIDE-ON ROLLER • OPERATION MANUAL — REV. #3 (09/06/19) - Page 5 ALWAYS clear the work area of any debris, tools, etc. that would constitute a hazard while the equipment is in operation. AR14H RIDE-ON ROLLER • OPERATION MANUAL — REV. #3 (09/06/19) — PAGE 5...
- Page 6 ALWAYS keep the machine in proper running condition. Always turn the engine off before performing maintenance. Fix damage to machine and replace any broken parts immediately. PAGE 6 — AR14H RIDE-ON ROLLER • OPERATION MANUAL — REV. #3 (09/06/19)
- Page 7 ALWAYS disconnect the NEGATIVE battery terminal hot engine. before performing service on the equipment. ALWAYS keep battery cables in good working condition. Repair or replace all worn cables. AR14H RIDE-ON ROLLER • OPERATION MANUAL — REV. #3 (09/06/19) — PAGE 7...
- Page 8 DO NOT use food or plastic containers to dispose of hazardous waste. DO NOT pour waste, oil or fuel directly onto the ground, down a drain or into any water source. PAGE 8 — AR14H RIDE-ON ROLLER • OPERATION MANUAL — REV. #3 (09/06/19)
-
Page 9: Specifications
Engine Oil Capacity 2.0 qts. (1.90 liters) Horsepower Rating 20.8 hp (15.5 kW) Fuel Unleaded gasoline Fuel Tank Capacity 9.5 gal (15.5 liters) Operating Speed 3,250 ±50 rpm AR14H RIDE-ON ROLLER • OPERATION MANUAL — REV. #3 (09/06/19) — PAGE 9... -
Page 10: Dimensions
Wall Clearance (R and L) 1.375 in. (35 mm.) Drum Thickness .38 in. (10 mm.) Overall Width 37 in. (940 mm.) Steering Wheel 58 in. (1,473.2 mm.) PAGE 10 — AR14H RIDE-ON ROLLER • OPERATION MANUAL — REV. #3 (09/06/19) - Page 11 NOTES AR14H RIDE-ON ROLLER • OPERATION MANUAL — REV. #3 (09/06/19) — PAGE 11...
-
Page 12: General Information
A fully enclosed hydraulic drive system offers a variable lifting hook decal. Make sure the lifting device speed control as well as smooth acceleration and braking. is capable of lifting 4,000 lb. (1,814 Kg). PAGE 12 — AR14H RIDE-ON ROLLER • OPERATION MANUAL — REV. #3 (09/06/19) -
Page 13: General Information
To prevent damage to the engine after a rollover, the roller must not be started. NEVER start a roller after a rollover. Contact your nearest authorized Multiquip dealer for instructions or servicing. Figure 2. Recommended Slope AR14H RIDE-ON ROLLER • OPERATION MANUAL — REV. #3 (09/06/19) — PAGE 13... -
Page 14: Components
COMPONENTS LEFT SIDE RIGHT SIDE Figure 4. Roller Components ( 1 of 3) PAGE 14 — AR14H RIDE-ON ROLLER • OPERATION MANUAL — REV. #3 (09/06/19) - Page 15 NEVER use the roller without wearing a seat belt. If the seat belt becomes worn or damaged, replace it immediately. 13. Parking Brake Lever — Pull the lever upward to AR14H RIDE-ON ROLLER • OPERATION MANUAL — REV. #3 (09/06/19) — PAGE 15...
- Page 16 COMPONENTS RIGHT SIDE Figure 5. Roller Components (2 of 3) PAGE 16 — AR14H RIDE-ON ROLLER • OPERATION MANUAL — REV. #3 (09/06/19)
- Page 17 Fuel tank has a spill biweekly. See maintenance section of this manual. containment feature. 28. Seat Adjustment Knob — Allows operator's seat to be adjusted (slide seat forward or backward). AR14H RIDE-ON ROLLER • OPERATION MANUAL — REV. #3 (09/06/19) — PAGE 17...
- Page 18 COMPONENTS Figure 6. Roller Components (3 of 3) PAGE 18 — AR14H RIDE-ON ROLLER • OPERATION MANUAL — REV. #3 (09/06/19)
- Page 19 47. Engine — This unit incorporates a HONDA Operation, Parts, and Engine manuals in this container GX630RHKAF, air-cooled engine rated at 20 hp at at all times. 3,200 rpm. AR14H RIDE-ON ROLLER • OPERATION MANUAL — REV. #3 (09/06/19) — PAGE 19...
-
Page 20: Basic Engine
ON position. lifting capacity at this lifting point whenever lifting of the 10. Oil Cooler — Helps keep engine oil cooler for longer engine is required. engine life. PAGE 20 — AR14H RIDE-ON ROLLER • OPERATION MANUAL — REV. #3 (09/06/19) -
Page 21: Inspection
"Oil Alert System". This system will automatically stop the engine in the event of low oil level. ALWAYS check the engine oil level prior to starting the engine. AR14H RIDE-ON ROLLER • OPERATION MANUAL — REV. #3 (09/06/19) — PAGE 21... - Page 22 DO NOT OVERFILL! NORMAL LEVEL HYDRAULIC OIL LEVEL SIGHT GLASS SEAT LOW LEVEL LATCH ENGAGED HYDRAULIC Figure 11. Fuel Tank Access Figure 13. Hydraulic Oil Sightglass PAGE 22 — AR14H RIDE-ON ROLLER • OPERATION MANUAL — REV. #3 (09/06/19)
- Page 23 Pay close attention to the polarity of During freezing weather conditions, drain water from the battery when connecting the battery. system to prevent component damage. WATER TANK WATER TANK Figure 15. Water Tank AR14H RIDE-ON ROLLER • OPERATION MANUAL — REV. #3 (09/06/19) — PAGE 23...
-
Page 24: Operation
4. Make sure that the roller's travel lever (Figure 18) is placed in the neutral position. SLOW FAST NEUTRAL Figure 18. Travel Lever (Neutral) Figure 20. Throttle Control PAGE 24 — AR14H RIDE-ON ROLLER • OPERATION MANUAL — REV. #3 (09/06/19) - Page 25 4. Make sure that the roller comes to a complete stop (neutral) before placing the travel lever in either a forward or reverse position. RELEASE POSITION PUSH DOWN Figure 22. Parking Brake AR14H RIDE-ON ROLLER • OPERATION MANUAL — REV. #3 (09/06/19) — PAGE 25...
- Page 26 1. Turn on the water pump switch (Figure 25) to activate the water pump. The water pump indicator will light. WATER PUMP SWITCH Figure 25. Water Pump Switch PAGE 26 — AR14H RIDE-ON ROLLER • OPERATION MANUAL — REV. #3 (09/06/19)
-
Page 27: Maintenance
6 Months Engine Oil Filter After first 20 hrs, change oil filter every 6 months or 100 hrs. Yearly Hydraulic Oil Use ISO 46 Type Hydraulic Oil AR14H RIDE-ON ROLLER • OPERATION MANUAL — REV. #3 (09/06/19) — PAGE 27... - Page 28 When the valve is fully opened, ports A and B are allowed to connect, bypassing the oil to and from the drum drive motors. PAGE 28 — AR14H RIDE-ON ROLLER • OPERATION MANUAL — REV. #3 (09/06/19)
- Page 29 With the travel lever in reverse position, oil will flow in the opposite direction (port B becomes high-pressure and port A becomes suction). AR14H RIDE-ON ROLLER • OPERATION MANUAL — REV. #3 (09/06/19) — PAGE 29...
- Page 30 1. Park the machine on a solid flat surface and stop the pressure will range between 900-1,500 psi. engine. Set the parking brake and block the front drum securely. PAGE 30 — AR14H RIDE-ON ROLLER • OPERATION MANUAL — REV. #3 (09/06/19)
- Page 31 5. If the steering relief pressure is not 700 psi, using the allen wrench adjust the pressure at port 4 until the pressure gauge reads 500 psi. TEST PORT 3 TEST PORT 2 Figure 31. Manifold Test Ports AR14H RIDE-ON ROLLER • OPERATION MANUAL — REV. #3 (09/06/19) — PAGE 31...
- Page 32 12. Test operation. Test and adjust the forward and reverse relief pressures as required. Adjust the forward/reverse control cable. PAGE 32 — AR14H RIDE-ON ROLLER • OPERATION MANUAL — REV. #3 (09/06/19)
- Page 33 INSTALL EXCITER ASSEMBLY WALL AND REASSEMBLE DRUM. USE LOCKTITE 271 ON ALL BOLT SHOCK MOUNTS STEP 5 THREADS. Figure 33. Exciter Assembly Removal/Installation (Front Drum - Right Side) AR14H RIDE-ON ROLLER • OPERATION MANUAL — REV. #3 (09/06/19) — PAGE 33...
- Page 34 REASSEMBLE DRUM. USE LOCKTITE 271 ON ALL BOLT THREADS. MOTOR SHOCK MOUNT STEP 6 STEP 4 Figure 34. Motor and Shock Mounts Removal/Installation (Front Drum - Left Side) PAGE 34 — AR14H RIDE-ON ROLLER • OPERATION MANUAL — REV. #3 (09/06/19)
- Page 35 5. REVERSE PROCEDURE TO INSTALL BEARING AND REASSEMBLE DRUM. USE LOCKTITE 271 ON ALL BOLT THREADS. STEP 4 BEARING DRUM SUPPORT PLATE Figure 35. Bearing Removal/Installation (Rear Drum - Right Side) AR14H RIDE-ON ROLLER • OPERATION MANUAL — REV. #3 (09/06/19) — PAGE 35...
- Page 36 OF THE DRUM SUPPORT PLATE. BOLT THREADS. 5. REMOVE LARGE NUT FROM THE LOWER PART OF THE DRUM SUPPORT PLATE. Figure 36. Motor Removal/Installation (Rear Drum - Left Side) PAGE 36 — AR14H RIDE-ON ROLLER • OPERATION MANUAL — REV. #3 (09/06/19)
- Page 37 This solenoid controls the vibration control valve which supplies hydraulic oil to the vibration drive motor. Figure 39. Battery Fluid Levels AR14H RIDE-ON ROLLER • OPERATION MANUAL — REV. #3 (09/06/19) — PAGE 37...
-
Page 38: Preparation For Long-Term Storage
7. Cover the roller and place it a clean dry area, that is protected from harsh elements. 8. Remove ignition key, and store in a safe place. PAGE 38 — AR14H RIDE-ON ROLLER • OPERATION MANUAL — REV. #3 (09/06/19) -
Page 39: Manifold Test Ports
MANIFOLD TEST PORTS AR14H RIDE-ON ROLLER • OPERATION MANUAL — REV. #3 (09/06/19) — PAGE 39... -
Page 40: Hydraulic System Diagram
STEERING & VIBRATION TEST SERIES DRIVE VALVE TEST FRONT REAR DRIVE DRIVE MOTOR MOTOR 10 MICRON SUCTION 100 PSI FILTER RETURN LINE FILTER ASSEMBLY FILTER BYPASS 25 PSI PAGE 40 — AR14H RIDE-ON ROLLER • OPERATION MANUAL — REV. #3 (09/06/19) -
Page 41: Wiring Diagram
AUDIBLE ALARM ORDER AS OPTION. GRAY LOCATED INSIDE STEERING COLUMN. 26 AMP CHARGE COIL BLUE LOCATED UNDERNEATH FOOT PLATFORM. LOCATED IN ENGINE COMPARTMENT. CHASSIS GROUND TO START ENGINE, (IGNITION SWITCH). WHT/BLU AR14H RIDE-ON ROLLER • OPERATION MANUAL — REV. #3 (09/06/19) — PAGE 41... -
Page 42: Troubleshooting
Inspect cable and adjust if necessary. Incorrect engine speed? Adjust engine speed to correct speed. Main Hydraulic Pressure Rubber shock mounts defective? Inspect for sheared rubber mounts. PAGE 42 — AR14H RIDE-ON ROLLER • OPERATION MANUAL — REV. #3 (09/06/19) - Page 43 Fuel fi lter/lines clogged? Replace fuel fi lter. Fuel tank cap breather hole clogged? Clean or replace fuel tank cap. Air in fuel line? Bleed fuel line. AR14H RIDE-ON ROLLER • OPERATION MANUAL — REV. #3 (09/06/19) — PAGE 43...
- Page 44 © COPYRIGHT 2019, MULTIQUIP INC. Multiquip Inc , the MQ logo are registered trademarks of Multiquip Inc. and may not be used, reproduced, or altered without written permission. All other trademarks are the property of their respective owners and used with permission.
Need help?
Do you have a question about the AR14H and is the answer not in the manual?
Questions and answers