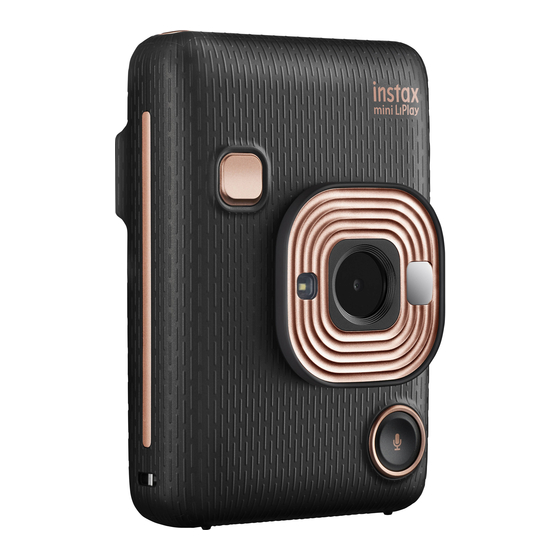
FujiFilm Instax mini LiPlay User Manual
Hybrid instant camera (instant print + digital technologies)
Hide thumbs
Also See for Instax mini LiPlay:
- User manual ,
- User's manual/safety precautions (116 pages) ,
- User manual (26 pages)
Table of Contents
Advertisement
Quick Links
- 1 Table of Contents
- 2 Lcd Monitor �������������������������������������������������������������������������������� 5 Using a Memory Card
- 3 Charging the Battery ���������������������������������������������������������������� 7 Using the Playback Menu
- 4 Loading the Film Pack
- 5 Troubleshooting
- Download this manual
See also:
User Manual
Advertisement
Table of Contents

Related Manuals for FujiFilm Instax mini LiPlay


Summary of Contents for FujiFilm Instax mini LiPlay
- Page 1 WW_EN [INSTANT PRINT DIGITAL TECHNOLOGIES] User's Guide (Full version) INSTAX MINI HM1 BODM1P301-100...
-
Page 2: Table Of Contents
Table of Contents Before Use ����������������������������������������������������������������������������������� 3 Various Types of Shooting �����������������������������������������������������15 Shoot Using the Self-timer ����������������������������������������������������������� 15 Notes on Disposing of the Camera ���������������������������������������� 3 Shooting Using the Flash ������������������������������������������������������������� 15 About This Camera �������������������������������������������������������������������� 3 Taking a Photo of Yourself (Selfie) ���������������������������������������������� 16 Main Features ������������������������������������������������������������������������������������3 Shooting Using the AF/AE Lock ��������������������������������������������������... -
Page 3: Before Use
About This Camera Before using the camera, check the following has been included. Main Features Supplied Accessories ● The “INSTAX mini LiPlay” is the most compact INSTAX product • USB cable for charging (1) • Strap (1) available on the market�... -
Page 4: Part Names
Part Names Front Film ejection slot Shutter button Flash/Self-timer lamp Strap hook USB port (Sound) button Lens Selfie mirror Film door lock Film door (Shortcut 1) button Reset button* (Shortcut 2) button (Shortcut 3) button Rear Micro SD card slot (Power) button Microphone F IL M... -
Page 5: Lcd Monitor �������������������������������������������������������������������������������� 5 Using A Memory Card
WW_EN LCD Monitor The shooting screen displays on the LCD monitor when the power is switched on. Current date and time • To switch from the shooting screen to the playback screen, press Exposure (Playback). • To switch from the playback screen to the shooting screen, press Frame name the shutter button. -
Page 6: Using The Cross Key
Using the Cross Key Attaching the Strap (up, down, left, and right) keys are used to select Attach the strap as shown below. menu items, or to recall the functions assigned to the • Put the strap around your wrist when carrying the camera or keys. -
Page 7: Charging The Battery ���������������������������������������������������������������� 7 Using The Playback Menu
WW_EN Charging the Battery Powering on/off Turn off the camera before charging the battery. Battery will not Press and hold (Power) to power on or off. charge if the camera is powered on. Ensure USB is correctly attached as indicated. Connect the camera and a USB AC adapter supplied with your smartphone using the supplied USB cable, then connect the USB AC adapter to an indoor power outlet. -
Page 8: Initial Settings
*Requirements for iOS smartphones: iOS Ver. 10 or higher Depending on your smartphone model, you may not be able to use "INSTAX mini LiPlay" even if you have installed it and your smartphone meets the above requirements. Next, configure the pairing settings. -
Page 9: Loading/Unloading The "Instax Mini" Film Pack
WW_EN Press [Bluetooth settings] on the smartphone app Loading/Unloading the “INSTAX mini” Film Pack Loading the Film Pack Slide the film door lock and open the film door Insert film pack by aligning the yellow marks Press [Connect] on the smartphone app Close the film door •... -
Page 10: Unloading A Used Film Pack
Unloading a Used Film Pack Basic Shooting and Playback Slide the film door lock and open the film door Shooting The following steps describe the basic shooting procedure. Turn on the power Hold the camera Configure the frame and filter, etc� as needed Decide the composition to shoot Press the shutter button halfway to focus on the subject... -
Page 11: Playing Back Images
WW_EN Changing the Playback Screen Display • When shooting, steady your arms against your body and hold the camera firmly with both hands. You can zoom in on the image and change the number of images • Be careful not to touch the camera lens when pressing the displayed on the LCD monitor. -
Page 12: Printing
■ Change the Number of Images Displayed Printing While displaying the playback screen, press (Playback) to change the number of images displayed. You can print the images using the following procedure. Turn on the power Press (Playback) The last image taken is displayed. Press to select the image you want to print Select desired settings such as frame and zoom... -
Page 13: Remaining Film Indicator
You can also press a shortcut button to select the frame assigned to that button. • For handling of the film, please refer to the FUJIFILM Instant Selecting the Filter Film "INSTAX mini" instruction manual. • Film development takes about 90 seconds (the time varies Follow the procedure below to select the filter type. -
Page 14: Adding Sound To Images
Press or [MENU/OK] Adding Sound to Images The filter is applied and the display returns to the previous screen. This camera can attach recorded sound to images. • Press (Back) to return to the previous screen without Adding Sound When Shooting applying the filter. -
Page 15: Various Types Of Shooting
WW_EN Adding Sound When Playing Back Various Types of Shooting On the single images playback screen, press and Shoot Using the Self-timer hold the (Sound) button Sound mode starts, and a recording icon is displayed in the Use the self-timer for group photos or to prevent the camera from center of the screen. -
Page 16: Taking A Photo Of Yourself (Selfie)
Press to select the flash setting Shooting Using the AF/AE Lock • For details about the flash settings, please refer to “Types of When shooting, holding the shutter button halfway locks the Flash”. focus, called “AF lock”. The brightness or exposure will also be Press [MENU/OK] or locked called “AE lock”. -
Page 17: Printing From Print History
WW_EN Printing from Print History Using a Memory Card You can find images printed previously and retain the settings The camera can save approximately 45 images in the internal (such as image effects) for printing. memory, but you can save more images by using a memory card. You can print the images you have taken previously using the Notes on memory card following procedure. -
Page 18: Using The Shooting Menu
Insert the memory card all the way until a click is Using the Shooting Menu heard� Ensure the correct orientation is used as shown below You can change various settings related to shooting from the shooting menu. Press [MENU/OK] on the shooting screen The shooting menu displays. -
Page 19: Using The Set-Up Menu
WW_EN For a description of the following items, please refer to “Using the Using the Playback Menu Set-up Menu”. (p. 19) [PRINT SETTINGS] / [Bluetooth SETTINGS] / [CROSS KEY GUIDE] / You can change various settings related to playback from the [DATE/TIME] / [言語/LANG.] / [SOUND SET-UP] / [PLAYBACK playback menu. -
Page 20: App
• You can play or delete the sound on images with sound that you and follow the instructions on the screen. have previously printed using the smartphone app. Download the latest firmware from the FUJIFILM website. Note If you delete an image with sound using the smartphone application, the sound will no longer be able to be played even if the QR Code is read. -
Page 21: Specifications
Sound recording Possible to record sound when shooting or playing back single image. Possible to overwrite. ■ Print Function Film used FUJIFILM instant film “INSTAX mini” (sold separately) Number of films 10 films/pack Film size 86 mm × 54 mm Screen size 62 mm ×... -
Page 22: Troubleshooting
The battery is If you use the camera in a very cold The film pack • Please use FUJIFILM instant film "INSTAX exhausted environment, the battery will drain quickly. does not load or mini" (other films cannot be used). -
Page 23: Important Safety Notice
If this product is dropped or damaged so that the inside is above +35 °C. Do not attempt to charge the battery at showing, do not touch it� Contact your FUJIFILM dealer� temperatures above +40 °C or at temperatures below +5 °C as Do not touch any parts or projecting parts inside the back the battery will not charge. -
Page 24: Bluetooth® Devices: Cautions
■ “INSTAX mini” Film and Print Care Bluetooth® Devices: Cautions See FUJIFILM Instant Film “INSTAX mini” for film use instructions. Follow all instructions for safe and proper use. IMPORTANT: Read the following notices before using the 1. Keep the film in a cool place. Do not leave the film in a place product’s built-in Bluetooth transmitter�... - Page 25 Address, City: 7-3, Akasaka 9-Chome, Minato-ku, Tokyo Country: JAPAN Authorized representative in Europe: FUJIFILM EUROPE GMBH Address, City: Dusseldorf Heesenstrasse 31, 40549 Country: Germany If you have any inquiries about this product, please contact a FUJIFILM authorized distributor, or access the website below. http://www.fujifilm.com/...