
Related Manuals for UHL Instruments X4 V Series

Summary of Contents for UHL Instruments X4 V Series
- Page 1 UHL INSTRUMENTS X4 V Owner's Manual X4 V-1 / X4 V-2 C o p y r i g h t b y U h l - I n s t r u m e n t s M a n u a l...
-
Page 2: Important Safety Instruction
IMPORTANT SAFETY INSTRUCTION Please read the entire manual and the safety instructions. It contains all the information you need to use this unit. Don't skip any passages to ensure perfect operating of the instrument. The product must be serviced by qualified service personnel only. DANGER! Risk of electric shock. -
Page 3: Table Of Contents
IMPORTANT SAFETY INSTRUCTION Inhaltsverzeichnis IMPORTANT SAFETY INSTRUCTION .......................... 2 Introduction ................................5 X4 V Overview ................................ 5 Backpanel Connections ............................. 6 Updates/Upgrades SD-Card-Slot ........................... 6 Connecting the Power Cable ............................. 8 Console ..................................9 Startup ..................................10 Connecting the Power Cable: ..........................10 Audio Connections ............................... - Page 4 IMPORTANT SAFETY INSTRUCTION Internal Rotary Ventilator II ............................. 29 Potentiometer Main Functions ........................... 29 Pots Secondary Functions ............................ 30 Overload-LED ............................... 32 C o p y r i g h t b y U h l - I n s t r u m e n t s M a n u a l Seite 4...
-
Page 5: Introduction
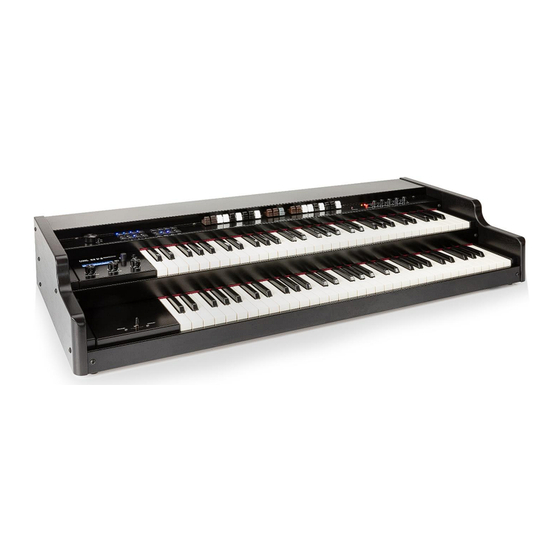
Introduction Thank you very much for choosing an Uhl-Instruments X4 V-1 or X4 V-2. You have obtained a state-of-the-art model of a vintage organ. We recommend that you read the entire manual carefully to take full advantage of all the functions of your new Uhl-Instruments X4 V. Please keep this manual for later reference. We also recommend you to keep all packaging to protect the instrument if transporting is required. -
Page 6: Backpanel Connections
Backpanel Connections SLOW/FAST VENT Note: Momentary Foot-Switch !! e.g. BOSS FS-5U!! SD-Card-Slot for Updates und Upgrades The contact must be open and close only briefly when the button is pressed, then immediately opens again when you let go. 2 x MIDI IN Expression-Pedal Page 17 Page 10... - Page 7 Separate Bass: Separate bass pedal: Here only the signal from the bass pedal is output and can thus be optimally mixed via a mixer. In this case, the signal from the bass pedal can be separated from the other outputs (Main-Out, Pure Organ and 11 PIN Rotary Socket) with the "Sep."...
-
Page 8: Connecting The Power Cable
Connecting the Power Cable The X3 runs on AC power: 100, 120, 230, or 240 volts at 50–60 Hz. The voltage level is set automatically. Make sure the X4 V power switch is set to off before you connect the power cable. Plug the cable into a grounded outlet only. -
Page 9: Console
Console Bass Sustain Chorus / Vibrato Drawbars Control Panel Vent II Drawbars Upper Percussion Drawbars Lower Bypass IQ Bass-Pedal (Page 29,30,31) Page 11 Page 12 Page 11 AMP122 on/off Page 11 Seite 13 Separate Bass Split Tone Presets Hall Drive Amp122 Chorus und Vibrato- Master- Page 7+14... -
Page 10: Startup
Startup Connecting the Power Cable: Make sure the power switch (see page 7) 10is set to OFF before you connect the power cable at the X4 V. Plug the power cable into a grounded outlet only. The X4 V runs on AC power: 100, 120, 230, or 240 volts at 50–60 Hz. Audio Connections Make sure your sound system is at a safe volume level. -
Page 11: Controls
Controls Drawbars 9 Drawbars Upper-Manual 2 Drawbars Bass-Pedal Sustain 9 Drawbars Lower-Manual Bass-Pedal 16“ 5 1/3“ 8“ 4“ 2 2/3“ 2“ 1 3/5“ 1 1/3“ 1“ 16“ 8“ 16“ 5 1/3“ 8“ 4“ 2 2/3“ 2“ 1 3/5“ 1 1/3“ 1“ The X4 V organ has 2 sets of nine drawbars, one for the upper manual and one for the lower manual plus 2 drawbars for the bass pedal. -
Page 12: Percussion
Percussion Percussion: ON/OFF SOFT FAST 3 RD Percussion changes the attack characteristic of a note by adding an percussion signal to the note that is played. The volume of the percussion is adjusted by the SOFT button. Decay of the percussion signal depends on the FAST button setting. -
Page 13: Chorus/Vibrato
Chorus/Vibrato VIB/Chorus Sixfold Rotary Switch VIB/Chorus Lower Upper VIB/Chorus Rotary switch is used for selecting one of the six effects vibrato V1, V2, V3 or chorus C1, C2, C3. The two push-buttons Vib/Chorus Upper and Lower are used to switch the effect on/off, either for the upper or lower manual. -
Page 14: Reverb, Separate Bass, Split
Reverb, Separate Bass, Split Sep. (Separate bass): The pedal bass is always separately available at the "Separate Bass" output socket on the back of the organ. With the "Sep." button you can switch off the pedal bass at the outputs "Main-Out L + R" "Pure Organ"... -
Page 15: Common-Presets
Common-Presets The X4 V provides 14 common presets. All settings of a sound are stored in these presets, such as percussion, chorus/vibrato, reverb, split . If none of the four LEDs is lit, the "live" setting is selected which means that drawbars and buttons are used to adjust the sound. -
Page 16: Master Volume, Drive Amp122, Tone, "Halfmoon-Switch
Master Volume, Drive Amp122, Tone, “Halfmoon-Switch” Master Volume Drive Amp122 Halfmoon-Switch Tone Slow Stop Fast Master Volume: If, for example, the overdrive control "Drive Amp122" is turned up, the overall level becomes considerably louder. This can also lead to the override of the Vent II. In this case, the "Overload-Led" lights up. This too high level must then be adjusted with the master volume control (turn to the left). -
Page 17: Midi
MIDI 2 x MIDI-IN MIDI-OUT MIDI-IN (2x) can be used to connect a controller keyboard for Lower Manual (Midi channel 2) and a Midi The two Midi inputs pedal for pedal bass (Midi channel 3) to obtain a fully fitted magnetic wheel vintage organ. Example X4 V-1: To play the Pedal-Bass of the X3-1: To play the „Lower“... -
Page 18: Midi-Out
Example X4 V-2: To play the Pedal-Bass of the X3-2: Connect a MIDI-Keyboard to one of the both MIDI-IN-Sockets of the X3-1. To play the Lower select MIDI Channel 3 MIDI-OUT MIDI-OUT a sound module or synthesizer which then can be played together with the The Midi-Out can be used to connect organ sound of the X3. -
Page 19: Midi Konfiguration Menu-Display
MIDI Konfiguration Menu-Display sets MIDI base receive channel 1 to 10 (upper manual, lower manual is on +1, pedals on +2). sets MIDI routing behaviour to: Local Tx – own MIDI events are sent on MIDI OUT , Inp 1 Thru – MIDI IN 1 is routed to MIDI OUT as THRU, Inp 2 Thru – do not use, USB InThru –... -
Page 20: Menu/Display
Menu/Display Menu Up - Button Menu Down -Button Data/Entry Button Display (Rotary-Switch + Button) Menu Panel Display Controls The menu panel display offers full access to many X3 parameters like percussion, chorus/vibrato, keyclick, reverb, factory presets, leakage, tapering. All parameters can be stored individually. Use Up/Down buttons to scroll through menu items. -
Page 21: Save Mode
Save Mode Target: more reverb Pressing and holding (2 The new "Reverb 1" is Turning the Data / The change is on Reverb 1 saved. The star is no sec) the Data / Entry Entry knob to the indicated by button will save the longer displayed right makes the... -
Page 22: Live-Preset
Live-Preset After switching on the X4 V, the following message appears on the display (the current real drawbar positions are played): Live-Preset „00“ Factory-Presets The X4 V has 14 factory presets each for the Upper Manual, Lower Manual and Pedal Bass. Turn the rotary knob to access the various factory presets. -
Page 23: Reverb Group (Hall)
Saving the Upper Drawbar Positions in the Factory Preset "01" Pressing and holding (2 sec) the Data Entry button will again ask if and how to save: Press the Data Entry button again to save the changes: In this way, all preset values of the factory presets can be changed. Reverb Group (Hall) The reverb menu can be used to adjust the individual levels of REV1, REV2, REV3. - Page 24 Parametric Equalizer Group Bass EQ – set here neutral Parametric Mid EQ - raised by approx. 5dB here The frequency (Mid’s), which should be changed, can be shifted very far from approx. 200 Hz to 4000 Hz. Here about 800 Hz Here, the width of the increase or decrease of the Mid’s is set Treble EQ - here lowered significantly...
-
Page 25: Split Mode
Split Mode Note: see also Split-Functions page 14 5 Options: PedalToLower on the lower (X3-2) press a key at the desired split-point - hold the key and simultaneously press button “Split” (Split-LED lights) Note: Great Sound for Lefthand-Bass!! LowerToUpper on the upper press a key at the desired split-point - - hold the key and simultaneously press button “Split” (Split-LED lights) The only makes sense at X3-1. -
Page 26: Generator Group
Generator Group The generator menu can be used to adjust typical generator settings Cap-Set - Generator (6 Presets) Year 1955, Year 1961, Year 1972, Recapped, Straight, Cheesy Fine-tuning, for example - tune to 443 Hz Slip and mechanical balance of tone Wheels Leakage Key-Click Frequency (Tone) Key-Click Length... -
Page 27: Vibrato / Chorus Group
Vibrato / Chorus Group Detailed modelling of scanner vibrato features lots of adjustable parameters. Avoid randomly changing parameters; they are intended for real organ enthusiasts – you should know what you’re doing. Adjusts scanner drive gear and thereby vibrato frequency Adjusts leakage of higher notes in scanner compartment due to parasitic capacitances. -
Page 28: Generator-Modelle
Generator-Modelle B3 default (91 tones sound generator) B3 old (as above, but more leakage, stronger key click) M3/M100 (no foldback for higher tones) C o p y r i g h t b y U h l - I n s t r u m e n t s M a n u a l Seite 28... -
Page 29: Internal Rotary Ventilator Ii
Internal Rotary Ventilator II Ventilator II has five knobs to control various parameters of the effect. Each controller has 2 functions. There are 2 levels of functionality: -Main functional level (label above the pots). This level is active after switching on the organ. Secondary function (underlined caption below the pots). -
Page 30: Pots Secondary Functions
Mix/Dist Lo: This controls the mix of the lower rotor in the signal as well as the distance of the virtual mic from the rotor. The first half of the travel (from all the way counter-clockwise to center) determines the mix. At 7 o’clock (all the way counter-clockwise) there is no lower rotor simulation in the mix. - Page 31 Acceleration (2nd Func): This knob adjusts the amount of time it takes both rotors to go from slow to fast and from fast to slow. Set the knob to the far left for the fastest acceleration and deceleration time. Twist it to the right and the effect will be slower to speed up and slow down.
-
Page 32: Overload-Led
Overload-LED Overload-LED The overload LED lights up when the Vent II is overdriven!!!!!! This situation should be avoided, as otherwise inharmonious cliffs negatively affect the sound. In the state of the organ is actually only if you turn up the Drive Amp122, so here how to work with the "Drive Amp122"...
Need help?
Do you have a question about the X4 V Series and is the answer not in the manual?
Questions and answers