
Related Manuals for Data Aire DAP III


Summary of Contents for Data Aire DAP III
- Page 1 Data Alarm Processor-III DAP™ III Operation Manual Unit Mounted DAP III Unit Mounted DAP III Wall Mounted DAP III Data Aire, Inc. 230 W. BlueRidge Avenue Orange, CA 92865 www.dataaire.com...
-
Page 3: Table Of Contents
Table of Contents Introduction ..........................4 Modes of Operation .........................5 Hard Off/ON ..........................6 DAP III Processor Standard Features ........................8 Optional Features ........................8 Diagnostic and Service Features ...................9 Protective and Safety Features ....................9 Display Panel .........................10 Condition and data displayed ..................10 Functions displayed ......................10 Warning and alarms displayed .................. - Page 4 DAP III communicates directly with all major building management system (BMS). Just add a communica- tions card and you are connected. One new exciting feature of the DAP III is a real time clock allowing you to pin- point problems, precisely knowing what occurred and when.
-
Page 5: Modes Of Operation
11.) If your unit uses chilled water DAP III will display the percentage of chilled water fl ow as well. In the upper right-hand corner of the DAP III display you should fi nd a blinking form in the shape of a heart. The blink- ing indicates that the processor is functional. - Page 6 After supplying power to the unit, if the DAP III does not come on when you press the soft ON/OFF button on the cover of the DAP III it will be necessary for you to open the cover of the DAP III The DAP III can be shipped in three different confi...
- Page 7 DAP III Circuit Board with Relay Module installed Hard power ON/OFF Switch shown here in the OFF position Relay Module DAPIII CIrcuit Board with Relay and Analog Modules installed Hard Power ON/OFF Switch shown here in the OFF position Analog Module...
-
Page 8: Standard Features
DATA ALARM PROCESSOR – III The Data Alarm Processor-III (DAP-III) offers the defi nite answer for precision environmental control. The DAP-III control system not only controls and monitors temperature, humidity, airfl ow and cleanliness, it provides component run times, alarm history and an automatic self-test of the microprocessor. All messages are presented in a clear simple English and sequentially displayed on a backlit, liquid crystal display (LCD). -
Page 9: Diagnostic And Service Features
Supplemental Compressor Operation during Energy Save Mode – Extends the savings from Energy Saver by allowing one or two compressors to supplement cooling as needed when Energy Saver cooling is not suffi cient. Temperature Anticipation – Responds to varying rates of temperature change. Humidity Anticipation –... -
Page 10: Display Panel
Protected 24 VAC Power Input – Fused metal oxide varistor (MOV) and transient voltage suppressor react to interrupt the power from the circuit board if excessive amperage or over voltage condition is detected. Isolation Transformer – Protection against ground loops, ground shorts, wiring errors and conducted electrical interference. -
Page 11: Warning And Alarms Displayed
WARNING AND ALARMS DISPLAYED HIGH TEMPERATURE WARNING – (Current temperature)º F/C HIGH HUMIDITY WARNING – (Current RH)% LOW TEMPERATURE WARNING – (Current temperature)º F/C LOW HUMIDITY WARNING – (Current RH)% LOW PRESSURE COMPRESSOR: 1 – (Automatic reset) NO AIRFLOW – CHECK BELT AND MOTOR UNDER FLOOR WATER DETECTION –... -
Page 12: Programmable Selections12
PROGRAMMABLE SELECTIONS Temperature setpoint Temperature deadband High temperature alarm limit Low temperature alarm limit Humidity setpoint Humidity deadband High humidity alarm limit Low humidity alarm limit Mode and stage response time Compressor lead/lag sequence Reset equipment runtimes Audio alarm mode Automatic self-test acknowledgement Manual diagnosis Humidity anticipation... -
Page 13: Menu Groups
Maximum fan speed 3-23 Minimum fan speed 3-24 Differential pressure setpoint 3-25 Differential pressure deadband 3-26 Fan speed response rate * Only displays when analog module is connected. ** Only displays when DAP III is in RFM (reduced function mode) ceiling systems. - Page 14 SUB-MENUS- continued Group 4 – Alarms Audio alarm mode Change high temperature alarm limit Change low temperature alarm limit Change hi humidity alarm limit Change lo humidity alarm limit Firestat temperature alarm limit Low discharge temp alarm limit Compressor short-cycle alarm Water under fl...
- Page 15 6-12 SNMPv2 Manager 1 Address 6-13 SNMPv2 Manager 1 Notifi cations 6-14 SNMPv2 Manager 2 Address 6-15 SNMPv2 2 Notifi cations Group 7 – Calibration Calibrate temperature sensor Calibrate humidity sensor Calibrate discharge air temperature sensor Calibrate CW temperature sensor Group 8 –...
- Page 16 10-17 Specify sensor 3 maximum value 10-18 Set sensor 3 calibrations 10-19 Select sensor 4 name 10-20 Specify sensor 4 units of measure 10-21 Specify sensor 4 signal range 10-22 Specify sensor 4 minimum value 10-23 Specify sensor 4 maximum value 10-24 Set sensor 4 calibration 10-25...
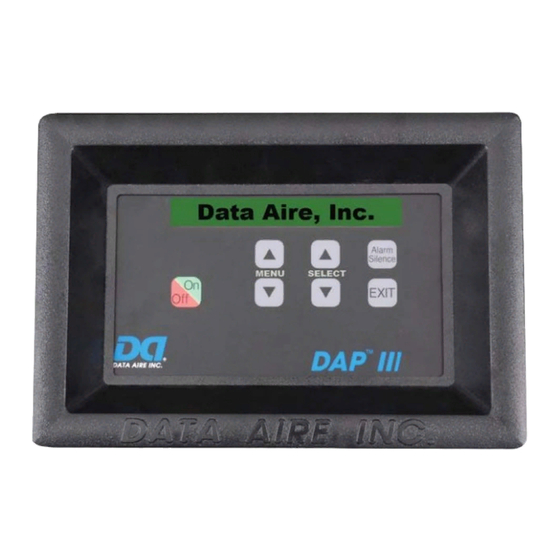
- Page 17 PUSH BUTTON FUNCTIONS The Data Alarm Processor-III panel has seven pressure sensitive feedback-type buttons on the face of the panel. All programming functions and/or settings are done from the face of the panel. Their functions are as follows: Menu Select ...
-
Page 18: Automatic Diagnostic Self-Test On Start Up
AUTOMATIC DIAGNOSTIC SELF-TEST - ON START UP Press the power ON button to energize the panel. The following messages will be displayed as the panel proceeds through the Automatic Diagnostic Self-Test. The Automatic Diagnostic Self-Test takes approximately 30 seconds. Display Message 1 DATA ALARM PROCESSOR III MODEL xxx-xxx-xxx BOOTLOADER REV x.xx Display Message 2... - Page 19 MENUS There are 10 MENU groups. Each group has a sub-set (SUB-MENUS). The following describes how to navigate through the MENUS and SUB-MENUS: Group 1 NOTE: GROUP 1 SUB-MENUS ARE READ ONLY. CHANGES CANNOT BE MADE. To Access: MENU - The display will read GROUP 1 – STATUS & HISTORY SELECT ...
- Page 20 SELECT - Display will read: COMPRESSOR 3: xxxx HOURS SELECT - Display will read: COMPRESSOR 4: xxxx HOURS SELECT - Display will read: REHEAT STRIP 1: xxxx HOURS SELECT - Display will read: REHEAT STRIP 2: xxxx HOURS SELECT ...
-
Page 21: Group 2 - Setpoints
NOTE: If the wrong password is entered, the display will read WRONG PASSWORD DELAY 60 SECONDS The message will continue to display for 60 seconds. At the end of 60 seconds the display will return to CURRENT OPERATING FUNCTIONS & STATUS DISPLAY. Display will read: GROUP 1 –... - Page 22 SELECT or - To display humidity deadband Display will read: 2-4 CHANGE HUMIDITY DEADBAND SET AT: nn.n% SELECT or - Scroll to desired setting, in 0.1% increments. (Humidity deadband is adjustable from 1.0 – 15.0% relative humidity. Factory setting is 3.0%.) MENU ...
-
Page 23: Group 3 - Operation
Group 3 MENU - Display will read: GROUP 3 - OPERATION SELECT - Display will read: SET TIME AND DATE SELECT - To change time and date Display will read: 3-1 SET TIME AND DATE SET WEEKDAY: mm-dd-yy hh:mm SELECT ... - Page 24 MENU - To display SUB-MENU 3-2: MODE AND STAGE RESPONSE TIME Display will read: 3-2 MODE & STAGE RESPONSE TIME The MODE AND STAGE RESPONSE TIME is a time-based differential over which the processor does not respond to any changes in temperature or humidity. This includes different functions as well as staging of individual functions.
- Page 25 MENU - To view SUB-MENU 3-5: RESET EQUIPMENT RUNTIMES SELECT - Display will read: 3-5 RESET EQUIPMENT RUNTIME BLOWER: nnnn HOURS Continue to press SELECT button to scroll thru the list. The following can be viewed: CONDENSER: REHEAT STRIP 3: COMPRESSOR 1: HUMIDIFIER:...
- Page 26 NOTE: If the optional discharge air sensor is not installed, the display will read: DISCHARGE TEMP SENSOR NOT INSTALLED MENU - To view SUB-MENU 3-8 ENERGY SAVER LOCK-OUT TIME Display will read: 3-8 ENERGY SAVER LOCK-OUT TIME SELECT - To view current mode Display will read: 3-8 ENERGY SAVER LOCK-OUT TIME LOCKOUT TIME:...
- Page 27 MENU - To view SUB-MENU 3-11: SCHEDULED NORMAL MAINTENANCE Display will read: 3 - 11 SCHEDULED NORMAL MAINTENANCE SELECT or - To view current setting Display will read: 3 - 11 SCHEDULED NORMAL MAINTENANCE MAINTENANCE DUE MESSAGE: OFF or MAINTENANCE DUE MESSAGE EVERY: nnn HRS Maintenance can be scheduled from 1 to 1000 hours in 1 hour increments.
- Page 28 3 - 15 HUMIDITY ANTICIPATION HUMIDITY ANTICIPATION: OFF The two choices: OFF or ON In the “ON” mode, the DAP III changes setpoints to minimize humidifi cation and dehumidifi cation cycles. See page for complete explanation. SELECT or - To change current setting Factory setting is: OFF MENU ...
- Page 29 SELECT or - To view current setting. Display will read 3-17 E-SAVER TO DX CHANGEOVER DEADBAND SET AT: 2.0F SELECT or - To change setting. E-Saver to DX changeover deadband is adjustable from 2 to 5 Factory setting is 2 F.
- Page 30 MENU - To view Sub-Menu 3-21: FAN SPEED CONTROL FOR CW COOLING Display will read 3-21 FAN SPEED FOR CW COOLING SELECT or - To view current setting Display will read 3-21 FAN SPEED CONTROL FOR CW COOLING FAN SPEED: CONSTANT SPEED or one of the following CONSTANT STATIC PRESSURE...
- Page 31 SELECT or - To view current setting Display will read 3-24 DIFFERENTIAL PRESSURE SETPOINT SET AT: 0.00” H2O Differential pressure setpoint is adjustable from 0.00 TO 1.00” H2O. Factory setting is 0.00” H2O. SELECT or - To change current setting. MENU ...
-
Page 32: Group 4 - Alarms
Group 4 MENU - To proceed to Group 4 - ALARMS Display will read: GROUP 4 – ALARMS SELECT - To view Group 4 - ALARMS Display will read: 4-1 AUDIO ALARM MODE SELECT or - To display current setting Display will read: 4-1 AUDIO ALARM MODE AUDIO ALARM: LONG BEEP... - Page 33 4-3 CHANGE LO TEMPERATURE ALARM LIMIT DISABLE LOW TEMPERATURE ALARM Factory setting is: 60F (C) MENU - To view next sub-menu Display will read: 4-4 CHANGE HI HUMIDITY ALARM LIMIT SELECT To view current setting Display will read: 4-4 CHANGE HI HUMIDITY ALARM LIMIT SET AT: nn% SELECT ...
- Page 34 MENU - Press MENU button to view next sub-menu Display will read: 4-7 LOW DISCHARGE TEMP ALARM LIMIT SELECT or - Press SELECT button to view current setting Display will read: 4-7 LOW DISCHARGE TEMP ALARM LIMIT SET AT: nnF (C) NOTE: Low discharge temperature alarm limit requires an optional discharge air sensor.
- Page 35 ALARM: CONTACT SERVICE COMPANY ALARM: CUSTOM MESSAGE - Requires programming at Data Aire factory. NOTE: Custom message is optional and requires programming at the Data Aire factory. SELECT or - To change current setting Factory setting is: CONTACT MESSAGE NOT USED MENU ...
- Page 36 HIGH PRESSURE/INTERNAL OVERLOAD: COMP2 LOW PRESSURE C1: AUTOMATIC RESET DIRTY FILTER: CHECK FILTERS Messages in shaded area only SMOKE DETECTOR: UNIT SHUTDOWN display when the DAP III is in NO WATER FLOW: CHECK PUMP mode. CHECK HUMIDIFIER CYLINDER CUSTOM MESSAGE ALARM - Requires programming at Data Aire factory.
- Page 37 HIGH PRESSURE/INTERNAL OVERLOAD: COMP2 LOW PRESSURE C1: AUTOMATIC RESET DIRTY FILTER: CHECK FILTERS Messages in shaded area only SMOKE DETECTOR: UNIT SHUTDOWN display when the DAP III is in NO WATER FLOW: CHECK PUMP RFM mode. CHECK HUMIDIFIER CYLINDER CUSTOM MESSAGE ALARM - Requires programming at Data Aire factory.
- Page 38 HIGH PRESSURE/INTERNAL OVERLOAD: COMP 2 LOW PRESSURE C1: AUTOMATIC RESET DIRTY FILTER: CHECK FILTERS Messages in shaded area only SMOKE DETECTOR: UNIT SHUTDOWN display when the DAP III is in RFM mode. NO WATER FLOW: CHECK PUMP CHECK HUMIDIFIER CYLINDER CUSTOM MESSAGE ALARM - Requires programming at Data Aire factory.
- Page 39 Factory setting is: LOCAL ALARM 4: SEE TAG INSIDE DOOR MENU - To view next sub-menu Display will read: 4-19 DELAY FOR OPT. ALARM INPUT 4 SELECT or - To view current setting Display will read: 4-19 DELAY FOR OPT. ALARM INPUT 4 ALARM DELAY: nnn SECONDS SELECT ...
- Page 40 Once selections have been made, MENU - To view next sub-menu Display will read: 4-21 REMOTE ALARM 2 SELECTION SELECT or - To view current setting Display will read: 4-21 REMOTE ALARM 2 SELECTION aaaaaaaaa Remote alarms may be grouped. To add or remove alarms press the SILENCE button. The added alarm will be designated by an asterisk (*).
- Page 41 NOTE: Remote alarm group 3 requires an optional Relay Module. If unit does not have a Relay Module, the following message will be displayed: 4-22 – REMOTE ALARM 3 SELECTION RELAY MODULE REQUIRED Available alarms for group 3: CHECK HUMIDIFIER CYLINDER LOCAL ALARM 3 CHILLED WATER SENSOR PROBLEM ALARM LOCAL ALARM 4...
- Page 42 COMPRESSOR SHORT-CYCLE LOW DISCHARGE AIR TEMPERATURE ALARM CUSTOM MESSAGE ALARM, OPT INPUT 1 LOW HUMIDITY ALARM CUSTOM MESSAGE ALARM, OPT INPUT 2 LOW PRESSURE COMPRESSOR 1 ALARM CUSTOM MESSAGE ALARM, OPT INPUT 3 LOW PRESSURE COMPRESSOR 2 ALARM CUSTOM MESSAGE ALARM, OPT INPUT 4 LOW TEMPERATURE ALARM DIRTY FILTER ALARM LOW VOLTAGE ALARM...
-
Page 43: Group 5 - Confi Guration
5-3 RFM ACTIVE SELECT or - To view current setting This menu option is set at the factory and cannot be changed. For DAP III’s with only a standard control Display will read: 5-3 RFM ACTIVE module (ceiling units) it will read: SHOW MENUS: OFF SHOW MENUS: ON. - Page 44 PRIMARY/SECONDARY PRIMARY/SECONDARY FOUR TANDEM COMPRESSORS NONE MENU - To view next sub-menu Display will read: 5-5 REHEAT STAGES Factory setting for 5-5 is dependent on the equipment and SELECT or - To view current setting options selected. If reheat has been deleted the factory setting is Display will read: 5-5 REHEAT STAGES...
- Page 45 Display will read: 5-8 WATER VALVE VOLTAGE CONTROL RANGE SELECT or - To view current setting Display will read: 5-8 WATER VALVE VOLTAGE CONTROL RANGE WATER VALVE CONTROL RANGE: 2-10 DC SELECT or - To view alternate setting 0-10 DC 4-7 DC 6-9 DC...
-
Page 46: Group 6 - Network
III panel needs to be reset. aaaaaaaaaaaaaaaaaaaa Turn panel OFF then ON. Data Aire offers protocols to interface with a number of building management systems (BMS). Units must be provided with optional communication cards. The following choices are available: BACNET IP... - Page 47 MENU - To view OCTET 3 Display will read: 6-3 IP ADDRESS IP ADDRESS OCTET 3: MENU - To view OCTET 4 Display will read: 6-3 IP ADDRESS IP ADDRESS OCTET 4: MENU - To advance to next sub-menu Display will read: 6-4 NETMASK SELECT ...
- Page 48 MENU - To view OCTET 4 Display will read: 6-5 ROUTER ADDRESS ROUTER ADDRESS OCTET 4: 0. MENU - To advance to next sub-menu Only displays when protocol (6-2) is set to BACNET Sub menu 6-6 only displays when protocol is BACnet or MODbus Display will read: 6-6 UDP PORT...
- Page 49 SELECT or - To change setting Network ID has a range from 001 to 260. Factory setting is: 000 MENU - To advance to next sub-menu 6-10 DEVICE ID . (BACnet device instance) NOTE: Sub-menu 6-10 only appears when BACNET IP or BACNET MS/TP MASTER is selected. Display will read: 6-10 DEVICE ID SELECT ...
- Page 50 MENU - To advance to next sub-menu 6-13 SNMPv2 MANAGER 1 NOTIFICATIONS Display will read: 6-13 SNMPv2 MANAGER 1 NOTIFICATIONS SELECT or - To view current setting Display will read: 6-13 SNMPv2 MANAGER 1 NOTIFICATIONS XXXXXXX SELECT or to move to the next alarm. Press the SILENCE button to select (*) or deselect (-) the alarm.
-
Page 51: Group 7 - Calibration
Group 7 MENU -To view group 7 Display will read: GROUP 7 – CALIBRATION SELECT - To view sub menu 7-1: Display will read: GROUP 7 -1 CALIBRATE TEMPERATURE SENSOR SELECT or - To view current setting Display will read: 7-1 CALIBRATE TEMPERATURE SENSOR RETURN TEMP: nn.n + n.n = nn.n F (C) - Page 52 MENU - To advance to next sub-menu Display will read: 7 - 4 CALIBRATE CW TEMP SENSOR SELECT or - Press SELECT button to view current setting Display will read: 7-4 CALIBRATE CW TEMP SENSOR COLD H20 TEMP: nnn.n - n.n = nnn.n F (C) The CW (chilled water) temperature sensor is CALIBRATED and the offset is entered at the factory.
-
Page 53: Group 8 - Set-Back
Group 8 NOTE: Menu Group 8 only displays when the DAP III is in reduced function mode (RFM), which is normally used with ceiling and wall mounted units. Menu Group 8 does not normally display when the DAP III is in use with fl oor mounted type units. - Page 54 SELECT - To view current setting Display will read: 8-5 – SET-BACK REHEAT Allows one to decrease reheat set SETBACK HEAT: nnF (C) point in Day Schedule. SELECT or - To change setting. The range is from 1 – 30 in 1 increments.
- Page 55 SELECT or - To change setting. Time can be set from 00:00 hours to 23:45 hours in 15 minute increments. N/C (no change) is also an option. MENU - To view next sub-menu Display will read: 8-9 TUESDAY SCHEDULE SELECT ...
- Page 56 SELECT or - To change setting. Time can be set from 00:00 hours to 23:45 hours in 15 minute increments. N/C (no change) is also an option. MENU - To view next sub-menu Display will read: 8-11 THURSDAY SCHEDULE SELECT ...
- Page 57 MENU - To view next sub-menu Display will read: 8-13 SATURDAY SCHEDULE SELECT - To view current setting Display will read: 8-13 SATURDAY SCHEDULE SCHEDULE TYPE: aaaa/aaa SELECT or - To change setting. There are two available settings: ON/OFF and SETBACK/ MENU ...
-
Page 58: Group 9 - Diagnostics
EXIT - Press EXIT again to return to Current Operating Functions & Status Display Group 9 MENU - To view group 9. Display will read: GROUP 9 - DIAGNOSTICS NOTE: The DIAGNOSTICS mode is primarily an aid for troubleshooting and should be used only by a qualifi... - Page 59 REHEAT STRIP #2 REHEAT STRIP #3 HUMIDIFIER HUMIDIFIER FLUSH ALARM RELAY #1 ALARM RELAY #2 (Relay module required) ALARM RELAY #3 (Relay module required) ALARM RELAY #4 (Relay module required) UNIT STATUS WATER VALVE LED HUMIDIFIER VALVE LED CHILLED WATER PUMP MENU ...
- Page 60 AI-2: NOT INSTALLED AI-3: NOT INSTALLED AI-4: NOT INSTALLED NOTE: Analog sensors require optional analog module MENU - To view next sub-menu Display will read: 9-7 VIEW ANTICIPATION HUMIDITY SETPOINT SELECT - To view current setting Display will read: 9-7 VIEW ANTICIPATION HUMIDITY SETPOINT HUMIDITY SETPOINT: nn.n + nn.n = nn.n % MENU ...
-
Page 61: Group 10 - Analog
NOTE: The ANALOG menu, GROUP 10, will only display if an analog module is installed in the DAP III. If there is no analog module in the DAP III menu 10 will not display. See Analog Mode micro-switch setting for details on setting the analog signal ranges in sub-menu 10-3. - Page 62 MENU - To view next sub-menu Display will read: 10-2 SPECIFY SENSOR 1 UNITS OF MEASURE SELECT - To view current setting Display will read: 10-2 SPECIFY SENSOR 1 UNITS OF MEASURE VAC (AC VOLTS) SELECT or - To change setting. AMPS (AMPERES) HZ (HERTZ) KW (KILOWATTS)
- Page 63 MENU - To view next sub-menu Display will read: 10-5 SPECIFY SENSOR 1 MAXIMUM VALUE SELECT - To view current setting Display will read: 10-5 SPECIFY SENSOR 1 MAXIMUM VALUE 10 VDC SIGNAL = 0.0 VAC SELECT or - To change setting. 10 VDC SIGNAL = 100.0 VAC 10 VDC SIGNAL = 200.0 VAC 10 VDC SIGNAL = 300.0 VAC...
- Page 64 MENU Next press and release the Menu button - keep the Menu button depressed while pressing and releasing the Menu button Release the MENU up button MENU Press and release the Menu button. If performed correctly the DAP III will beep three times.
-
Page 65: Control Logic
DATA ALARM PROCESSOR-III (DAP-III) CONTROL LOGIC PROCESSOR SELF-TEST Whenever the DAP-III is turned on, it performs a Diagnostic Self-Test of the following: MODEL nnn-nnn-nnn BOOTLOADER REV: n:nn MODEL nnn-nnn-nnn SOFTWARE REV: n.nn MODEL nnn-nnn-nnn CONTROL MODULE: REV Nnn.n MODEL nnn-nnn-nnn EXPANSION MODULE REV. nn.n* MODEL nnn-nnn-nnn RELAY MODULE REV. - Page 66 4. Compressor staging sequence at each adjustment period, sub-menu 3-2 (Mode and Stage Response Time). UNITS WITH STANDARD (DUAL) SCROLL COMPRESSORS Compressor “ON” sequence (Increasing Temperature) Cool 1 ON at Temperature Setpoint + Temperature Deadband Cool 2 ON at Temperature Setpoint + Temperature Deadband + 0.3º F Compressor “OFF”...
- Page 67 Chilled water valve “CLOSING” sequence (Decreasing Temperature) 1. The chilled water valve proportionally closes 10% for each 0.1ºF below the temperature setpoint plus 1ºF. 2. The chilled water valve responds to a change of the return air temperature after each adjustment period. When a change is made to the setpoint, the chilled water valve will delay its response for fi...
- Page 68 Current Temperature = Setpoint + 0.0º F = 0% Position Open 9. DAP III will switch the unit to DX cooling for 1 hour after every 100 continuous hours of Energy Saver or Auxiliary Chilled Water cooling. ENERGY SAVER and AUXILIARY CHILLED WATER COOLING with COMPRESSOR SUPPLEMENT 1.
- Page 69 REHEAT 1. There is a one (1) minute delay between the stop of any reheat stage to start of any reheat stage. 2. There is a one (1) minute delay from start-to-start of different reheat stages. Reheat stages rotate every 100 hours of runtime.
- Page 70 3. If dehumidifi cation is programmed for “NO REHEAT LIMITS” it remain ON until the humidity setpoint is reached. In this mode dehumidifi cation has priority and overcooling is disregarded. The reheat sequence will remain the same. 4. If dehumidifi cation is programmed for two (2) compressors, with or without reheat limits, only one (1) compressor will be allowed if reheat is required.
- Page 71 HUMIDIFIER AUTO-FLUSH TIMER CONTROL 1. Humidifi er auto-fl ush timer control is optional and requires a Relay Module. The auto-fl ush timer is only available on units with infrared humidifi ers. 2. The auto-fl ush timer is programmed through sub-menu 5-10. 3.
- Page 72 COMPRESSOR SHORT-CYCLE ALARM 1. The alarm is programmed (ON or OFF) through sub-menu 4-8. A compressor short-cycle alarm will activate if the compressor has been energized ten (10) times in a one(1) hour period 2. The alarm is a warning only. Compressor operation will continue. 3.
- Page 73 FIRESTAT TEMERATURE ALARM 1. The fi restat temperature alarm limit is programmed through sub-menu 4-6. 2. If the return air temperature reaches the fi restat temperature alarm limit, the blower, cooling, reheat, humidifi cation and dehumidifi cation functions are immediately terminated. 3.
- Page 74 LOW DISCHARGE TEMPERATURE ALARM LIMIT 1. An optional discharge air sensor is required. If the optional discharge air sensor is not installed, the setting in sub- menu 4-7, will automatically read “SENSOR NOT INSTALLED ON THIS UNIT”. 2. The low discharge temperature alarm limit is set and/or disabled through sub-menu 4-7. 3.
- Page 75 PERSON TO CONTACT ON ALARM 1. The person to contact on alarm is set and/or disabled through sub-menu 4-11. 2. The alarm is a warning only and will not prevent any of the unit functions from operating. 3. The alarm will remain until acknowledged by pressing the “SILENCE” button. SMOKE ALARM 1.
- Page 76 4. The alarm can be set to a warning only and will not prevent any of the unit functions from operating or set to lockout the compressor(s). All other functions continue and manual reset is required. 5. The alarm will remain until the alarm condition is corrected. Chilled Water 1.
- Page 77 4. The alarm is a warning only and will not prevent any of the unit functions from operating. 5. The alarm will remain until the alarm condition is corrected. REHEAT INHIBITED ALARM 1. The reheat inhibited alarm is optional and requires an input contact from a fi eld supplied alternate power source or contacts.
- Page 78 2. Depending on the setting of sub-menu 4-9 the unit will either shutdown or the compressors will be inhibited when the alarm is activated. 3. Unit will return to normal operation when this alarm is corrected. FAN SPEED CONTROL FOR CHILLED WATER (CW) UNITS WITH PLUG FANS Four (4) fan speed control modes can be selected for units with plug fans.
- Page 79 BMS programmed fan speed when the unit stops calling for reheat or humidifi er. WARNING: IF THE CUSTOMER DECIDES TO USE THIS FAN SPEED CONTROL MODE (FAN SPEED CONTROLLED BY BMS MODE), DATA AIRE WILL NOT BE RESPONSIBLE FOR ANY EFFECTS, MALFUNCTIONS OR SPACE CONTROL CONDITIONS CAUSED BY THIS SELECTION.
- Page 80 The differential pressure transducer is connected to the DAP-III analog module to report the differential pressure across the unit (between the supply and return air section). Three Sub-Menus must be programmed for proper operation. The Sub-Menus are 3-18 (CONSTANT FAN SPEED FOR DX COOLING), 3-22 (MAXIMUM ALLOWABLE FAN SPEED) and 3-23 (MINIMUM ALLOWABLE FAN SPEED).
-
Page 81: Troubleshooting Guide
DATA ALARM PROCESSOR III (DAP III) TROUBLESHOOTING GUIDE 1. The power must be off before servicing the DAP-III 2. Factory notifi cation is required prior to replacing any components in the panel 3. Meters or any type of test instruments are NOT to be used on the panel without specifi c instructions from the factory... - Page 82 Bad connections on the plugs or Check connections. Use blower manual over- cable (P5-3,P5-4, P6-1) ride switch to test F2 RELAY fuse on DAP III is blown Replace with 8 amp fuse One of the manual override switches Check manual override switches, make sure...
- Page 83 Problem Possible Cause Check or Remedy Compressor(s) do not come Smoke detector alarm activated Reset the smoke detector on - continued Firestat temperature alarm activated System in inhibited until return air tempera- ture is below the fi restat limit menu 4-6 Faulty cool 1 stage relay Use manual test relay check sub menu 9-3.
- Page 84 Problem Possible Cause Check or Remedy Chilled Water valve does not No call for cooling Check temperature setpoint and deadband modulate Inhibited by no airfl ow alarm Correct no airfl ow alarm Incorrect confi guration Check settings in sub menu 5-7 Loose connection on plugs or cable Check connections.
- Page 85 Check connections use humidifi er manual come on - continued P6-5 override switch to test F2 RELAY fuse of DAP III is blown Replace with 8 amp fuse Panel is operating in manual override Check manual override switches and the humidifi er override is not ON Faulty humidifi...
- Page 86 Loose CAT-5 cable Power OFF, remove battery, check CAT-5 cable and Power ON Watchdog LED lit DAP III has experienced a frozen Tighten mounting screws on PC board to display problem or loose ground aluminum enclosure. Reset panel. Audio alarm does not sound Audio alarm has been turned OFF...
-
Page 87: Manual Override Switches
Manual Override Switches On all DAP III control modules there are six manual over ride switches. These switches are on the board and to access the cover has to be opened. As discussed in the beginning of this man- ual the fi rst or top switch is the “hard” power ON/OFF switch. The next switches in order are for the blower, cool 1, cool 2, reheat, and humidifi... - Page 88 Analog Module Micro-Switch Settings On the Analog Module there is a set of eight micro switches that must be set in conjunction with sub-menu 10-3 to establish signal range. Below is a photo of the Analog Module with the switches circled in yellow. Also a table indi- cating the appropriate settings for the various input options.
- Page 89 Humidity and temperature Sensor Chart DC VOLTAGE vs RELATIVE HUMIDITY DC VOLTAGE vs TEMPERATURE 10.0% 0.37 37.1% 0.64 63.9% 2.800 44.3 F 2.873 57.5 F 2.948 71.0 0.11 11.0% 0.38 38.1% 0.65 65.2% 2.801 44.5 F 2.876 58.0 F 2.951 71.5 0.12 11.9% 0.39...
- Page 90 PIN IDENTIFICATION FOR DAP III MODULES PIN Identifi cation DAP III Connector PIN No. DAP III Cable No. STANDARD CONTROL MODULE 24VAC ISOLATION TR. P5-1 24VAC COMMON ISOLATION TR. P5-2 24 VAC P5-3 24 VAC COMMON. P5-4 BLOWER P6-1 COMPRESSOR 1...
- Page 91 Upgrading the software for the DAP-III microprocessor control is relatively simple. Make certain the DAP-III panel is online and in the Normal Operating Mode. Insert the USB key that contains the updated DAP III binary fi le to the USB port of the DAP III panel.
- Page 92 gForce Terminal Strip...
- Page 93 Remote DAP III Display Mount connection to Control Module...
- Page 94 A Member of the CS Group of Companies © 2010 Data Aire, Inc. Data Aire, Inc. reserves the right to make design changes for the purpose of product improvement or to withdraw any design without notice. DAPIII-IOM-1-11...
Need help?
Do you have a question about the DAP III and is the answer not in the manual?
Questions and answers