Table of Contents
Advertisement
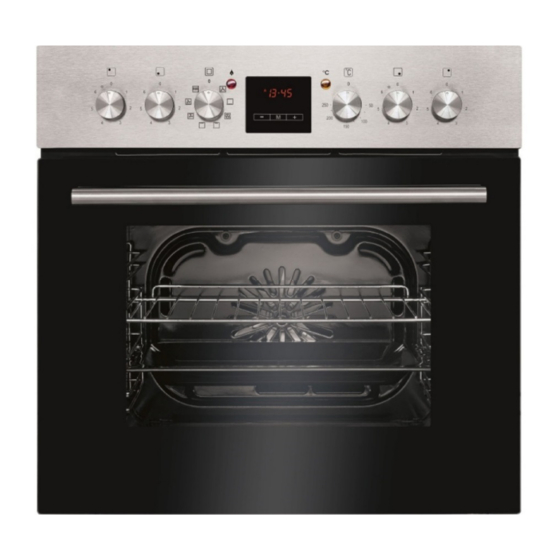
Quick Links
Advertisement
Table of Contents

Related Manuals for BOMANN EHBC 562.1 IX


Summary of Contents for BOMANN EHBC 562.1 IX
- Page 1 EHBC EHBC 562 562.1 .1 .1 .1 IX IX IX IX EHBC EHBC H H H H - - - - E E E E O O O O S S S S OUSEHOLD OUSEHOLD OUSEHOLD OUSEHOLD LECTRIC LECTRIC LECTRIC LECTRIC Instruction Manual Instruction Manual...
-
Page 2: Table Of Contents
Contents Contents Contents Contents Introduction ……………………..………………….………………………………………………….…..Page 3 General Notes …...……………………………………….……………………………………………..…. Page 3 Special safety Information for this Unit ……………………………...……………………………..Page 4 Unpacking the Appliance …...………………………………..…………………………………………… Page 6 Appliance Equipment ……………………..….…………………………………………………………..Page 6 Installation …...…………………………………………………………………………………………..…. Page 6 Startup / Operation ……………………..………………………………………..…………………..Page 8 Cleaning and Maintenance …...……………………….…..………………………………………………... -
Page 3: Introduction
Introduction Introduction and disconnect the plug (pull the plug itself, not Introduction Introduction the lead) or turn off the fuse. Thank you for choosing our product. We hope you • The appliance and if possible the mains lead have will enjoy using the appliance. to be checked regularly for signs of damage. -
Page 4: Special Safety Information For This Unit
Special safety information for this Unit Special safety information for this Unit Special safety information for this Unit Special safety information for this Unit WARNING NING: : : : Danger from electrical current! Contact with live leads or Danger from electrical current! Contact with live leads or NING NING Danger from electrical current! Contact with live leads or... - Page 5 • CAUTION: The cooking process must be observed. A short cooking op- eration is to be observed continuously. • Never store objects on the cooking surface. • The appliance is not intended for operation with an external timer or external remote control system. •...
-
Page 6: Unpacking The Appliance
Unpacking the Appliance Unpacking the Appliance Unpacking the Appliance Unpacking the Appliance Installation Installation Installation Installation • Remove the appliance from its packaging. WARNING: WARNING: WARNING: WARNING: • Remove all packaging material, such as foils, filler The installation and the connection to the main power and cardboard packaging. - Page 7 Dimensions in mm Installing the hob Installing the hob Installing the hob Installing the hob NOTE NOTE: : : : NOTE NOTE To avoid damage, place the hob with the top of the cooking surface on a padded base. • First check the factory fitted hob seal at the hob frame to the integrity and the proper fit.
-
Page 8: Startup / Operation
WARNING: WARNING: 220-240V~ 380-415V 3N~ 380-415V 3N~ WARNING: WARNING: 50Hz 50Hz 50Hz • Improper connection may cause to an electric electric electric electric shock! shock shock shock • Before connecting, ensure that the power supply corresponds with the information on the rating la- H05 VV-F3G H05 VV-F4G H05 VV-F5G... - Page 9 2 2 2 2 Cooking zone power control lamp Cooking zone power control lamp The time and the various functions of the timer are Cooking zone power control lamp Cooking zone power control lamp The power control lamp indicates the operation of the set via the display.
- Page 10 GENERAL NOTES to the timer functions GENERAL NOTES to the timer functions GENERAL NOTES to the timer functions GENERAL NOTES to the timer functions Using the timer to delay the cooking time and to Using the timer to delay the cooking time and to Using the timer to delay the cooking time and to Using the timer to delay the cooking time and to •...
- Page 11 • Double cooking and roasting tin zone: Double cooking and roasting tin zone: Double cooking and roasting tin zone: Double cooking and roasting tin zone: By rotating www.bomann- - - - germany.de www.bomann germany.de. Use the reference num- www.bomann www.bomann germany.de...
- Page 12 Oven functions Oven functions NOTE: : : : NOTE Oven functions Oven functions NOTE NOTE • Unsuitable is cookware of bright, shiny aluminum, Symbol Symbol Description Description Symbol Symbol Description Description unglazed clay and tableware made of plastic or 0 0 0 0 Off- - - - Position: Position: Position:...
- Page 13 • Slide an empty baking tray for dripping grease to Always close pots with a suitable lid. When cooking directly lower level, below the grill grid. Pour some without lid you need four times more energy. When water into the baking tray for later easily cleaning. using glass lids, more energy can be saved be- cause you can see into the pot without open the lid.
-
Page 14: Cleaning And Maintenance
Cleaning and Maintenance Cleaning and Maintenance Removing the oven door Removing the oven door Cleaning and Maintenance Cleaning and Maintenance Removing the oven door Removing the oven door You may remove the oven door to facilitate cleaning WARNING: WARNING: WARNING: WARNING: and to get better access to the oven interior. -
Page 15: Troubleshooting
• Remove the rack by slightly bending the lowest Troubleshooting Trou bleshooting Trou Trou bleshooting bleshooting metal rod to loosen it from the lower mounting Before you contact an Before you contact an Before you contact an Before you contact an authorized specialist authorized specialist authorized specialist authorized specialist... -
Page 16: Disposal
A further disassembly for maintenance purposes is not provided. If you would like to exchange defective compo- Disposal Disposal Disposal Disposal nents, please contact our customer service. Accumulators are not included. Meaning of the “Dustbin” Symbol Meaning of the “Dustbin” Symbol Meaning of the “Dustbin”... -
Page 17: Eu Product Data Sheet
Position Position Symbol Symbol Symbol Symbol Value Value Value Value Unit Unit Unit Unit Brand Brand BOMANN BOMANN Brand Brand BOMANN BOMANN Model Model identification Model Model identification identification identification EHBC 56 EHBC 56 EHBC 56 EHBC 562 2 2 2 .1 .1 .1 .1 IX IX IX IX... - Page 18 Symbol Symbol Value Value Value Value Unit Unit Unit Unit Brand Brand Brand Brand BOMANN BOMANN BOMANN BOMANN Model Model identification Model Model identification identification identification EHBC 56 EHBC 56 EHBC 56 EHBC 562 2 2 2 .1 .1 .1 .1 IX IX IX IX...
- Page 19 C. Bomann GmbH C. Bomann GmbH C. Bomann GmbH C. Bomann GmbH www.bomann www.bomann- - - - germany.de www.bomann www.bomann germany.de germany.de germany.de Made in P.R.C.
Need help?
Do you have a question about the EHBC 562.1 IX and is the answer not in the manual?
Questions and answers