Table of Contents
Advertisement
Quick Links
H H H H
- - - - E E E E
OUSEHOLD
OUSEHOLD
OUSEHOLD
OUSEHOLD
LECTRIC
LECTRIC
LECTRIC
LECTRIC
EHBC 557
EHBC
EHBC
EHBC
O O O O
S S S S
VEN
VEN
VEN
VEN
ET
ET
ET
ET
557 IX IX IX IX / / / / EHBC
EHBC 558
557
557
EHBC
EHBC
Instruction Manual
Instruction Manual
Instruction Manual
Instruction Manual
558 IX IX IX IX
558
558
Advertisement
Table of Contents

Subscribe to Our Youtube Channel
Related Manuals for BOMANN EHBC 557 IX


Summary of Contents for BOMANN EHBC 557 IX
- Page 1 EHBC EHBC 557 557 IX IX IX IX / / / / EHBC EHBC 558 558 IX IX IX IX EHBC EHBC EHBC EHBC H H H H - - - - E E E E O O O O S S S S OUSEHOLD OUSEHOLD...
- Page 2 Contents Contents Contents Contents Introduction ……………………..………………….………………………………………………….…..Page 3 General Notes …...……………………………………….……………………………………………..…. Page 3 Special safety Information for this Unit ……………………………...……………………………..Page 4 Unpacking the Appliance …...………………………………..…………………………………………… Page 5 Appliance Equipment ……………………..….…………………………………………………………..Page 5 Installation …...…………………………………………………………………………………………..…. Page 6 Startup / Operation ……………………..………………………………………..…………………..Page 8 Cleaning and Maintenance …...……………………….…..………………………………………………...
-
Page 3: Introduction
Introduction Introduction Introduction Introduction • Do not use it outdoors. Keep it away from sources Do not use it outdoors. Keep it away from sources of heat, direct sunlight and light and humidity. Thank you for choosing our product. We hope you Thank you for choosing our product. -
Page 4: Special Safety Information For This Unit
Special safety information for t Special safety information for t Special safety information for t Special safety information for this Unit his Unit Special safety information for t Special safety information for t Special safety information for t Special safety information for t his Unit his Unit WARNING... -
Page 5: Unpacking The Appliance
• Make sure that with installing adequate air Make sure that with installing adequate air circulations ensured and the ventilation circulations ensured and the ventilation slots are not blocked. • Never pour liquids into a hot oven! Scalding by rising water vapor as well as po Never pour liquids into a hot oven! Scalding by rising water vapor as well as po Never pour liquids into a hot oven! Scalding by rising water vapor as well as pos- sible damage to enamel. -
Page 6: Installation
• The appliance conforms to the heat insulation The appliance conforms to the heat insulation class Y, i.e. only one side of the appliance may be class Y, i.e. only one side of the appliance may be NOTE NOTE NOTE NOTE: : : : installed near higher kitchen furniture or walls. - Page 7 • The cut surfaces (cutout edges) must be sealed dges) must be sealed with special varnish, silicone rubber or cast raisin rubber or cast raisin in order to prevent swelling caused by humidity. in order to prevent swelling caused by humidity. Installing the oven Installing the oven Installing the oven...
-
Page 8: Startup / Operation
a suitable cord as mains cable, considering the a suitable cord as mains cable, considering the Startup / Operation Startup / Operation Startup / Operation Startup / Operation Startup / Operation Startup / Operation Startup / Operation Startup / Operation connection type and nominal power of the oven. - Page 9 CAUTION: CAUTION: Correct! To save time a Correct! To save time and energy! nd energy! nd energy! nd energy! CAUTION: CAUTION: Correct! To save time a Correct! To save time a nd energy! nd energy! nd energy! nd energy! Turn the temperature selector switch only clockwise Turn the temperature selector switch only clockwise Diameter of the cookware corresponds Diameter of the cookware corresponds...
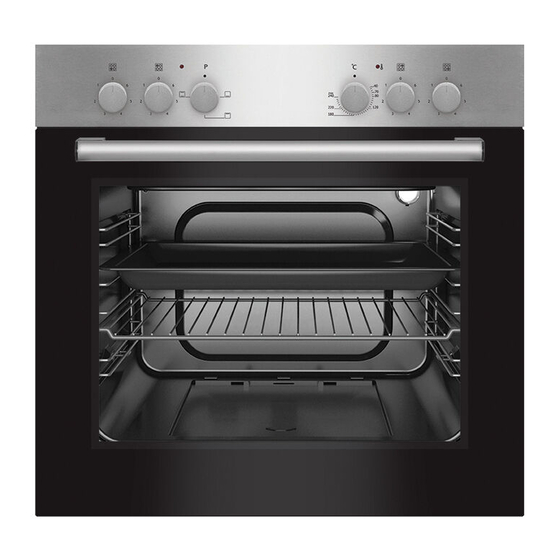
- Page 10 Oven functions Oven functions Cooking and roasting meat & fish Cooking and roasting meat & fish Cooking and roasting meat & fish Cooking and roasting meat & fish Oven functions Oven functions Cooking and roasting meat & fish Cooking and roasting meat & fish Cooking and roasting meat &...
-
Page 11: Cleaning And Maintenance
• The base of the cookware and the cooking zone The base of the cookware and the cooking zone Information to reduce the environmental effect of Information to reduce the environmental effect of Information to reduce the environmental effect of Information to reduce the environmental effect of Information to reduce the environmental effect of Information to reduce the environmental effect of... - Page 12 WARNING: WARNING: • Then press down the retaining brackets (a) again, Then press down the retaining brackets (a) again, Then press down the retaining brackets (a) again, Then press down the retaining brackets (a) again, WARNING: WARNING: Then press down the retaining brackets (a) again, Then press down the retaining brackets (a) again, Then press down the retaining brackets (a) again, Then press down the retaining brackets (a) again,...
-
Page 13: Troubleshooting
• Remove the retaining strip by pressing the r by pressing the re- NOTE: NOTE: NOTE: NOTE: lease tabs on the side and simultaneously pulling se tabs on the side and simultaneously pulling If a problem still persists after following the steps If a problem still persists after following the steps the strip forward forwards. - Page 14 WARNING: WARNING: For maintenance purposes, the oven door can be For maintenance purposes, the oven door can be WARNING: WARNING: Remove or disable any existing snap and bolt locks, Remove or disable any existing snap and bolt locks, hang out and reinstalled, for the procedure please hang out and reinstalled, for the procedure please if you take the unit out of operation or dispose it.
-
Page 15: Eu Product Data Sheet
BOMANN BOMANN Model Model identification Model Model identification identification identification EHBC 557 IX EHBC 557 IX EHBC 557 IX EHBC 557 IX EHBC 558 IX EHBC 558 IX EHBC 558 IX EHBC 558 IX Type of hob Hob of a built-in oven... - Page 16 BOMANN BOMANN BOMANN Model Model identification Model Model identification identification identification EHBC 557 IX EHBC 557 IX EHBC 557 IX EHBC 557 IX EHBC 558 IX EHBC 558 IX EHBC 558 IX EHBC 558 IX Type of oven Built-in Mass of the appliance 27.0...
- Page 20 C. Bomann GmbH C. Bomann GmbH C. Bomann GmbH C. Bomann GmbH www.bomann www.bomann- - - - germany.de www.bomann www.bomann germany.de germany.de germany.de...
Need help?
Do you have a question about the EHBC 557 IX and is the answer not in the manual?
Questions and answers