
Related Manuals for Stirling SU105UE


Summary of Contents for Stirling SU105UE
- Page 1 SU 1 UE -86˚C Ultra-Low Storage Operating Manual 02.06.19 6000 Poston Rd Athens, Ohio 45701, USA 740.274.7900 / 855.274.7900 740.274.7901 www.stirlingultracold.com...
- Page 2 T H I S PAG E I N T E N T I O N A L LY L E F T B L A N K 2 of 40 Operating Manual: SU105U-MAN10-C | 02.06.19...
- Page 3 SU105UE Quick Guide Initial Setup 1. Unpack freezer unit and included components, ensure all packaging material has been removed from around the fan inlet and outlet holes. 2. Plug AC power cord into the main power socket at the back of the unit and then into an electrical outlet.
- Page 4 T H I S PAG E I N T E N T I O N A L LY L E F T B L A N K 4 of 40 Operating Manual: SU105U-MAN10-C | 02.06.19...
-
Page 5: Table Of Contents
2. FEATURES OF THE SU105UE FREEZER ..8-11 Free-Piston Stirling Engine ......8 Cabinet Design Features. -
Page 6: Introduction
1.3.1 – Operating Manual • This operating manual describes all aspects of receiving, installing, use, moving and storage of the Stirling Ultracold SU105UE Freezer. More detail on specific aspects of operation of the freezer is available via online supplementary documentation. •... -
Page 7: Organization Of This Operating Manual
Flammable Refrigerant Use: SU105UE uses 30-33 grams of R-170 (Ethane) in hermetically sealed thermosiphon tubing. It requires caution in use/repair. A. Danger – Risk of Fire or Explosion. Flammable Refrigerant Used. Do Not Drill or Puncture Inner Liner. -
Page 8: Features Of The Su105Ue Freezer
2. Features of the SU105UE freezer 2.1 – Free-Piston Stirling Engine The SU105UE Ultra-Low Temperature Freezer uses the state of the art Stirling Ultracold Model M150A free-piston Stirling engine to provide high efficiency, deep-temperature cooling. No HCFC or CFC refrigerants are used in the M150A and SU105UE. -
Page 9: Graphical User Interface (Gui)
Display temperature graph and event log • Display diagnostic and service information • Display freezer identification information Values for the following SU105UE parameters are viewed and modified through the touch screen. Modifiable Values Accessible Values Temperature setpoint Current freezer interior temperature... -
Page 10: Pictorial Tour
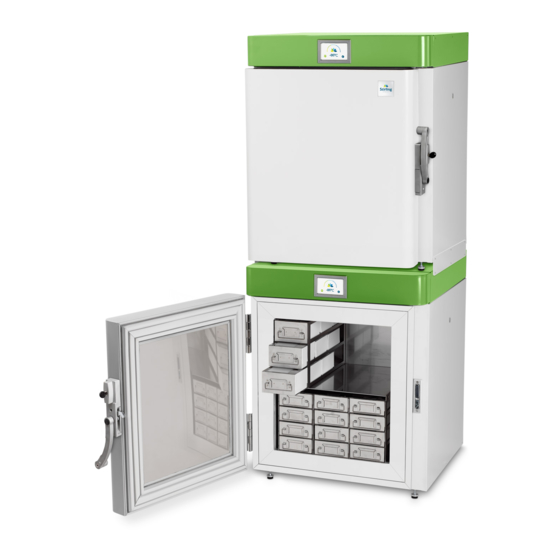
8. Recessed Electrical Panel A. AC Power Connector B. AC Power Switch C. External Alarm Terminal Strip, Dry Contacts (NC, NO, C) D. Battery Power Switch Model SU105UE. Shown with optional stainless steel inventory racks. 2.6 – Included Items • Packing List •... -
Page 11: Options
2.7 – Options • Stacking Adapter When stacking two Stirling Ultracold SU105UE free-piston Stirling engine Ultra- Low Temperature (-86°C) Freezers, a stacking adapter is required. The Stacking Adapter consists of two (2) plates and twelve (12) screws. 2.7.1 – Adapter Installation Procedure 1. -
Page 12: Safety Precautions
3. Safety Precautions Potential hazards associated with use of the SU105UE freezer may impact the safety of persons in the workplace in which the freezer is installed. This includes persons who operate the freezer, and other personnel in its vicinity. The freezer itself may also be damaged or its warranty voided by improper operation or usage. - Page 13 • When removing the power cable, hold onto the plug and not the cable. • Do not block the air intake or air discharge vents used by the free-piston Stirling engine (See pictorial on Page 10 for locations.) • Ultra-low temperature freezers are different from home freezers in that at -86°C frostbite can occur instantly.
-
Page 14: Unpacking And Installation
4. Unpacking and Installation Verify the SU105UE freezer shipment by uncrating the freezer and included items, inspecting them for damage during shipping, and compare the items to the packing list for completeness. 4.1 – Qualify the installation site for the freezer before placing it into service. -
Page 15: Setup
4. Unpacking and Installation 4.2 – Set-up 1. Before switching on electrical power to the freezer, make all desired external connections: AC power connection External alarm 2. Turn on the AC switch. If the DC power option has been provided please see the supplemental instructions. -
Page 16: Operation
5. Operation 5.1 – Operation of the SU105UE freezer comprises four stages: 1. Monitoring temperature performance using the Graphical User Interface (GUI) touch screen control panel. 2. Managing the freezer contents. 3. Cleaning and defrosting the freezer. 4. Calibrating the freezer's display RTD. -
Page 17: Graphical User Interface (Gui) & Pin
5. Operation 5.1.1 – Graphical User Interface (GUI) & PIN A Password Identification Number (PIN) may be set, but is not displayed. The default PIN is 1234 and may be changed by the user to any four-digit numeric. Use the PIN to control access to parameter change screens. -
Page 18: Gui Menu
5.1.2 – GUI Menu The GUI menu tree below starts with the Home screen. (How to get there is described later.) Soft buttons provide navigation to the screens on the next level of the menu tree. Home – display current freezer temperature. •... -
Page 19: Basic Gui Controls
5. Operation 5.1.3 – Basic GUI Controls • Generally, to change a value on a screen, Tap the appropriate soft button to highlight the parameter. • Use the +/- buttons to enter the desired value and then use the “Save” soft button to complete the change. -
Page 20: Gui Instructions
5.1.4 – GUI Instructions 1. Start Screen: Turn On Freezer and Battery Power • Stirling Ultracold splash screen will appear for 3 seconds 2. Home Screen: The Home screen will be displayed next Tap the Setup button to proceed to system settings •... - Page 21 5. Operation 3. Data Setup: From the Setup Screen Tap the Set-up button to change alarm settings, date & time, door defrost heater, and PIN • Tap the Silence button to temporarily silence the audible alarm • Tap the Event Log button to track the last approximately 200 events •...
- Page 22 5. Secure Temperature Setpoint: To observe the current temperature setpoint Tap Change to change the temperature setpoint and over / under temperature thresholds • Tap the Alarms button to change the alarm delays • Tap the Date & Time button to change system date and time •...
- Page 23 5. Operation 7. Alarm Delay: From the Setup Alarms Screen • Select the appropriate parameter then use the + and – buttons to adjust then tap Save (Note: If Save is not tapped new values will not be used) • Temp.
- Page 24 9. Door Defrost Heater: When set to Auto Defrost, the door defrost heater will cycle 15 minutes ON and 20 minutes OFF unless otherwise programmed • Auto Defrost parameters are not adjustable To enable Manual Defrost tap the Auto Manual button to activate Manual mode •...
- Page 25 5. Operation 11. Event Log: The Event Log will display the last approximately 200* events in about 30 pages, listing 7 events per page. The last 7 events are shown by default. Events beyond 30 pages will not be saved Tap Prev Page and Next Page to scroll through the pages •...
- Page 26 Chart History, Zoom: The Chart History can be enlarged to use the entire display • Tap the screen to enlarge or reduce the Chart History Screen 14. About Freezer: To observe specific freezer information including Model and Serial Num- ber, Firmware Version, Engine Number, Run Hours, Setpoint, and Date •...
- Page 27 5. Operation 15. Performance Snapshot: The Service Screen gives you access to system information and calibration, as well as Firmware Upgrade options, Alarm Tests, Diagnostics, Service Contact, and RTD Calibration • Tap the Firmw. Upgrade button to for system firmware upgrades •...
- Page 28 17. Diagnostics: Diagnostic Screen provides system health information Tap the Back button to return to the Setup Screen • Tap the Home button to take you back to the Home Screen • 18. Service Contact: Service Contact Screen provides phone, email, and web address for manufacturer Tap the Back button to return to the Setup Screen •...
- Page 29 5. Operation 19. Calibration: RTD Calibration Screen is used to compensate for discrepancies between the Display RTD and a user provided standard Tap RTD Select until the desired RTD is selected then use the + and – buttons • to adjust the offset. Tap the Calib. button to save changes •...
-
Page 30: Managing Freezer Contents
5.3 – Cleaning Cleaning the Freezer Surfaces • Clean the exterior surfaces of the SU105UE cabinet as needed by using a soft cloth and mild detergent. Do not use solvent (such as bleach) or harsh abrasive cleansers or pads. •... -
Page 31: Calibration Of The Rtds
5-6. Contents, Cleaning, Transportation 5.4 – Calibration of the RTDs The SU105UE Display RTD and Control RTD may be calibrated by inserting a temperature sensor through the access port of the cabinet wall and securing it next to the RTDs located in the right rear corner of the interior just above the shelf. -
Page 32: Specifications
Maximum Power 300 watts (3 amps @120V, 1.5 amps @240V) (Current) Electric Supply Rating 15 amp or greater grounded circuit Direct cooling by a free-piston Stirling engine and thermosiphon Cooling System / Device heat transfer Refrigerant, Engine Helium R-170 (Ethane) 30-33 grams Refrigerant, Thermosiphon To be repaired only by trained service personnel. - Page 33 7. Specifications Control Sensor Two RTDs (PT100 Class A) Normally closed, normally open, common; activated by power Dry Contacts outage or any alarm condition 12 hour control battery back-up for touchscreen Battery Back-up (6V Lead Acid Battery) Pull-Down from 9 hours to -80 º C (empty cabinet) 25°C Ambient Recovery from Door 40 minutes to -80 º...
-
Page 34: Materials Specifications
7. Specifications 7.2 – Materials Specifications Part Material Color Treatment Body: Main Body, Door, Mild steel White Powder coated Front Cover and Top Cover Interior Steel White Powder coated Stainless Steel Shelf (non-adjustable) Handle Aluminum Gray Powder coated Hinges Steel White Powder coated LCD Bezel... -
Page 35: Troubleshooting
8. Troubleshooting Problem Possible Cause Solution Check the connections to the power supply Freezer does not Power is not getting to the power on freezer from the Power Supply Assure that the wall plug is firmly seated Inadequate air circulation Remove airflow obstructions Assure that the wall plug is Inadequate power... -
Page 36: Warranty
Limited Warranty, USA The warranty period starts TWO WEEKS after the original date of shipment • from Global Cooling, Inc. The Stirling Ultracold freezer is warranted for a period of TWO YEARS for materials • and labor. • The Stirling Ultracold free-piston Stirling engine and thermosiphon is warranted for a full SEVEN YEARS, parts only. - Page 37 TWO YEARS. • The Stirling Ultracold free-piston Stirling engine and thermosiphon is warranted for a full SEVEN YEARS, parts only. Warranty will start ONE MONTH after the ship date from Global Cooling.
-
Page 38: Ce Documentation
10. CE Documentation 10. CE Documentation Operating Manual: SU105U-MAN10-C | 02.06.19 38 of 40... - Page 39 T H I S PAG E I N T E N T I O N A L LY L E F T B L A N K Operating Manual: SU105U-MAN10-C | 02.06.19 39 of 40 www.stirlingultracold.com...
- Page 40 ©2019 Stirling Ultracold, Global Cooling, Inc . All Rights Reserved. Global Cooling technology is manufactured under U.S. and International patents. Stirling Ultracold is a trademark of Global Cooling, Inc. Specifications subject to change without notice. Refer to www.stirlingultracold.com for the latest specifications.
Need help?
Do you have a question about the SU105UE and is the answer not in the manual?
Questions and answers