
Related Manuals for Eaton HCU2


Summary of Contents for Eaton HCU2
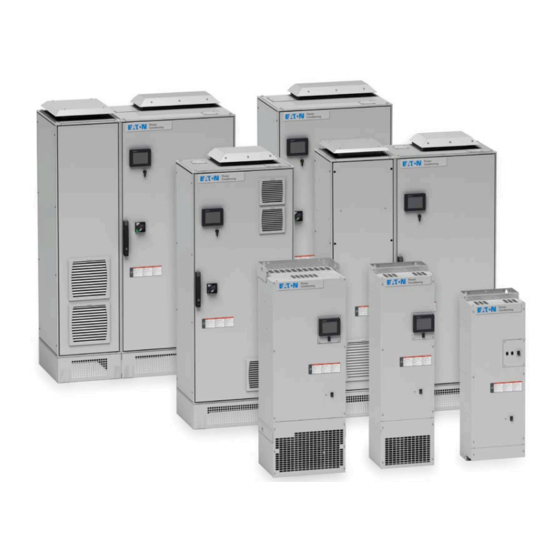
- Page 1 Harmonic correction unit (HCU2) and electronic VAR injector (EVI2) active filters Operational manual...
- Page 2 If further information is required, an Eaton sales office should be consulted. Sale of the product shown in this literature is subject to the terms and conditions outlined in appropriate Eaton selling policies or other contractual agreement between Eaton and the purchaser.
-
Page 3: Table Of Contents
Performance ......7 System Mode Setup (HCU2 type) ... . . 30 Power . - Page 4 Harmonic correction unit (HCU2) and electronic VAR injector (EVI2) active filters Safety information Important information Read these instructions carefully and look at the equipment to become familiar with the device before trying to install, operate, service or maintain it. The following special...
-
Page 5: Safety Precautions
• Replace all devices, doors, and covers before turning on power to this equipment • Carefully inspect the interior for tools left behind before closing and sealing the door Failure to follow these instructions will result in death or serious injury . OperatiOnal manual MN156001EN October 2015 www.eaton.com... -
Page 6: Introduction
Where there are differences, they (capacitive) or lagging (inductive) loads that cause poor are indicated by [HCU2] or [EVI2] in the topic heading. For DPF . Mains current balancing is achieved by measuring the example, the information in Harmonic Enable [HCU2 type] negative sequence current present and injecting the inverse on page 14 pertains to HCU2 type active filters. -
Page 7: Operation
Start System when inactive and Stop System when active. Start System activates the unit, or in parallel operation, it starts the entire system. Stop System stops the unit, or in parallel operation, it stops the entire system. OperatiOnal manual MN156001EN October 2015 www.eaton.com... -
Page 8: Overall Status Screen
Control DSP Versione: Displays the software version Prioritye: Indicates the priority group that is operating. installed on the Control DSP . Protection DSP Versione: Displays the software version installed on the Protection DSP . OperatiOnal manual MN156001EN October 2015 www.eaton.com... -
Page 9: Network Setup
Line Frequencye: The measured source frequency. DC Bus Tope: The measured DC voltage of the top DC bus section. DC Bus Bote: The measured DC voltage of the bottom DC bus section. OperatiOnal manual MN156001EN October 2015 www.eaton.com... -
Page 10: Metering
ON or OFF . Output Funde: Output current at the fundamental frequency for power factor correction and/or load balancing. Total Outpute: Total output current of the unit in amperes RMS. Sourcee: Total source current in amperes RMS. OperatiOnal manual MN156001EN October 2015 www.eaton.com... -
Page 11: Performance
If you have a USB drive inserted into the USB port next to Power the HMI, you can click the camera icon to save the screen in a PDF format. This screen displays three-phase values of the source, load, and output of the Harmonic Correction Unit. OperatiOnal manual MN156001EN October 2015 www.eaton.com... -
Page 12: Available Scope Data
Isrc3e: Bar graph harmonic analysis of Current source L3. • Iload1e: Bar graph harmonic analysis of current load L1. • Iload2e: Bar graph harmonic analysis of current load L2. • Iload3e: Bar graph harmonic analysis of current load L3. • OperatiOnal manual MN156001EN October 2015 www.eaton.com... -
Page 13: Phasor Diagram
Then, press the magnifying glass icon to display the details for that event. You can save the Event Log to a USB storage device. Once it is connected, press this icon to save the log: OperatiOnal manual MN156001EN October 2015 www.eaton.com... -
Page 14: System Settings
Operation System Settings Compensation Mode Screen (HCU2 type) Within System Settings, you can change parameters for the system. When the unit is part of a parallel system, all of these settings for each unit must match. System Settings screen (HCU2 type) Harmonic Modee: Activates/Deactivates the harmonic correction mode. -
Page 15: Compensation Mode Screen (Evi2 Type)
Compensation Mode Screen (EVI2 type) Reactive Mode—V-Rege: Voltage Regulation Mode. Voltage regulation mode monitors the voltage and adjusts the reactive current injected to maintain a voltage level. V-Reg Set Pointe: Sets the desired voltage to be maintained. OperatiOnal manual MN156001EN October 2015 www.eaton.com... -
Page 16: Miscellaneous Settings
Power Save Off percentage. Power Save OFFe: Percentage of rated output current below which the unit shuts down. The default value is 10%. It must be lower than the Power Save On percentage. OperatiOnal manual MN156001EN October 2015 www.eaton.com... -
Page 17: Voltages
The is set to zero. It is not an adjustable parameter. 150 Lag (Phase) Unit Touching this data box displays the available phase shift options for the transformer. 150 Lead 120 Lead Dy10 60 Lead Dy11 30 Lead OperatiOnal manual MN156001EN October 2015 www.eaton.com... -
Page 18: Parallel Configuration
Select Parallel Rotation ON if the additional units should be cycled through with the minimum number operating to support the correction required. This is based on the Parallel Priority Group parameter located under Unit Settings, Basic Setup. OperatiOnal manual MN156001EN October 2015 www.eaton.com... -
Page 19: Basic Setup
STOP condition. Refer to Automatic CT configuration on page 16. Selecting Manual displays a Modify CT Configuration screen to allow manual setting of these parameters. Refer to Manual CT configuration. OperatiOnal manual MN156001EN October 2015 www.eaton.com... -
Page 20: Manual Ct Configuration
Select Source if the CTs are measuring the current of all loads being corrected and the active filter current. CT Secondary Ratinge: The rating of the CT secondary that is installed. OperatiOnal manual MN156001EN October 2015 www.eaton.com... - Page 21 OK. 2. Once the unit is properly configured for the CTs that are installed, press OK to continue. Load CT Detected If a Load CT is detected, the following screen displays. OperatiOnal manual MN156001EN October 2015 www.eaton.com...
- Page 22 The unit asks if the displacement power factor of the load operating at the time of the test was extremely low, less than 0.5. OperatiOnal manual MN156001EN October 2015 www.eaton.com...
-
Page 23: Brightness And Advanced Hmi Settings
Advanced HMI Settings accesses the options for adjusting Current Statee: Indicates the current condition of • TCP/IP Address, Subnet, and default gateway as well as the input. DHCP settings. Refer to “Modbus TCP/IP Address Setup” on page 21 for more information. OperatiOnal manual MN156001EN October 2015 www.eaton.com... -
Page 24: Output Configuration
Harmonic correction unit (HCU2) and electronic VAR injector (EVI2) active filters Output Configuration External Interfaces Four configurable outputs or dry contacts are provided on On the External Interfaces screen, you can turn the external the Control board labeled Q1 to Q4. The four outputs can be... -
Page 25: Modbus Tcp/Ip Address Setup
Harmonic correction unit (HCU2) and electronic VAR injector (EVI2) active filters Modbus TCP/IP Address Setup 3. Press Log In. 4. Press Manage Users. To set up the Modbus TCP/IP address, do the following: 1. Press Unit Settings. 2. Press Display Settings. -
Page 26: Change A Password
The password must be between 6 and 32 characters with any combination of letters or numbers. Passwords are case sensitive. 4. Enter it again in the Confirm field. 5. Press Change Password. 6. Press Back to return to the log in screen. OperatiOnal manual MN156001EN October 2015 www.eaton.com... -
Page 27: Commissioning And Start-Up
3. Follow the procedure covered in Commissioning the unit on page 23. 4. Start up the unit. 5. Set up users in the User Manager and configure the network, system, and unit settings. Refer to Operation on page 3. OperatiOnal manual MN156001EN October 2015 www.eaton.com... -
Page 28: Adjust Date And Time
Inductivee: This mode is for applications with a leading • power factor. Operating in Inductive mode corrects for a leading power factor facility. OperatiOnal manual MN156001EN October 2015 www.eaton.com... - Page 29 Contact technical support for assistance. – If any other alarms are displayed during this test, contact technical support for assistance. – If no issues are detected, click Next. OperatiOnal manual MN156001EN October 2015 www.eaton.com...
-
Page 30: Parallel System Setup
– Press No if the output voltage rating of the unit matches the voltage rating of the loads being corrected. OperatiOnal manual MN156001EN October 2015 www.eaton.com... -
Page 31: Ct Configuration
– Press Yes to perform CT configuration if CT wiring is connected to the unit. – Press No if the unit is intended to operate as a Slave in a parallel system. OperatiOnal manual MN156001EN October 2015 www.eaton.com... -
Page 32: Automatic Ct Configuration
5. Touch OK when the test is complete and the detected CT configuration is displayed. CT Secondary Ratinge: Select the secondary rating of the CT installed. Automatic CT Configuration If you chose Auto for CT configuration, do the following: OperatiOnal manual MN156001EN October 2015 www.eaton.com... - Page 33 Either the CTs are load operating at the time of the test was extremely low, improperly installed, the CTs are not functioning, or the less than 0.5. CT secondary wiring is not properly installed. OperatiOnal manual MN156001EN October 2015 www.eaton.com...
-
Page 34: System Mode Setup (Hcu2 Type)
5. When the CTs are properly configured, touch OK. The unit asks if the connected load at the time of the CT System Mode Setup (HCU2 type) detection was capacitive (having a leading power factor) or inductive (having a lagging power factor). - Page 35 (phi). Load Balancinge: When ON, the unit corrects for load imbalance (negative sequence current). Load Balancinge: When ON, the unit corrects for load imbalance (negative sequence current). OperatiOnal manual MN156001EN October 2015 www.eaton.com...
-
Page 36: Admin Password Setup
If this is a parallel system, perform this step after all other units in the system have been properly commissioned and are ready to run or you might see a reduction in performance. OperatiOnal manual MN156001EN October 2015 www.eaton.com... - Page 37 A screen displays indicating that a USB storage device The report is saved as a csv file on the USB is required. storage device at: *:\PUBLIC\PROJECTS\ACTIVEFILTER\DATA\ALARM\ COMMISSIONINGREPORT 6. Press Finish to complete the commissioning procedure. OperatiOnal manual MN156001EN October 2015 www.eaton.com...
-
Page 38: Catalog Numbering System
Catalog numbering system HCU2 060 D5 N2 Equipment type Ampere rating Voltage Enclosure type HCU2 = Harmonic correction unit 040 = 40 A D5 = 380–480 V IP00 = Chassis mount 047 = 47 A D6 = 600 V = NEMA 1 wall mount... - Page 39 (600 and 690 V units only) specification. Verify intake and exhaust air vents are not obstructed. High Frequency Voltage Excessive inverter switching frequency detected Call your local service center. Distortion Condition on line voltage OperatiOnal manual MN156001EN October 2015 www.eaton.com...
-
Page 40: Warranty
OR USAGE OF TRADE, ARE MADE REGARDING THE INFORMATION, RECOMMENDATIONS, AND DESCRIPTIONS CONTAINED HEREIN . In no event will Eaton be responsible to the purchaser or user in contract, in tort (including negligence), strict liability or otherwise for any special, indirect, incidental or...
Need help?
Do you have a question about the HCU2 and is the answer not in the manual?
Questions and answers