
Related Manuals for STOVES 900G


Summary of Contents for STOVES 900G
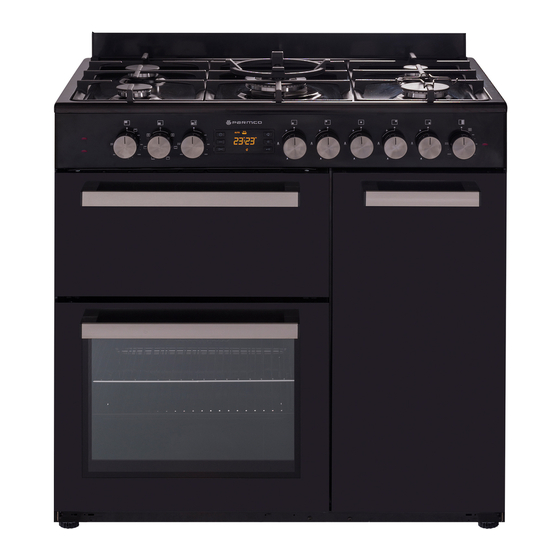
- Page 1 900G, Q901G Oven & Grill For Natural Gas Models User, Installation & Servicing Instructions...
-
Page 3: Table Of Contents
Technical Data ........40 Stoves Customer Support ......44 If you smell gas: - Do not try to light any appliance. -
Page 4: Introduction
INTRODUCTION Thank choosing Gas & Electrical connections British built appliance by Stoves Please refer ‘Installation We hope that the following information Instructions’ for the Gas and Electrical will help you to quickly familiarise Safety Regulations, and the Ventilation yourself with the features of the following Requirements. - Page 5 INTRODUCTION The cooling fan To replace a light bulb The cooling fan keeps the doors, Caution: Switch off the electricity fascia and control knobs cool during supply, to remove the risk of electric shock. Wait until the oven /grill is normal use.
-
Page 6: Be Safe - Not Sorry
BE SAFE - NOT SORRY When you are cooking, keep • Do not use aluminium foil to cover children away from the vicinity the grill pan, or put items wrapped of the appliance. in foil under the grill as this creates a fire hazard. -
Page 7: Using The Grill
USING THE GRILL Caution: Accessible parts may Aluminium foil be hot when the grill is used, Never cover the grill pan or grill trivet young children should be kept with cooking foil, or allow fat to build away. up in the grill pan, as this creates a fire hazard. - Page 8 USING THE GRILL Using the grill Push the grill pan towards the back of the shelf, to position it under the grill. Variation in grilling can be achieved by setting the grill between the large and small flame symbols, or by moving the grill pan up or down.
-
Page 9: Using The Oven
USING THE OVEN When you are cooking, keep Preheating children away from the vicinity The oven must be preheated for 15 of the oven. minutes when reheating frozen or chilled food, and we recommend Oven ignition preheating for yeast mixtures, batters, Push in and turn the oven control knob soufflés and whisked sponges. -
Page 10: Slow Cooking
USING THE OVEN Baking tray and roasting tins Slow cooking For best cooked results and even • Make sure that frozen foods are browning, the maximum size baking thoroughly before cooking. THAWED trays and roasting tins that should be • Do not slow cook joints of meat used are as follows;... -
Page 11: Cooking Frozen & Chilled Foods
USING THE OVEN Cooking frozen & chilled foods Baking guide - hints • When cooking frozen or chilled foods, To protect a very rich fruit cake during please follow the manufacturer’s cooking, stand the tin larger tin or tie instructions. If cooking more than 2 layers of brown paper around the tin. -
Page 12: Traditional Fruit Cakes
USING THE OVEN Traditional fruit cakes Roast turkey It should be remembered that ovens Roasting turkey perfectly involves can vary over time, therefore cooking cooking two different types of meat - times can vary, making it difficult to be the delicate light breast meat, which precise when baking fruit cakes. - Page 13 USING THE OVEN Baking guide Dish Recommended Shelf Approximate gas mark position cooking times Scones top to middle 8 - 15 mins Meringues “S” (slow) middle to bottom 2 - 3 hours Cakes Small cakes middle to top 15 - 25 mins Whisked sponge middle to top 20 - 25 mins...
-
Page 14: Roasting Guide
USING THE OVEN Roasting guide Notes; • When cooking stuffed meat or The times given in the roasting guide poultry, calculate the cooking time are only approximate, because the from the total weight of the meat size and age of the bird will influence plus the stuffing. -
Page 15: Automatic Cooking
USING THE OVEN Automatic cooking Do not: The automatic cooking facility is • Warm food should never be controlled by the programmer (see placed in the oven if there is a ‘Programmer / Clock’ section) and delay period. allows complete meals, or individual •... - Page 16 USING THE OVEN Important: Food is more susceptible Hints for automatic cooking to the growth of food poisoning • Food is placed in a cold oven so organisms in warm conditions. If the you will need to add about 10 - weather is hot, either take care to 15 minutes onto the cooking time ensure that food is not left standing in...
-
Page 17: Analogue Programmer / Clock (If Fitted)
ANALOGUE PROGRAMMER / CLOCK (if fitted) Analogue clock Manual operation For the appliance to be used manually, the clock must be set for manual A Clock minute hand operation - ie; the manual symbol B Clock hour hand must be showing in the window, and C Orange cooking start time hand the orange “start time”... - Page 18 ANALOGUE PROGRAMMER / CLOCK (if fitted) Minute minder To set for automatic cooking The minute minder can be set for up to For use when a delayed start time is 55 minutes. required. You need to set the time for cooking to start, and the length of The appliance must be in manual setting cooking time.
-
Page 19: Digital Programmer / Clock (If Fitted - 5 Button Version)
DIGITAL PROGRAMMER / CLOCK (if fitted - 5 button version) The Programmer Buttons Manual operation minute minder cook time ready time minus plus To set the programmer to manual To set the “Time of Day” operation at any time (cancelling any automatic setting), press the cook time and ready time buttons simultaneously. -
Page 20: Digital Programmer / Clock (If Fitted - 6 Button Version)
DIGITAL PROGRAMMER / CLOCK (if fitted - 5 button version) Semi-automatic cooking (example) 1. A (Auto) symbol appears. You have started cooking a meal or dish in the oven, and want to set the time for the oven to switch off. Press the cook time button, then use the plus and minus buttons to set the display to show the length of cooking... - Page 21 DIGITAL PROGRAMMER / CLOCK (if fitted - 5 button version) Fully automatic cooking (example) 5. A (Auto) symbol appears. For use when a delayed start time is required. You want to set the length of cooking time, and the time for the oven to switch off.
- Page 22 DIGITAL PROGRAMMER / CLOCK (if fitted - 5 button version) The oven will automatically switch off 9. A (Auto) symbol will flash. at 18.00 hours (6.00 pm) and the alarm will sound (9). To switch off the alarm press the minute minder button (10).
- Page 23 DIGITAL PROGRAMMER / CLOCK (if fitted - 6 button version) The programmer buttons Manual operation minute minder cook time ready time manual minus plus To set the programmer to manual To set the time of day operation at any time (cancelling any automatic setting), press the manual button.
- Page 24 DIGITAL PROGRAMMER / CLOCK (if fitted - 6 button version) Semi-automatic cooking (example) 1. Auto symbol appears. You have started cooking a meal or dish in the oven, and want to set the time for the oven to switch off. Press the cook time button, then use the plus and minus buttons to set the display to show the length of cooking...
- Page 25 DIGITAL PROGRAMMER / CLOCK (if fitted - 6 button version) Fully automatic cooking 5. Auto symbol appears. (example) For use when a delayed start time is required. You want to set the length of cooking time, and the time for the oven to switch off.
- Page 26 DIGITAL PROGRAMMER / CLOCK (if fitted - 6 button version) The oven will automatically switch off 9. Auto symbol will flash. at 18.00 hours (6.00 pm) and the alarm will sound (9). To switch off the alarm press the minute minder button (10). When the oven has switched off, return 11.
-
Page 27: Cleaning
CLEANING Caution: Any cleaning agent Vitreous enamel parts used incorrectly may damage & GRILL PAN GRILL COMPARTMENT OVEN FLOOR the appliance. Use a mild cream cleaner. Look for Always let the appliance cool one which has the Vitreous Enamel before cleaning. Development Council’s Recommendation Some cooking operations generate a Seal - eg;... - Page 28 CLEANING Glass parts Stainless Steel surfaces (stainless steel finish models only) DOOR PANEL FASCIA PANEL FACIA PANEL HANDLES DOOR PANELS Warning: Do not operate the appliance without the glass panel correctly fitted. Only use a clean cloth wrung out in hot soapy water, and dry with a soft cloth.
-
Page 29: Installation Instructions
INSTALLATION INSTRUCTIONS Before you start: Ventilation Requirements Please read the instructions, planing your The room containing the appliance should installation will save you time and effort. have an air supply in accordance with BS 5440: Part 2: 1989: Check that your appliance is suitable for the gas supply in your house - ie;... - Page 30 INSTALLATION INSTRUCTIONS Step 1: Prepare installation When the false back is removed, it is normally the case that the support shelf Do not lift the appliance by the for the appliance leaves a gap door handle. between the back edge of the support Remove the fixing screws from the shelf rear...
- Page 31 INSTALLATION INSTRUCTIONS Dimensions The appliance is designed to fit into a standard 600 mm wide housing unit, with minimum internal dimensions as shown. Note: All sizes are nominal, some variation is to be expected. 560 mm 550 mm 17 mm 7 mm 6 mm...
-
Page 32: Connect To Electricity Supply
INSTALLATION INSTRUCTIONS Step 2: Connect to the electricity As the colours of the wires in the mains supply lead for the appliance may not correspond with the coloured markings This appliance must be connected by identifying the terminals in your spur a competent person, using fixed box, proceed as follows: wiring via a double pole switched... -
Page 33: Connect To Gas Supply
INSTALLATION INSTRUCTIONS Step 3: Connect to gas supply 4. Flexible connections should be to BS 669. Parts of the appliance 1. The inlet to the appliance is ” BSP ⁄ likely to come into contact with situated towards the top right a flexible connecter have a corner of the rear. - Page 34 INSTALLATION INSTRUCTIONS Step 4: Fit edging strip (Q901G Step 5: Secure appliance into only) housing unit Before inserting the appliance into the Insert appliance into cabinet. Note: cabinet, fit the silicon edging strip The unit housing the appliance must be (supplied in the oven pack) to the front appropriately fixed.
- Page 35 INSTALLATION INSTRUCTIONS Step 6: Commissioning Oven 1. Make sure that the programmer is Burner aeration set to manual. All burners have fixed aeration and no 2. Push in and turn the control adjustment is possible. knob anticlockwise to gas mark 9. The oven light will come on Pressure setting automatically.
-
Page 36: Servicing Instructions
SERVICING INSTRUCTIONS Before servicing - Disconnect the gas and electrical supplies. After servicing - Check gas soundness. Wiring Diagram......... . . 35 Remove appliance from housing. - Page 37 SERVICING INSTRUCTIONS NEON NEON Gn/Y TIMER P-T-M GRILL ROTARY OVEN THERMAL SWITCH (L120C) GRILL LIGHT GRILL LIGHT Gn/Y Gn/Y OVERRUN Gn/Y Gn/Y GRILL OVEN LIGHT OVEN LIGHT SOLENOID IGNITION UNIT OVEN SOLENOID Gn/Y Gn/Y MAINS INLET BLOCK Wiring colour code: Bn = Brown, Bk = Black, Bu = Blue, R = Red, Or = Orange, W = White, Y = Yellow, Gn = Green.
- Page 38 900G - Open the grill door & support appliance. the facia glass while unscrewing its g. Remove circlip from grill tap spindle to securing screws from under the facia.
- Page 39 Note: When replacing the injector d. Disconnect leads from back of clock. carrier make sure the positioning clip 900G is located into the groove. b. Remove the fascia glass panel (2). Unscrew the screws holding the 11. Grill tap programmer support to the front frame a.
- Page 40 SERVICING INSTRUCTIONS 12. Oven burner / electrode / 16. Grill injector injector a. Remove appliance from housing (1). a. From inside the oven remove the oven b. Unscrew the top / rear panel securing burner shield by slackening the single screws.
- Page 41 SERVICING INSTRUCTIONS 18. Thermal cut out switch (manual 20. Fan control PCB reset, L120C) a. Release appliance from housing unit (1). a. Release appliance from housing unit (1). b. Unscrew the top / rear panel securing b. Unscrew the top / rear panel securing screws.
-
Page 42: Technical Data
TECHNICAL DATA Data badge Grill Lower part of front frame Nominal Rate Qn: 2.25 kW Injector: 1.12 mm Pressure test point Spark gap: 3 - 4 mm Oven injector Oven Pressure setting Bray type burner, sheet steel body, Natural Gas 20 mbar (8”wg) stainless steel flame strip Gas category Nominal Rate Qn:... - Page 43 NOTES...
- Page 44 NOTES...
- Page 45 NOTES...
-
Page 46: Stoves Customer Support
Enter appliance numbers here for future reference: Model No Serial No Please ensure you have the above details (Model No and Serial No) to hand when calling Stoves Customer Support. They are essential to booking your call. STOVES PLC, STONEY LANE, PRESCOT, MERSEYSIDE, L35 2XW... - Page 48 08 23894 02 © 2000...
Need help?
Do you have a question about the 900G and is the answer not in the manual?
Questions and answers