Advertisement
Advertisement

Subscribe to Our Youtube Channel
Related Manuals for STOVES Sterling R1100E


Summary of Contents for STOVES Sterling R1100E
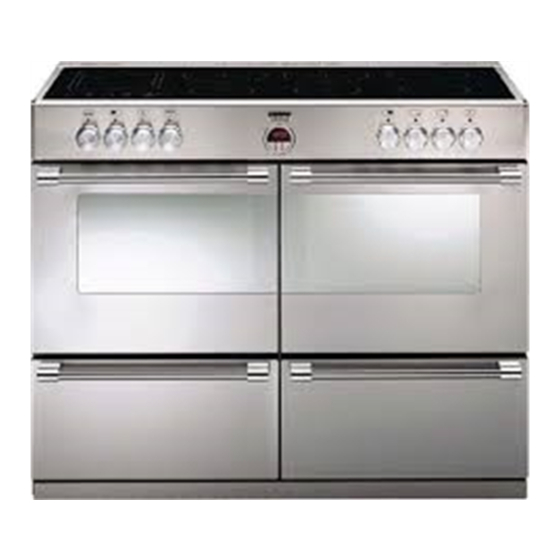
- Page 1 User and Installation Instructions Stoves Range Electric...
-
Page 2: Table Of Contents
contents Introduction Before Using Safety Using the Hob Using the Grill Using the Ovens Cleaning Installation Technical Customer Care Please keep this handbook for future reference, or for anyone else who may use the appliance. -
Page 3: Introduction
Please ensure that you have the product’s model no and serial no available when you call. These can be found on the silver data label on your product. Alternatively, general information, spares and service information is available from our website: www.stoves.co.uk... -
Page 4: Before Using
Before Using the ProdUct • Make sure that you have removed all packaging and wrapping. Some of the items inside this appliance may have additional wrapping. • It is advised that you turn the ovens and/or grill on for a short while. This will burn off any residues left from manufacturing. There may be a smell which accompanies this process - but this is nothing to worry about and is harmless. • It is recommend that you wash the oven shelves, baking tray, grillpan and grillpan trivet before their first use in hot soapy water. This will remove the protective oil coating. -
Page 5: Safety
safety Caution: This appliance is for cooking ✓ Always make sure that the oven purposes only. It must not be used for shelves are resting in the correct position other purposes, for example room between two runners. Do not place the heating. - Page 6 safety ✓ If the appliance has a glass hobtop, CHIP PaN fIRes make sure you do not drag pans across What causes a chip pan fire? the ceramic surface as this will lead to scratches and damage. • Chip pan fires start when oil of fat overheats and catches fire, or when oil or Never use double pans, rim-based ✗...
-
Page 7: Using The Hob
using the hob - ceramic glass Warnings hot hob indicator - (if fitted) The hot hob light will come on when one • Do not use the ceramic hob if the of the hotplates is switched on. It will glass surface is cracked, as electrical parts remain on for a short time after the last are directly beneath. Switch off the appli- element has been switched off to serve as ance at the supply to prevent electric shock a reminder that the hob top may still be and contact your supplier. warm to the touch. • The hob surface remains hot after use. use - rotary control DO NOT TOUCH • Select the element you wish to use, • Use pans which are large enough to place the pan on and turn the control avoid overflows onto the ceramic glass knob to the heat you wish to use. hob surface. • To switch off, turn the selected control • As soon as the water boils, turn the knob to the ‘off’ position. - Page 8 using the hob - ceramic glass • Once liquids have been brought to the • Use pans which are large enough boil, reduce the heat setting to a simmer. for the foods inside to avoid over flowing - this may cause damage to your hob. • Consider using a pressure cooker if possible. • Pans with dull or dark coloured bases give the quickest results. All pans used on • Vegetables cut into small pieces will ceramic/halogen hobs should have thick, cook more quickly. flat, smooth bases to ensure maximum • Use a pan which is a close match to contact with the element. your element size. • To avoid the risk of scratching the • Smaller elements are ideal for simmer- glass top of your hob, avoid sliding the ing and stewing in smaller pans, while the pan across the glass surface or use pans larger elements are ideal for frying and with an enamelled base. boiling. • Aluminium pans will give goods results, but please take care when using them. If they are dragged across the glass they tend to leave visible marks which can...
- Page 9 USING THE TOP CAVITY GRILL - ELECTRIC (If fITTEd) Before you start grilling..• High: For thin foods and toasting. Before you use the grill, make sure you • Low: For thicker meat pieces. have placed the grill shelf in the position Aluminium foil you need as once the grill is on you may UsYour Top Cavity Grill...
- Page 10 USING THE TOP CAVITY GRILL - ELECTRIC (If fITTEd) Time Approx As with any cooking guide, all food Type (mins) times are approximate and can be adjusted to suit personal taste. Bacon 8-15 Sausages 12 - 15 Chops • Lamb 10 - 15 •...
- Page 11 Using the Main Oven - electric fanned Manual Operation accessible parts may be hot when the oven is used. Young children should be kept away. The programmer must be set to manual operation before the main oven can be used. If A (Auto) is on the programmer to switch on the oven display, return the oven to manual by pressing the up and down buttons...
- Page 12 e Main Oven Using the Main Oven - electric fanned Slow cooking ( Setting) slow cooking ( setting or 100°c) Foods are cooked at a lower temperature than a conventional oven, so conventional � Make sure that frozen foods are •...
- Page 13 Using the Main Oven - electric fanned to help the air circulate freely Be safe Position the shelves evenly within the oven Do not defrost stuffed poultry using this and maintain a clearance from the oven method. roof and base. Do not defrost larger joints of meat and If more than one cooking dish or baking poultry over 2kg / 4lb using this method.
- Page 14 Using the Main Oven - electric fanned Note: this is a high efficiency oven, therefore some adjustment will have to be made to conventional cooking temperatures. The table below shows conventional cooking temperatures, ‘A’ efficiency temperatures and gas marks. For optimum results, conventional temperatures need to be converted to ‘A’...
- Page 15 Using the Main Oven - electric fanned Main oven baking guide dish recommended approximate temperature °c cooking time (preheated oven) Scones 8 - 15 mins Meringues 2 - 3 hours cakes Small cakes 15 - 25 mins Whisked sponge 15 - 20 mins Swiss roll 10 - 12 mins Victoria sandwich...
- Page 16 Using the Main Oven - electric fanned traditional fruit cakes roast turkey It should be remembered that ovens can Roasting turkey involves cooking two vary over time, therefore cooking times different types of meat - the delicate light can vary, making it difficult to be precise breast meat, which must not be allowed when baking fruit cakes.
- Page 17 Using the Main Oven - electric fanned Notes: roasting guide • When cooking stuffed meat or poultry The times given in the roasting guide are calculate the cooking time from the total only approximate, because the size and weight of the meat plus the stuffing. age of the bird will influence cooking times as will the shape of a joint and the •...
- Page 18 USING THE MULTIFUNCTION OVEN/GRILL Multifunction Oven Fanned Oven (if fitted) The multifunction oven may be controlled Switching on the fanned oven by the programmer (see The Programmer/ • Use the main oven control to turn Clock for details). your oven on, and select your The programmer, if fitted must be set temperature.
- Page 19 USING THE MULTIFUNCTION OVEN/GRILL Oven & Grill Functions Oven & Grill Functions Oven & Grill Functions Oven & Grill Functions Oven & Grill Functions Oven & Grill Functions Oven & Grill Functions Oven & Grill Functions Oven & Grill Functions Oven &...
- Page 20 USING THE MULTIFUNCTION OVEN/GRILL Single/Fanned Grill (if fitted) Warning: Accessible parts may become hot when the grill is in use. Before you start grilling..children should be kept away. Before you use the grill, make sure you have placed the grill shelf in the position Types of grill you need as once the grill is on you may...
- Page 21 USING THE MULTIFUNCTION OVEN/GRILL Dual/Single Grill (if fitted) Warning: Accessible parts may become hot when the grill is in Before you start grilling..use.children should be kept away. Before you use the grill, make sure you have placed the grill shelf in the position Types of grill you need as once the grill is on you may injure yourself if you try to move the shelf.
- Page 22 USING THE MULTIFUNCTION OVEN/GRILL Fanned Oven Guide • When cooking chilled or frozen foods, use the recommended cooking times • Some adjustment will have to be and temperature on the packaging. made to conventional cooking Always make sure the food is piping temperatures.
- Page 23 USING THE MULTIFUNCTION OVEN/GRILL Cooking Guide Pre-heating To get the best results from your oven, we Pre-heating Pre-heating Pre-heating recommend pre-heating for around 5 to To get the best results from your oven, we recommend To get the best results from your oven, we recommend To get the best results from your oven, we recommend 15 minutes before placing your dishes in.
- Page 24 USING THE MULTIFUNCTION OVEN/GRILL Roasting Guide • The use of a roasting tin larger then that supplied is not advised, as this • Roasting times depend on the weight, may impair performance and lead to shape and texture of the meat and extended cooking times.
- Page 25 USING THE MULTIFUNCTION OVEN/GRILL Roasting Guide Turkey Roasting times. Most Turkeys are measured by the Roast turkey kilogram. Timing should be calculated • Roasting turkey perfectly involves in either of these ways: cooking two different types of meat - the delicate light breast meat, which 40 minutes per 1kg plus 10 minutes must not be allowed to dry out, and per 1/4 kg.
- Page 26 USING THE MULTIFUNCTION OVEN/GRILL General Baking Guide Trouble-shooting - Fruit Cakes PROBLEM POSSIBLE CAUSE Low oven temperature which may cause the cake to take longer to set, allowing the fruit to sink. Or, Fruit sinking to the bottom too much liquid, or raising agent. The fruit may not have been properly washed and dried.
- Page 27 USING THE MULTIFUNCTION OVEN/GRILL Cooling and Defrosting Function • To cool foods quickly straight after cooking, but before refrigerating or freezing, turn the oven control to the defrost position, and open the door. • To defrost frozen foods, turn the oven control to the defrost position, place the food in the centre of the oven and close the door.
- Page 28 Plate Rack (if fitted) Plate Rack (if fitted) To fit the plate rack: To fit the plate rack: • Pull the shelf out of the cavity. Pull the shelf out of the cavity. � • Tilt the plate warmer towards you and Tilt the plate warmer towards you and make sure that it �...
- Page 29 used for setting the minute minder and setting up the automatic cooking. See This messag below for details. when you a Using the PROgRAMMeR / CLOCK - eLeCtRiC (if fitted) PROGRAMMER / CLOCK of time you Press once : Minute Minder Press twice : Cook Time Press three times : End Time automatical...
- Page 30 Using the PROgRAMMeR / CLOCK - eLeCtRiC (if fitted) PROGRAMMER / CLOCK PROGRAMMER / CLOCK To set the time of day To set the time of day Setting the minute minder Setting the minute minder to set the time of day setting the minute minder Press the Up and Down buttons Press the Up and Down buttons...
- Page 31 Using the PROgRAMMeR / CLOCK - eLeCtRiC (if fitted) For the instructions on how to use both of semi-automatic cooking these functions, please see the following There are two types of semi automatic page. cooking available on this appliance. Fully automatic cooking the oven must be switched on, and in use to This function incorporates both a duration use either of these functions successfully.
- Page 32 Using the PROgRAMMeR / CLOCK - eLeCtRiC (if fitted) PROGRAMMER / CLOCK semi-automatic cooking 1. The Duration method Semi-automatic cooking the Duration method • Press the Function button twice,(1) The Duration method which will skip past the Minute Minder. Press the Function button twice,(1) •...
- Page 33 Using the PROgRAMMeR / CLOCK - eLeCtRiC (if fitted) PROGRAMMER / CLOCK Fully automatic cooking (example) Fully automatic cooking (example) This programming method is best suited This programming method is best suit- for when a delayed start time is required. ed for when a delayed start time is Unlike the semi automatic methods this required.
-
Page 34: Cleaning
cleaning geneRal • Baby oil can be used to restore stainless steel finishes - but only use a • It is important to clean the product few drops. Don’t use cooking oils as they regularly as a build up of fat can affect can contain salts, which will damage the its performance or damage it and may metal. invalidate your guarantee. • Do not use steam cleaners. • Always switch off your appliance and allow it to cool down before you clean any enamel surfaces & parts part of it. • Clean with warm, soapy water and a • Do not use undiluted bleaches, clean cloth. products containing chlorides, wire wool • If larger splashes of fat do not readily or abrasive cleaners on aluminium, disappear, you can use a mild cream stainless steel, or plastic / painted parts cleaner to remove them. More stubborn as they can damage the appliance. Nylon marks can be removed using a soap filled pads can also be unsuitable. pad. • Take extra care when cleaning over • Rinse well and dry with a soft clean symbols on fascia panels. Excessive towel or cloth. - Page 35 REMOVING OVEN PARTS FOR CLEANING cleaning Inner Door Glass The inner door glass panel can be removed for cleaning • but it must be replaced the right way up. If there is any • To remove the glass panel, open the thickly. Too much cream cleaner will lead writing on the glass, you must be able to read it clearly door wide, hold the top and bottom edges to discolouration. Use a dry, clean cloth to when the cavity doors are open.
- Page 36 Telescopic shelving sysTem (if fiTTed) Telescopic Shelving System (if fitted Telescopic shelving system To remove the telescopic shelves • In addition to the traditional shelving • Make sure the shelf is cool enough to Telescopic Shelving System fitted in your appliance, the telescopic touch.
- Page 37 installation instructions - electric products Always make sure that your appliance is fitted correctly, by a competent electrician. This is a class 1 appliance regarding installation requirements, and must be earthed. Before you start • Always make sure that you have carefully read through the installation pages of this book - careful planning at the beginning will ensure a quick...
- Page 38 installation instructions - electric products Installing Your Cooker clearances Clearances This cooker may be fitted flush to the base units of your kitchen. This cooker may be fitted flush to the base units of your kitchen. • No shelf, overhang, cupboard, or cooker hood should be less than No shelf, overhang, cupboard, or cooker hood should 650mm above the hob top, but...
- Page 39 installation instructions - electric products The information below is crucial to installing this appliance correctly and safely. uK regulations & standards always refer to the most recent issue of the standards • Building Regulations - issued by the DEFRA. • Building Standards (Scotland) (Consolidated) - issued by the Scottish Development Department.
- Page 40 n bracket (2). Do not remove this screw entirely. � ��� � Open the appliance doors, and loosen screw A located n bracket (2). Do not remove this screw entirely. Plinth cover nsert screw B, through slot (3) and screw into the small ole at the bottom of bracket (2).
- Page 41 installation instructions - electric products Installing Your Cooker connecting the electricity supply - terminal Connecting the electricity supply - Terminal Block Block type B • This appliance must be fitted using This appliance must be fitted using a double pole unit a double pole unit of 45 ampere �...
-
Page 42: Technical Data
technical data kW Rating Fuel type hotplate Burner / element @ 240v Ceramic- Hob - Small 1.2kW electric Hob - Large 1.8kW Hob - Warming zone 0.12kW Induction Hob - large 2.3kW Hob - small 1.4kW dual Variable dual Variable Multifunction Fuel type Fanned oven... -
Page 43: Customer Care
customer care FaQs • Automatic cooking will normally produce condensation when the oven is What parts of the appliance can be washed in cooling down with food inside. a dishwasher? should the cooling fan continue to run once • Any enamelled parts such as the the appliance has been switched off? grillpan can be cleaned in a dishwasher, as can oven shelves and shelf guides. • Yes. This is to make sure that you can always touch the control knobs to make What parts must Not be cleaned in a dish- temperature adjustments, and turn your washer? appliance off. - Page 44 customer care cHaNGING LIGHt BuLBs (where fitted) Warning: There is a risk of electric shock, so always make sure you have turned off and unplugged your appliance before starting. Always allow the product to cool down before you change a bulb. Not all appliances have the same number and type of bulbs.
- Page 45 customer care cooKsHoP To order or enquire about any of these products, please call the Spares Sales team on 0870 458 9961 Product Description Product Code Quantity Where Used Rectangular carbon filters 082612620 Hoods Round carbon filters 082611571 Hoods Ceramic hob scraper kit 082606781 All ceramic glass hobs including induction...
- Page 48 Engineer’s name For customers outside the UK and Northern Ireland, please contact your local supplier. Glen Dimplex Home Appliances Limited is the owner of the Stoves brand and is part of the Glen Dimplex group of companies. Glen Dimplex Home Appliances, Stoney Lane, Prescot, Merseyside, L35 2XW 08 30777 00a 04.2010...
Need help?
Do you have a question about the Sterling R1100E and is the answer not in the manual?
Questions and answers