Watts BT-D03 RF User Manual
Wireless digital room thermostat watts vision system
Hide thumbs
Also See for BT-D03 RF:
- Quick installation manual (2 pages) ,
- Quick start manual (2 pages)

Subscribe to Our Youtube Channel
Related Manuals for Watts BT-D03 RF


Summary of Contents for Watts BT-D03 RF
- Page 1 BT-D03 RF Wireless digital room thermostat WATTS Vision System ® User Guide wattswater.eu...
-
Page 2: Table Of Contents
English Table of conTenT General information ................... 1. Presentation ....................2. box contents ....................3. first Installation ....................4. Product description ..................4.1 lcD logo description ..................6 5. Mode selection ....................5.1 change temperature setting ................8 5.1.1 Boost/Timer mode 5.1.2 AUTO mode 5.1.3 Comfort mode 5.1.4 Reduced / ECO mode... -
Page 3: General Information
English • 2012/19/EU (WEEE directive): Products GeneRal InfoRMaTIon marked with this symbol cannot be dis- posed of as unsorted municipal waste Safety warnings and operating in the European Union. For proper recy- cling, return this product to your local instructions supplier upon the purchase of equiva- • This product... -
Page 4: Presentation
English 1. PReSenTaTIon • Connected thermostat WaTTS Vision • Pin Code & screws lock for public area. ® system compatibility. • EEPROM non volatile memory. • 3 sensitive touch buttons. • 2x1,5V AAA batteries (LR3). • Wireless bidirectional communication • 2 parameter menus: User and Installer. -
Page 5: First Installation
• Open the cover and insert the 2 AAA supplied batteries. • Close the cover. Thermostat pairing, Rf wireless com- munication initialization. You must put your receiver or WATTS Vision touch screen in radio pairing ® mode (refer to the device leaflet). -
Page 6: Product Description
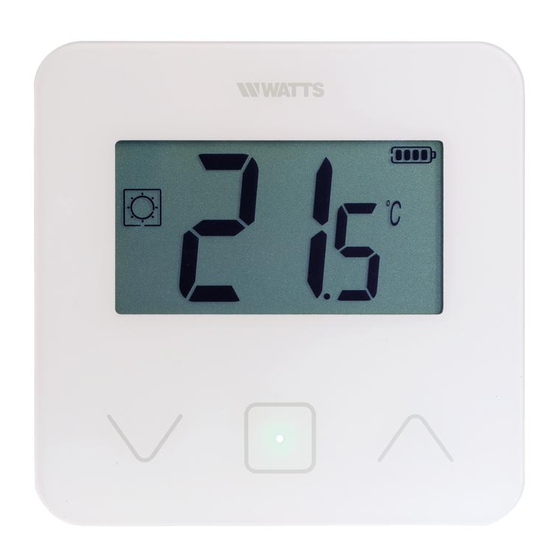
English 4. PRoDUcT DeScRIPTIon Minus button or Plus button or up/ down/left button for right button for menu navigation. menu navigation. Validation of temperature set point setting or accessing to parameter menu or displaying measured temperature/ temperature set point. 4.1 lcD logo description: Icon showing current operating mode Locked keyboard. -
Page 7: Mode Selection
English 5. MoDe SelecTIon Menu for mode selection No user action 5 seconds after 10 s 2 seconds automatic selection Parameter menu Selection of mode of current mode Press any key to wake-up the thermostat and activates the back- light. Hold key for 2 second to access to menu for selection of mode. -
Page 8: Change Temperature Setting
Use this mode if you need to switch off 5.1.2 AUTO mode your installation. This mode is activated only when ther- be careful: In this mode your installation mostat is paired with a WaTTS Vision ® can freeze. touch screen bT-cT02. In Auto mode, the heating system will... -
Page 9: Functions Highlights
English 6. fUncTIonS HIGHlIGHTS 6.1 access user parameter menu Automatic return (10 seconds of keyboard inactivity) Comfort, reduced, auto, stand-by, Mode selection menu Parameter menu boost or antifreeze menus 2 seconds 5 seconds 10 seconds without user 2 seconds action Screensaver Navigation menu Press any key to wake-up the thermostat... -
Page 10: Reversible Mode
English When activated and a detection is run- 6.2 Reversible mode ning, the icon will appear and blink Reversible menu access is only pos- on the screen!; This function is done by sible on two conditions: measuring and recording the temperature - thermostat isn’t associated to a touch evolution. -
Page 11: Pin Code
English 6.6 PIn code 6.7 other informations To activate this function enter user param- 6.7.1 heating and cooling indications eter 10. Logos used to indicate than system requires: The PIN code protect the thermostat from any change of the setting as temperature heating is or mode. -
Page 12: User Parameter Description
English 7. USeR PaRaMeTeR DeScRIPTIon RF pairing activation: Pressing the key starts communication initialization: Another press of key will exit this mode. Degree unity for displaying: ➤ °c: Celsius ➤ °f: Fahrenheit Default value: °c Values: °c / °f Buzzer activation: “Yes”: activation of function “no”: no activation Default value: no... - Page 13 English Calibration of external room sensor (remote): This menu is only displayed if parameter rEG (#20) is set with “Amb”. Calibration must be done after a given order has been operating for a day. Place the thermometer in the middle of the room at about 1.5 m above the floor. Record the temperature shown after 1 hour.
- Page 14 English setting value for Pin code: User has to configure values of the three digits with and validate its choice with validation key. Factory setting value: 000 Value range: 000 to 999 Reset user settings: Press and hold for 5 seconds to reset, all segments light up, showing that the thermostat has been reset with the factory default setting: ➤...
-
Page 15: Installer Parameter Description
English 8. InSTalleR PaRaMeTeR DeScRIPTIon To access to these installer parameters, installer has to go to user parameter number 15. After, he presses and holds validation key during 5 seconds: Accessing to installer parameters Installer parameters holding holding releasing button button button selecting temperature sensor used for the regulation:... - Page 16 English Regulation type: - HYs: regulation of hysteresis - bP: regulation of proportional type Factory setting value: bP Other values: HYs hysteresis value: This menu is displayed only if parameter “typ” is equal to “HYs”. Use keys to set hysteresis value. The setting is validated with key Default value: 0.3°c Value range: 0.2°c to 3°c...
-
Page 17: Troubleshooting & Solution
English Anti-condensation function of the installation: When condensation is detected, air conditioning is stopped or/and dehumidifier is activated. Factory setting value: yes Other values: no EEPROM clearing: All thermostat parameters will be loaded with factory set- tings. RF wireless communication will be reset too. Pressing and maintaining key displays: Accessing to installer parameters... -
Page 18: Maintenance
English My Thermostat seems work correctly but the heating or the cooling doesn’t work correctly Output On the receiver: - Check the good reception of RF signal. - Check the connections. - Check the power supply of the heating element. - Contact your installer. -
Page 19: Dimensions & Weight
English Software version Showed in parameter menu. Vers 14 Compatible receivers BT-M6Z02 RF - BT-FR02RF BT-WR02RF / BT-WR02HC BT-PR02RF - BT-CT02 Other receivers can be compatible, check on the instruction manual of your receiver. Product conformed to UE 811/2013 and 2010/30/UE classification contribution (2%) - Page 20 The descriptions and photographs contained in this product specification sheet are supplied by way of information only and are not binding. Watts Industries reserves the right to carry out any technical and design improvements to its products without prior notice.” Warranty: All sales and contracts for sale are expressly conditioned on the buyer’s assent to Watts terms and conditions found on its website at www.wattswater.eu Watts hereby objects to any term, different from or additional to Watts terms, contained in any buyer communication in any form,...
Need help?
Do you have a question about the BT-D03 RF and is the answer not in the manual?
Questions and answers