Table of Contents
Advertisement
Advertisement
Table of Contents

Related Manuals for Electrothermal IA 9200


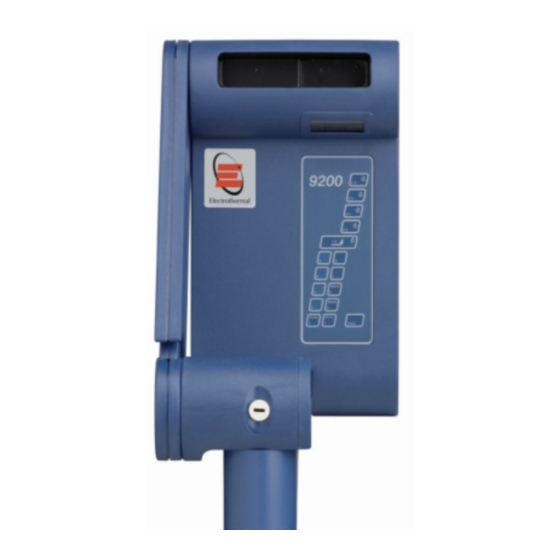
Summary of Contents for Electrothermal IA 9200
- Page 1 IA9000 SERIES Digital Melting Point Apparatus Operating and Safety Instructions...
- Page 2 PAGE INTRODUCTION…………………………………………………… SAFETY INFORMATION………………………………………….. INSTALATION INFORMATION…………………………………… PRINCIPALS OF OPERATION…………………………………… CALIBRATION………………………………………….. IA 9100 OPERATION…………………………………… IA 9200 OPERATION…………………………………… IA9300 OPERATION…………………………………… TECHNICAL SPECIFICATION…………………………………… EQUIPMENT MAINTENANCE…………………………………… SERVICE INFORMATION………………………………………… APPENDIX A………………………………………………….. APPENDIX B…………………………………………………. APPENDIX C………………………………………………… EC Declaration of Conformity…………………………………….
- Page 3 Electrothermal IA9000 Series of Digital melting Point Instruments are designed for general purpose laboratory use, in which samples submitted for analysis are enclosed in glass capillary tubes and brought to a melt point condition under strictly controlled parameters of time and temperature.
- Page 4 This product has been designed for safe operation AVERTISSEMENT when in normal use and when used and operated in accordance with the manufactures instructions. Cet équipment appartient å la Classe O (IEC519: Partie 2) en ce qui trait å la protection contre la This equipment is classified as Class O (IEC519: surchauffe et doit étre utilise en consequence.
- Page 5 For additional safety it is recommended the unit be connected inline to a RCD (Residual Current Device) or GFI (Ground fault interrupter) in the U.S.A. Environmental Protection It is the policy of Electrothermal to give consideration to environmental issues in design and manufacturing without compromising end product performance and value.
- Page 6 During operation the various parameters of the sample analysis are shown on the liquid crystal display, and all the stages of the process are indicated by the L.E.D. illumination or audible warning. The principles of the operation are as follows:- ...
- Page 7 Preparation of Samples To obtained the best results, the samples under test / observation should be perfectly dry. Drying is best accomplished by storing the samples overnight in a vacuum desiccator over a suitable drying agent such as phosphourus pentoxide. A drying method must be employed in the case of hygroscopic samples.
- Page 8 Calibration must be carried out annually, or whenever the performance of the apparatus is suspected e.g. when similar successive test produce markedly divergent results. The apparatus must either be returned to the dealer for calibration, or calibration must be carried out in the following manner, using Calibration Kit AZ6730 and the standard chemicals Carbazole (AZ9118) and P-nitrotoluene (AZ9218).
- Page 9 12. Switch the selector switch to the Hi position. 13. Adjust the HI knob until the display shows the actual melting point obtained in b) above for the standard sample of Carbazole 14. Adjust VR1 on the PCB with the trim tool provided untilt the display reads the melting point o Carbazole as quoted on the Calibration Certificate provided with the sample.
- Page 10 Upon receipt of the instrument proceed consecutively as follows:- 4.2.1 Power Supply. The power supply supplied with your new IA 9100 supports all A.C. Mains supply voltages within the range of 100V to 240V inclusive at 50-60Hz. Do not use the power supply with a D.C. supply voltage or in conjunction with any type of voltage regulation equipment.
- Page 11 4.2.3 Connections. Insert the jack connection Plug from the Power Supply Unit into the instrument supply socket. Connect the Power Supply mains cable to the Power Supply Unit. Plug the Mains power supply cable into the supply outlet. 4.2.4 Start up. Switch the power on.
- Page 12 4.2.5 Prepare a Sample Up to three samples may be accommodated in the tube guide. To prepare a sample proceed as follows: Break a new capillary tube in half and insert the powdered sample in the tube. The quantity should be such that the height dose no exceed 1mm.
- Page 13 4.2.9 Analysis and Storage of Melt points. The four basic stages of melting should be anticipated as described in Principals of Operation on Page 6. Proceed as follows: Adjust the object lens by rotation until a sharp focus on the sample is obtained. When the desired stage of melt is observed press the GOTO key to store that temperature in the memory.
- Page 14 4.2.12 CLEAR Key. The CLEAR key may be operated at any time and will, depending upon the current stage, function as follows: If as section 4.2.6 operation of the CLEAR key will reset display to 0000 If at section 4.2.7 by pressing CLEAR key the display will show oven temperature and heater will control to ‟Set point‟.
- Page 15 Upon receipt of the instrument proceed consecutively as follows:- 4.2.1 Power Supply. The power supply supplied with your new IA 9100 supports all A.C. Mains supply voltages within the range of 100V to 240V inclusive at 50-60Hz. Do not use the power supply with a D.C. supply voltage or in conjunction with any type of voltage regulation equipment.
- Page 16 4.3.4 Initial Set-Up. When the instrument is first received the following procedure should be followed in order to set the clock and print parameters. For Instrument MK4 and below: Press the Batch key and maintain the depression while the mains power is switched on.
- Page 17 Setting the Clock and Print Parameters. Enter the Year; Month; Day date and Time in order as follows; (The figures for January 22 2005 at 09:56 are given as an example). Press CLEAR Press 0; 5; (enters the year) press GOTO Press in turn 0;...
- Page 18 4.3.5 Normal Start-up Switch the power on. Observe all indicator lights flash momentarily and then the display rolls from 9999 to 0000 and settles at the oven ambient temperature. NOTE: In order to attain maximum accuracy from the unit it is important to allow all components to stabilise at their working temperature.
- Page 19 GOTO ‘Set-Point’ 4.3.8 Press GOTO key, (if long audible bleep is heard and the display does not change then the „Set Point‟ is outside allowable parameters. Key in correct „Set Point‟). The four bar L.E.D‟s will illuminate consecutively as the temperature rises.
- Page 20 4.3.10 Analysis and Storage of Melt points. The four basic stages of melting should be anticipated as described in Principals of Operation on Page 6. Proceed as follows: Adjust the object lens by rotation until a sharp focus on the sample is obtained. When the desired stage of melt is observed press the GOTO key to store that temperature in the memory.
- Page 21 Store To store the current values in each memory: Press the BATCH, key in batch number between 0000 and 9999, for example, 123 an press GOTO. Previously stored valued having the sane Batch Number will be overwritten. Recall To recall values previously stored against a Batch Number, press RECALL the key in the desired batch number and press GOTO.
- Page 22 The IA9300 provides a range of facilities as the 9200 with the following exceptions: Only one pre-programmed ramp rate is available i.e. 1.0 C/per min. Six melting points may be stored in the resident memory per batch. Three additional LED indicators are installed in the head to facilitate ease of assignment of recorded melt points to particular capillaries.
- Page 23 The specified data for each instrument is shown in Table 2. The accessories available are shown in table 3. Table 1. General Features. IA9100 IA9200 IA9300 16-bit Processor 3 Capillary Tubes up to 2mm OD (Storage for pack 100) ...
- Page 24 Table 2. Specification Table 3. Accessories Electrical AZ9001 Cold Finger Oven wattage AZ9002 Dust Cover Total Power 45W (including PR2000 printer) Oven Control Closed Loop P.I.D. Zero AZ9185 Bulb 12V 2.2W M.B.C. cross burst fire. Oven Illumination 12V 2.2W Bulb M.B.C. AZ9218 P-nitrotoluene Oven Temperature...
- Page 25 This equipment is classified as Class II (Ref. IEC 536) with respect to protection against electric shock. WARNING * Unplug equipment from mains supply before undertaking any maintenance tasks. * Maintenance should only be carried out by a competent Electrician under the direction of the Responsible body With proper care and operation the equipment should give reliable service.
- Page 26 For service or Technical Assistance contact the local distributor from where the unit was obtained. Any unit returned for service / maintenance should be accompanied by a completed Decontamination Certificate prior to any work be undertake. Copies of the certificate are available from the Suppler / Distributor and Manufacturer. Little maintenance is required, except for ensuring a general standard of cleanliness by periodically wiping the apparatus clean with a dry, lint-free cloth.
- Page 27 Baud rate Default is 096.0 = 9600 baud; i.e Set display to 003.0 for 300. See table below for appropriate rate settings. Display Baud rate 003.0 006.0 012.0 1200 0.24.0 2400 048.0 4800 096.0 9600 192.0 19200 Press GOTO Parity Default is 000.0 = None Set display a indicated in table below.
- Page 28 (applicable only to Serial Numbers 1100 and above) Fast Ramp Selection. In order to facilitate the determination of unknown melt points, a fast ramp of 10ºC/ Per min may be selected with or without the pre-selection of a set point temperature.
- Page 29 PR2000S SERIAL PRINTER BAUD RATE SET-UP. Before commencing the this setting please ensure the printer is off and disconnected from the electrical supply. The PR2000S serial printer must be set up to make it compatible with the setting made to the IA unit. The Baud rate on the PR2000S printer is factory set at 9600. This must be changed to 4800.
- Page 32 For the America’s and Canada, contact: Techne Incorporated, 3 Terri Lane, Suite 10 Burlington, NJ 08016 USA. Toll free:800-225-9243Tel: 609-589-2560 Fax: 609-589-2571 Email: labproducts@techneusa.com Http www.techneusa.com 2011 Electrothermal. All rights reserved. Printed in Great Britain Operating and safety Instruction booklet part No M6346 iss 8.0...
Need help?
Do you have a question about the IA 9200 and is the answer not in the manual?
Questions and answers