Table of Contents
Advertisement
Quick Links
Advertisement
Table of Contents

Subscribe to Our Youtube Channel
Related Manuals for Drive Inspired Kanga


Summary of Contents for Drive Inspired Kanga
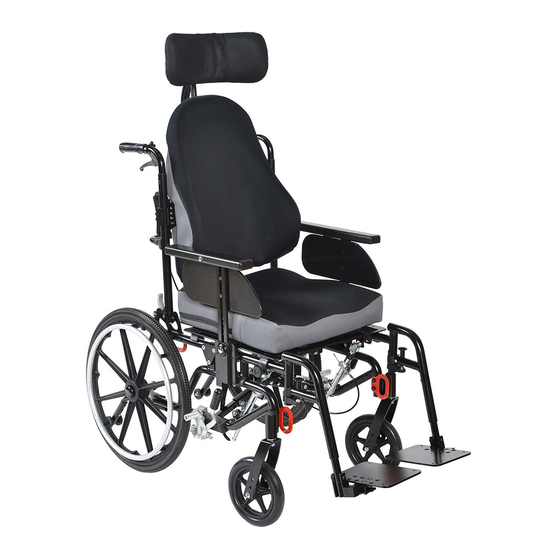
- Page 1 Kanga Wheelchair Seating Package Headrest Truck Support Thigh Supports Abductor Poly Tray 2017 Medical Depot, Inc. All rights reserved. Drive DeVilbiss Healthcare 99 Seaview Boulevard www.inspiredbydrive.com Port Washington N.Y. 11050 USA Made in USA REV2.10.4.17...
- Page 2 NOTE - Seat/back assembly; “holes through upholstery” kanga seating package have already been made for ease of assembly. Do not ini- tially over tighten mounting hardware as final adjustments Item Number will be necessary prior to fitting client into seating. 1300-921110 Kanga Seating Package 10”...
- Page 3 step two - Installing hardware to step three - attaching seat/back wheelchair frame to wheelchair frame Attach the seat by aligning the seat mount brackets onto the seat knob clamps attached to the wheelchair seat rails. Align the back knob brackets onto the back knob clamps on the back canes.
- Page 4 kanga comfort max headrest, assembly offset hardware 1.1 Locate the mounting base and mounting base hard- ware packet. 1.2 Locate the (2) t-nut holes (through upholstery) on the contoured back to attach the mounting base, carefully cut upholstery to access t-nuts. 1.3 Using the mounting base hardware packet, attach (2) screws/washers through the middle holes of the mount- ing base to securely mount to the contoured back.
- Page 5 kanga lateral trunk supports, assembly qr-removable 1.1 On the rear side of contoured back ( I cut-out area) choose either left or right side, locate the (2) t-nut holes through upholstery, carefully cut upholstery to access t-nuts. 1.2 Open the lateral mounting packet and remove (2) screws, use screws to attach track mount bracket with lateral assembly to the contoured back.
- Page 6 NOTE - The 12inch and 14inch contoured seats come kanga thigh supports, with multiple thigh support mounting base t-nut locations, removable it is best to dry-fit hardware in-place prior to cutting upholstery. This installation is easiest with the contoured seat removed from the wheelchair, lying bottom side up flat on a solid surface.
- Page 7 assembly kanga abductor pommel, flip down 1.1 Locate the mounting base and mounting base hardware packet. 1.2 Locate the (2) t-nut holes (through upholstery) on the bottom of contoured seat to attach the mounting base, carefully cut upholstery to access t-nuts. 1.3 Using the mounting base hardware packet, attach (2) screws/washers through the middle holes of the mounting base to securely mount to the contoured seat.
- Page 8 Kanga Abductor Pommel, Flip Down, 10” periodic replacement. 11060-10112 Kanga Abductor Pommel, Flip Down, 12” If you have a question about your Inspired by Drive 11060-10114 device or this warranty, please contact an authorized Kanga Abductor Pommel, Flip Down, 14”...
Need help?
Do you have a question about the Inspired Kanga and is the answer not in the manual?
Questions and answers