Brother DCP-1618W Quick Setup Manual
Hide thumbs
Also See for DCP-1618W:
- Quick setup manual (2 pages) ,
- User manual (118 pages) ,
- Service manual (200 pages)
Advertisement
Quick Links
DCP‑1618W / MFC‑1919NW
Quick Setup Guide
CHN‑ENG
Version A
Operation Videos
www.95105369.com
Installation
& Using
Videos
1
Remove the packing materials and install the toner cartridge
Drum Unit (Remove the drum unit)
2
Load paper in the paper tray
3
Connect the telephone line cord, the power cord and turn on the machine
Connect the handset cord and the telephone line cord
(Only for MFC‑1919NW)
Printing and scanning using your mobile device
4
Your mobile device must be connected to the same wireless network as your Brother machine.
STEP1: According to the kinds of Wireless LAN Access Point/Router, there are two ways to connect Brother machine to WLAN Access Point/Router.
1) If your Wireless LAN Access Point/Router does not support WPS/AOSS™, please connect Brother machine to the WLAN Access Point/Router by setting Setup Wizard on Brother
machine. (Take DCP‑1618W as an example)
Find your SSID (Network Name) and Network
Key (Password) on your wireless access point/
router and write them in the table provided below.
SSID (Network Name)
Network Key (Password)
SSID: XXXXXXX
Network key: XXXX
If you cannot find this information, ask your
network administrator or wireless access
point/router manufacturer.
Unpack the machine and check the components
Inbox Toner Cartridge
CD‑ROM
A5 Long Edge Paper Input
With the printing surface face down
To use A5 Long Edge paper.
1.
Press Menu key on control panel of Brother machine.
2.
Press a or b key until show [4.Network], and press OK key.
3.
Press a or b key until show [1.WLAN], and press OK key.
4.
Press a or b key until show [3.Setup Wizard], and press OK key.
5.
Show [WLAN Enable? a On b Off], press a key to enable it.
6.
Show [Searching SSID], after showing the searched SSIDs, press a or b key to select the SSID name of your
router and press OK key.
7.
Hold down or repeatedly press a or b key to select a character. Press OK when the character or symbol you want is
displayed, and then enter the next character. After repeating these steps to enter passwords, press OK key.
8.
Show [Apply? Yes], press OK key.
9.
Show [Connecting WLAN], if success. Show [Connected Printing], it will print a WLAN report.
USB Interface Cable
Handset, Handset Cord and
Phone Line Cord
(For MFC‑1919NW)
Quick Setup Guide,
Support
Product Safety Guide and
User's Guide
Adjust the paper guides to fit
the paper being used.
Back
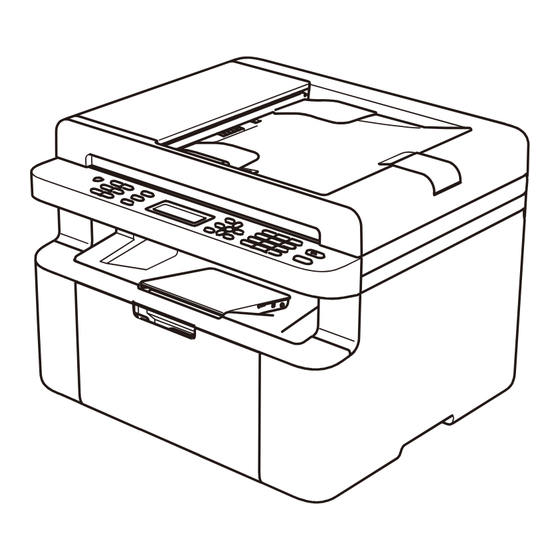
Read the Product Safety Guide first, then read this Quick
Setup Guide for the correct installation procedure.
NOTE:
• The illustrations in this Quick Setup Guide are based
on the MFC‑1919NW.
• You must purchase the correct interface cable for the
interface you want to use.
USB cable
We recommend using a USB 2.0 cable (Type A/B)
that is no more than 2 metres long.
Network cable
Use a straight‑through Category 5 (or greater)
twisted‑pair cable for 10BASE‑T or 100BASE‑TX Fast
Ethernet Network.
Front
1
Advertisement

Related Manuals for Brother DCP-1618W


Summary of Contents for Brother DCP-1618W
-
Page 1: Load Paper In The Paper Tray
STEP1: According to the kinds of Wireless LAN Access Point/Router, there are two ways to connect Brother machine to WLAN Access Point/Router. 1) If your Wireless LAN Access Point/Router does not support WPS/AOSS™, please connect Brother machine to the WLAN Access Point/Router by setting Setup Wizard on Brother machine. - Page 2 2) If your Wireless LAN Access Point/Router supports One Push Method of WPS/AOSS™, you can connect Brother machine to the WLAN Access Point/Router directly and easily. Wireless setup is now complete. Press the WiFi button on your machine. Press the WPS or AOSS™ button on your wireless LAN access point/router.
Need help?
Do you have a question about the DCP-1618W and is the answer not in the manual?
Questions and answers