Table of Contents
Advertisement
Advertisement
Table of Contents

Related Manuals for CenterVue drs


Summary of Contents for CenterVue drs
- Page 1 Operating Manual CenterVue DRS Operating Manual Pg. 1 of 57...
-
Page 2: Table Of Contents
LABELING ..............................6 SYMBOLS..............................7 Symbols adopted on the device ......................7 Symbols adopted in this manual ......................7 PREPARING THE DRS ..........................8 PREPARING THE PATIENT ........................9 WARNINGS AND PRECAUTIONS ......................10 NOTES TO OPERATOR ......................... 11 PERFORMING THE TEST ........................12 Adding a new patient ........................... - Page 3 22. DISPOSAL ............................... 51 23. TROUBLESHOOTING ..........................52 APPENDIX A - DICOM Statement ........................53 APPENDIX B – AUTOMATED MOSAIC FUNCTION ..................55 APPENDIX C – EYE KNOWLEDGE NETWORK (EKN) ................. 57 CenterVue DRS Operating Manual Pg. 3 of 57...
-
Page 4: Introduction
In particular, the DRS allows to acquire color images of the retina over a field of view of 45° x 40°, in a fully automatic mode. Seven different retinal fields can be framed using multiple internal fixation targets. -
Page 5: System
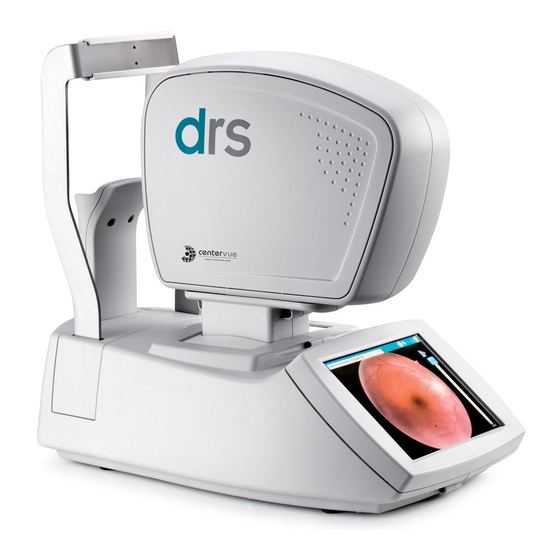
Chin rest applied part Touch screen Operator side Patient side Figure 1 - DRS left side view Power switch Power inlet USB ports Fuses Ethernet port Figure 2 - Detail of the device right side The DRS system is supplied with: ... -
Page 6: Labeling
LABELING CenterVue DRS Operating Manual Pg. 6 of 57... -
Page 7: Symbols
CE mark: the device complies with the essential requirements of the European Medical Devices Directive 93/42/EC Warning: Do Not Touch Type B Applied Part Generic Warning Symbols adopted in this manual Note Warning CenterVue DRS Operating Manual Pg. 7 of 57... -
Page 8: Preparing The Drs
Figure 4 - Forehead rest rear side Time zone configuration The first time the DRS is powered on, the operator is requested to set the time zone. The configuration request (Figure 5) will appear every time the DRS is started, until the time zone is set (see §14.4). -
Page 9: Preparing The Patient
Figure 7 – Camera auto-tuning completion message PREPARING THE PATIENT This paragraph explains how to prepare a patient for the DRS test. There are no restrictions as to the selection of the patients undergoing DRS testing. The DRS is a non-mydriatic device (minimum pupil diameter 3.8 mm), so there is no need to dilate the subject’s pupil. -
Page 10: Warnings And Precautions
The DRS needs to be operated in a semi dark room (except when taking Anterior Eye photos). The DRS needs to be operated under the following environmental conditions: Temperature: 10 - 40 C°... -
Page 11: Notes To Operator
Under such circumstances the exam should be repeated after removing the cause of the failure. NOTES TO OPERATOR No specific skills are required to operate the DRS. A minimal, device specific, training is required to become able to use the system. The operator needs to be acquainted with the following concepts: ... -
Page 12: Performing The Test
(see 9.3 below). When the DRS is enabled for data transmission to EKN a new icon appears in the home screen top bar, providing data upload status information. See also par. Settings >>... -
Page 13: Starting The Image Acquisition Process
The START button is only enabled if the chin rest is engaged. If the patient is not properly positioned on the chin rest, the START button will not be enabled and it will not be possible to start the acquisition process. CenterVue DRS Operating Manual Pg. 13 of 57... -
Page 14: Automated Acquisition
Automated acquisition Once the START button is pressed, the DRS will automatically perform the following steps: a. Move the optical head to locate the patient’s pupil (see Figure 10); b. Move the optical head to center the patient’s pupil to the front lens (see Figure 11); the system will also display the pupil current diameter and which eye is being acquired;... -
Page 15: Manual Alignment
Figure 14 – Message indicating failure of automatic eye search The result of the acquisition process is one or more retinal images as the one shown in Figure 15. Figure 15 – Example of retinal image captured by the DRS CenterVue DRS Operating Manual Pg. -
Page 16: Anterior Eye
Click on the live image to toggle a full-screen view (Figure 18). Once satisfied with alignment and focus, press SHOOT to acquire the image. Figure 16 - Anterior eye: correct patient position Figure 17 - Anterior eye acquisition Figure 18 - Full screen view of the anterior eye CenterVue DRS Operating Manual Pg. 16 of 57... -
Page 17: Stereo Exams
If the pupil – measured immediately before the snapshot - is smaller than 3.8 mm, a warning message is shown to inform the operator about the possible degradation of image quality (see Figure 21). Figure 21 - Warning due to small pupil CenterVue DRS Operating Manual Pg. 17 of 57... - Page 18 When the auto-focus process is not able to find an optimal focus, a warning message is shown to inform the operator about the possible occurrence of poor focusing conditions (see Figure 22). Figure 22 - Warning due to incorrect focusing CenterVue DRS Operating Manual Pg. 18 of 57...
-
Page 19: Reviewing The Images
Click on the corresponding thumbnail to open the full image screen image screen Open 3D Click on the STEREO button between the two thumbnails of a stereo image view couple thumbnail: this command will open the 3D viewer. Only CenterVue DRS Operating Manual Pg. 19 of 57... -
Page 20: Full Image Screen
Automated installed. See Appendix B for explanations on how to use this function. mosaic Please contact your CenterVue representative for information on how to obtain the license. 10.2 Full image screen The Full Image screen (see Figure 24) is used to review individual images at full screen. - Page 21 Add image Click on Add Notes to add / edit image specific comments (see notes Notes Figure 25) Figure 25 – Notes editing screen Figure 26 - Stereo Images 3D viewer CenterVue DRS Operating Manual Pg. 21 of 57...
- Page 22 To obtain a three dimensional view, images must be looked at with appropriate prismatic goggles (see Figure 27). A crossed-eye format is also supported. Figure 27 – Example of prismatic goggles for three-dimensional viewing CenterVue DRS Operating Manual Pg. 22 of 57...
-
Page 23: Remote Viewer
11. REMOTE VIEWER There are two ways to review DRS data and images from a remote PC, a tablet or a smart-phone. The first is by connecting to an existing network (LAN) and the second is by creating a private network, even in absence of an existing network infrastructure. - Page 24 Figure 28 - DRS patient list in remote viewer CenterVue DRS Operating Manual Pg. 24 of 57...
-
Page 25: Printout
In the same way a pdf file containing the dual printout can be generated if a USB key is connected. The single image printout uses portrait format, while the dual image printout uses landscape format. Figure 29 – image selection screen for dual image printout CenterVue DRS Operating Manual Pg. 25 of 57... - Page 26 Figure 30 - Single and dual image printout CenterVue DRS Operating Manual Pg. 26 of 57...
-
Page 27: Retinal Fields
INFERIOR: centered 17° inferiorly to the foveal pit; optic disk Figure 31 - DRS retinal fields The field(s) acquired respectively when using the SINGLE FIELD or MULTI FIELD acquisition modes described previously can be configured in the Settings (see par. 14). -
Page 28: Settings
set the fixation target to be permanent or blinking at 3 different speeds; enable automatic chin rest adjustment; select UNIFORMITY or CONTRAST image processing strategy (see note below). CenterVue DRS Operating Manual Pg. 28 of 57... - Page 29 DICOM export of images from the Remote Viewer. (The DICOM file format contains both the retina image and some corollary field, for example: exam date/time, patient name, type of medical instrument, etc., see Appendix A). CenterVue DRS Operating Manual Pg. 29 of 57...
-
Page 30: Network
Current network status label. The result can be any of the following (see Figure 36): Internet connection fully available on address xxx.xxx.xxx.xxx: the DRS is fully connected to the Internet (required for EKN connection and support purpose, see Settings >> EKN). ... - Page 31 14.3.1 GENERAL To enable a wired connection, plug a network cable into the DRS and wait a few seconds. Press “SET NETWORK” to refresh the network configuration. Most networks do not require the operator to set the IP address manually, but in case it’s needed, click on the Manual button and enter the IP address (mandatory), netmask (mandatory), gateway (optional) and DNS (optional).
- Page 32 The images in the shared folder can be deleted at any time by the operator or by a program without altering the database and files inside the DRS. The exported files are saved by creating a file whose name follows the following format: patientID_lastname_firstname_date_time_drsNumber_eye_fieldNumber_examNumber.<ext>...
- Page 33 PC by searching a network resource named \\DRS-ID\shared (e.g. \\drs-0010\shared). In case of complex networks, it may be necessary to insert the IP address of the DRS instead of its name (e.g. \\192.168.1.10\shared). In this case you might need to seek the support of your local IT staff.
-
Page 34: System
14.3.4 LAN ACCESS The LAN ACCESS sub tab lets you set a password for the Remote Viewer access to the DRS, to prevent access to the data by unauthorized persons. Figure 43 – Network tab in Settings (>> LAN ACCESS) 14.4 System... - Page 35 Automatically from Internet Manually from the pull-down menus In this submenu, you can also set: the correct time zone, format the date and time Figure 45 - System tab in Settings (>> TIME) CenterVue DRS Operating Manual Pg. 35 of 57...
- Page 36 The Backup tab allows full management of the backup (and restore) of DRS data. To perform a backup, connect a USB key or hard disk to the DRS and start the backup operation by pressing the Backup Data button (see Figure 46).
- Page 37 Restore mode selection view. Figure 50 - Restore mode Using the first mode (ERASE mode) the current DRS exams and patient's data are overwritten by data of the selected backup source. In the second mode (APPEND mode), the system properly recognizes identical patients and exams and executes a restoration into the DRS of the differences only.
- Page 38 (built-in drivers or generic postscript driver); adjust image brightness on the printout; optionally enable the “Automatic fit to page” for printouts. Figure 52 – System tab in Settings (>> PRINTERS) CenterVue DRS Operating Manual Pg. 38 of 57...
- Page 39 Remote assistance opens a remote connection that allows authorized service technicians to connect to the DRS. Once pressed, the disclaimer shown in Figure 54 appears, informing the operator that he/she is authorizing access to all data present on the device, for servicing purposes. Once confirmed with the OK button, the DRS contacts CenterVue servers and generates a random password and a port to connect to.
- Page 40 Clicking on SHOOT captures an image which should be mostly black: white particles indicate presence of residual dirt on the outer surface of the lens. Figure 55 – Lens cleaning Assistant information dialog Figure 56 – Lens cleaning instructions CenterVue DRS Operating Manual Pg. 40 of 57...
-
Page 41: Ekn
EKN. Free trial periods may be available from time to time. To enable the EKN service and start accessing DRS data online, you need to first register the DRS on the EKN: ... -
Page 42: About
14.5.2 Checking the EKN upload status Once the DRS is configured for data transmission to the EKN, the Settings >> EKN tab provides status information on the upload process (see Figure 58). Figure 58 - EKN tab in Settings with upload status information 14.6 About... -
Page 43: Automatic Software Update
15. AUTOMATIC SOFTWARE UPDATE When a new software update is released by the manufacturer and the DRS is connected to the internet, a new icon in the Home screen top bar, notifies availability of the update. Clicking on the icon, the message shown in Figure 59 will appear. To download and install the new software version click Install, otherwise click Cancel. -
Page 44: System Shutdown
Always put back the cap on the front lens. Do not leave the front lens uncovered while the system is not in use. CenterVue DRS Operating Manual Pg. 44 of 57... -
Page 45: Cleaning
Please note that some small white dots will always appear due to dust (see Figure 65), but they do not affect image quality. See Lens cleaning assistant at par.14.4.5, for a detailed assisted procedure. CenterVue DRS Operating Manual Pg. 45 of 57... -
Page 46: Patient Cushions
If the unit is equipped with silicon cushions, it is possible to remove the forehead rest, and rinse it with warm water and a mild hand detergent. Chin rest cushion is not removable. CenterVue DRS Operating Manual Pg. 46 of 57... -
Page 47: Touch Screen Panel
If needed, the external covers of the unit can be cleaned by means of a cloth slightly damped in water. Do not use alcohol or detergents to clean the plastic shells, as they might erase labels or indications. CenterVue DRS Operating Manual Pg. 47 of 57... -
Page 48: Maintenance
Connect the power cord to the mains. All service interventions other than the above should be carried out by authorized CenterVue personnel. CenterVue recommends to require a service to the instrument in order to: check the electrical safety (IEC 60601-1) every year. -
Page 49: Electromagnetic Compatibility
20. FCC (USA) and IC (Canada) radio certification The DRS contains a radio module that complies with regulations of the USA and Canada, in particular with part 15 of the FCC rules. -
Page 50: Technical Specifications
Silicone forehead rest; Hand blower; Glasses with adjustable prisms; USB 2.0 extension cord. Power requirements: Voltage: 100-240 VAC, 50-60 Hz, fuse 3.15 A (T type) Power consumption: 100 VA CenterVue DRS Operating Manual Pg. 50 of 57... -
Page 51: Disposal
22. DISPOSAL The DRS is made of different materials, such as plastics, aluminum, electronic parts. In case of instrument disposal, please separate the various materials and follow the laws and regulations regarding disposal or recycling for each material effective in your own country. -
Page 52: Troubleshooting
If any problem occurs, check the following table and try to apply the proposed solution. If this does not solve the problem, immediately stop the unit operation, switch off the main power, disconnect the power supply cord and contact CenterVue authorized personnel. Issue... -
Page 53: Appendix A - Dicom Statement
APPENDIX A - DICOM Statement DRS can export a DICOM-compliant file format. Refer to the table below for the list of supported tags. Description Value (0002,0000) Group Length (0002,0001) File Meta Information Version (0002,0002) Media Storage SOP Class UID 1.2.840.10008.5.1.4.1.1.77.1.5.2... - Page 54 (0028,0002) Samples per Pixel (0028,0004) Photometric Interpretation (0028,0006) Planar Configuration (0028,0010) Rows 1944 (0028,0011) Columns 2592 (0028,0030) Pixel Spacing 0.0064 (0028,0100) Bits Allocated (0028,0101) Bits Stored (0028,0102) High Bit (0028,0103) Pixel Representation CenterVue DRS Operating Manual Pg. 54 of 57...
-
Page 55: Appendix B - Automated Mosaic Function
Typical examples of fields used are: central, temporal and nasal or central, temporal, nasal, superior and inferior. This function is not active by default on the DRS system and requires installation of a dedicated license. Please contact your CenterVue representative for further information on how to activate the mosaic function. - Page 56 Such artifacts can be easily ruled out by comparing the mosaic image with the original single-field images. Figure 69 – Example of a 3-fields mosaic image CenterVue DRS Operating Manual Pg. 56 of 57...
-
Page 57: Appendix C - Eye Knowledge Network (Ekn)
Admin page: reserved to the Administrator user Data upload messages When the DRS is enabled for data transmission to EKN a new icon set appears on the top bar of the home screen, besides the settings icon. Icons have the following meaning:...
Need help?
Do you have a question about the drs and is the answer not in the manual?
Questions and answers