Table of Contents
Advertisement
Quick Links
Advertisement
Table of Contents

Related Manuals for CenterVue COMPASS


Summary of Contents for CenterVue COMPASS
- Page 1 Operating Manual CenterVue COMPASS Operating Manual Pag. 1 di 53...
-
Page 2: Table Of Contents
10. REVIEWING RESULTS ........................... 24 10.1 Individual test results review ........................ 26 10.2 Reliability indices ..........................27 10.3 Dual image review ..........................29 10.4 Creating a Progression Report ......................30 10.5 Remote Viewer ............................ 31 CenterVue COMPASS Operating Manual Pag. 2 di 53... - Page 3 12.7 Network configuration .......................... 43 12.8 Shared folder configuration........................44 13. SYSTEM SHUTDOWN ..........................44 14. TECHNICAL SPECIFICATIONS ......................45 15. CLEANING............................... 46 16. TROUBLESHOOTING ..........................47 17. ELECTROMAGNETIC COMPATIBILITY ....................48 18. DISPOSAL ............................... 53 CenterVue COMPASS Operating Manual Pag. 3 di 53...
-
Page 4: Introduction
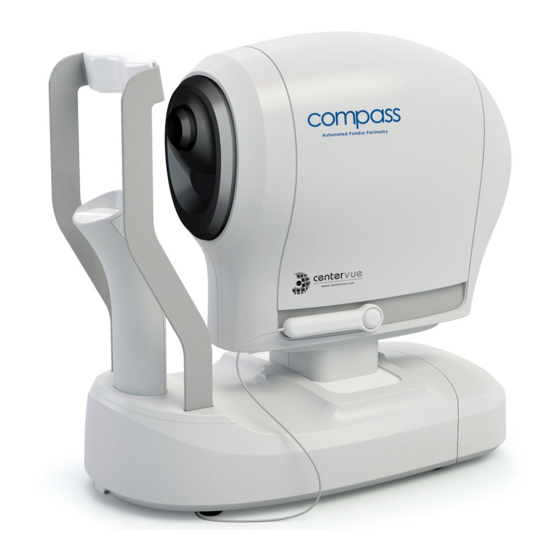
COMPASS is intended for use as a diagnostic device to aid in the detection and management of glaucoma. The device is indicated for measuring retinal sensitivity, for a quantitative assessment of fixation characteristics, as well as to capture infrared and color images of the retina without the use of a mydriatic agent. -
Page 5: System
Chin rest = contacting part Tablet (example) Patient Side Digital joystick (not used) Fig. 1 - COMPASS 12V power inlet 3 USB ports Main switch Ethernet port Fig. 2 – Detail of connectors side Fig. 3 – Patient push button... -
Page 6: The Tablet
The tablet is an integral part of the system and COMPASS cannot operate without it. The tablet must be connected to COMPASS using the supplied USB cable: if the connection is not working an error message will appear on the screen (see par. 16 for details). -
Page 7: Labels
LABELS CenterVue COMPASS Operating Manual Pag. 7 di 53... -
Page 8: Symbols
CE mark: the device complies with the essential requirements of the European Medical Devices Directive 93/42/EC Type B Applied Part Non-ionizing radiation - ME EQUIPMENT that include RF transmitters Generic Warning Important information CenterVue COMPASS Operating Manual Pag. 8 di 53... -
Page 9: Preparing The System
PREPARING THE SYSTEM We recommend to read carefully and thoroughly par. 7 WARNINGS AND PRECAUTIONS before proceeding with first use. To make COMPASS functional for the first use: extract the system from its box; place it on a suitable electrical table ... -
Page 10: Assembling The Tablet And Joystick Supports
The joystick is not used in the current software version. Fig. 5 – Tablet mounted on the left side of the device Fig. 6 – Support for the tablet Fig. 7 – Instrument bottom with holes for tablet and joystick supports CenterVue COMPASS Operating Manual Pag. 10 di 53... -
Page 11: Turning On The Device
Login. If login is successful, the Home screen opens (see Fig. 9). To modify the password, see par. 12.2. Fig. 9 - Home screen To find out the password please contact an authorized Centervue representative CenterVue COMPASS Operating Manual Pag. 11 di 53... -
Page 12: Preparing The Subject
Patient contacting parts are indicated in Fig. 1 and Fig. 3. COMPASS is a non-mydriatic device: there is no need to dilate the subject unless if the pupil is smaller than 3 mm. The eye which is not examined should be patched. -
Page 13: Warnings And Precautions
In case an unexpected hardware condition occurs during use, an error message may appear (see for example Fig. 10) and COMPASS may become temporarily locked. It is possible to reset this condition by letting the device re-initialize: refer to par. 12.4 for the complete procedure. -
Page 14: Notes For The Operator
NOTES FOR THE OPERATOR COMPASS provides capabilities for a fully automated test process. No specific skills are required to operate the Device and a minimal, device specific, training is required to become able to operate the system. In particular, the operator shall be acquainted with the following concepts: ... -
Page 15: Performing The Test
PERFORMING THE TEST This paragraph explains how to operate COMPASS to perform the test (in this manual the terms “test” and “exam” are used as synonyms). Once the Device has been turned on click on the compass button to open the Patient List screen (see Fig. 11). - Page 16 (see Fig. 13) and provides information on the selected patient, whose name is shown at the top-left corner of the screen. See par. 10 for full details on how to review a patient’s data. Fig. 13 – Patient Record screen CenterVue COMPASS Operating Manual Pag. 16 di 53...
-
Page 17: Root Test Vs. Follow-Up Test
Root test vs. follow-up test COMPASS allows to measure a subject’s visual field in time, hence creating a sequence of tests. COMPASS provides two different test modalities: a root test is the first performed on a certain subject and eye, thus it does not require the existence of a previous test;... -
Page 18: Choosing Test Parameters
In terms of examination time, the average for a 24-2 test is approximately 40% shorter using ZEST than using 4-2. Total deviation and Pattern deviation maps and related indices are only available when using the 24-2 grid CenterVue COMPASS Operating Manual Pag. 18 di 53... -
Page 19: Before Starting
Chin rest should be positioned so that eye is aligned to the mark ask the subject to look at the fixation target throughout the test perform a quick training on subjects that never had perimetry before CenterVue COMPASS Operating Manual Pag. 19 di 53... -
Page 20: During The Test
Subject should not blink and should look at the green fixation dot until a Capture color light is flashed. Color photo of posterior image pole : click on the back arrow to retake the image if of poor quality. CenterVue COMPASS Operating Manual Pag. 20 di 53... -
Page 21: Auto-Alignment
EYE TOO HIGH: Please lower chin rest until alignment process restarts PATIENT TOO FAR: Please make sure patient head is not tilted, or detached from front rest Table 1 – System hints during auto-alignment CenterVue COMPASS Operating Manual Pag. 21 di 53... -
Page 22: Retinal Tracking
Typical reasons for tracking failure include: blinking, small pupil (requires dilation), closed eye lids, incorrect subject position (e.g. far from forehead rest). Fig. 17 - Tracking active (left) and on hold (right) CenterVue COMPASS Operating Manual Pag. 22 di 53... -
Page 23: Monitoring Test Progress
Completed stimuli over total being projected: test proceeds slow at the beginning and turns progressively faster Allows to stop the test at any time COMPASS requires a minimum pupil of 3.0 mm: a test with average pupil size smaller than 3.0 mm may be unreliable. CenterVue COMPASS Operating Manual Pag. -
Page 24: Reviewing Results
False Negatives index (FN); False Positives index (FP); Blind Spot index (BS); Mean Deviation index (MD); Pattern Standard Deviation index (PSD); Fig. 19 – Example of thumbnail CenterVue COMPASS Operating Manual Pag. 24 di 53... - Page 25 (do not use this button if you wish to start a follow-up) start a follow-up test within the specified sequence of tests go back to patient list screen Fig. 20 – Patient Record screen CenterVue COMPASS Operating Manual Pag. 25 di 53...
-
Page 26: Individual Test Results Review
11. Command to view or print a progression report 12. Export results to shared folder (see par. 12.8) 13. Command to go back to Patient record screen 10 11 Fig. 21 – Exam review screen, red-free display modality CenterVue COMPASS Operating Manual Pag. 26 di 53... -
Page 27: Reliability Indices
10.2 Reliability indices COMPASS provides standard methods to assess the reliability of a subject in performing the visual field test: False Positives: these are trials in which no stimulus has been projected, therefore the subject is not expected to respond. If this index exceeds 25% the number will show in red, indicating possibly poor reliability. - Page 28 COMPASS uses white light instead of monochromatic lasers, hence providing true color images and offering high image fidelity, no need for dilation down to 3 mm. pupil, excellent resolution and contrast, high quality even in presence of media opacities and optimized exposure of the ONH.
-
Page 29: Dual Image Review
Fig. 25. Fig. 24 – Dual Review screen Fig. 25 – Image type selection panel CenterVue COMPASS Operating Manual Pag. 29 di 53... -
Page 30: Creating A Progression Report
4. Save Progression Report to shared folder 5. Cancel report generation and go back to Exam Review screen See par. 11.4 for a description of the Progression report. Fig. 26 – Progression Report test selection screen CenterVue COMPASS Operating Manual Pag. 30 di 53... -
Page 31: Remote Viewer
Patient Search function is available in the top-left corner of the screen. Click on the desired patient to enter the Patient Record screen (see Fig. 28), which resembles the corresponding screen in the on-board software. Click on Logout to exit the Remote Viewer. CenterVue COMPASS Operating Manual Pag. 31 di 53... - Page 32 Shows red-free version of color image Allows to save the corresponding image (jpg), or test report (pdf), or progression report (pdf, if available) on the local memory CenterVue COMPASS Operating Manual Pag. 32 di 53...
- Page 33 Dual Image review screen This screen allows comparison of any pair of images (color and infrared, left and right eye, same or different dates). Fig. 30 – Dual Image Review screen in Remote Viewer CenterVue COMPASS Operating Manual Pag. 33 di 53...
-
Page 34: Printing
There are two possible network setups for printers, depending on whether a wireless Access Point (e.g. Wireless router) is available or not. Infrastructure Mode In this configuration, both the COMPASS tablet and the printer are connected to an Access Point, such as a wireless router. Access Point (e.g. -
Page 35: Report For 24-2 Test
Glaucoma Staging System (13) is not available and is replaced by the color photo. Tests performed with the “small test grid” are solely for training and not suitable for generating a report. CenterVue COMPASS Operating Manual Pag. 35 di 53... - Page 36 Fig. 32 – COMPASS report for 24-2 test CenterVue COMPASS Operating Manual Pag. 36 di 53...
- Page 37 Fig. 33 – Stimuli of the 24-2 pattern grouped in clusters Fig. 34 – Symbols used for the grayscale map and related dB intervals Garway-Heath et al; Mapping the Visual Field to the Optic Disc; Ophthalmology Volume 107, Number 10, October 2000 CenterVue COMPASS Operating Manual Pag. 37 di 53...
-
Page 38: Progression Report
10. Pointwise differences (dB) between last follow-up and baseline 11. Differences in cluster MDs between last follow-up and baseline 12. MD progression plot for all included tests 13. Software version used to generate report CenterVue COMPASS Operating Manual Pag. 38 di 53... - Page 39 Fig. 35 – Progression report for 24-2 series CenterVue COMPASS Operating Manual Pag. 39 di 53...
-
Page 40: Settings
SETTINGS COMPASS provides access to settings by means of a separate application called “Configurator”. 12.1 Launching the Configurator To access the Configurator: Press the “back” icon at the bottom of the screen to go to the Home screen; ... -
Page 41: Backup
12.3 Backup COMPASS provides a USB-based data backup function. Backup requires an external USB media (hard disk or memory stick), formatted as NTFS, with enough free space to store the backup file. Although COMPASS uses Solid State Drive (SSD) technology for data storage, performing periodic backups is critical for the safety of your data against unpredictable hardware failures. -
Page 42: Restore
Example: A backup of COMPASS SN 00001 exists and is named “gsd-00001_20150408-1028.backup”. In order to transfer the content of this backup into COMPASS SN 12345, plug the USB media onto any PC and rename the backup file to “gsd-12345_20150408-1028.backup”. Eject the USB media from the PC and follow the usual restore procedure. -
Page 43: Network Configuration
Fig. 38 – Configurator – Remote Viewer screen 12.7 Network configuration COMPASS supports wired network connection. To enable network connectivity, the device must be connected to the local network via Ethernet cable, using the port located on the back of the system. Then click on the “Network” tab to configure the network. -
Page 44: Shared Folder Configuration
Fig. 40 – Configurator – Shared folder configuration – remote shared folder SYSTEM SHUTDOWN To shut down the system go back to the Home screen and press the power off icon: COMPASS beeps twice when turned off. CenterVue COMPASS Operating Manual Pag. 44 di 53... -
Page 45: Technical Specifications
Size: H 620 X W 590 X D 360 mm Electrical requirements: Power: 100-240 VAC, 50-60 Hz Consumption: 80 W Specifications are subject to change without notice for improvement CenterVue COMPASS Operating Manual Pag. 45 di 53... -
Page 46: Cleaning
When cleaning the rest of device, the device must be off, and the power cord shall be disconnected from mains. If needed, the external covers of the unit can be cleaned by means of a slightly damp cloth. CenterVue COMPASS Operating Manual Pag. 46 di 53... -
Page 47: Troubleshooting
TROUBLESHOOTING Symptom Possible cause(s) Solution Plug the power supply into a properly 1. COMPASS does not power on (no green System is not powered working socket then press the power LED) button for at least 3 seconds 2. System keeps failing alignment with... -
Page 48: Electromagnetic Compatibility
This device needs special precautions regarding EMC and needs to be installed and put into service according to the EMC information provided within this document. Portable and mobile RF communications equipment can affect the readings made by this device. CenterVue COMPASS Operating Manual Pag. 48 di 53... -
Page 49: Manufacturer
Manufacturers EMC Declaration to ISO 60601-1-2 The following tables provide specific information regarding compliance of COMPASS. COMPASS is intended for use in the electromagnetic environment specified below. The customer or the user of COMPASS should ensure that it is used in such an environment. - Page 50 IEC 61000-4-8 typical location in a typical commercial or hospital environment. NOTE U T is the a.c. mains voltage prior to application of the test level Table 2: Electromagnetic Immunity (ISO 60601-1-2:2007 5.2.2.1f) CenterVue COMPASS Operating Manual Pag. 50 di 53...
-
Page 51: Manufacturer
If the measured field strength in the location in which COMPASS is used exceeds the applicable RF compliance level above, COMPASS should be observed to verify normal operation. If abnormal performance is observed, additional measures may be necessary, such as re-orientating or relocating COMPASS. -
Page 52: Manufacturer
Table 4: Recommended Separation Distances FCC (USA) and IC (Canada) radio certification The COMPASS contains a radio module that complies with regulations of the USA and Canada. FCC ID: PPD-AR5BHB116 ... -
Page 53: Disposal
The results can be allergic reactions, asthma and it is considered to be genotoxic (damages the DNA). Especially dangerous when incinerated. Brominated Flame Retardants: widely used to reduce flammability (e.g. cables, connectors and plastic cases). CenterVue COMPASS Operating Manual Pag. 53 di 53...
Need help?
Do you have a question about the COMPASS and is the answer not in the manual?
Questions and answers