Table of Contents
Advertisement
Quick Links
Advertisement
Table of Contents

Subscribe to Our Youtube Channel
Related Manuals for idp SMART-70X

Summary of Contents for idp SMART-70X
- Page 1 SMART-70X ( Laser Engraver ) User Manual...
- Page 2 IDP Reseller. The IDP Reseller will bear the costs of shipping and insuring the printer from the repair location to the address from which the printer was shipped.
-
Page 3: Table Of Contents
Table of Contents Basic Information ................................ 4 SMART-70X Overview ..........................4 1.1. SMART-70X Features ..........................5 1.2. Caution ................................8 1.3. SMART0-70X Installation............................9 Driver Installation ............................9 2.1. Stand-alone installation .......................... 11 2.2. Installation with the SMART-70P ....................... 13 2.3. -
Page 4: Basic Information
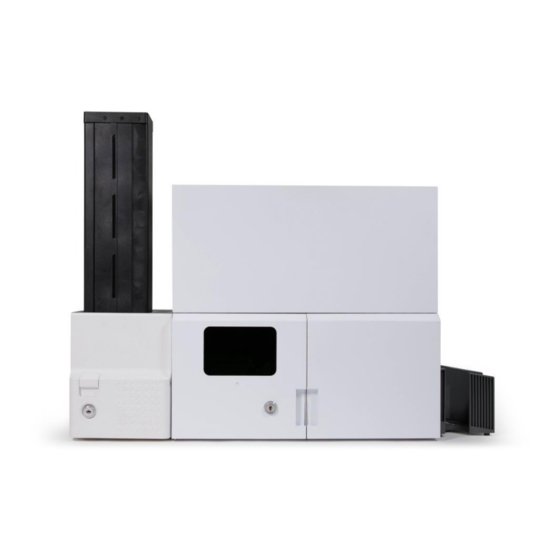
1. Basic Information 1.1. SMART-70X Overview SMART-70X is a device to engrave a card on both sides by laser. SMART-70X is used independently or with other modules of SMART-70 series. Picture 1 (a) shows a combination of SMART-70I(Input Hopper) and SMART-70X(Laser Engraver) for encoding and laser engraving. -
Page 5: Smart-70X Features
1.2. SMART-70X Features 1) External features (Front) ① ② ③ ⑤ ⑥ ④ ① Control Panel LCD The status of engraver is displayed. It can be operated by buttons. ② Window for monitoring It shows operation by eye. ③ Indicator LED It shows the simple status of module. - Page 6 2) External features (Rear) ① ② ③ ④ ⑥ ⑤ ⑦ ① Air Inlet The hole which air is inhaled ② Air Outlet The hole which air is exhaled ③ Power Switch Turn On/Off ④ Power Plug 110-240V~ 50-60Hz Power plug ⑤,⑦...
- Page 7 3) Internal features ② ① ③ ④ ⑤ ⑥ ① Laser safety switch When a door is opened, it blocks a power of laser for safety. ② Camera It can check a graving ③ Flipper It flip a card for engraving on both surfaces ④...
-
Page 8: Caution
1.3. Caution Use a power of AC 100~240V, 5~60Hz electric outlet. Otherwise, the device may have a fault or cause fire. Do not strike or apply strong vibration to the device. Otherwise, the device may have a fault or cause fire. Do not use the device in a dusty place, or in a place with high temperature. -
Page 9: Smart0-70X Installation
2.1. Driver Installation SMART-70X contains the laser controller, card movement controller and web cam. The related device driver should be installed in the PC. SMART-70X provides a one-time installation program for easy driver installation of all components. Please install them as following the below steps. - Page 10 3) Confirm a “Windows Security” Click “Install” button when “Windows Security” windows is displayed. 4) Complete drivers STEP 3: Installation is completed. Click “Close” button.
-
Page 11: Stand-Alone Installation
2.2. Stand-alone installation Please connect a SMART-70I input hopper and SMART-70X as a below pictures for laser engraving only. Connection between SMART-70X and SMART-70I After install a binder below a SMART-70X, connect a SMART-70I on the binder. Arrangement of modules... - Page 12 Connection of cables Connect power cables, red communication cable and USB cable as a left picture. ① Connect a 100~240V, 50~60Hz AC power to SMART-70X, a 24V DC adapter to SMART-70I. ② Connect the red communication cables to each module. ①...
-
Page 13: Installation With The Smart-70P
2.3. Installation with the SMART-70P Please connect a SMART-70I input hopper, SMART-70P printer and SMART-70X as a below pictures for printing and laser engraving. Connection between SMART-70X and SMART-70P After install a binder below a SMART-70X, connect a SMART-70P on the binder. - Page 14 70X and arrange modules. Connection of cables Connect power cables, red communication cables and USB cables as a left picture. ① Connect a 100~240V, 50~60Hz AC power to SMART-70X, a 24V DC adapter to SMART-70P/I. ② Connect the red ① ① ① ②...
- Page 15 Power on Turn on the power in order of the below steps. ③ Turn on SMART-70X. ④ Turn on SMART-70P. ⑤ Turn on SMART-70I. ① ③ ② Change Mode of SMART-70P Change mode of SMART-70P to ‘Slave’. ① Click Menu( ) button and find “System Config.”...
- Page 16 Completion of installation All modules are installed normally if the colors of status LED are blue.
-
Page 17: Engraving A Card
3. Engraving a card 3.1. LaserTest LaserTest is a testing utility for SMART-70X. Please run LaserTest in the ‘\SMART-70X\Utilities\’ folder. 1) The left window is displayed when running LaserTest. 2) Check a “Printing & Engraving” item and click the ‘Select’ button to select a “sample_single.csd”. -
Page 18: Smartid
Please use the LaserTest Utility if the encoder is used in the laser module. Run SmartID The left window is displayed when running SmartID. Activation of laser function The ‘Laser’ button is in the Option tab. Click it to activate a SMART-70X. - Page 19 Design a card Design a card after clicking “Front page” of ‘Page’. You can open a “sample_ single.csd” in the Utilities folder, too. Design engraved objects Design engraved objects after clicking “Front page” of ‘Page 2’. You can open a “sample_ single.csd”...
-
Page 20: Utilities
4. Utilities 4.1. LaserConfig SMART-70X is optimized for the best engraving in the factory. However, the user can configure the power, speed, position and other values for laser engraving. Please run the LaserConfig in the ‘\SMART-70X\Utilities\’ folder for adjusting a configuration of SMART-70X. - Page 21 Information Show a serial number of SMART-70X. Serial Number Setup Version Show a version of configuration for SMART-70X Power Select the resolution of laser engraving between 600 dpi / and 1200 dpi. Set the power level of laser. Range :...
- Page 22 Position Set the maximum size for laser engraving. Field Size Range of Field Size is 120~150, the unit is mm. The size of output is changed if Field Size is changed. Set the rotation value for laser engraving. Angle ...
- Page 23 The image is deformed depending on a value of Trapezoid as below. Trapezoid Load / Save Load factory configuration values in the memory of Load Default SMART-70X. To apply it, click a ‘Store’ button. Reload Show the configuration values in SMART-70X. Store Save current values to SMART-70X. Close...
-
Page 24: Laserfirmware
For updating a firmware of SMART-70X, run the LaserFirmware in the ‘\SMART- 70X\Utilities\’ folder. The SMART-70X should be installed and power is turned on before running a LaserFirmware utility. And, SmartID or other Laser utilities should be closed before running a LaserFirmware. -
Page 25: Lasercam
4.3. LaserCam The camera is installed by default in the SMART-70X and the status of engraving on real time. Run ‘LaserCam’ in the ‘\SMART-70X\Utilities\’ folder. Run LaserCam The left window is displayed when running ‘Laser Firmware’ after connecting SMART-70X. It works if ‘Microsoft ... - Page 26 Save an image of LaserCam To save an image in the window, click a Camera icon in the LaserCam. Configuration of LaserCam To adjust a focus and white balance, click Gear icon in the LaserCam. Set the focus of camera by Focus. ...
-
Page 27: Lasertest
4.4. LaserTest LaserTest is a sample program for encoding, printing and engraving by SMART-70X. The basic functions of SMART-70X can be tested by LaserTest. Users can use SmartID or the customized program by SDK. Please run ‘LaserTest’ in the ‘\SMART-70X\Utilities\’ folder. - Page 28 Flip: flip a card or rotate a card by the indicated angle. Output: Eject a card to left / right. Status Status shows a status of sensors in SMART-70X. Message Message shows a operation of SMART-70X on real time.
-
Page 29: Specification
5. Specification Model SMART-70X Laser Engraving Laser Type 6W Air-Cooled DPSS Laser, ND:YAG Resolution 1200dpi Scanning Raster & Vector Scanning Engraving Mode Single or Dual-sided Laser Engraving Speed 103 cards/hour (Single-sided Laser engraving only) (Changeable Laser Image) Warranty 20,000 hours...
Need help?
Do you have a question about the SMART-70X and is the answer not in the manual?
Questions and answers