
Related Manuals for Panther PIXY Series

Summary of Contents for Panther PIXY Series
- Page 1 PIXY Crane System Betriebsanleitung Manual PANTHER GmbH Raiffeisenallee 3 | 82041 Oberhaching‑Munich | Germany T +49.89.61 39 00 01 | F +49.89.61 31 00 0 www.panther.tv | contact@panther.tv...
-
Page 2: Table Of Contents
Table of Content Introduction To the grip safety instructions Advice regarding the payload: Scope of delivery Check-List for assemby Assembly instruction preparation Installation instructions version 1 (Jib Arm) Installation instructions versions 2-7 preparation Putting into operation Loading of the weight bar Precise adjustment Protection of cables Adjustment of the remote mount... -
Page 3: Introduction
– fast and easy – with fantastic shots and camera moves. The PANTHER PIXY Crane System is a product that has been created and built by experts for experts – to satisfy the high demands of every camera man. -
Page 4: Safety Instructions
Only competent persons are allowed to work with the PANTHER PIXY Crane system. PANTHER GmbH offers training work shops which will enable the participants to work with the PANTHER PIXY Crane system. The participants will receive a certificate at the end of this seminar. For more informa‑... - Page 5 Also slight unevenness can endanger standing– and driving security. Only use the PIXY Crane system with the PANTHER PIXY tripod (code no. 138892). Do only use original PANTHER accessories and spare parts. It is not allowed to drive with the completely mounted PIXY Crane system using...
-
Page 6: Advice Regarding The Payload
The payload of the remote head mount is the accumulated weight of all devices (such as remote head, camera, lens, …) mounted at the remote head mount. The PANTHER PIXY Crane system may only be assembled according to the assembling versions shown in this operating manual. Other kinds of assembly are not permitted! (see Quick Information) When turning... -
Page 7: Scope Of Delivery
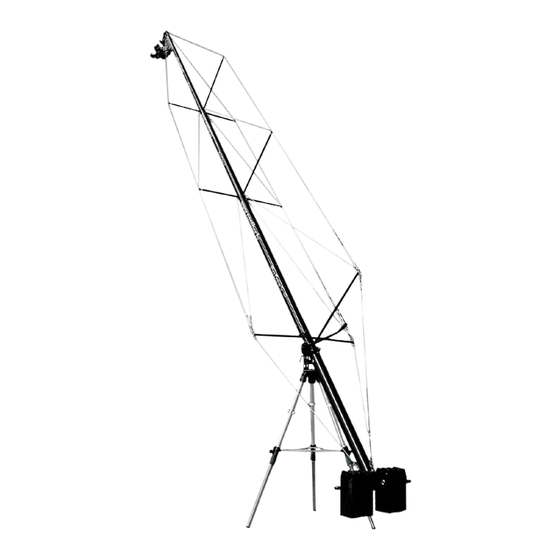
Manual | English Scope of delivery The PIXY Crane System has been conceived for individual adjusting to the respective purpose and re‑ quirement. Thanks to a large number of singular components there are nearly unlimited possibilities of combinations and it is possible to assemble the system for almost every application. Following... - Page 8 Manual | English illustration not to scale product name code no. Darstellung nicht maßstabsgetreu Bezeichnung Art.-Nr. PIXY crane, version 3 PIXY Kran, Version 3 Qty. consisting of code no. Anzahl bestehend aus Art.-Nr. Pixy Tripod Pixy Stativ 138892 Central pivot section Mittelteil Pixy Kran 143788 weight*...
- Page 9 Manual | English PIXY crane, version 5 PIXY Kran, Version 5 Qty. consisting of code no. Anzahl bestehend aus Art.-Nr. Pixy Tripod Pixy Stativ 138892 Central pivot section Mittelteil Pixy Kran 143788 lifting rod Pixy Hebelstange Pixy 137363 weight* Eigengewicht* 25 kg...
- Page 10 Manual | English illustration not to scale product name code no. Darstellung nicht maßstabsgetreu Bezeichnung Art.-Nr. PIXY crane, version 7 PIXY Kran, Version 7 Qty. consisting of code no. weight* Eigengewicht* 31 kg / 69 lb Anzahl bestehend aus Art.-Nr. max.
- Page 11 Manual | English illustration not to scale product name code no. Darstellung nicht maßstabsgetreu Bezeichnung Art.-Nr. PIXY crane, version 2 compact PIXY Kran, Version 2 Kompakt Qty. consisting of code no. weight* Eigengewicht* 16 kg / 35 lb Anzahl bestehend aus Art.-Nr.
-
Page 12: Check-List For Assemby
Manual | English Check-List for assemby Please check which konfiguration is best for your shooting. The following criteria have to be considered: • height • limits in weight • working distance • payload required • spatial limits • access to shooting place Take your time to securely assemble, to check and to test the system before use. -
Page 13: Assembly Instruction
Load‑carrying capacity of the base min. 1200 kg / m² c) on tracks Note the user manual of the Track system. Only use origi‑ nal PANTHER track systems. Activate the dolly’s brakes so that it cannot roll away during assembly. -
Page 14: Installation Instructions Version 1 (Jib Arm)
Manual | English Installation instructions version 1 (Jib Arm) Step 1 – Setting-up the tripod Each tripod leg has to be set up in the same height and then the tripod with tense distance wires has to be erected steady on the plane ground. An uneven floor can be levelled by turning... - Page 15 Manual | English Step 4 – Remote mount installation Put the remote mount on the carrier tube. The retaining eyelets for bracing have to point upwards and sidewards. Here again, make sure that the spring lock is snapped in. Components needed: Mount PIXY 137098 Step 5 a –...
- Page 16 Manual | English Step 5 b - ALTERNATIVELY – assembly of the balance rod tube The balance rod tubes are available as an option for the PIXY Crane System. They are designated for the firmly locked parallel operation of the crane (e.g. with the Remote Head). The rods make a fixed connection between the central section and the remote mount.
- Page 17 Manual | English c) Now extend the tubing clamp with the balance rod tube up to the remote mount. In order to do so, put the tubes into each other and fix them with quickpins. d) Use the balance rod tube with turnbuckle at its front end.
-
Page 18: Installation Instructions Versions
Manual | English Installation instructions versions 2-7 Please follow the instructions below to install the PIXY Crane System version 7. NOTE ! Versions 2‑6 can be installed in the same way. Just accordingly less number of outriggers and bracing wires shall be installed at the front side (remote mount). - Page 19 Manual | English Step 3 – Hanging-up the carrier tube Hang up the carrier tube on the central section, put the binder screw by hand through the hole intended for versi‑ ons 2 ‑ 7 and screw together. Components needed: Carrier tube PIXY, 150 cm / 4‘11“...
- Page 20 Manual | English Step 6 – Putting-on the extension tube for bracing Put the extension tube for bracing in front on the extensi‑ on tube. Make sure that the spring lock snaps in right. Components needed: Extention tube PIXY, 145 cm / 4‘9“ 137342 for bracing...
- Page 21 Manual | English Step 8 - Putting-on the first side bracing (Blue) Stick both shorter bracing supports into the respective holes just next to the central section. Then hook up the wires into the eyelets placed sideways on the counterweight outrigger and on the outrigger 3 and stretch the wires with turnbuckles.
- Page 22 Manual | English Step 10 - Putting-on the extension tube for bracing Put the extension tube for bracing in front on the extensi‑ on tube. Make sure that the spring lock snaps in right. Components needed: Extention tube PIXY, 145 cm / 4‘9“ 137342 for bracing...
- Page 23 Manual | English Step 11 b - Putting-on the second side bracing (Blue) Put both shorter bracing supports sidewards on the respective studs of the outrigger. Hook up the blue bracing wires into the bottom side eyelets of the base bracing. Then pull the wires over the horizontal bracing...
- Page 24 Manual | English Step 13 – Mounting the weight bar Mount the counterweight bar on the rear outrigger and secure it with split pins to the left and right of the outrig‑ ger. Components needed: Weight bar for 14 weights, Ø 25 mm / 1‘ 142297 Step 14 –...
- Page 25 Manual | English Step 17 a - Attaching the third upper bracing (Red) WARNING ! Always mount the upper bracing first before attaching the side ones. Put the long bracing supports vertically on the respective studs of the outrigger. Do not forget to mount the balance rod support on bracing...
- Page 26 Manual | English Step 17 b - Putting-on the third side bracing (Blue) Put both shorter bracing supports sidewards on the respective studs of the outrigger. Hook up the blue bracing wires each into the bottom side eyelets of the base bracing and pull the wires over the horizontal bracing...
- Page 27 Manual | English Step 18 a - Assembly of the balance rod tube The balance rod tubes are standard part of the PIXY Crane System. They allow dynamic movement of the remote mount in the top as well as bottom view. NOTE ! Early PIXY Cranes have a wire instead of rods.
- Page 28 Manual | English f) Mount the lifting rod on the central section. Balance rods needed: (per version) Version: Qty: product name: code no. Version 1 ‑ ‑ ‑ Version 2 Balance rod PIXY 1.6 m / 5‘3“ 142404 Version 3 Balance rod PIXY 1.6 m / 5‘3“...
- Page 29 Manual | English Step 18 b - ALTERNATIVELY – Mounting the balance rod tubes The balance rod tubes are available as an option for the PIXY Crane System. They are designated for the firmly locked parallel operation of the crane (e.g. with the Remote Head). The rods create fixed connection between the central section and the remote mount.
- Page 30 Manual | English c) Mount the balance rod supports for tubes on the verti‑ cal bracing supports (if not already done). d) Now extend the tubing clamp with the balance rod tubes up to the remote mount. Put the tubes into each other and fix them with quickpins.
- Page 31 Manual | English Balance tubes needed: (per version) Version: Qty: product name: code no. Version 1 Balance tube kit PIXY version 1 156391 Version 2 Balance tube kit PIXY version 1 156391 Balance tube PIXY 1.3 m / 4‘3“ 156147 Version 3 Balance tube kit PIXY version 1 156391...
-
Page 32: Preparation
Manual | English Putting into operation CAUTION ! Tight fit of all connecting elements (screws, hooks etc.) has to be checked once again before every loading (remote mount, weight bar) and putting into operation. Follow the safety instructions. Max load capacity: see Quick Information Max wind speed: 3,6 km/h... -
Page 33: Protection Of Cables
Manual | English Protection of cables Lead all the necessary cables along the crane up to the central section and secure them with clamping straps placed on the crane. Adjustment of the remote mount The levelling of the remote mount is done by modifica‑ tion of the balance rod/wire length. -
Page 34: Hand-Operated Camera
Manual | English Hand-operated camera For version 2‑7 only: The camera can be inclined by moving the handle. For this purpose the locking bolt needs to be unlocked. WARNING ! The heavier the load at the remote head mount (camera) the more force is re‑ quired to move the handle. -
Page 35: Remote Head Operation
Manual | English 10. Remote Head operation The PIXY Crane System is also designed for remote head operation. For assembling a remote head spe‑ cial adapter needes. illustration not to scale descripion code no. Darstellung nicht maßstabsgetreu Bezeichnung Art.-Nr. PIXY Crane ‑ Optional Accessories Remote HeadPIXY Kransystem - Sonderzubehör Remote Head PIXY‑Jimmy Jib Adapter 155416... -
Page 36: Special Accessories
Manual | English special accessories For the PIXY Crane system are miscellaneous optional accessories available. illustration not to scale descripion code no. Darstellung nicht maßstabsgetreu Bezeichnung Art.-Nr. adapter for euromount 139313 Adapter für Euromount PIXY adapter for Foxy pyramid 141172 PIXY Adapter für Foxy Pyramide Monitor holder PIXY 140241... -
Page 37: Transportation
Manual | English 12. transportation The PIXY Crane system is transportable with hard cases or easy soft bags. Both are availabe as normal and extra short „Compact“ versions. illustration not to scale descripion code no. suitable for Darstellung nicht maßstabsgetreu Bezeichnung Art.-Nr. -
Page 38: Service And Maintenance
Interrupt the work immediately, if only a small part of the system is damaged or mis‑ sing. Maintenance and repair should only be made by trained and competent persons. PANTHER GmbH offers service seminars, which will be hold according to your desires. For exact dates, please call +49 (89) 613 900 30 (PANTHER‑Service). -
Page 39: Warranty
Manual | English 14. Warranty We warrant that the products are free of manufacturing defects in material. Both for mechanical and for electronic parts, the warranty period is 12 months. The warranty period begins with the date of delivery. Any warranty shall, however, expire if our operating and maintenance instructions are not complied with, if changes are made to the products, or if parts of our equipment are replaced with parts that do not correspond to the original specifications;... -
Page 40: Gs - Zertificat
Manual | English GS - Zertificat Page ‑ 38... -
Page 41: Inspection Book
Manual | English 16. Inspection Book product: PANTHER PIXY Crane manufacturer: PANTHER GmbH Raiffeisenallee 3 82041 Oberhaching payload: version 1‑6: 25 kg / 55 lbs version 7: 20 kg / 44 lbs year of construction: series ‑ no. : user:... -
Page 42: Repeated Check Up
16.2 Repeated Check Up Ref. safety‑related and und maschine‑related equipment on stages and in studios. Certification of recur‑ rent inspection according to §34 UVV Veranstaltungs‑ und Produktionsstätten für szenische Darstellung (VBG 70). product: PANTHER PIXY Crane manufacturer: PANTHER GmbH Raiffeisenallee 3 82041 Oberhaching... -
Page 43: Maintenance Booklet
Manual | English 16.3 Maintenance Booklet product: PANTHER PIXY Crane manufacturer: PANTHER GmbH Raiffeisenallee 3 82041 Oberhaching payload: version 1‑6: 25 kg / 55 lbs version 7: 20 kg / 44 lbs year of construction: series ‑ no. : following maintenance has been done::... - Page 44 Manual | English date: maintenance requirements: name: date: maintenance requirements: name: date: maintenance requirements: name: date: maintenance requirements: name: date: maintenance requirements: name: 10. date: maintenance requirements: name: Page ‑ 42...
- Page 45 Manual | English date: maintenance requirements: name: 12. date: maintenance requirements: name: date: maintenance requirements: name: 14. date: maintenance requirements: name: date: maintenance requirements: name: 16. date: maintenance requirements: name: Page ‑ 43...
Need help?
Do you have a question about the PIXY Series and is the answer not in the manual?
Questions and answers