
Subscribe to Our Youtube Channel
Related Manuals for Panther Foxy Pro

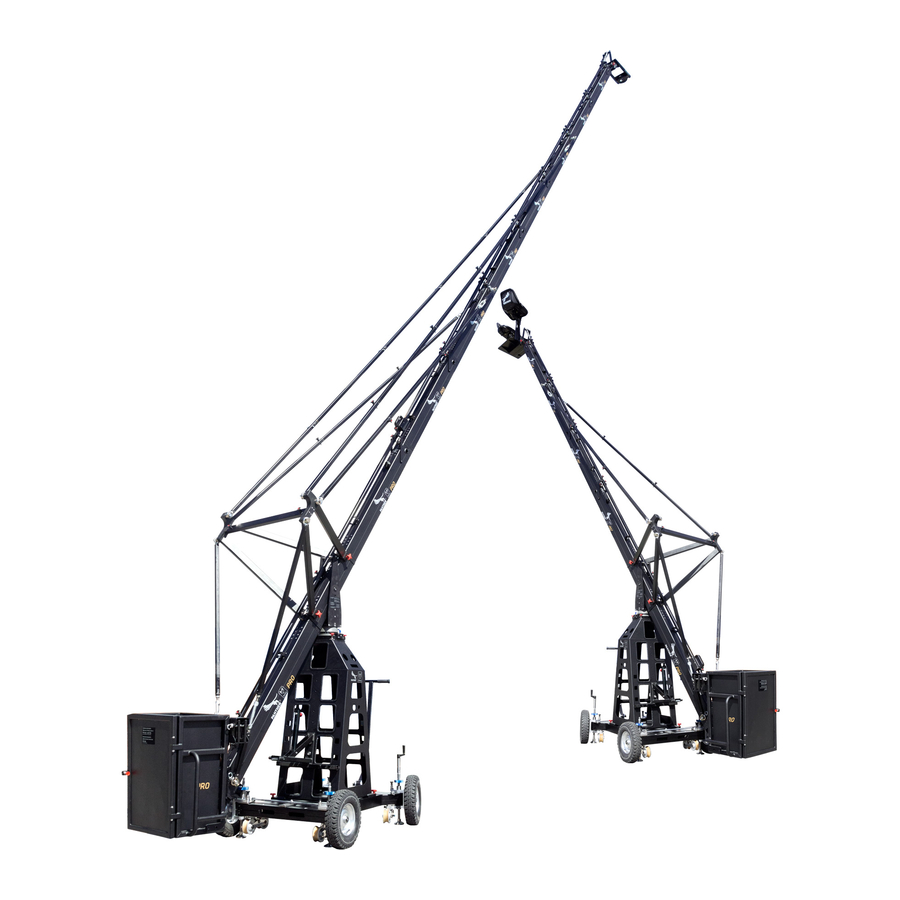
Summary of Contents for Panther Foxy Pro
- Page 1 INSTRUCTION MANUAL FOXY PRO PANTHER GMBH Raiffeisenallee 3, 82041 Oberhaching-Munich Tel.: +49 89 - 613 900 01 | Fax: +49 89 613 1000 www.panther.tv | contact@panther.tv...
-
Page 2: Table Of Contents
Instruction Manual - TABLE OF CONTENT FOXY PRO Introduction To the grip Safety advice Information on load (payload): Check-List for assemby Quick Guide FOXY PRO Setup instructions Preparation Assembly - Remote Version 8 Assembly - Platform Versions 1 - 4 Start of Operation Transport 10. -
Page 3: Introduction
– fast and easy – with fantastic shots and camera drives. The PANTHER FOXY Crane is a product that has been created and built by experts for experts – to satisfy the high demands of every grip and camera man. -
Page 4: Safety Advice
Instruction Manual FOXY PRO Safety advice The FOXY PRO crane system may only be operated by competent and trained personnel. It may only be used to carry cameras and their operators for use in motion picture production. PANTHER regularly holds training workshops for which participants receive a certificate on com- pletion. - Page 5 Even small spots of unevenness may endanger secure standing and driving. When assembled, the FOXY PRO crane system may only be moved on a PANTHER track system or, on smooth ground, with studio wheels made out of solid rubber (order number 128825). The as- sembled FOXY PRO crane system may not be moved on pneumatic wheels.
-
Page 6: Information On Load (Payload)
The remote head mount’s load capacity involves all elements that are attached to it (e. g. Mit- chell Adapter, Remote Head, camera, lens etc.). The PANTHER FOXY PRO crane system may only be assembled according to the options described in this operating manual. Other assembly options are not allowed (see quick guide - chapter 6). -
Page 7: Check-List For Assemby
Instruction Manual FOXY PRO Check-List for assemby Please check which configuration is best for your shooting. The following criteria have to be considered: • height • limits in weight • working distance • payload required • spatial limits • access to shooting place Take your time to securely assemble, to check and to test the system before use. -
Page 8: Quick Guide Foxy Pro
Necessary number of Panther 5,7m / 18.5ft. 2,45m/ 8ft. counterweights in bucket (e.g. 39 pcs.) for max. payload. 80 kg/ 176lbs. 1 Panther counterweight / Gegengewicht = 17kg (37.5lbs) max. Height/Höhe: 6,1m(20ft.) Front side / Vordere Seite: 5,7m / 18.5ft. 2,45m/ 8ft. -
Page 9: Setup Instructions
The foundation’s minimum loading capacity must be 3000 kg/m². c) Track operation Please heed the information in the operating manual respective to the track system. Use only original PANTHER track systems. During the track build, the dolly brakes must be activated. ATTENTION ! During track operation, the tracks must be level. -
Page 10: Assembly - Remote Version
FOXY PRO Assembly - Remote Version 8 In the following there is a description of how the FOXY PRO crane system Version 8 is assembled. INFO ! Versions 1 - 7 are assembled in the same manner, but respectively less outrig- gers and anchor poles are mounted at the front side (on the remote mount/ platform). - Page 11 • Set the center pivot section on the pyramid and screw tight. ATTENTION ! Check the bubble level again to ensure that the center pivot section is correctly levelled. Necessary components: Central pivot section FOXY PRO 156773 www.panther.tv PASSION OF MOVEMENT...
- Page 12 Instruction Manual FOXY PRO Step 4 - Mount Outrigger 150cm & Balance rod • Hook Outrigger 150cm into Central Pivot Section. • Screw in connecting screw by hand. • Clamp the connection tight by using the locking lever. • Attach the Balance Rod for Outrigger 150cm to the square end on the Central Pivot Section and lock with Quickpin.
- Page 13 Instruction Manual FOXY PRO Step 5 - Mount Outrigger 150cm, Outrigger tail 15cm, anchor pole axis & Balance Rod • Hook Outrigger 150cm with Outrigger tail 15cm with balance rod and with anchor pole axis in Central Pivot Section. • Screw in connecting screw by hand.
- Page 14 Instruction Manual FOXY PRO Step 6 - Mount Outrigger 150cm & Balance Rod • Hook Outrigger 150cm. • Screw in connecting screw by hand. • Clamp the connection tight by using the locking lever. • Attach the Balance Rod for Outrigger 150cm to the square end and lock with Quickpin.
- Page 15 Instruction Manual FOXY PRO Step 7 - Attach Counterweight Basket • Put up crane outrigger. • Activate vertical brake. • Hook Counterweight Basket to backside Outrigger . • Screw together using red knurled screws on both sides. • Attach Balance Rods to Counterweight Basket and lock with Quickpin.
- Page 16 Instruction Manual FOXY PRO Step 8 - Mount Outrigger 150cm, anchor pole axis & Balance Rod • Hook Outrigger 150cm with with balance rod and with anchor pole axis in. • Screw in connecting screw by hand. • Clamp the connection tight by using the locking lever.
- Page 17 Instruction Manual FOXY PRO Step 9 - Attach Trapezoid • Lower crane outrigger • Lock the vertical brake. ATTENTION ! When attaching the trapezoid, do not step on the pyramid. Always use a ladder! • Mount first side of trapezoid to Central Pivot Section.
- Page 18 Instruction Manual FOXY PRO Step 10 - Attach Rear Anchor Pole • Hook rear anchor pole in weights outrigger and secure with retaining ring. • Hook rear anchor pole in trapezoid and secure with retaining ring. • Tension rear brace evenly on both sides using turnbuckle, hand-screwed.
- Page 19 Instruction Manual FOXY PRO ATTENTION ! Turnbuckles must be tensi- oned ! The Balance Rod rings should lie against the outer edge! ATTENTION ! Watch out for flexing of crane! The crane outrigger must be straight. Necessary components: Base Anchor pole...
- Page 20 Instruction Manual FOXY PRO Step 12 - Balance the Crane • Put approx. 4 counterweights into Counter weight Basket. ATTENTION ! When the Counterweight Basket is being loaded, an assistant should secure the crane outrigger against rising abruptly. Necessary components:...
- Page 21 Instruction Manual FOXY PRO Step 14 - Attach Outrigger 150cm & Balance Rod • Hook Outrigger 150cm. • Screw in connecting screw by hand. • Clamp the connection tight by using the locking lever. • Attach the Balance Rod for Outrigger 150cm to the square end and lock with Quickpin.
- Page 22 Instruction Manual FOXY PRO Step 16 - Mount Outrigger 150cm, anchor pole axis & Balance Rod • Hook Outrigger 150cm . • Screw in connecting screw by hand. • Clamp the connection tight by using the locking lever. • Attach the Balance Rod for Outrigger 150cm to the square end and lock with Quickpin.
- Page 23 Instruction Manual FOXY PRO ATTENTION ! Turnbuckles should be tensioned! The Balance Rod rings should lie against the outer edge! ATTENTION ! Watch out for flexing of crane! The crane outrigger must be straight. Necessary components: Base Anchor pole 157129...
- Page 24 Instruction Manual FOXY PRO Step 18 - Balance the Crane • Put approx. 8 more counterweights in the Coun terweight Basket. ATTENTION ! When the Counterweight Basket is being loaded, an assistant should secure the crane outrigger against rising abruptly.
- Page 25 Instruction Manual FOXY PRO Step 19 - Attach Outrigger 150cm & Balance Rod • Hook Outrigger 150cm. • Screw in connecting screw by hand. • Clamp the connection tight by using the locking lever. • Attach the Balance Rod for Outrigger 150cm to the square end and lock with Quickpin.
- Page 26 Instruction Manual FOXY PRO Step 20 - Mount Outrigger 150cm, Outrigger tail 15cm & Balance Rod • Hook Outrigger 150cm with Outrigger tail 15cm with balance rod. • Screw in connecting screw by hand. • Clamp the connection tight by using the locking lever.
- Page 27 Instruction Manual FOXY PRO Step 21 - Attach Remote head mount • Hook Remote head mount in outrigger 150cm • Screw tight on both sides • Attach Balance Rod to end square on remote mount and lock with Quickpin. Necessary components:...
-
Page 28: Assembly - Platform Versions
Instruction Manual FOXY PRO Assembly - Platform Versions 1 - 4 Versions 1 - 4 are assembled in the same manner as version 8, but with respectively less outrig- gers and anchor poles mounted at the front side (on the remote mount/platform). -
Page 29: Start Of Operation
Only use the maximum allowable number of counterweights (see quick guide - chapter 6). We recommend using original PANTHER co- unterweights (code no. 109023). The use of additional or improvised weight material (e. g. sandbags) is not allowed. -
Page 30: Transport
Instruction Manual FOXY PRO Transport The FOXY PRO crane system possesses a patented transport concept. All components necessary for setup can be stowed away in the pyramid. Illustration: FOXY PRO Version 8 with Pyramid 9. For smaller versions, also Pyramid 3 (order number 142109) and Pyramid 7 (order number 149739) are available. -
Page 31: Service And Maintenance
FOXY PRO 10. Service and Maintenance The FOXY PRO is a very solid piece of equipment that guarantees reliable work without a lot of maintenance work. To guarantee a long life and stable quality, it is advisable to treat all elements of the crane very carefully. -
Page 32: Warranty
Instruction Manual FOXY PRO 11. Warranty We warrant that the products are free of manufacturing defects in material. Both for mechanical and for electronic parts, the warranty period is 12 months. The warranty period begins with the date of delivery. -
Page 33: Inspection Book
Instruction Manual FOXY PRO 12. Inspection Book Panther FOXY PRO Crane Product: Manufacturer: Panther GmbH Raiffeisenallee 3 82041 Oberhaching depending on Version max. 265 kg Payload: Platform Version (incl. max. 2 persons): / 585 lbs (see quick guide) Remote Version depending on Version max. -
Page 34: Recurrent Inspection 1
Ref. safety-related and und maschine-related equipment on stages and in studios. Certification of recurrent inspection according to §34 UVV Veranstaltungs- und Produktionsstätten für sze- nische Darstellung (VBG 70). Product : Panther FOXY PRO Crane Manufacturer: Panther GmbH Raiffeisenallee 3 82041 Oberhaching... -
Page 35: Maintenance Booklet
Instruction Manual FOXY PRO 12.3 Maintenance Booklet Product: Panther FOXY PRO Crane Manufacturer: Panther GmbH Raiffeisenallee 3 82041 Oberhaching Payload: Platform Version depending on Version max. 250 kg (inkl. max. 2 persons): / 550 lbs (see quick guide) Remote Version depending on Version max. - Page 36 Instruction Manual FOXY PRO Date: Description of maintenance: Name: Date: Description of maintenance: Name: Date: Description of maintenance: Name: Date: Description of maintenance: Name: Date: Description of maintenance: Name: 10. Date: Description of maintenance: Name: www.panther.tv PASSION OF MOVEMENT...
- Page 37 Instruction Manual FOXY PRO 11. Date: Description of maintenance: Name: 12, Date: Description of maintenance: Name: 13. Date: Description of maintenance: Name: 14. Date: Description of maintenance: Name: 15. Date: Description of maintenance: Name: 16. Date: Description of maintenance: Name: www.panther.tv...
Need help?
Do you have a question about the Foxy Pro and is the answer not in the manual?
Questions and answers