Advertisement
Quick Links
Advertisement

Related Manuals for AccessPRO MAG-175

Summary of Contents for AccessPRO MAG-175
- Page 1 MAG-175 ELECTROMAGNETIC LOCK (FOR AUTOMATIC DOOR) MANUAL...
-
Page 2: Model Series
1. Features introductions All-in-one design far easy installation. The lock itself would not have any residual magnetism. Adjustable width (59mm-89mm) far use of different sliding doors' slots. Armature bracket which can be adjusted horizontally or vertically for better fitting. ... - Page 3 4. lnstallation instructions P.S. (1) Please select only one power input (DC12V or 110V or 220V) (2) Trigger to door open relay contact rating: 1A@30VDC,0.5A@120VAC.
-
Page 4: Connector Wiring
5. Connector Wiring A .Use of DC12V only... - Page 5 6. Precautions (1) Before installation, please check the voltage and polarity of the power supply in order to avoid wrong connection causing damage to the magnetic lock. (2) Please make sure the armature is fit correctly to avoid any damage to the door before use.
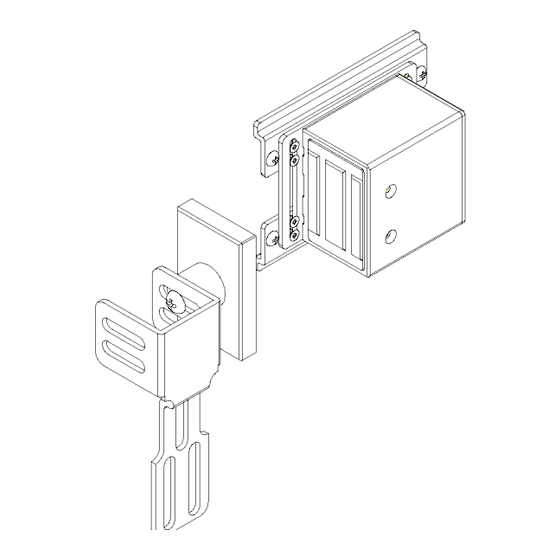
- Page 6 Physical installation Template assembly Adjustabl e brackets (Top) Fixed screws Adjustabl e brackets (Bottom) Adjustabl e screws (A) •The use of the template is to fix the lock body to the adjustable bracket. 8 adjustable screws adjust the lock body on the template's two long vertical slits. •8 adjustable screws There are 2 adjustable screws for all 4 sides of the template for stronger position holding and to avoid any damage to the template.
- Page 7 Adjusting the brackets Adjustabl e screws ( B) Adjustable brackets (Top ) Adjustabl e screws (A) Adjustabl e brackets (Bottom) A. Loosen all 8 adjustable screws (A and B). Adjust the bracket (bottom) to the lowest point and tighten all 4 adjustable screws (A). B.
- Page 8 Relevant positions:...
Need help?
Do you have a question about the MAG-175 and is the answer not in the manual?
Questions and answers