
Subscribe to Our Youtube Channel
Related Manuals for ETEKCITY ESWL03

Summary of Contents for ETEKCITY ESWL03
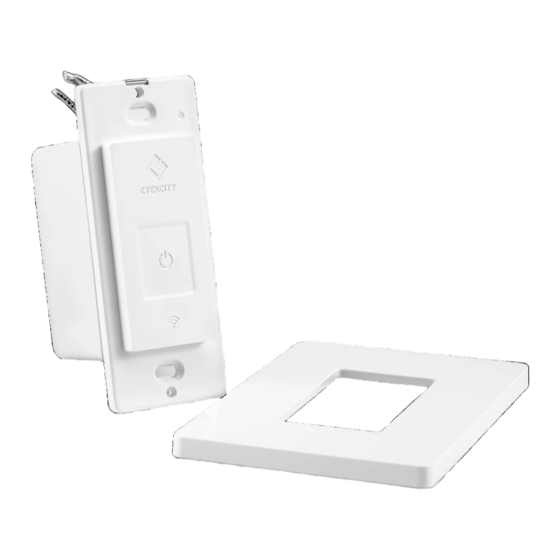
- Page 1 ETEKCITY Smart WiFi Light Switch Model No.:ESWL03 Questions or Concerns Mon-Fri 9:00 AM - 5:00 PM PT support@etekcity.com • (855) 686-3835...
- Page 2 Android™ or iOS™ devices. Pair your smart outlet with the Etekcity VeSync app to use your phone to control your connected electrical appliances anywhere, at any time. Set up your smart outlet with the IFTTT™ (if this then that) app to program your smart home.
-
Page 3: Table Of Contents
Table of Contents Product Introduction..............................3 Package Contents................................ 3 Specifications................................3 Safety Information.................................3 Product Requirements..............................4 Function Diagram................................. 4 FCC Notice..................................5 FCC Radiation Exposure Notice..........................5 Installation..................................6 What You’ll Need................................6 Checking Wires................................6 Removing the Old Light Switch..........................8 Installing the Smart Switch............................8 Add Device..................................9 VeSync App Setup................................9... -
Page 4: Product Introduction
Only install the smart switch if you are comfortable with electrical work. If not, contact a qualified electrician. Improper installation significantly increases risk of fire, contact a qualified electrician. Improper installation significantly increases risk of fire, Note: Etekcity cannot guarantee the quality of installation, and cannot cover associated costs. General Safety ... -
Page 5: Product Requirements
Note: This smart switch complies with Part 15 of the FCC Rules. Operation is subject to the following 2 conditions: (1) this device may not cause harmful interference, and (2) this device must accept any interference received, including interference that may cause undesired operation. SAVE THESE INSTRUCTIONS Product Requirements ... -
Page 6: Fcc Notice
Indicator blinks 4 times per second (total 10 times) Smart switch has been factory reset (see page 46). Indicator blinks 2 times per 5 seconds The smart switch does not connect with router. The smart switch has connected with router Indicator blinks 1 time per 5 seconds successfully, but the router is not connected to the internet. -
Page 7: Installation
2. Installation For a video walkthrough of these instructions, scan the QR code. the QR code. You can also type in the web address:https://www.youtube.com/**************************. Watching the video walkthrough is highly recommended. What You ’ ll Need Non-contact voltage tester Wire nuts (also called twist-on wire connectors). - Page 8 switch has five wire connections, two travel wires, one black wire, one white neutral wire, and one green grounding wire.Without these wires, it may not be compatible with the three-way smart switch.You can check other switches to confirm compatibility.You can also seek help from local electricians to run the new wiring.
-
Page 9: Removing The Old Light Switch
Ground A ground wire is not required for the smart switch to work, as not all switches need ground wires. However, if a ground wire is present, it must be connected to the smart switch. Removing the Old Light Switch After taking off the faceplate and checking the wires, use the voltage tester again to test for any current around the wires. -
Page 10: Add Device
Turn power back on at the circuit breaker, and test the light switch by turning it on. You’ve successfully installed your smart switch. 3. Add Device VeSync App Setup Note: The VeSync app and IFTTT app user interfaces may appear slightly different. A. -
Page 11: Configuration
D. After you’ve signed up, enter your email and password, then tap Note: You must create your own VeSync account to use third-party services and products, such as the Amazon® Echo™, Google Home™, and IFTTT™. The guest account will not work for this. With a VeSync account, you can also allow your family or friends to control your smart switch. - Page 12 Tap the “+” button to add your smart light switch. Tap Switches C. Tap Etekcity Light Switch 3 way. D. Tab Next. Plug in and turn on your smart switch. The LED indicator light should blink blue (1 blink per second), indicating that your smart switch is in Configuration Mode.
- Page 13 Note: Configuration Mode will turn off after 10 minutes. Type in the name of your home WiFi network and password, then tap Join Network. Note: The smart switch configuration requires a 2.4GHz WiFi network. Tap Connect and select the WiFi network that reads “VeSync_xxxx”.
- Page 14 The switch will take a few seconds to connect. To return to the “Add Device” page, tap <. Your setup is complete! Give your switch a unique name, or use the default name and tap Ok. Note: to change the outlet icon. ...
-
Page 15: Functions
4. Functions Turning Devices On/Off Method 1: On the “My Home” page or the smart light switch page, tap to turn the devices on or off. Method 2: Tap on the smart switch’s name on the “My Home” screen to view device options and details. Tap to turn the light on/off. -
Page 16: Create Schedule
Create Schedule Tap to the smart light switch in the device list, Go to the smart light switch page. Tap Create Schedule to create a scheduled time for the smart light switch to turn on and off.. Go to the Create Schedule page and set the working time of the smart light switch. - Page 17 Choose On or Off at start time . To set an end time (optional): a. Tap > next to End. b. Scroll up and down to select time. Alternatively, tap < for Sunrise and > for Sunset. c. Tap √ to confirm.
- Page 18 Choose On or Off at end time. Repeat (Optional) - Select days you want this task to repeat.
- Page 19 on the top right of the screen when you are done creating the schedule. . √ Turn the schedule on or off on the smart light switch page by tapping the toggle next to the scheduled time.
-
Page 20: Set Timer
Set Timer You can create a timer to turn your smart light switch on and off. A. Tap Timer. Then, Create Timer. Scroll up and down to set time and select On or Off. √ to confirm and start timer. Timer will start automatically. -
Page 21: Away Mode
D. Tap to cancel the timer. Tap to restart the timer. NOTE: If you selected On, the timer will turn on after the timer ends To remove the timer entry, tap on the timer entry, then tap Delete. Away Mode When you have a light plugged into your smart light... - Page 22 on and off to give the appearance that someone is home. A. Tap Away, then Set Away Mode. Select an option from the “Away Mode” page. . start: Sets time to start Away Mode Tap > next to “Start”. Scroll up and down to select time. √...
- Page 23 Scroll up and down to select time. √ to confirm. .Repeat Select days you want to repeat Away Mode. Tap > next to “Repeat”. Select days you want this task to repeat. √ to confirm. C.You can turn the Away Mode timer on/off at any time by tapping the toggle button to the right of the timer.
-
Page 24: Smart Light Switch Settings
Smart light switch Settings to see Device Settings. The Device Settings menu allows you to: Edit your smart light switch name. Edit your smart light switch picture. C. Turn on/off WIFI indicator light. Turn smart switch notifications on/off by tapping Share your smart light switch. -
Page 25: Share Your Smart Light Switch
Share Your Smart light switch Use Share Device to allow someone else to control your smart light switch (such as family, friends, roommates, or anyone you choose). Note: People who you share your smart light switch with cannot edit or delete any of your device settings. A. -
Page 26: More Features
5. More Features On the “My Home” page, tap More, for more features. Connecting with Amazon® Alexa™ To view instructions on the VeSync app, tap More, then tap Link to Alexa Note: You must create your own VeSync account to connect with Alexa. Connecting with Google Home™. -
Page 27: Ifttt
6. IFTTT Pairing Your Smart Outlet with IFTTT A. Download the IFTTT app from the App Store or Google Play store. B. Open the app and tap sign up or sign in. C. Tap... - Page 28 D. Enter “VeSync” and tap Services. Tap Connect. Enter your VeSync account details and tap Authorize.
-
Page 29: Create An Applet Using Existing Vesync Templates
Create an Applet Using Existing VeSync Templates. A. Open the IFTTT app and tap My Applets. B. Tap Services and tap VeSync. C. Scroll to search for an applet you want to use, such as “Turn on a VeSync smart device at sunrise“... -
Page 30: Create A Custom Applet
E. Under Device, select the smart outlet that you want the applet to apply to and tap Save. F. The applet has been created successfully! Create a Custom Applet A. On the My Applets screen, tap + . this B. Tap to add a Trigger Service. - Page 31 Example: To trigger a service everyday at 11:45 PM: a. Tap the Date & Time icon. b. Tap Every day at. c. Under “Time”, select 11:45 PM. Note: Popular Trigger Services include Date & Time, Location, and an Alexa or Google Home Command. Different Trigger Services have different user interfaces.
- Page 32 E. Tap Activate a Device. F. Select the smart outlet and status you would like to activate (turn on or turn off). Tap Create Action. G. Tap Finish. You’ve created your own custom applet!
-
Page 33: Maintaining Your Smart Light Switch
7. Maintaining Your Smart Light Switch Firmware Updates To keep the smart light switch up-to-date with the latest improvements and fixes, you should always update the firmware when available. On the Device Settings screen, tap Upgrade Firmware. Factory Reset Factory resetting the smart light switch can help you troubleshoot any issues you may have. Please keep in mind that factory resetting a device will erase all of your custom settings and restore the factory default settings. -
Page 34: Troubleshooting
8. Troubleshooting Q: Why can’t I connect my light switch to my WiFi network during setup? Make sure your phone is connected to a 2.4GHz WiFi network. Smart light switches currently only support 2.4GHz WiFi networks during configuration, but you can use any available network, including cellular data networks, to control the switch from your phone once you’ve finished setting up... - Page 35 Once the smart switch has been deleted and reset, reconfigure your smart switch with the VeSync app. Note: Power outages or changing WiFi routers may cause your smart switch to go offline. Q: Why won't the VeSync app let me add my smart switch? ...
-
Page 36: Warranty Information
Etekcity and its subsidiaries assume no liability for damage caused by the use of the product other than for its intended use or as instructed in the user manual. Some states do not allow this exclusion or limitation of incidental or consequential losses so the foregoing disclaimer may not apply to you. -
Page 37: Customer Support
10. Customer Support If you encounter any issues or have any questions regarding your new product, please contact our helpful Customer Support Team. Your satisfaction is our goal! Etekcity Corporation 1202 N. Miller St., Suite A Anaheim, CA 92806 Email: support@etekcity.com...
Need help?
Do you have a question about the ESWL03 and is the answer not in the manual?
Questions and answers